Knowledge base
1000 FAQs, 500 tutorials and instructional videos. Here, there are only solutions!
Discover the Infomaniak Mail Service interface
This guide presents the main features of an Infomaniak Mail Service. Discover the administration interface for your email addresses created and hosted with Infomaniak.
Accessing the Mail Service
To access the Mail service:
- Click here to access the management of your product in the Infomaniak Manager (need help?):
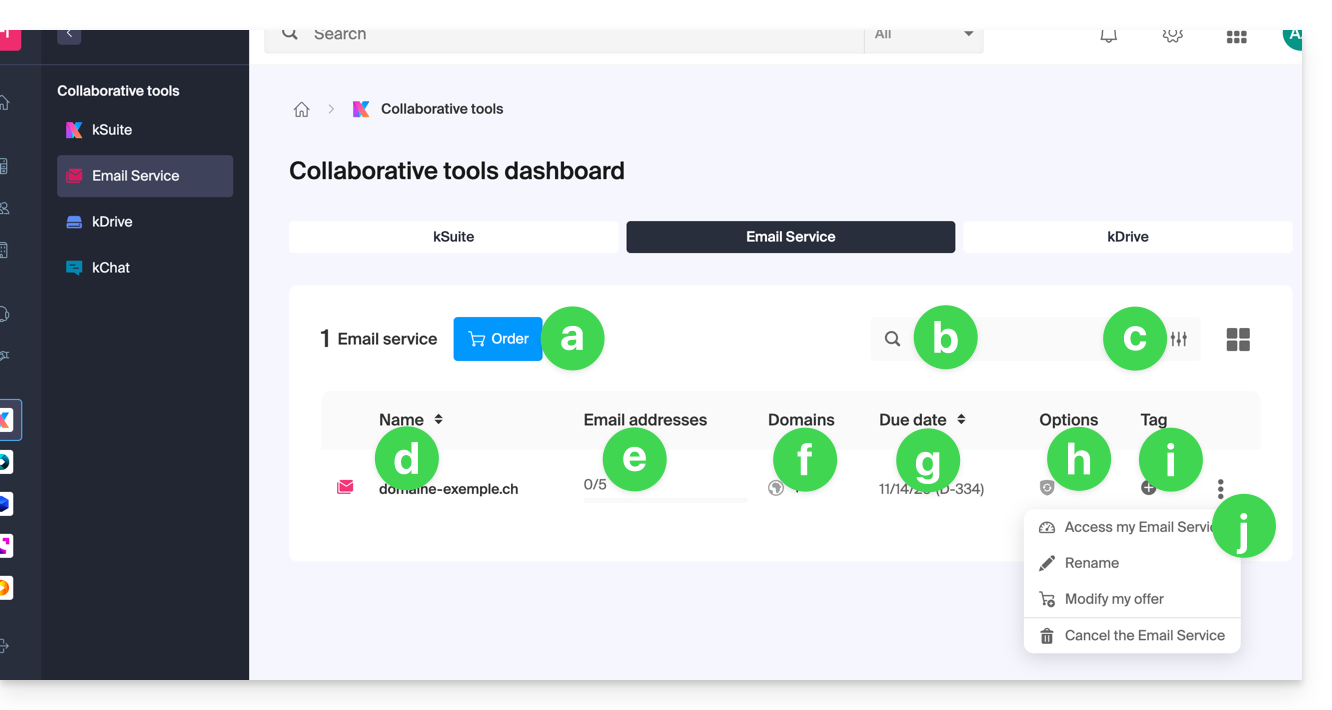
- Order a new Mail Service (to obtain email addresses on a new domain name, for example).
- Search among your Mail Service names.
- Filtering/sorting and table display options.
- The name of your Mail Service (note that it can be renamed (see point j) to facilitate its organization, but the associated domain, which is visible on hover (see point f), will remain the same).
- The number of email addresses created and available (here the quota is 5, but no addresses have been created).
- The domain(s) associated with your Mail Service; see this other guide to change the domain name of your Mail Service.
- Service expiration date (may be linked to kSuite).
- Possible option(s) such as Renewal Warranty, for example.
- Possible label(s)/tag(s).
- Action menu allowing you, in particular, to rename the Mail Service or to modify the offer.
Accessing email addresses
To access the email addresses contained in this Mail Service:
- Click directly on the name of the Mail Service in question in the table (see illustration above).
- You will arrive on this type of page:
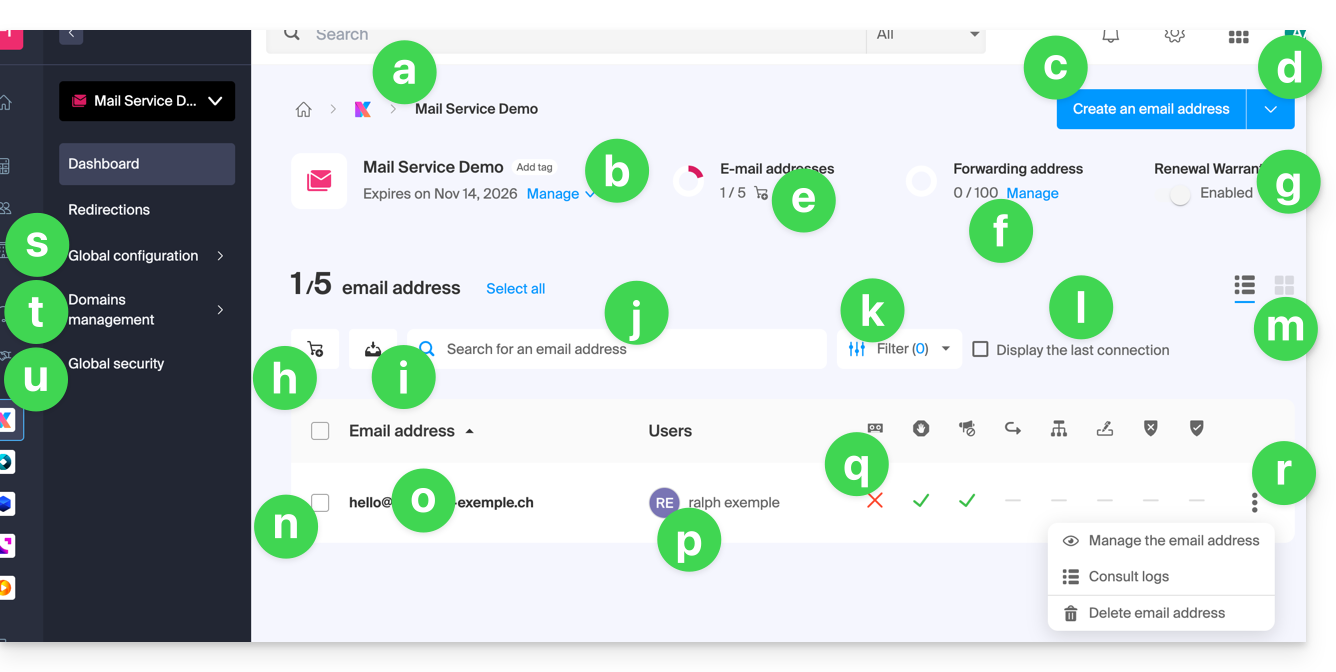
- Breadcrumb trail and name of the Mail Service (possibly renamed as in this example).
- Mail Service management menu, which allows actions that point j in the previous table does not.
- Create additional email addresses (or order them first if the quota is not sufficient) on the same domain.
- Additional menu to, in particular, create addresses in bulk or generic addresses.
- Current quota (you can modify it).
- Create virtual addresses (redirection addresses).
- See point h in the previous table.
- Order additional email addresses.
- Download the list of addresses in a CSV file (
.csvformat). - Search among the addresses of the Mail Service (unlike the search bar above, which allows you to search among all the products of the Organization).
- Filter the display according to different criteria, including the users' login dates.
- Display in the table the last login of a user to the Infomaniak Mail interface to which the email address in question is linked.
- Table display options.
- In front of each email address is a small square that can be clicked and allows you to select multiple addresses at the same time in order to perform actions (available at the bottom of the page once the selection is made).
- Click directly on the name of the email address to configure it (see the following table).
- The user(s) of the Infomaniak Mail interface who have linked the email address in question.
- By clicking on the boxes in the table, you can access the options; a sign indicates whether the option in question is not activated.
- Possible actions on the email address.
- Global configuration (applies to the entire Mail Service) to, for example, apply a signature or anti-spam to the entire Mail Service.
- Management of domains linked to the Mail Service.
- Global security to perform a technical diagnostic and, if possible, correct errors automatically.
Access email address details and settings
To access the settings and information related to the email address (storage, password, etc.) and the users of the Infomaniak Mail app (i.e., when not using IMAP) who use the email address:
- Click directly on the relevant email address in the table.
- You will be taken to a page like this:
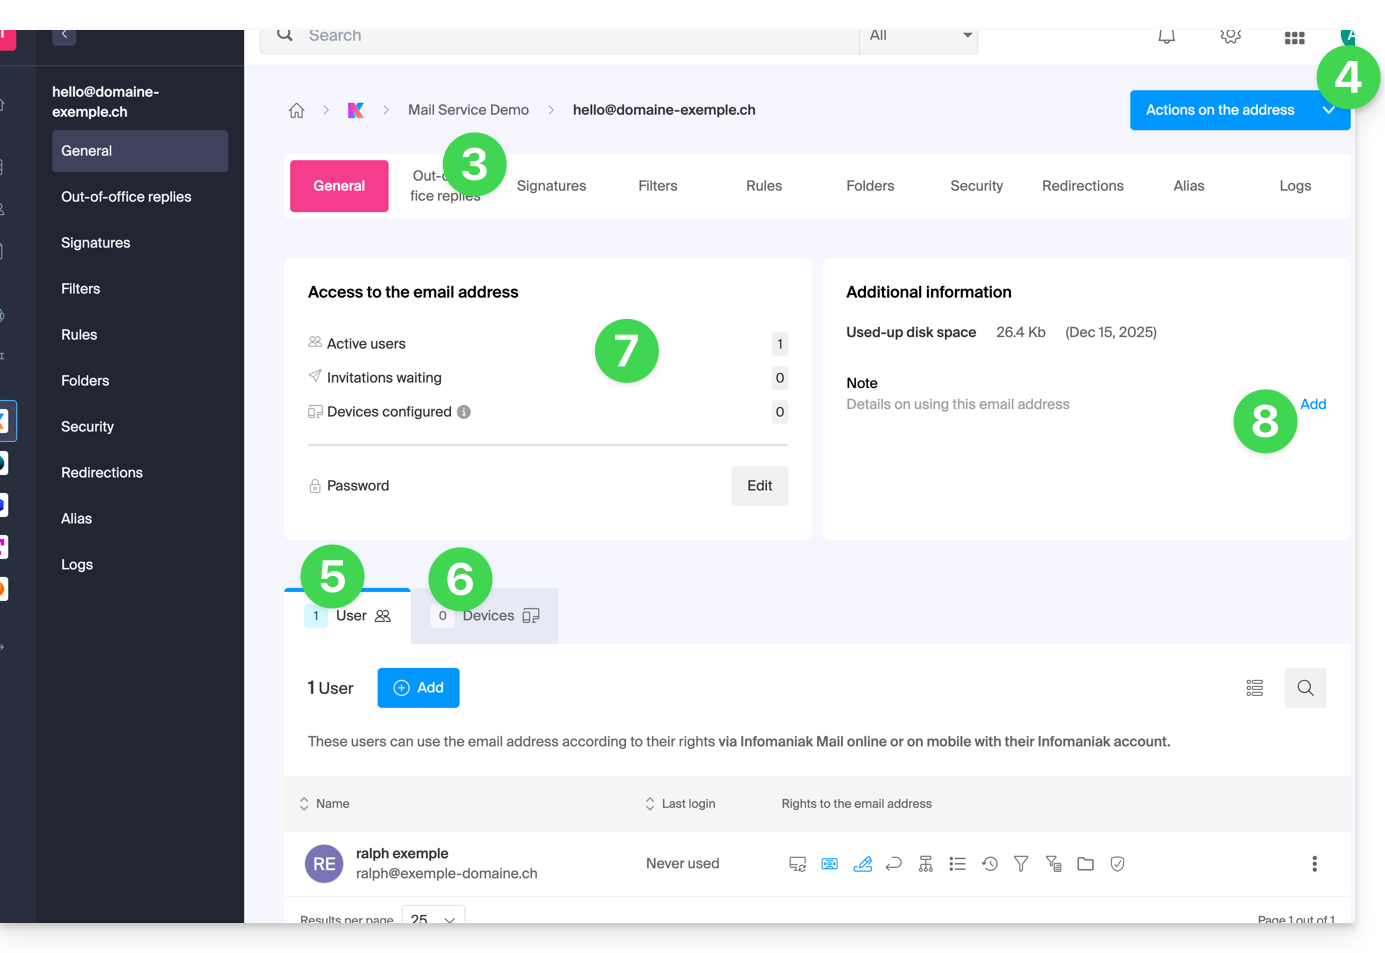
- Click on the various tabs at the top of the page (or in the left-hand menu) to configure the different settings for your email address.
- Additional actions, such as restoration, are available using the Actions button.
- The Users tab (allows you to invite users and grant them permission to manage the address).
- The Devices tab (allows you to add a password to the address for use on a specific device).
- Summary of current access to the address (see points 5 & 6).
- Allows you to add free text that will be displayed on the left.
Link to this FAQ: https://faq.infomaniak.com/2435
Has this FAQ been helpful?