Knowledge base
1000 FAQs, 500 tutorials and instructional videos. Here, there are only solutions!
Manage Newsletter Subscribers
This guide shows you how to create / import / manage contacts within subscriber lists for Infomaniak Newsletters.
Preamble
- You must obtain the explicit consent of your recipients via the double opt-in model:
- Sending spam and using purchased/rented address lists is prohibited.
- Importing does not send any messages to the added contacts (so read and accept the points above).
- Duplicates will be automatically removed.
- If you re-import an address that is already subscribed, the different custom fields will be updated.
Create a subscriber list
To access the management of Newsletter subscribers:
- Click here to access the management of your product on the Infomaniak Manager (need help?).
- Click on the domain name concerned in the table that appears:
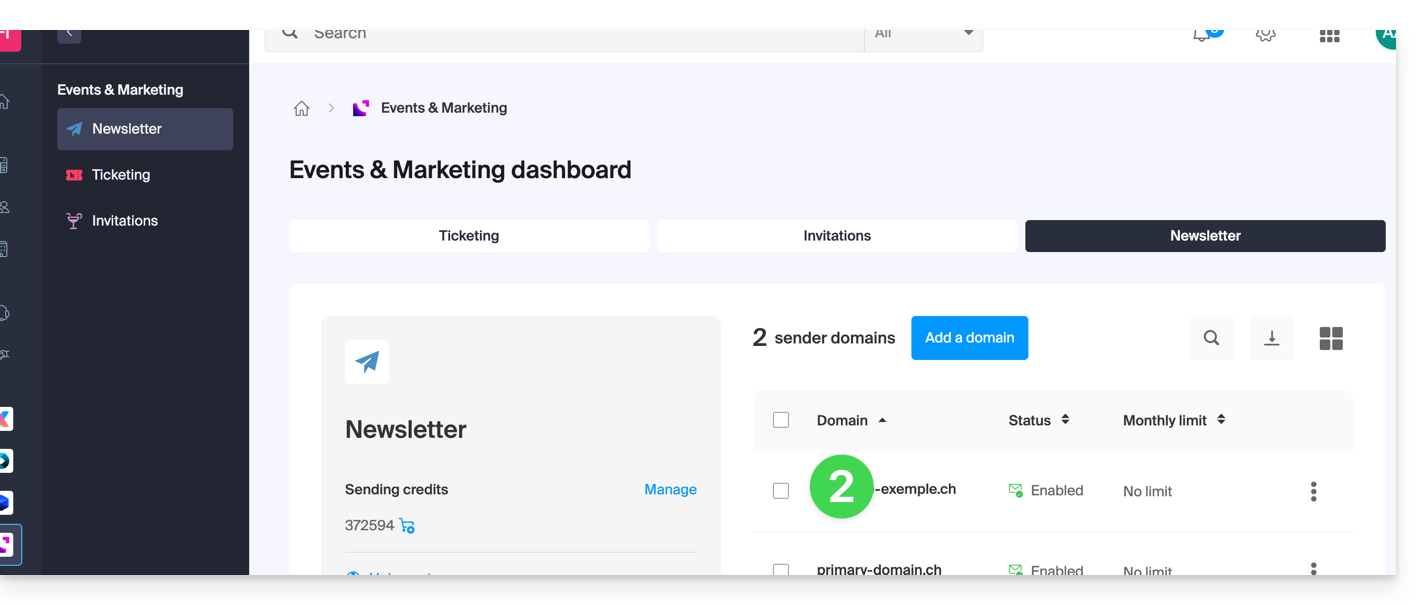
- Click on Subscribers in the left sidebar.
- Click on the blue button Add contacts:
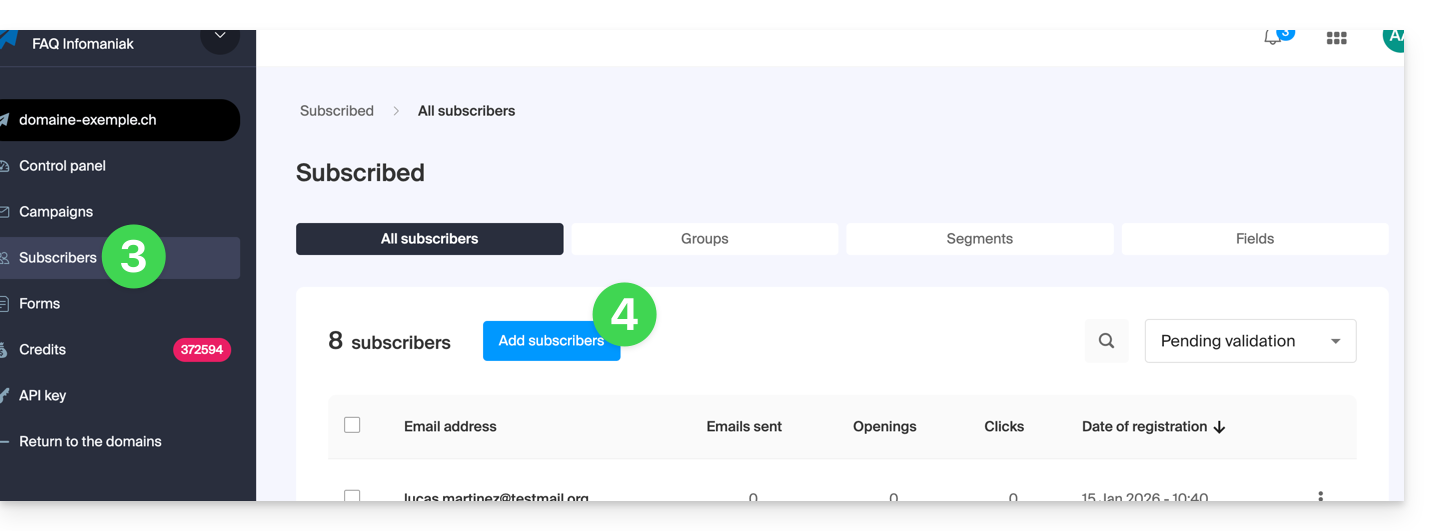
- Read and accept the Terms of Service.
- Choose from the different ways to create a subscriber list:

A. Import a CSV file (format .csv) or .txt file (predefined format)
- The format must be respected (a template to download is available as an example on the page). Maximum size: 300 Mo

- Once the spreadsheet-type document is written, export it as
.csvwhich will create a kind of text document with a separator between each piece of information in the different cells: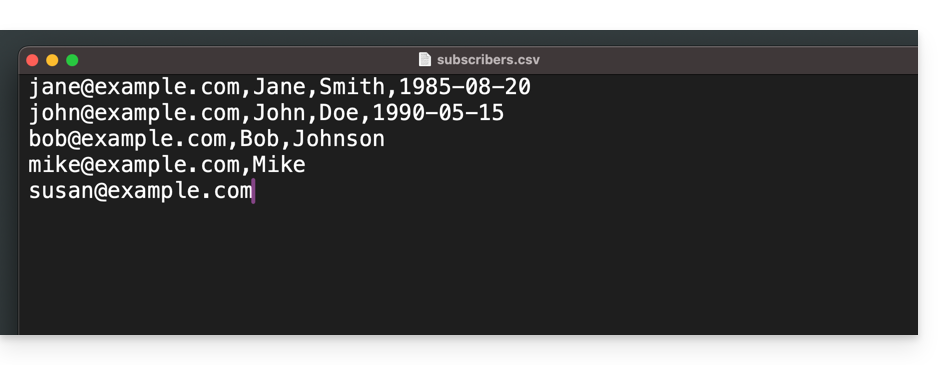
- Select the
.csvfile from the import interface and then click on the blue button Import: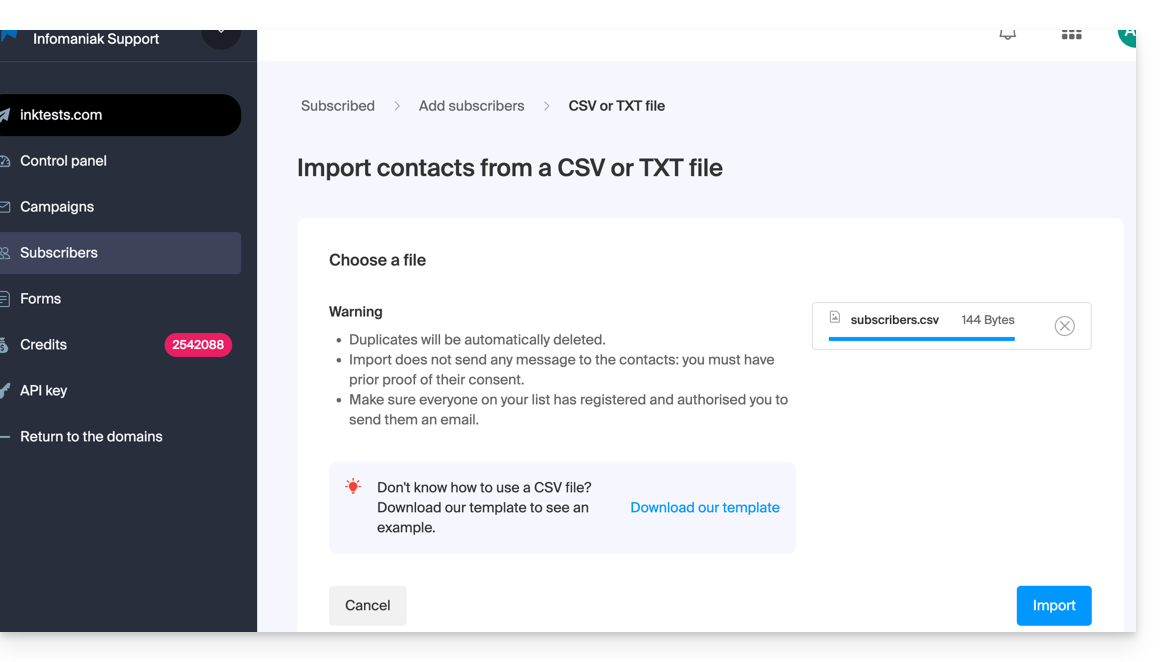
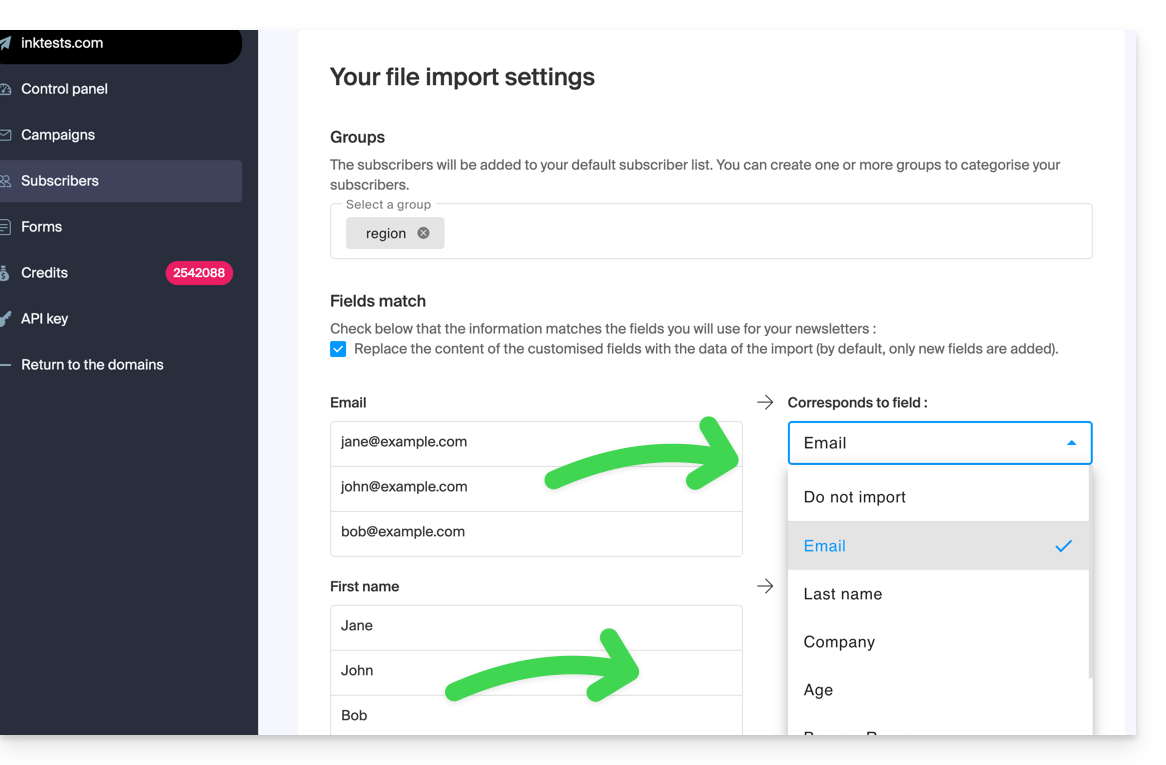
- You need to assign the desired field to the desired information (the information is grouped according to the original columns).
- At the bottom of the dropdown menu, it is possible to create the fields that do not yet exist (the type of field can be forced to numbers or a date, boolean, etc.).
- Choose an optional group from your created groups in which to place the imported contacts:
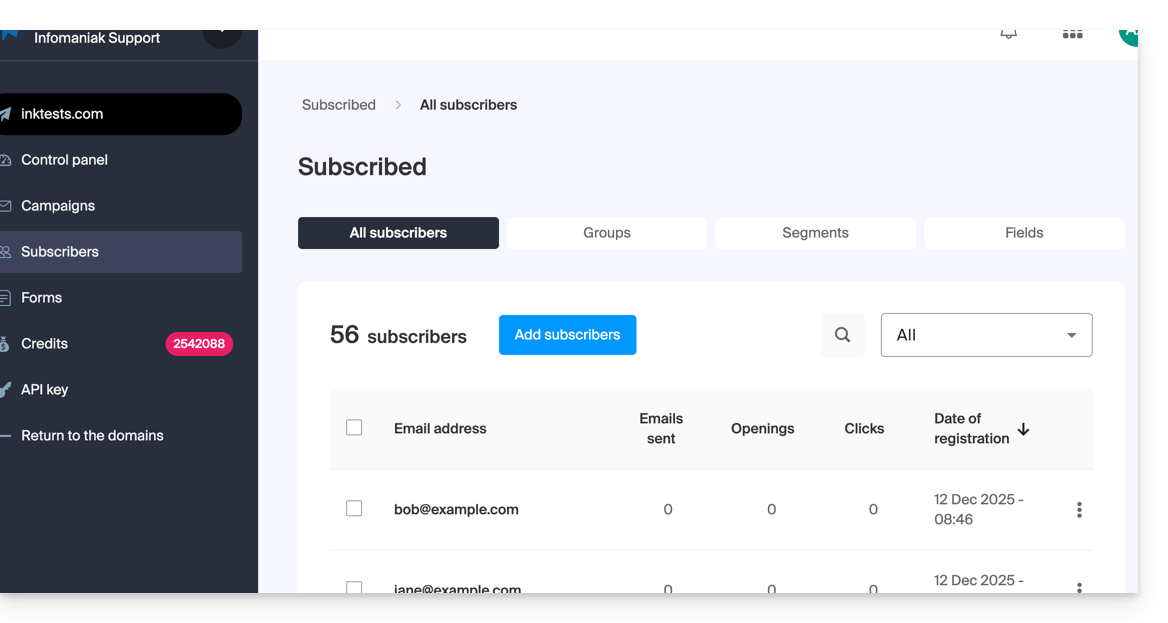
- There you go, whether under Groups or under Subscribers, your import is visible.
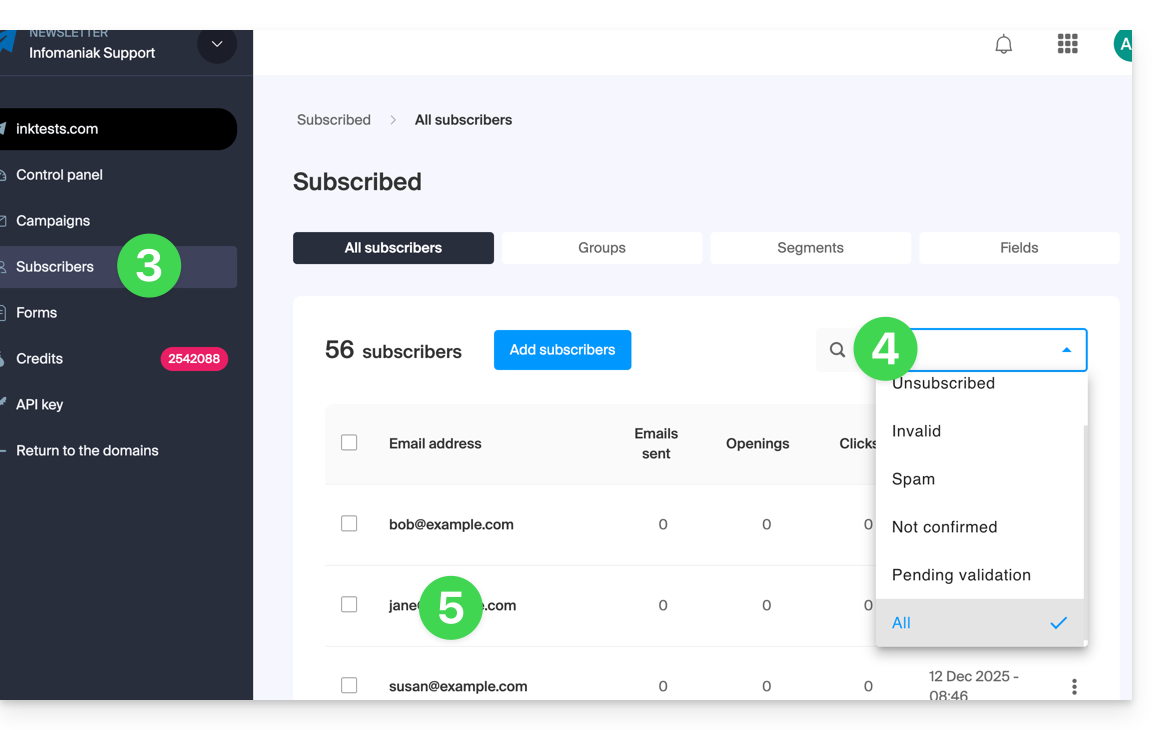
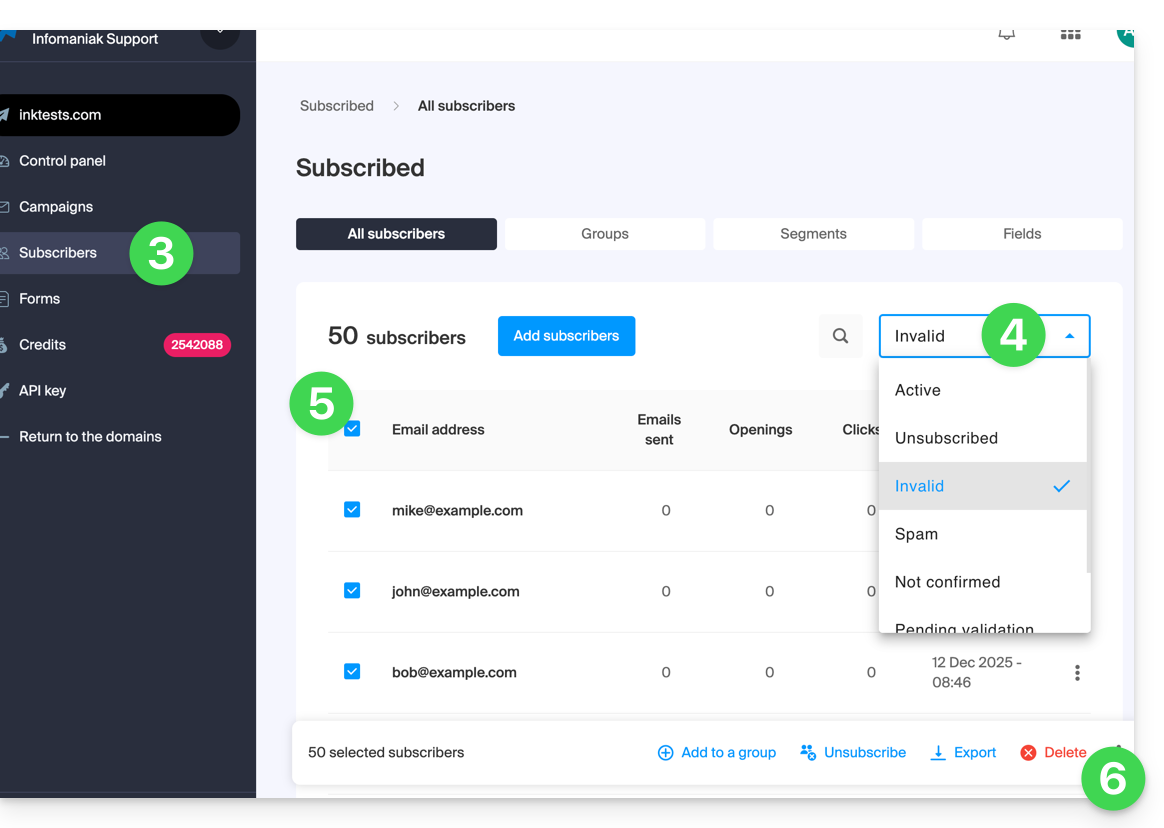
- If this is not the case, check if they are visible with the display filtering "All":
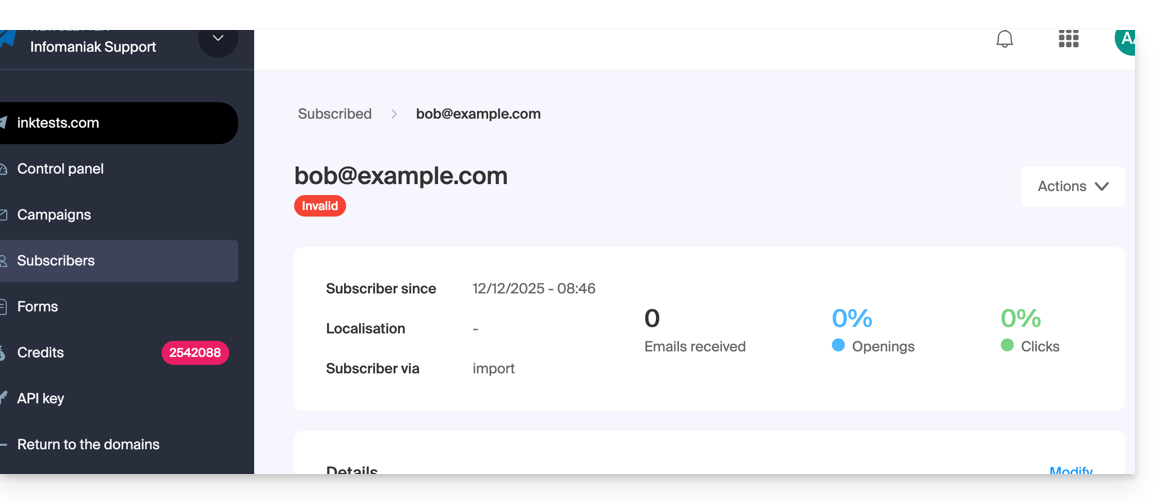
- It may be that after an email verification, the status of the imported subscriber is invalid, so you will not be able to write to them:
- If this is not the case, check if they are visible with the display filtering "All":
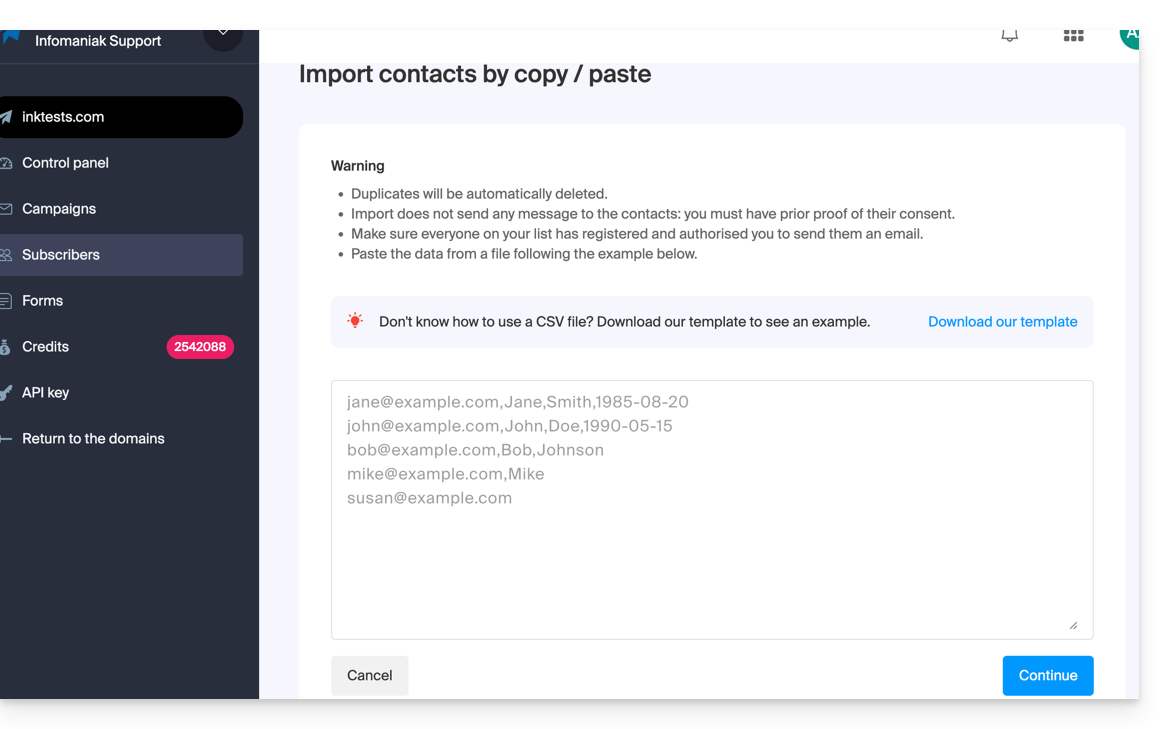
B. Copy-paste the equivalent of a .csv or .txt (predefined format)
- The format must be respected, as in the file to download (see above), for example:
anna.a@domain.xyz,Anna,Alpha,1985-08-20
alfred.a@domain.xyz,Alfred,Alpha
contact@domain.xyz,Support
mail@domain.xyz- Once this information is pasted into the dedicated field, click on the blue Continue button:
- The rest of the import is identical to point A above.
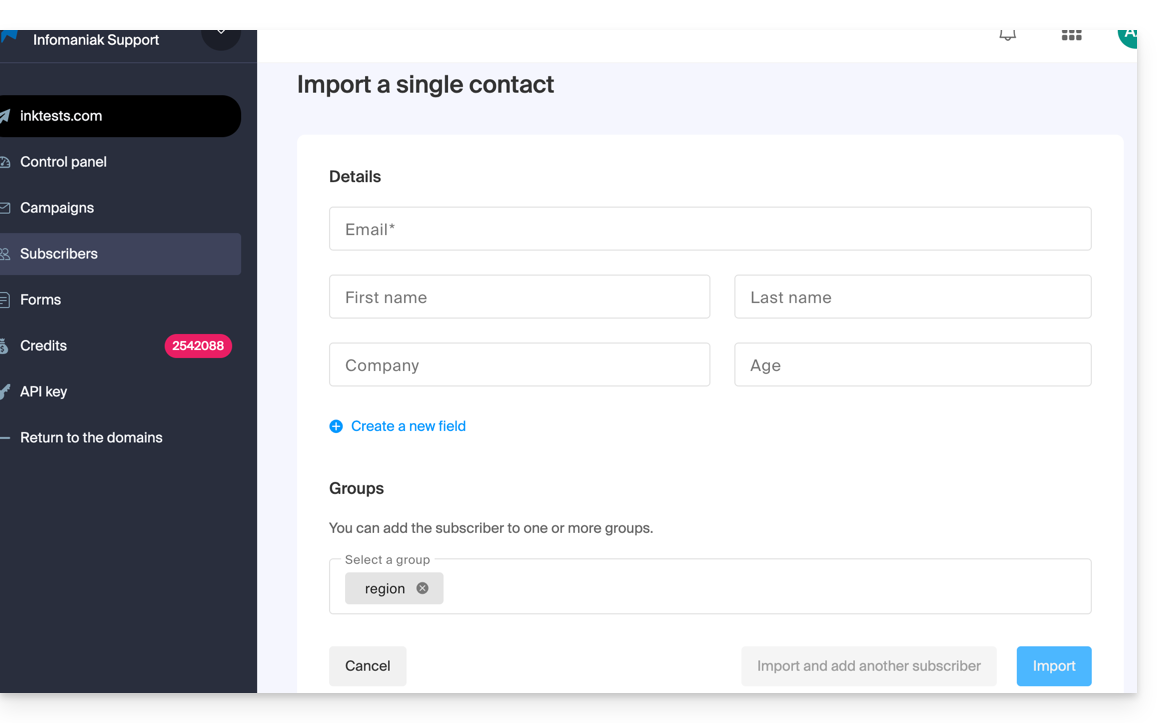
C. Filling out an individual contact form
- Import contacts one by one using the proposed form.
- Add free fields if necessary (the type of field can be forced to numbers or a date, boolean, etc.).
- Specify the optional existing group:
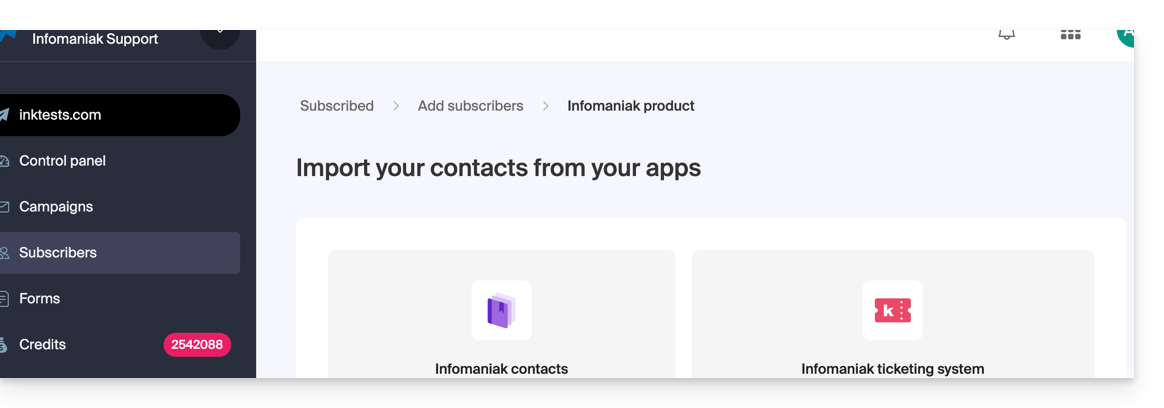
D. Automatic import from other Infomaniak tools
- Import contacts from your Infomaniak address books and from the Infomaniak ticketing tool if available (with the possibility of importing only users who have specified that they want to receive a Newsletter):
Edit a subscriber's details
To edit the information related to your subscribers:
- Click here to access the management of your product on the Infomaniak Manager (need help?).
- Click on the domain name concerned in the table that appears.
- Click on Subscribers in the left sidebar.
- Search or filter the type of display if necessary.
- Click on the subscriber whose details you wish to edit:
- Click on Modify:
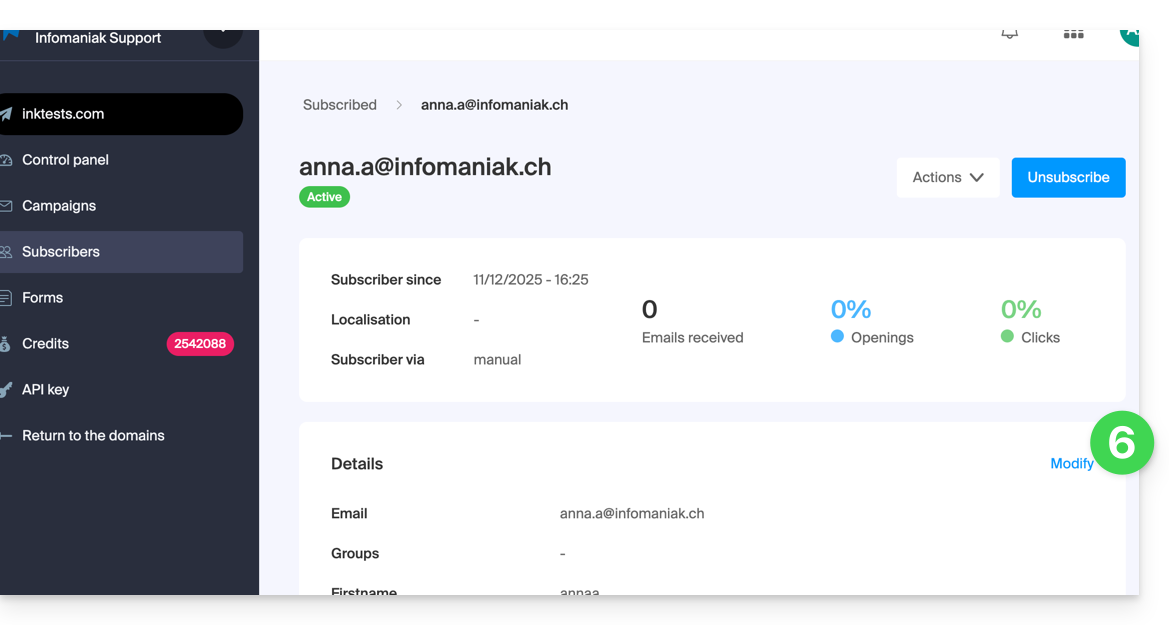
- Edit the information (only the email address cannot be modified):
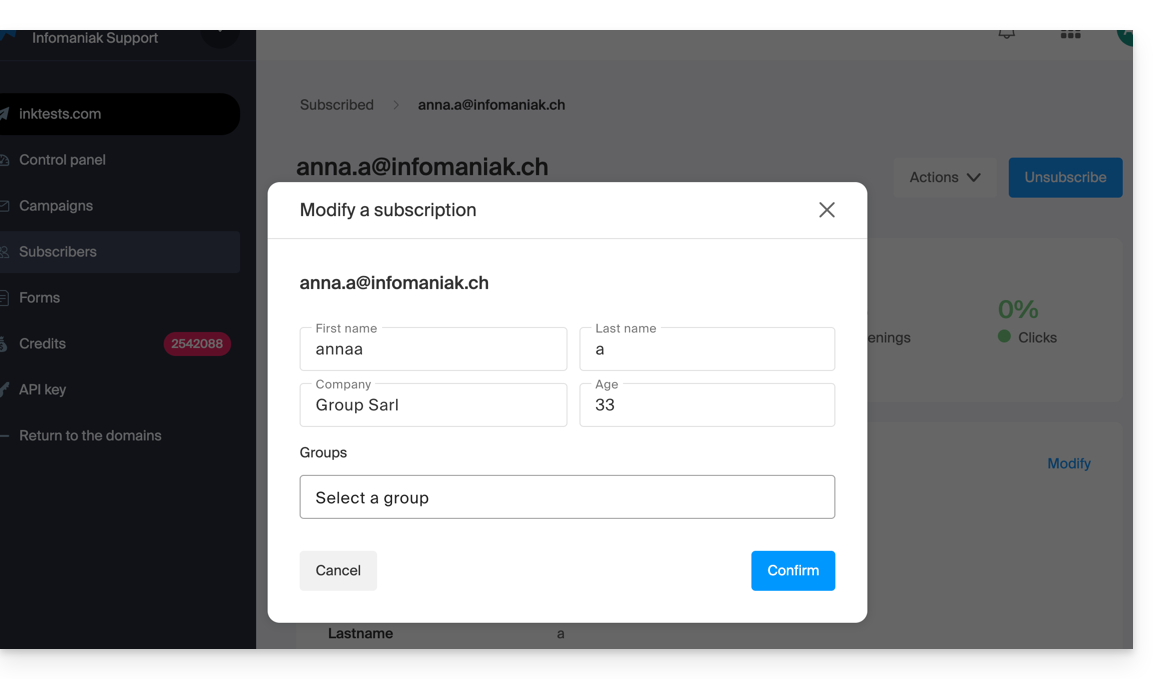
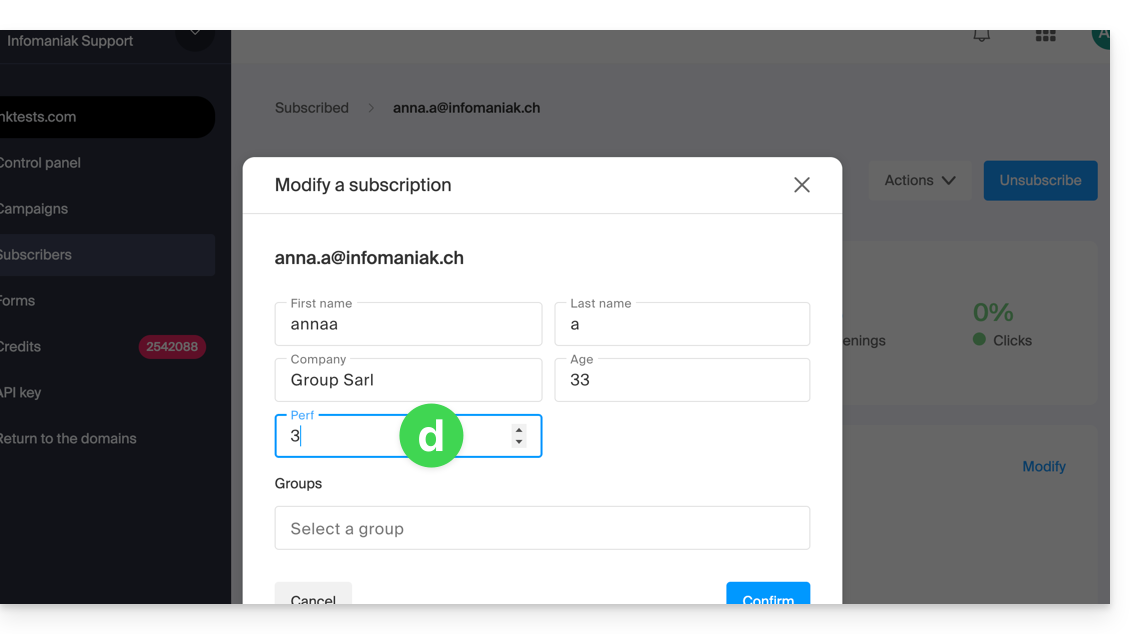
- If you wish to add a new field, you must add it globally by returning to the Subscribers menu.
- Click on the Fields tab.
- Click on Create a field.

- The subscriber's details can now be edited at the level of this new field:
Delete subscribers
To delete newsletter subscribers:
- Click here to access the management of your product on the Infomaniak Manager (need help?).
- Click on the domain name concerned in the table that appears.
- Click on Subscribers in the left sidebar.
- Search for or filter the display type if necessary.
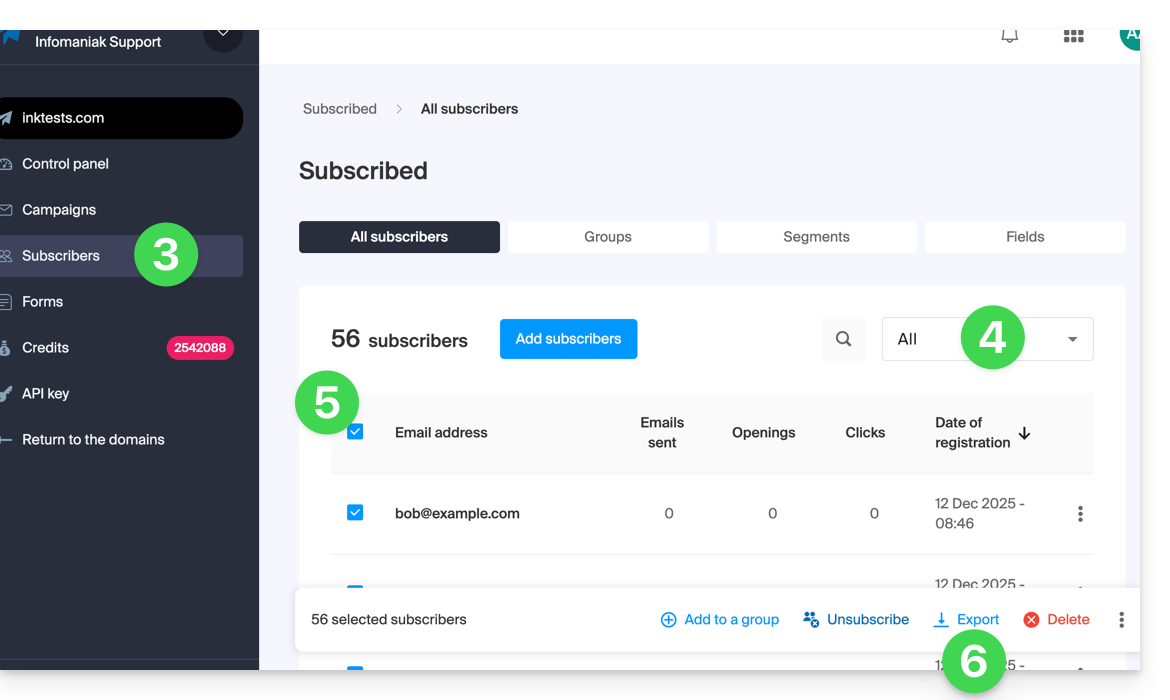
- Click the box to select one or more subscribers.
- Click on Delete:
- Confirm the deletion
You can also click on Unsubscribe instead of Delete so that the contacts remain in the list: refer to this other guide.
Export subscribers
To export the list of newsletter subscribers in .csv format and according to selected criteria:
- Click here to access the management of your product on the Infomaniak Manager (need help?).
- Click on the domain name concerned in the table that appears.
- Click on Subscribers in the left sidebar.
- Search for or filter the display type if necessary.
- Click the box to select one or more subscribers.
- Click on Export:
- Click the blue button once the export is prepared to download the data into a CSV file (format
.csv).
The resulting file includes these columns: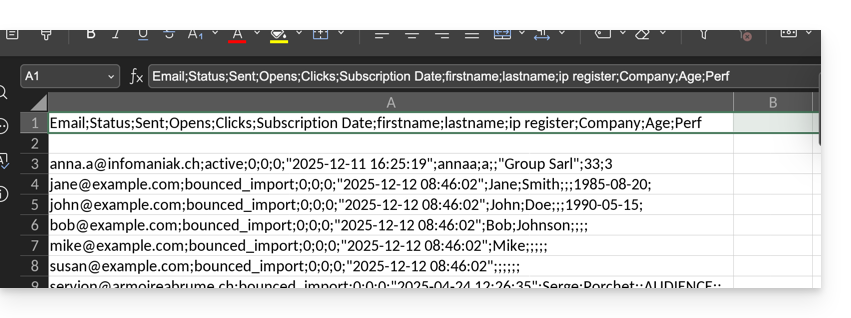
- Status
- Sent
- Opens
- Clicks
- Subscription Date
- firstname
- lastname
- ip register
- and then the custom fields (text, number, date, etc.) created manually…
Link to this FAQ: https://faq.infomaniak.com/2165
Has this FAQ been helpful?