Knowledge base
1000 FAQs, 500 tutorials and instructional videos. Here, there are only solutions!
Replace a subdomain with a domain
Update 10/05/2026
This guide explains how to replace, within an Infomaniak web hosting plan, the address of a website currently using a subdomain (https://dev.domain.xyz) with the main domain (https://domain.xyz).
Introduction
- Here's a summary of the steps:
- Start with a website created and accessible via the main domain's URL:
dev.domain.xyz. - Add an alias:
domain.xyz. - Reverse the two types (the main domain becomes an alias, and the alias becomes the main domain).
- Remove the old name:
dev.domain.xyz.
- Start with a website created and accessible via the main domain's URL:
- Note that the website's location remains in the original folder on the server; the name of this location may be in the form
/sites/dev.domain.xyz, but this has absolutely no impact on the website in production. - Also, refer to the latest chapter of this other guide.
Reverse a linked domain
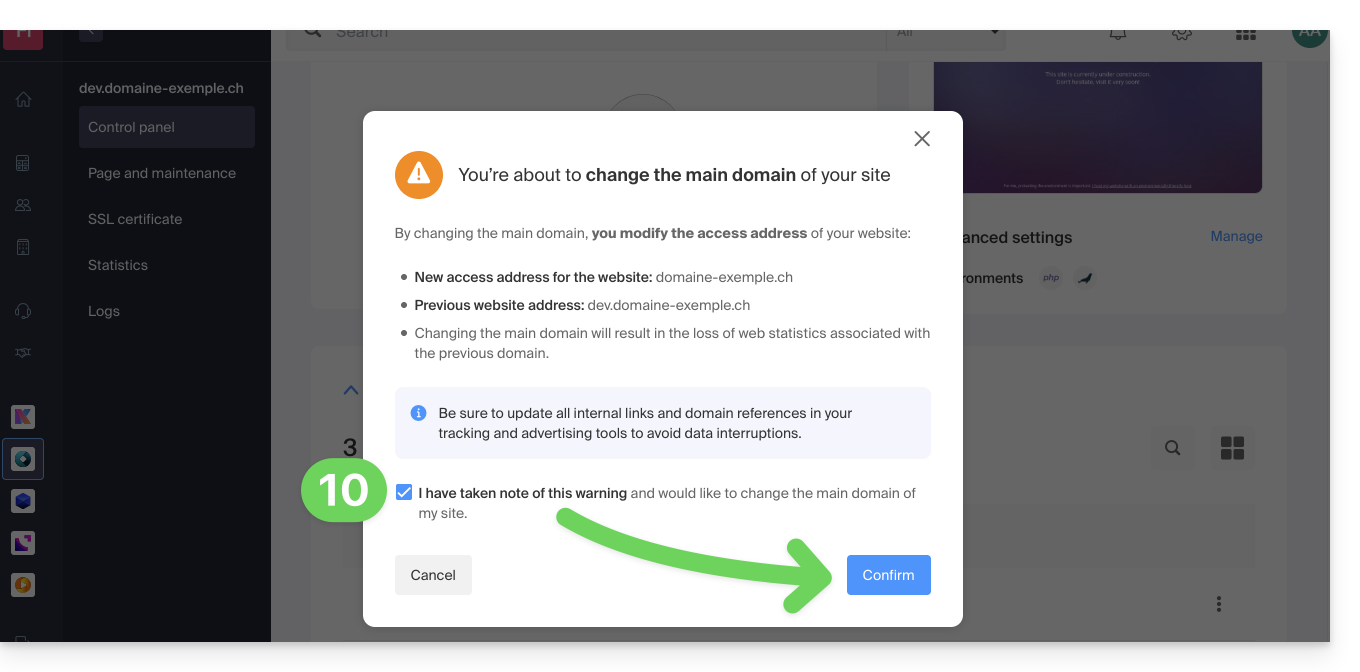
Here are the detailed steps to switch from a website with a subdomain-type address to a direct address (here, dev.domaine-exemple.ch becomes domaine-exemple.ch):
- Click here to access the domain management section in your Infomaniak Manager (❓: help).
- Click on the name of the domain in question.
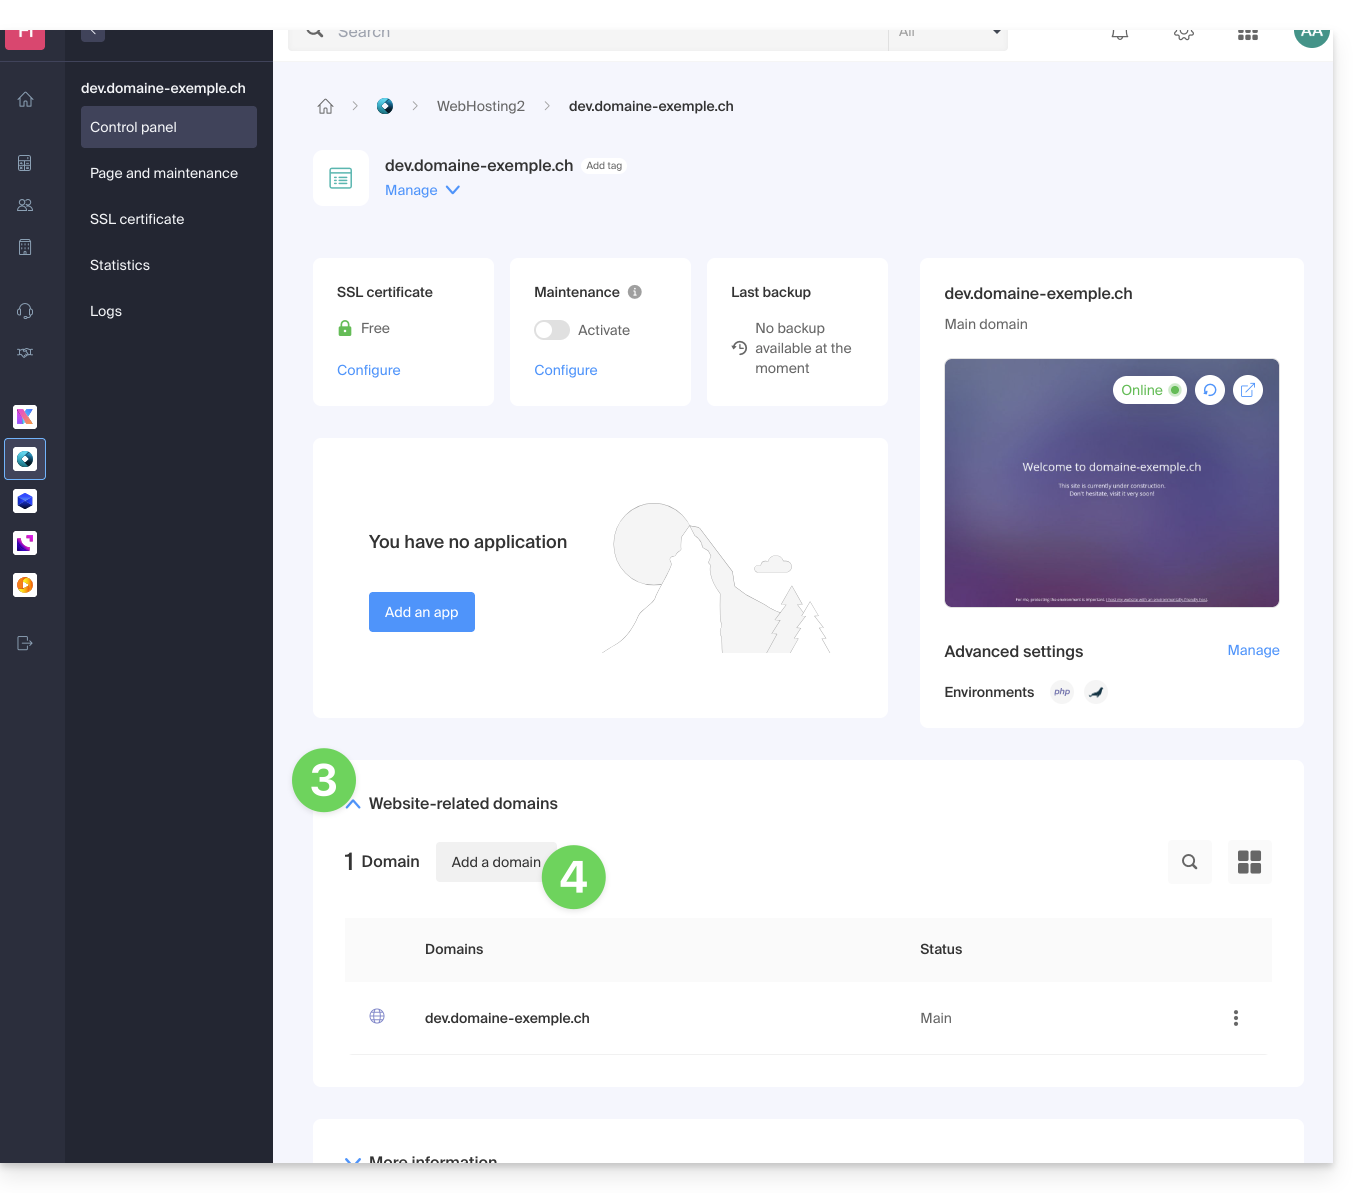
- Then, click on the down arrow to expand the Domains section of this site:
- Click on the Add a domain button:
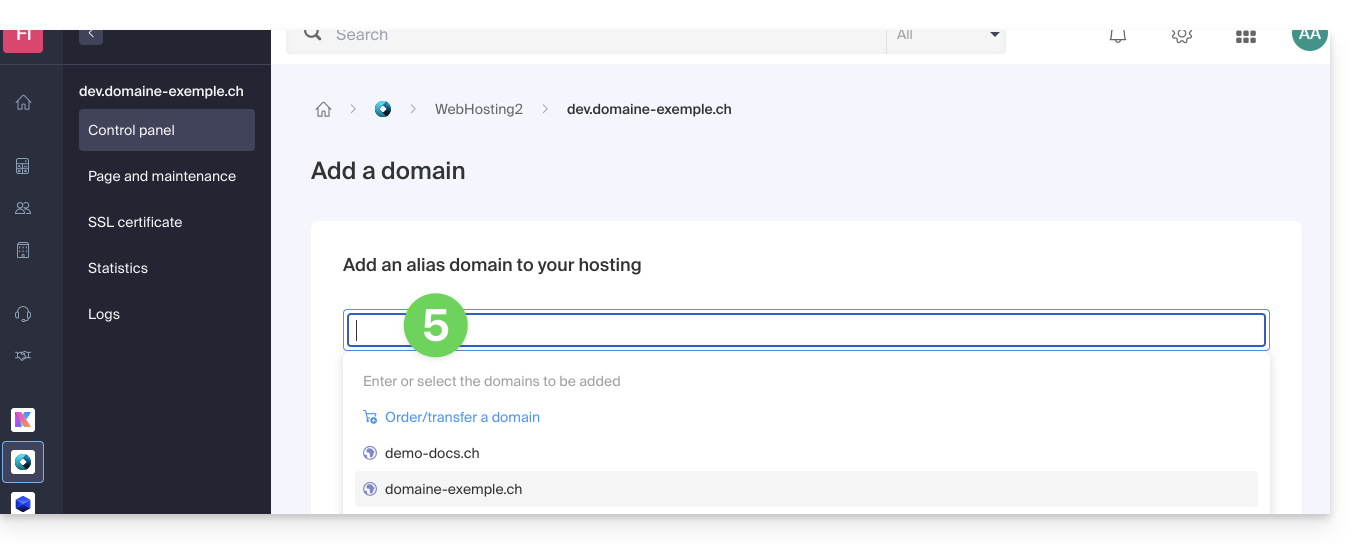
- Add the new desired name (if the domain name to be added is on the same Organization, it will be suggested in the list; otherwise, enter its spelling):
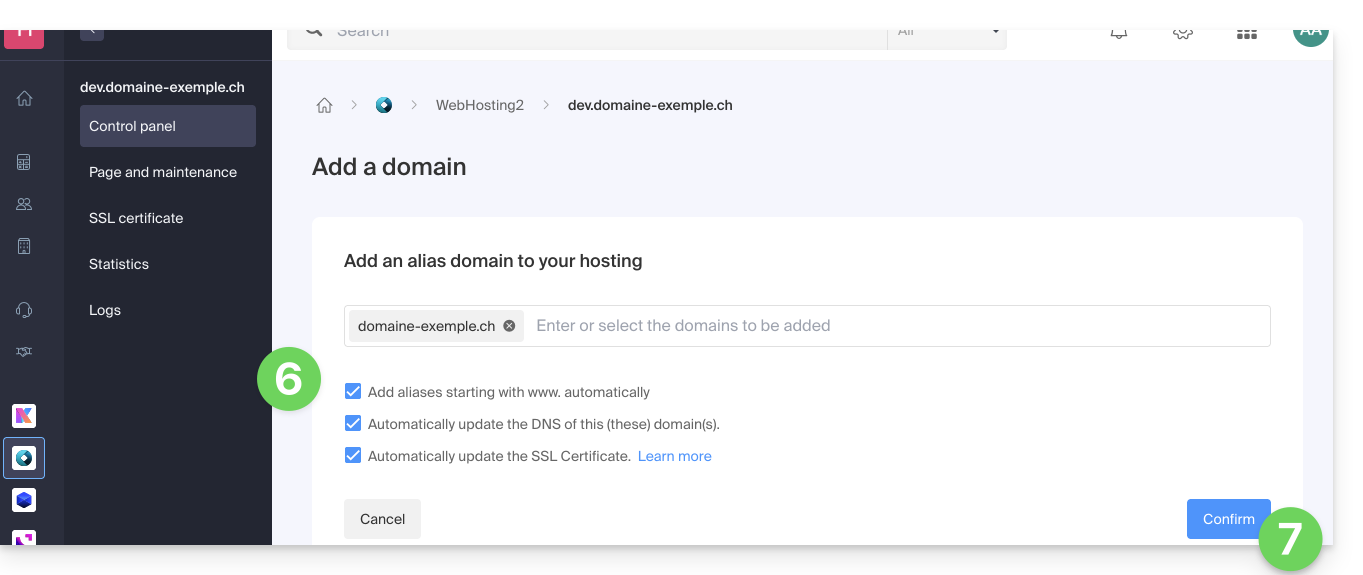
- Enable or disable the checkboxes:
- If the added domain is not in the form of a subdomain, you can request that the
wwwversion of the domain be added automatically. - Automatically update (if possible) the DNS records of the added domains.
- Automatically update the related SSL certificates (if possible).
- If the added domain is not in the form of a subdomain, you can request that the
- Click the button to Confirm and wait:
- Once added, click on the action menu ⋮ located to the right of the domain you just added and want to set as the primary domain:
- Choose to define the item as the primary domain:
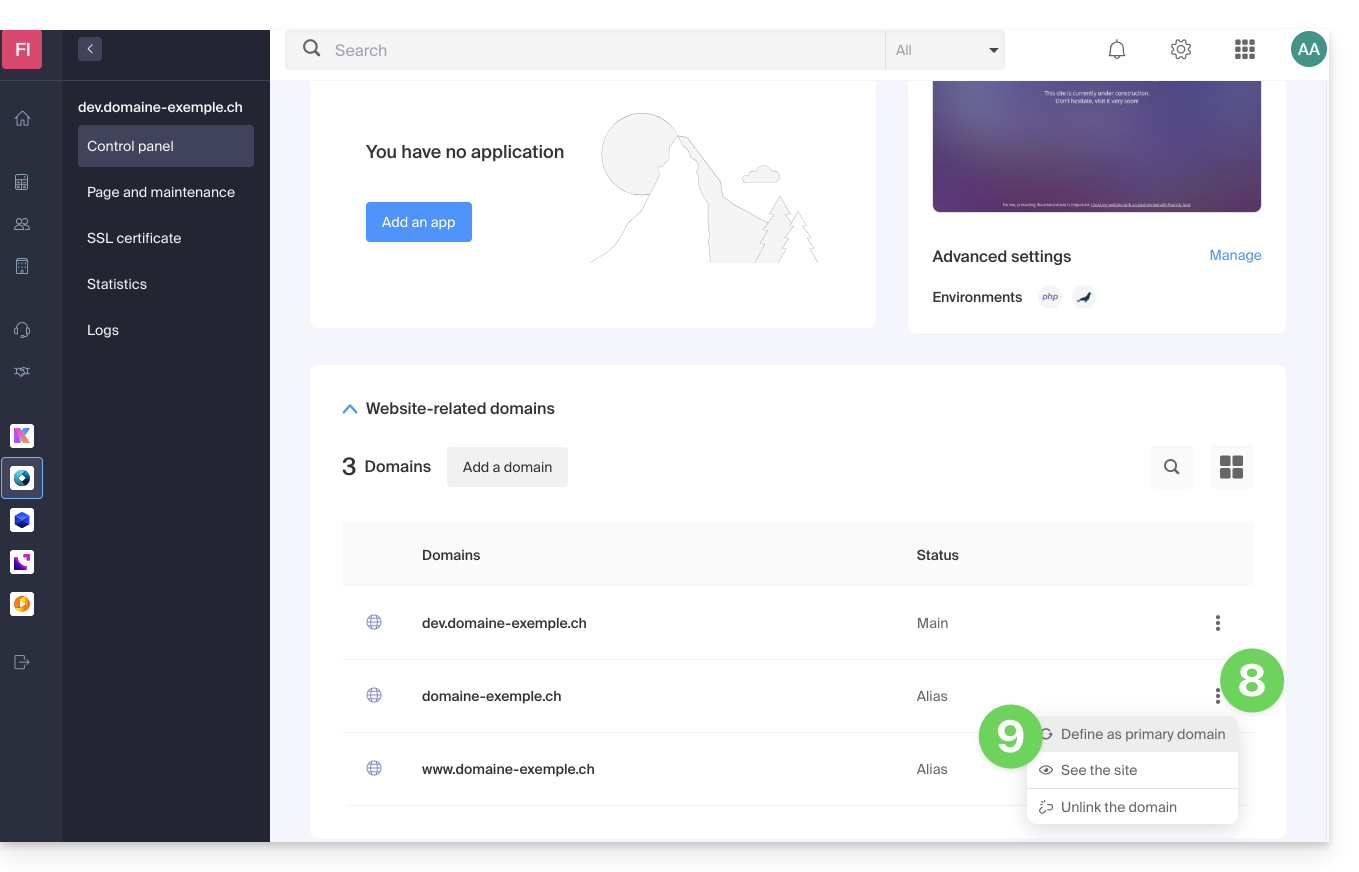
- Confirm the operation to proceed with the domain swap:
Link to this FAQ: https://faq.infomaniak.com/2160
Has this FAQ been helpful?