Knowledge base
1000 FAQs, 500 tutorials and instructional videos. Here, there are only solutions!
Manage dedicated IPs
Update 10/05/2026
This guide explains how to order, link, or remove a dedicated IP for a website.
Manage dedicated IPs on a hosting plan
Order one or more dedicated IP addresses
To do this:
- Click here to access the hosting & website management section in your Infomaniak Manager (❓: help).
- Click on the name of the website in question.
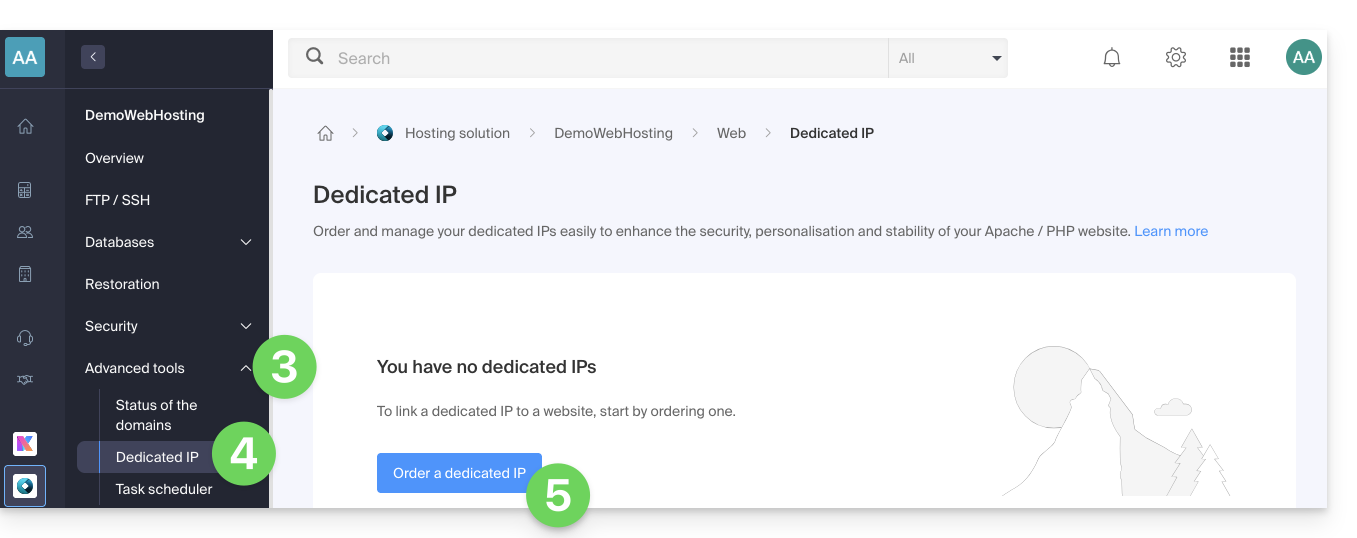
- Click on the chevron to the right of Advanced Tools in the left-hand menu.
- Click on Dedicated IPs in the left-hand menu.
- Click on the button to order one or more IP addresses:
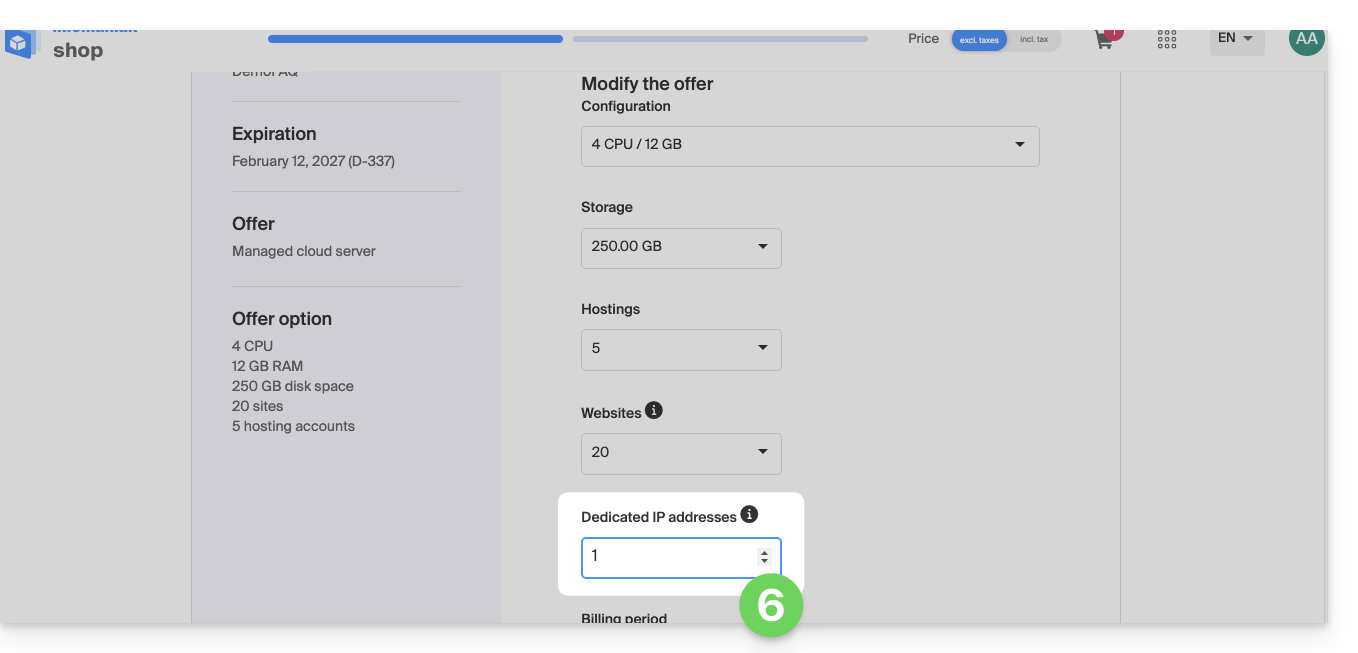
- Increase the quantity according to the number of IP addresses desired:
Order one or more additional dedicated IP addresses
To do this:
- Click here to access the hosting & website management section in your Infomaniak Manager (❓: help).
- Click on the name of the website in question.
- Click on the chevron to the right of Advanced Tools in the left-hand menu.
- Click on Dedicated IPs in the left-hand menu.
- Click on the text to order one or more additional IP addresses:
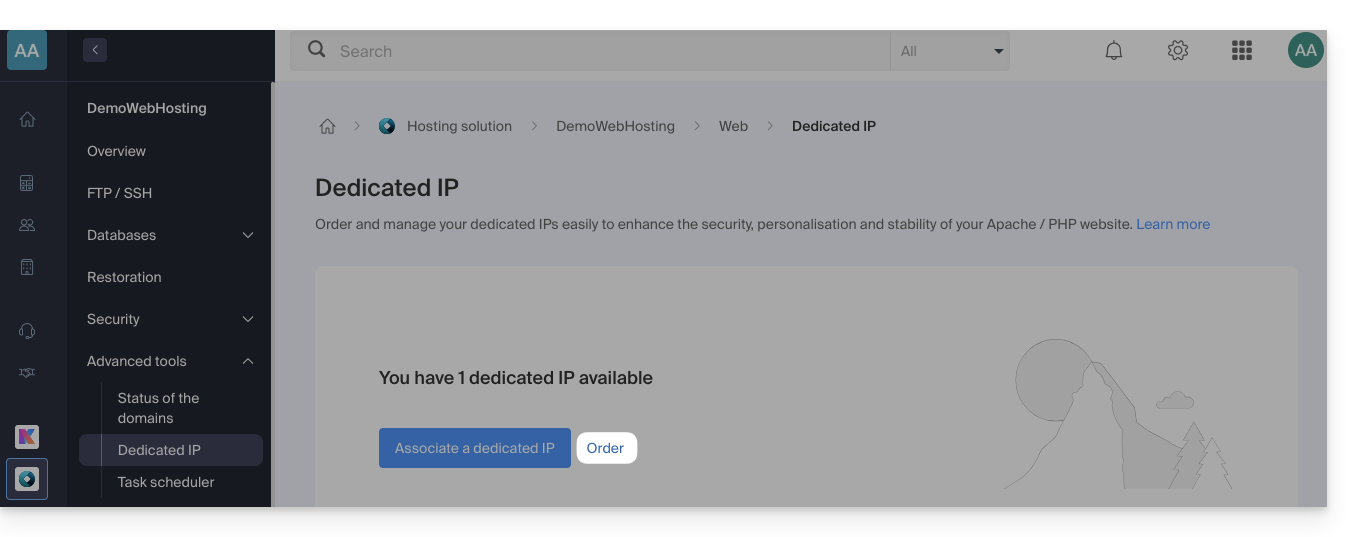
- Increase the quantity according to the number of IPs desired.
Associate a dedicated IP address with a website on your hosting
Once the IP address has been ordered and paid for, please review the prerequisites below, as switching to a dedicated IP address for a website may cause a temporary interruption, especially if a Let's Encrypt SSL certificate is in use.
Prerequisites
- Start by reducing the TTL of the DNS records
AandAAAA(for@andwww) to 5 minutes. - Wait for the duration of the previous TTL before making any changes.
- The change below should be made during a period of low traffic to limit the disruption caused by the inevitable interruption.
- At the end of the process, you will need to wait for the new TTL to take effect so that the new configuration can propagate and the SSL certificate can be regenerated, and then verify the site's accessibility via HTTPS to ensure that everything is working correctly.
To switch to a dedicated IP address:
- Click here to access the hosting & website management section in your Infomaniak Manager (❓: help).
- Click on the name of the website in question.
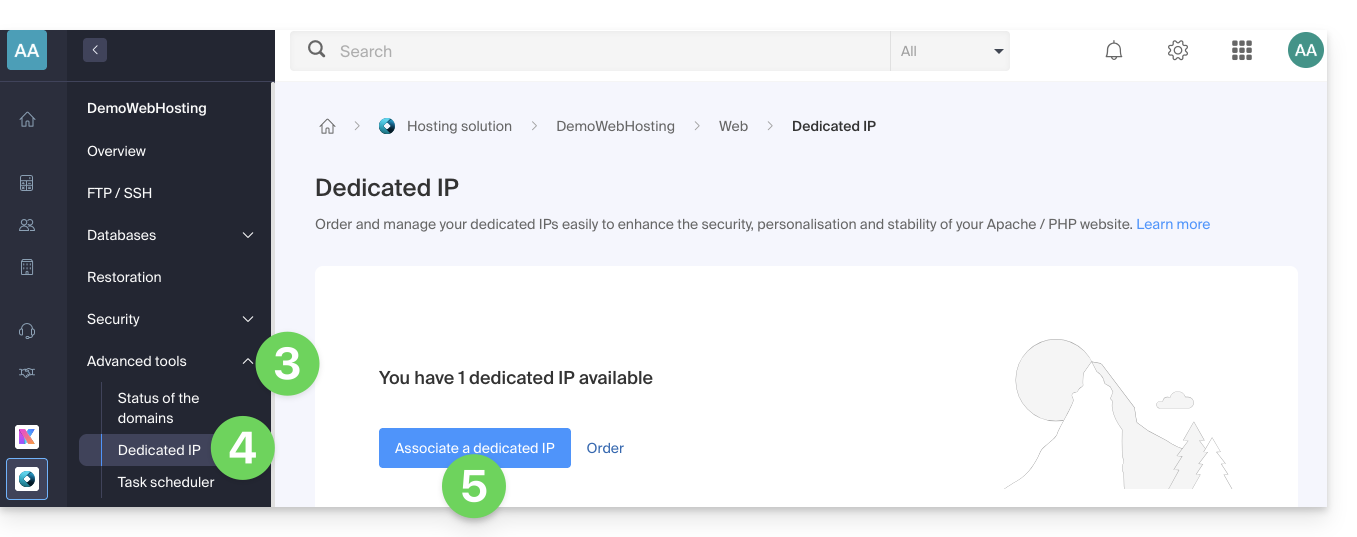
- Click on the chevron to the right of Advanced Tools in the left-hand menu.
- Click on Dedicated IPs in the left-hand menu.
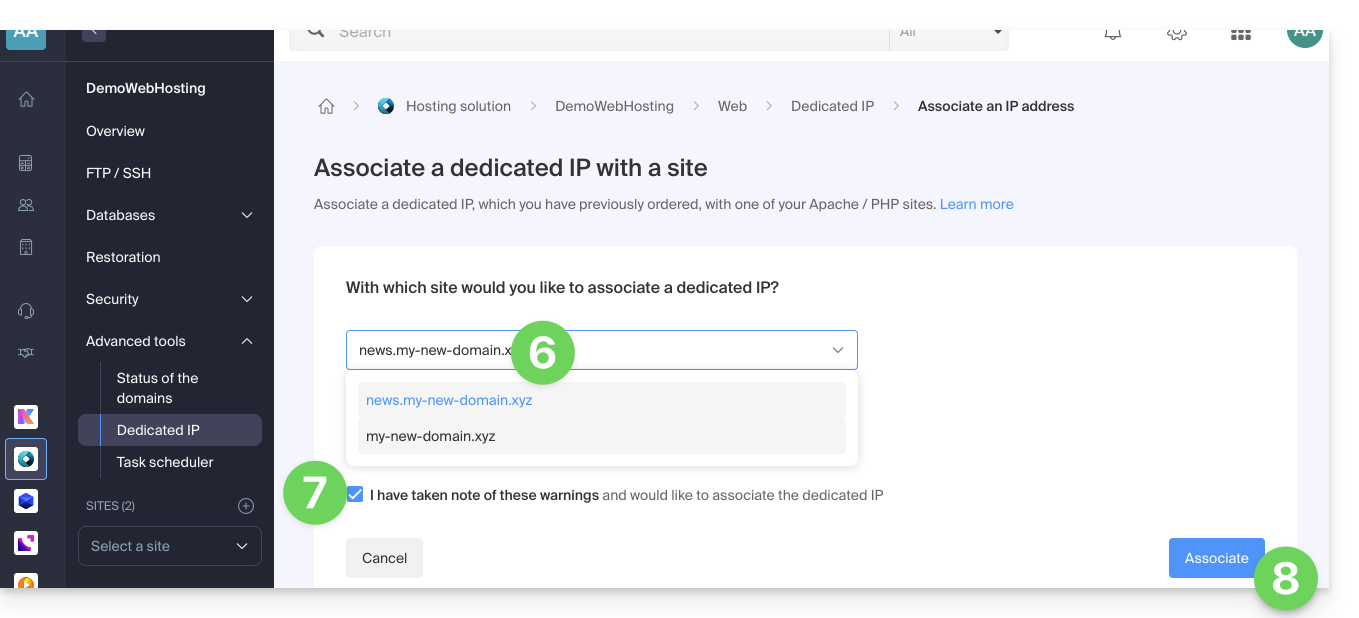
- Click the button to associate the IP with a website in your hosting account:
- Choose the website to which you want to assign the new IP address.
- Check the box after reading the warnings.
- Click the Associate button:
Remove a dedicated IP address from a website
Once the IP address is installed, to uninstall it:
- Click here to access the hosting & website management section in your Infomaniak Manager (❓: help).
- Click on the name of the website in question:
- Click on the chevron to the right of Advanced Tools in the left-hand menu.
- Click on Dedicated IPs in the left-hand menu.
- Click on the action menu ⋮ located to the right of the item in question.
- Choose Unlink:
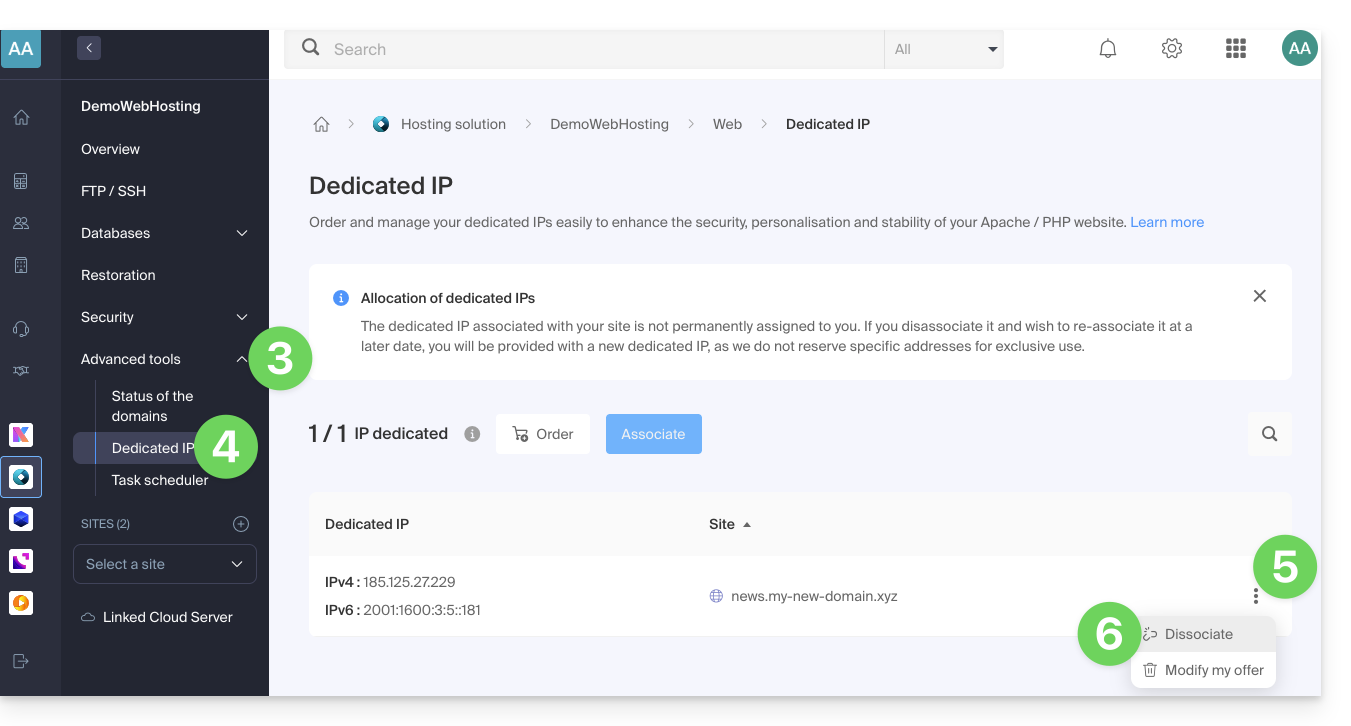
- Read the warnings and confirm the deletion to complete the IP uninstallation process.
Read this other guide if you are looking for information about potential issues related to your IP.
Link to this FAQ: https://faq.infomaniak.com/2139
Has this FAQ been helpful?