Knowledge base
1000 FAQs, 500 tutorials and instructional videos. Here, there are only solutions!
Create a mail address alias
This guide explains how to create an alias, i.e., a variant of your usual email address without having to add a new address to your existing Mail Service.
✘ UNAVAILABLE with
my kSuite (ik.me, etik.com, ikmail.com)
Introduction
- Number of aliases possible per email address:
- kSuite Free = 1
- kSuite Standard = 50
- kSuite Business = 50
- kSuite Enterprise = 50
- my kSuite+ = 2 (note: a deleted alias cannot be recreated with the exact same name)
- Mail Service Starter = 1
- Mail Service Premium = 50
- An alternative feature exists (❓: help).
- To modify what comes after the @ symbol instead, use domain aliases (❓: help).
- Users of the address (on the Mail Infomaniak web app) receive an email each time an alias is added or removed.
How an alias works
You can create alternative versions of your email addresses by modifying what comes before the @ symbol.
For example:
john-peter.smith@domain.xyz is a long email address…
It can be shortened and used as follows:
jps@domain.xyz
In this example, you need to create an alias "jps" for the address "john-peter.smith".
Then, if someone writes to jps@domain.xyz:
- their message will arrive in the inbox of the main address (
john-peter.smith@domain.xyz).
If someone sends an email to john-peter.smith@domain.xyz AND includes jps@domain.xyz in the CC field:
- their message will arrive twice in the inbox of the primary address (
john-peter.smith@domain.xyz).
Add an alias from the Infomaniak Web Mail app
Prerequisites
- You may no longer have permission to manage aliases: the Mail Service administrator may have removed this right from their admin account (❓:
Next, to add an alias:
- Click here to access your emails in your Infomaniak kSuite (❓: help).
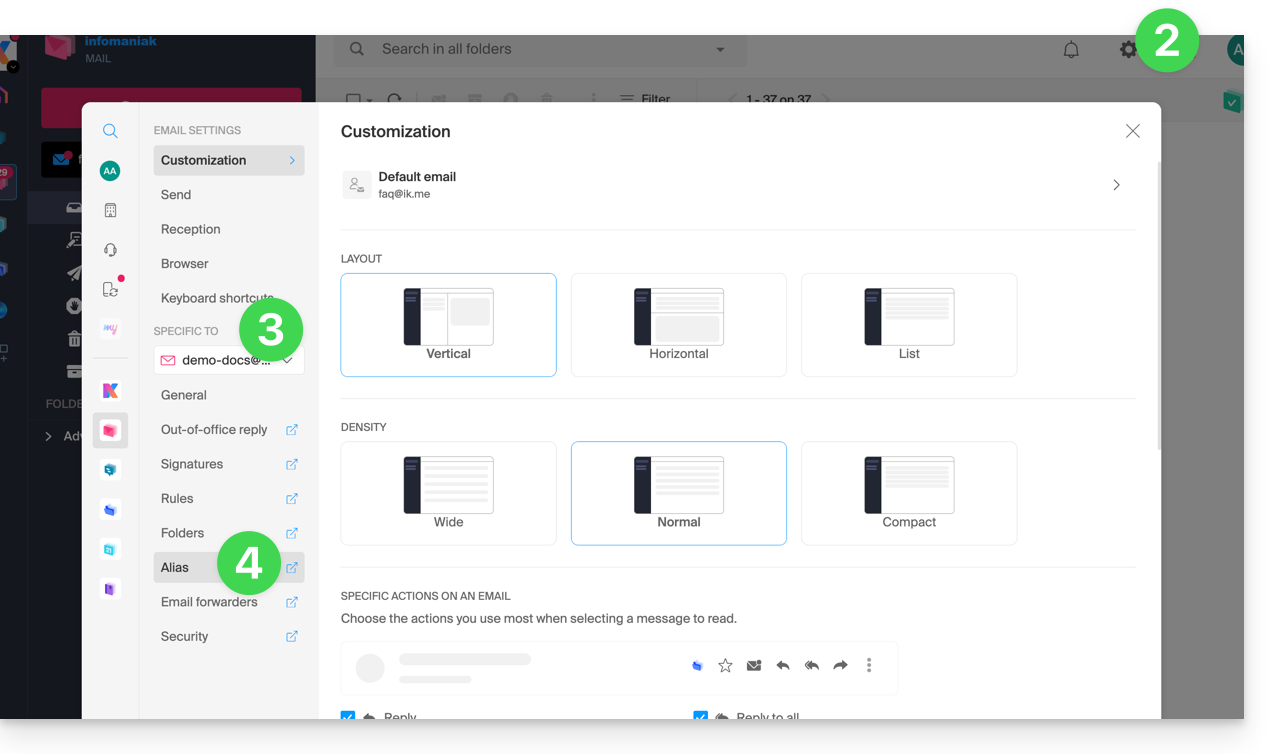
- Click on Settings in the top right corner.
- Check or select the relevant email address from the dropdown menu in the left-hand menu.
- Click on Alias:
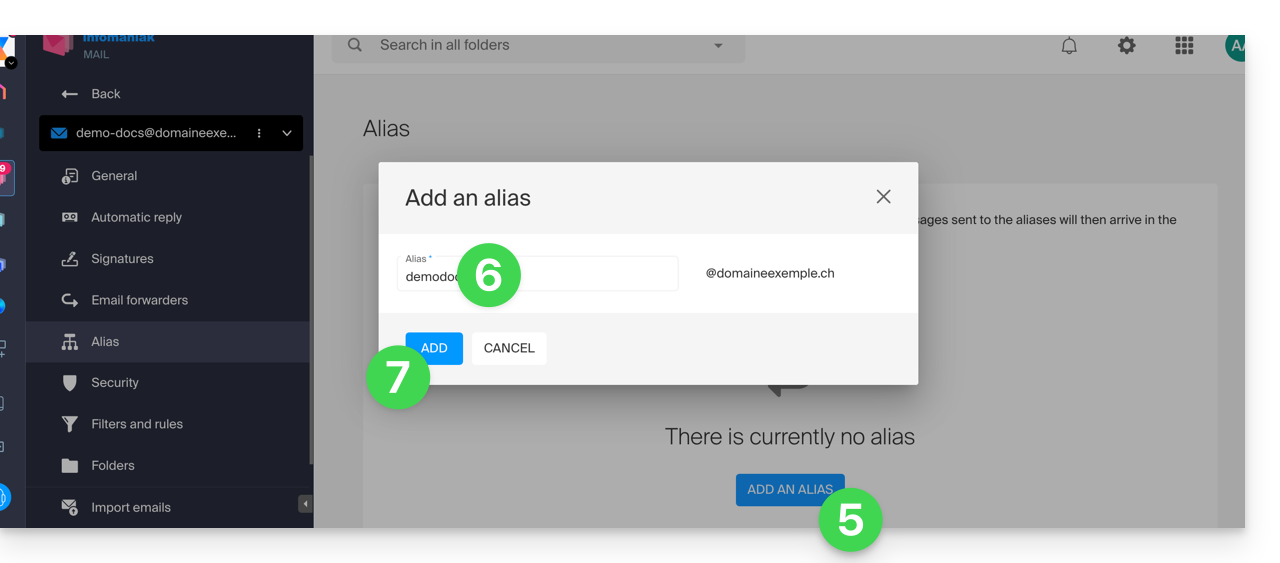
- Click on Add an alias to create a variation of your email address.
- Enter the desired alias (the part before the @ symbol).
- Click on Add:
Add an alias from the Mail Service
To access the Mail Service:
- Click here to access the Mail Service management in your Infomaniak Manager (❓: help).
- Click on the name of the Mail Service in question.
- Click on the email address in the table that appears.
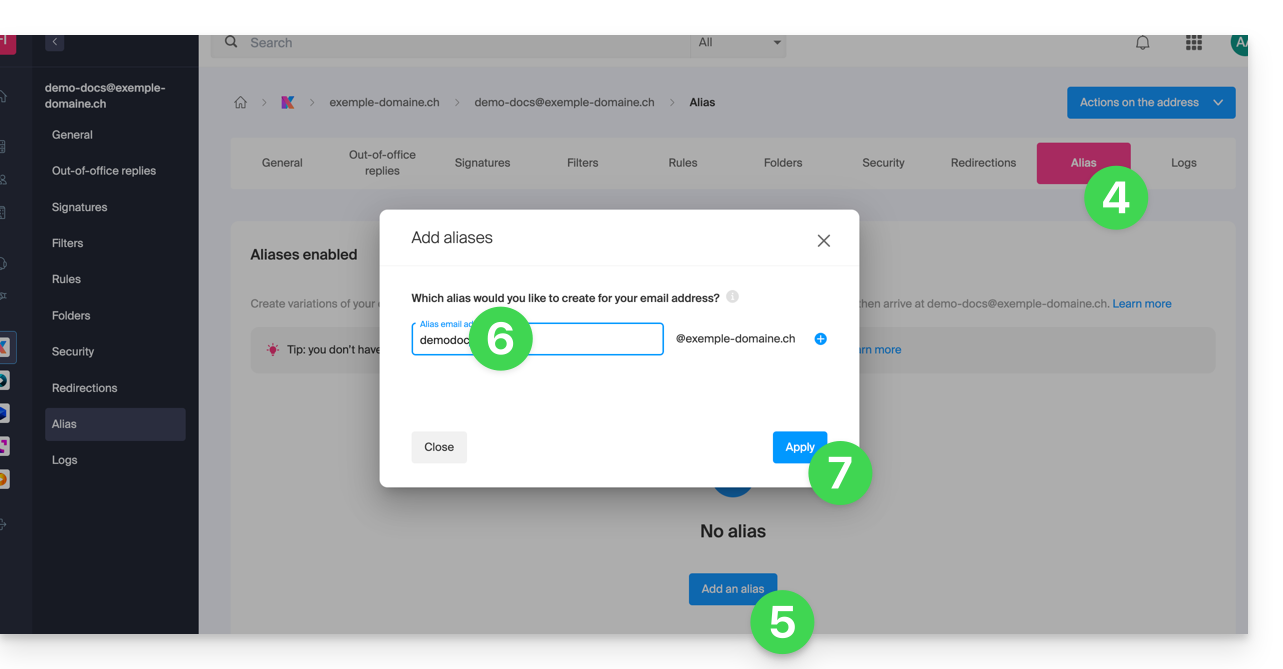
- Click on the Alias tab, or in the left-hand menu, click on Alias.
- Click on the blue Add an alias button.
- Enter the desired alias (the part that comes before the @ symbol):
- Click Apply to save the changes:
Link to this FAQ: https://faq.infomaniak.com/2129
Has this FAQ been helpful?