Knowledge base
1000 FAQs, 500 tutorials and instructional videos. Here, there are only solutions!
Add an alias to an email address
Update 11/09/2026
This guide explains how to create a mail “alias” address, i.e., a variant of your usual mail address, from the settings of a mail address on an Mail Service or the Mail app from Infomaniak.
✘ NOT AVAILABLE with
my kSuite (ik.me, etik.com, ikmail.com)
Preamble
- Number of aliases possible per email address:
- kSuite Free = 1
- kSuite Standard = 50
- kSuite Business = 50
- kSuite Enterprise = 50
- my kSuite+ = 2 (note: a deleted alias cannot be recreated with the exact same name)
- Mail Service Starter = 1
- Mail Service Premium = 50
- Users of the address receive an email each time an alias is added or removed.
- You can also configure the Infomaniak Web Mail app or a software/email client so that sending emails from this type of email address works (❓: help).
- An alternative, on-the-fly alias feature exists (❓: help).
- To modify what comes after the @ symbol instead, use alias domains (❓: help).
Add an alias from the Infomaniak Web Mail app
Prerequisites
- You may no longer have permission to manage aliases: the Mail Service administrator may have removed this right from their admin account (❓:
Next, to add an alias:
- Click here to access your emails on your Infomaniak kSuite (❓: help).
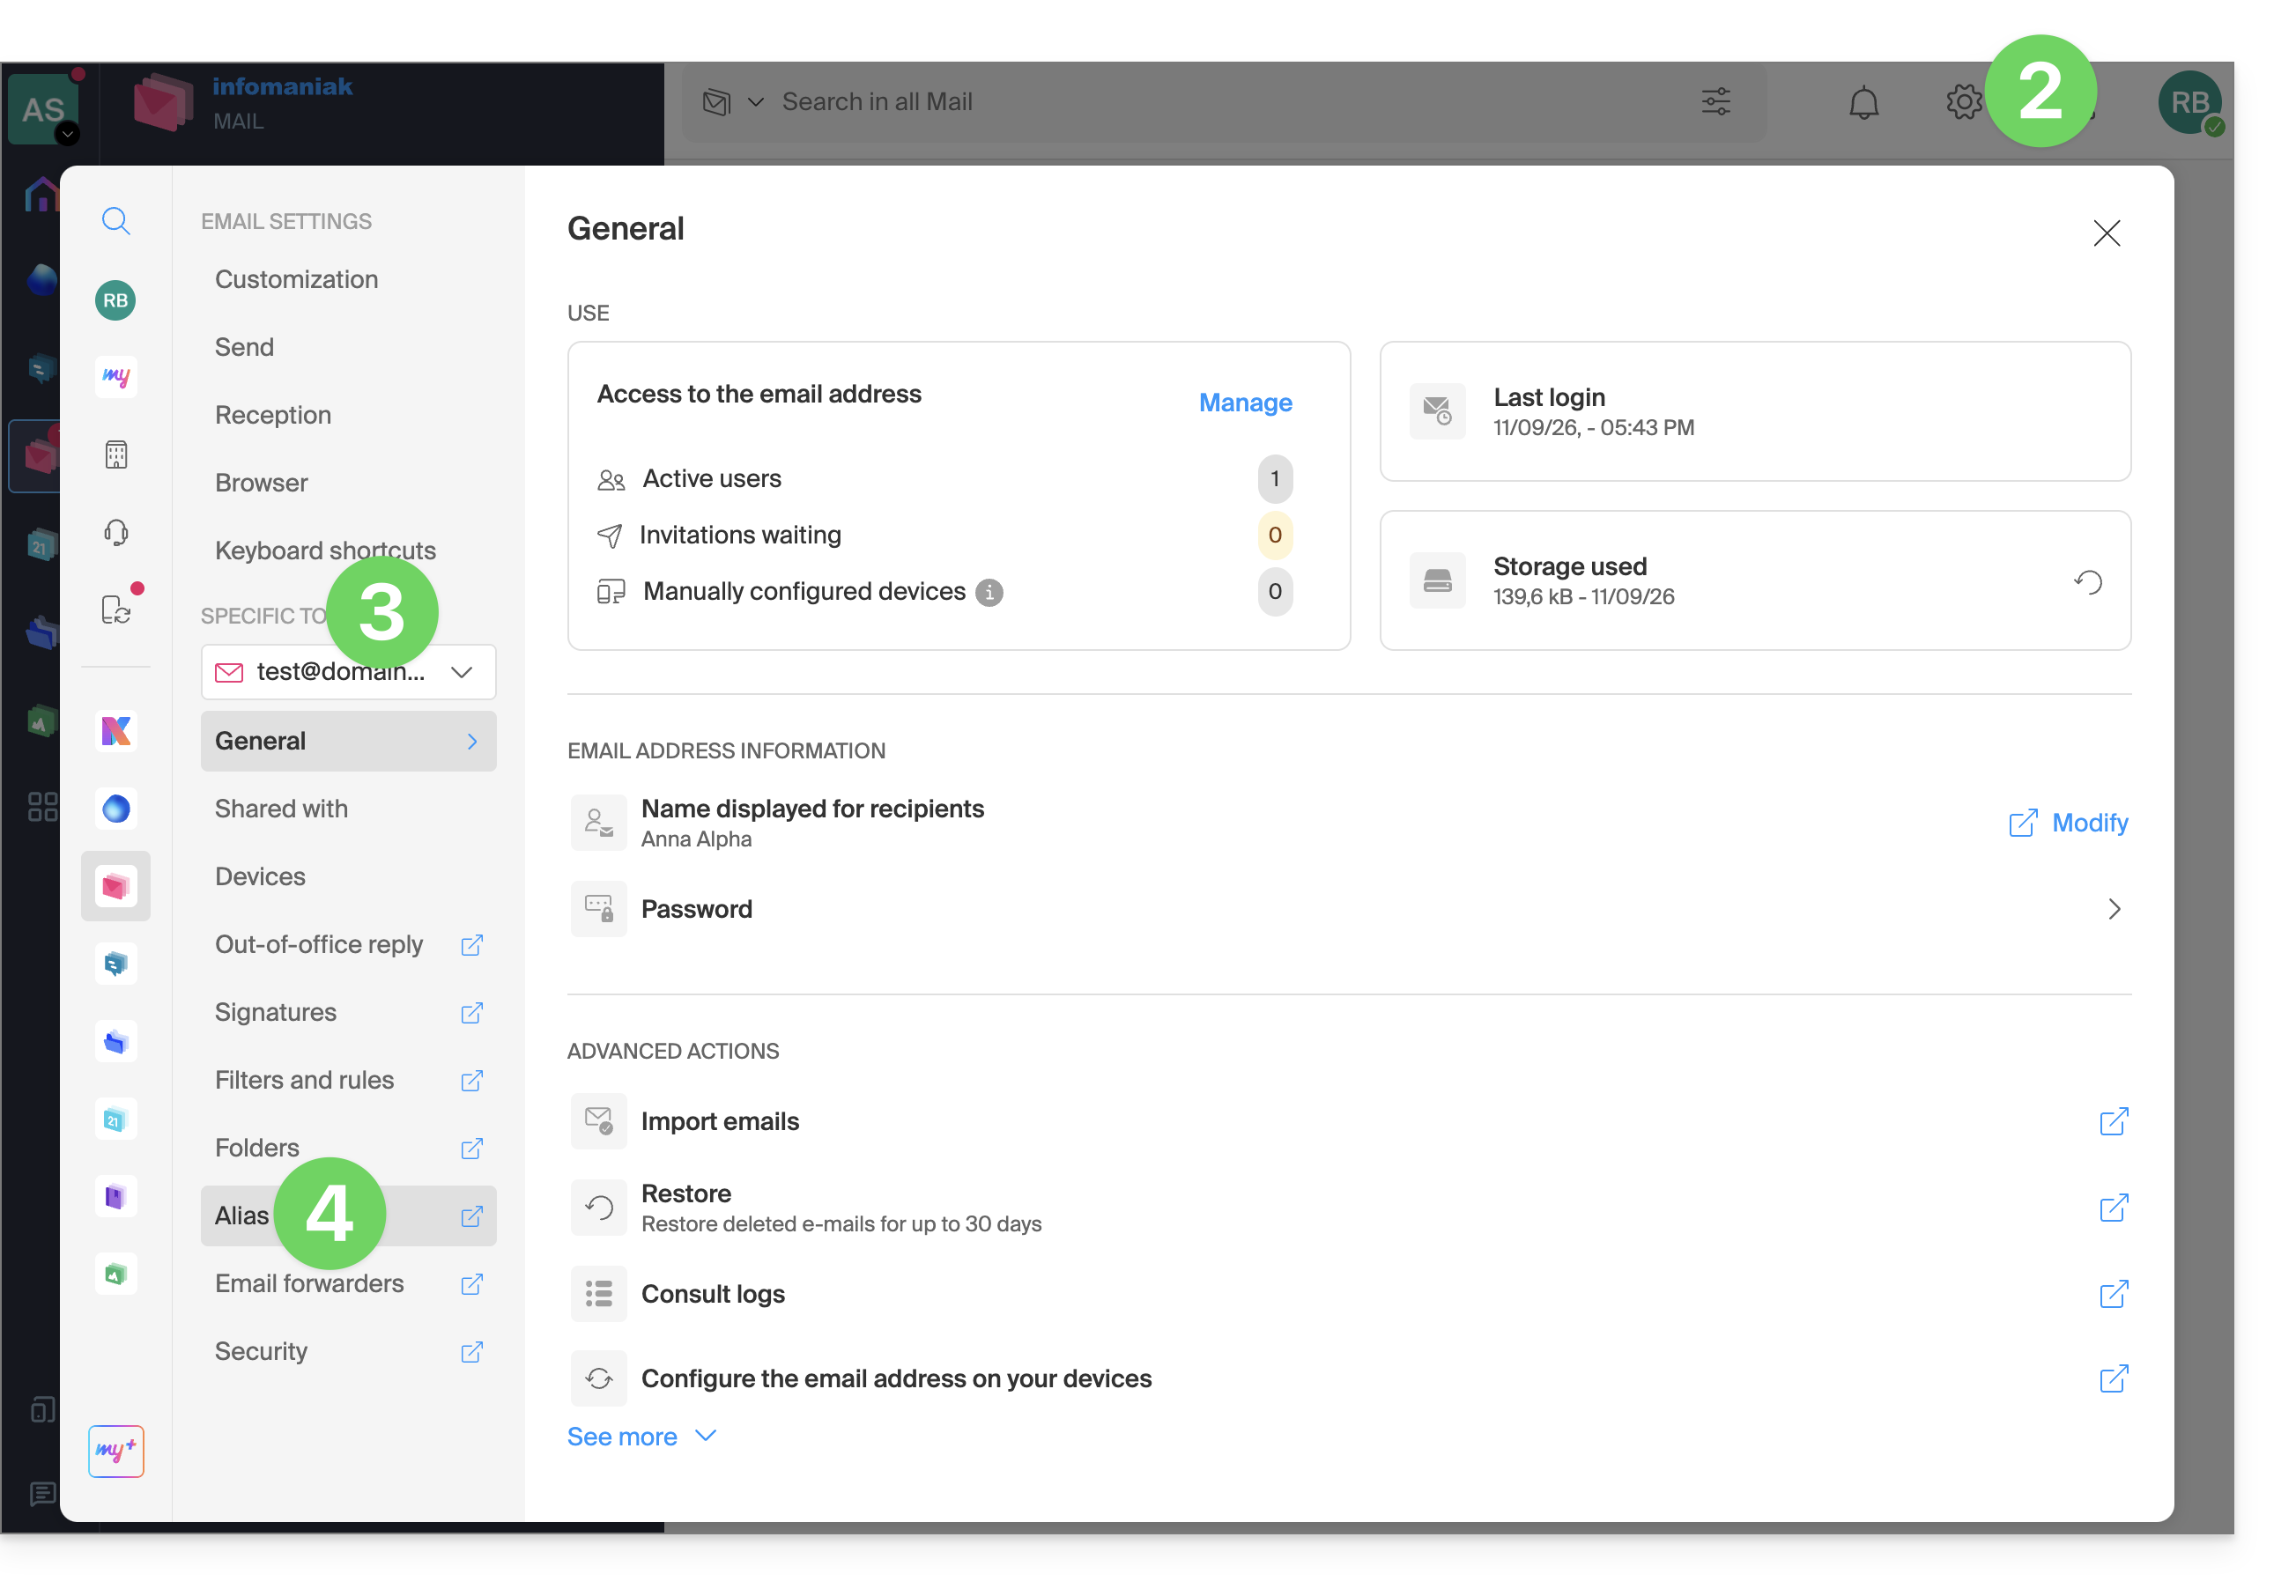
- Click on Settings in the top right corner.
- Check or select the relevant email address from the dropdown menu in the left-hand sidebar.
- Click on Alias:
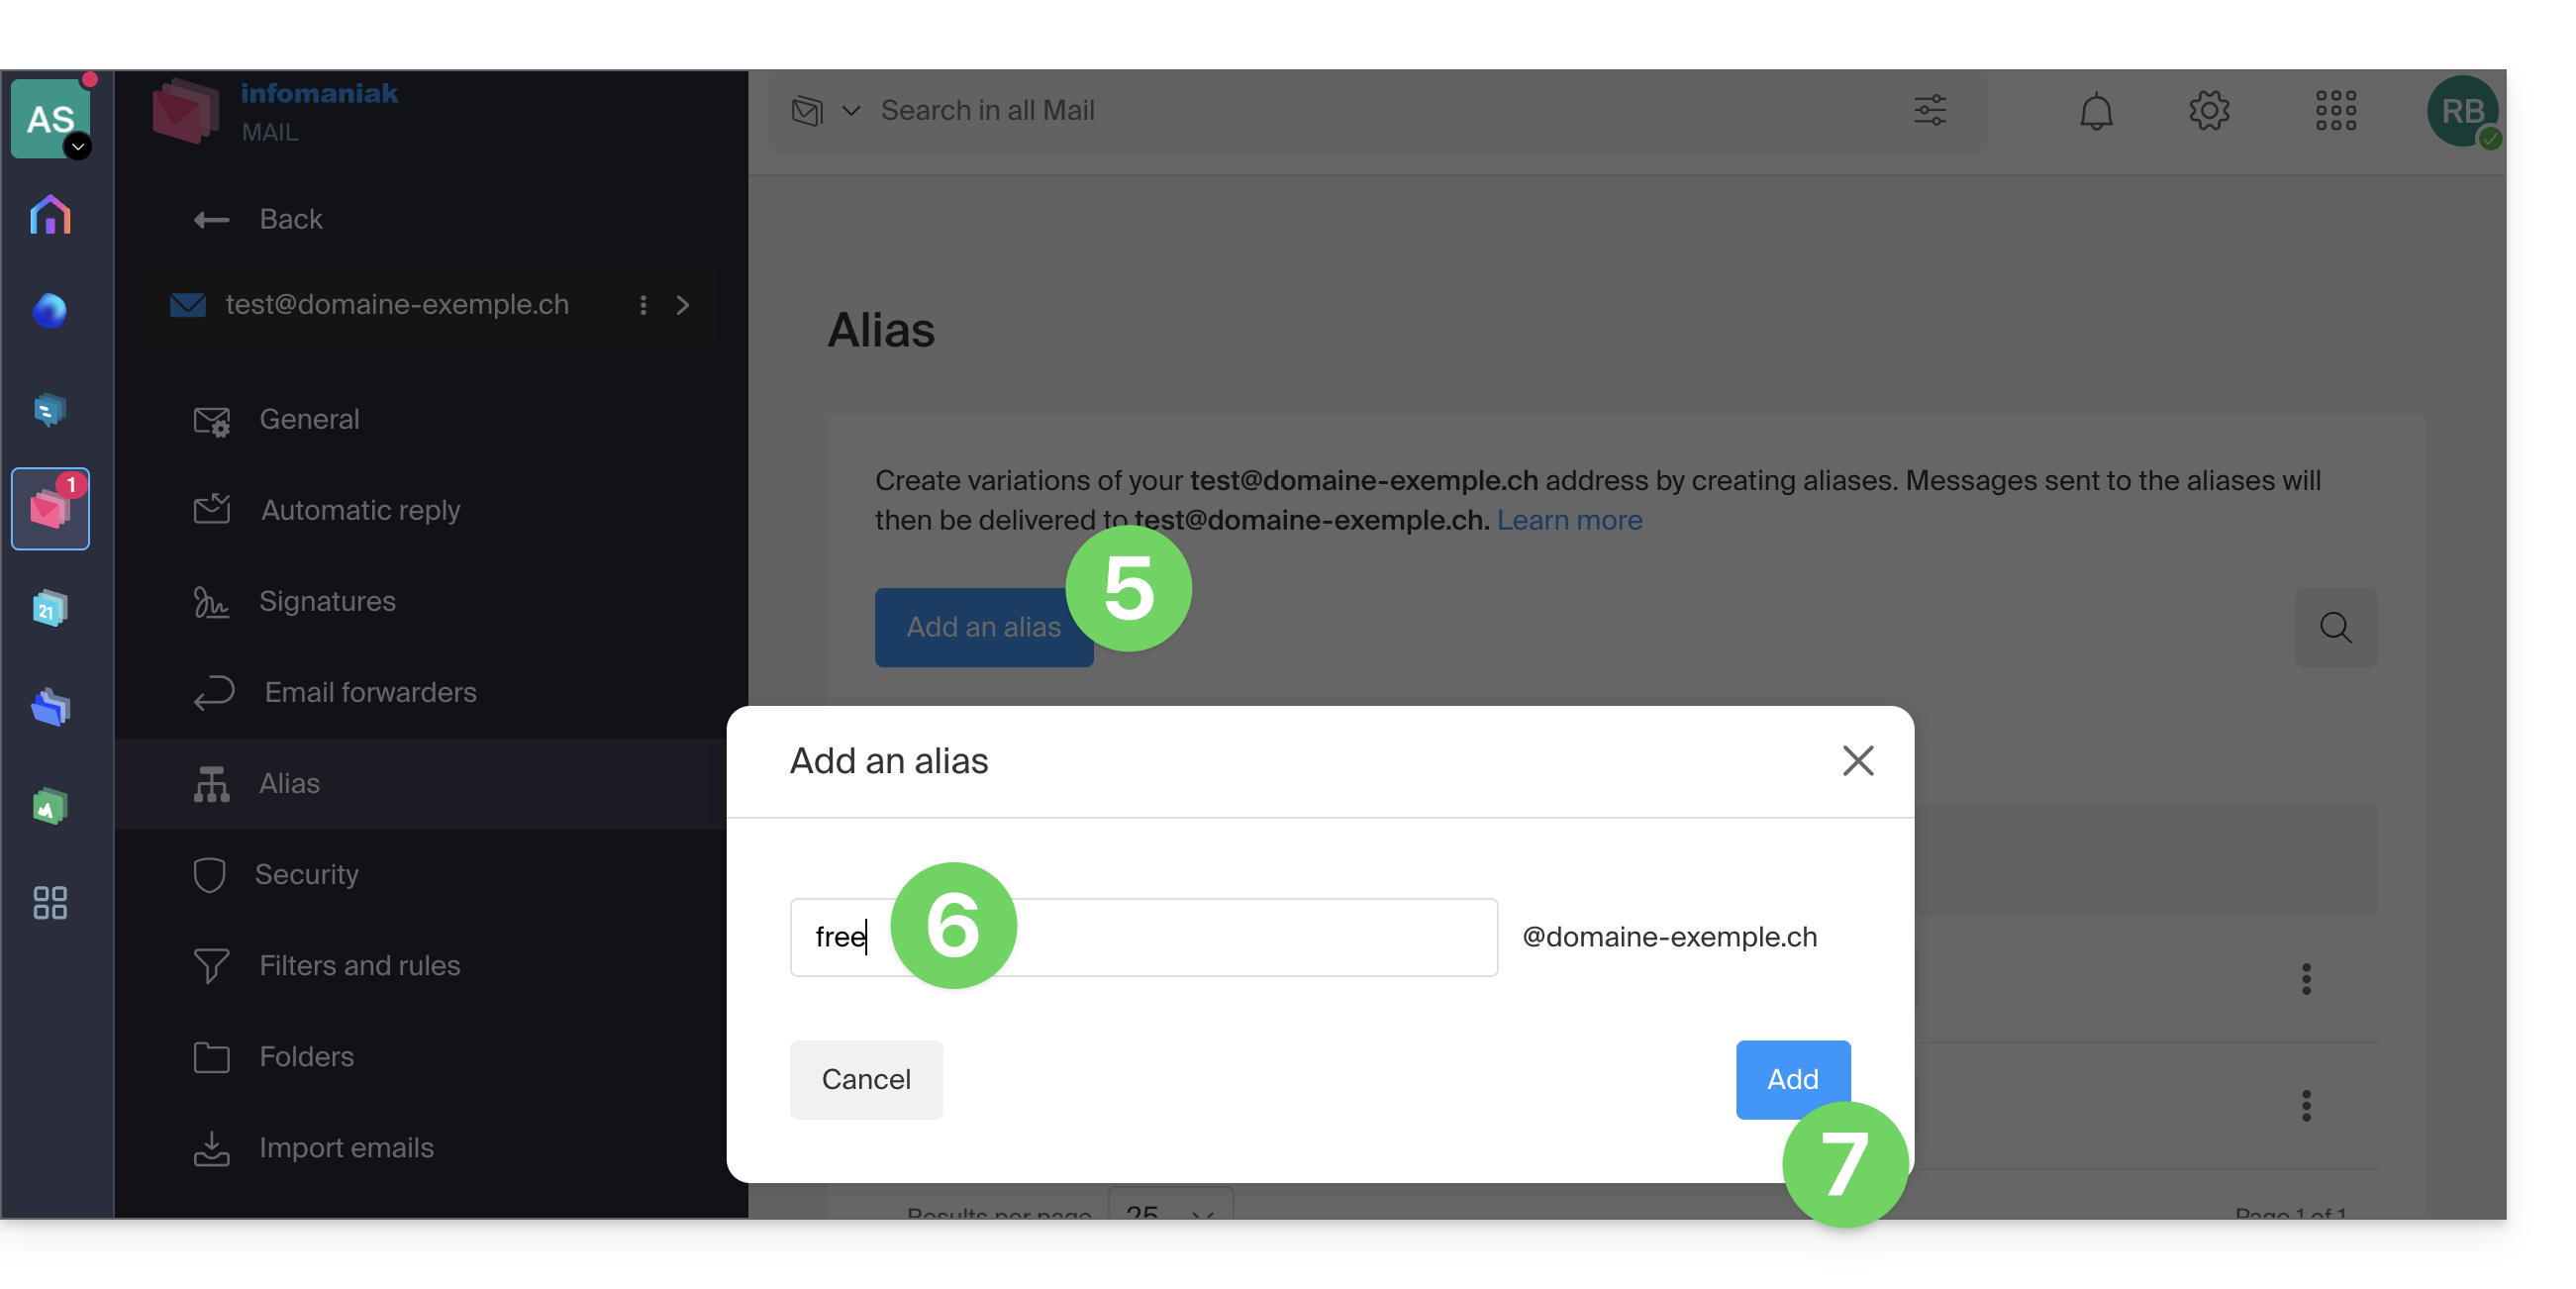
- Click on Add an alias to create a variation of your email address.
- Enter the desired alias (the part before the @ symbol).
- Click on Add:
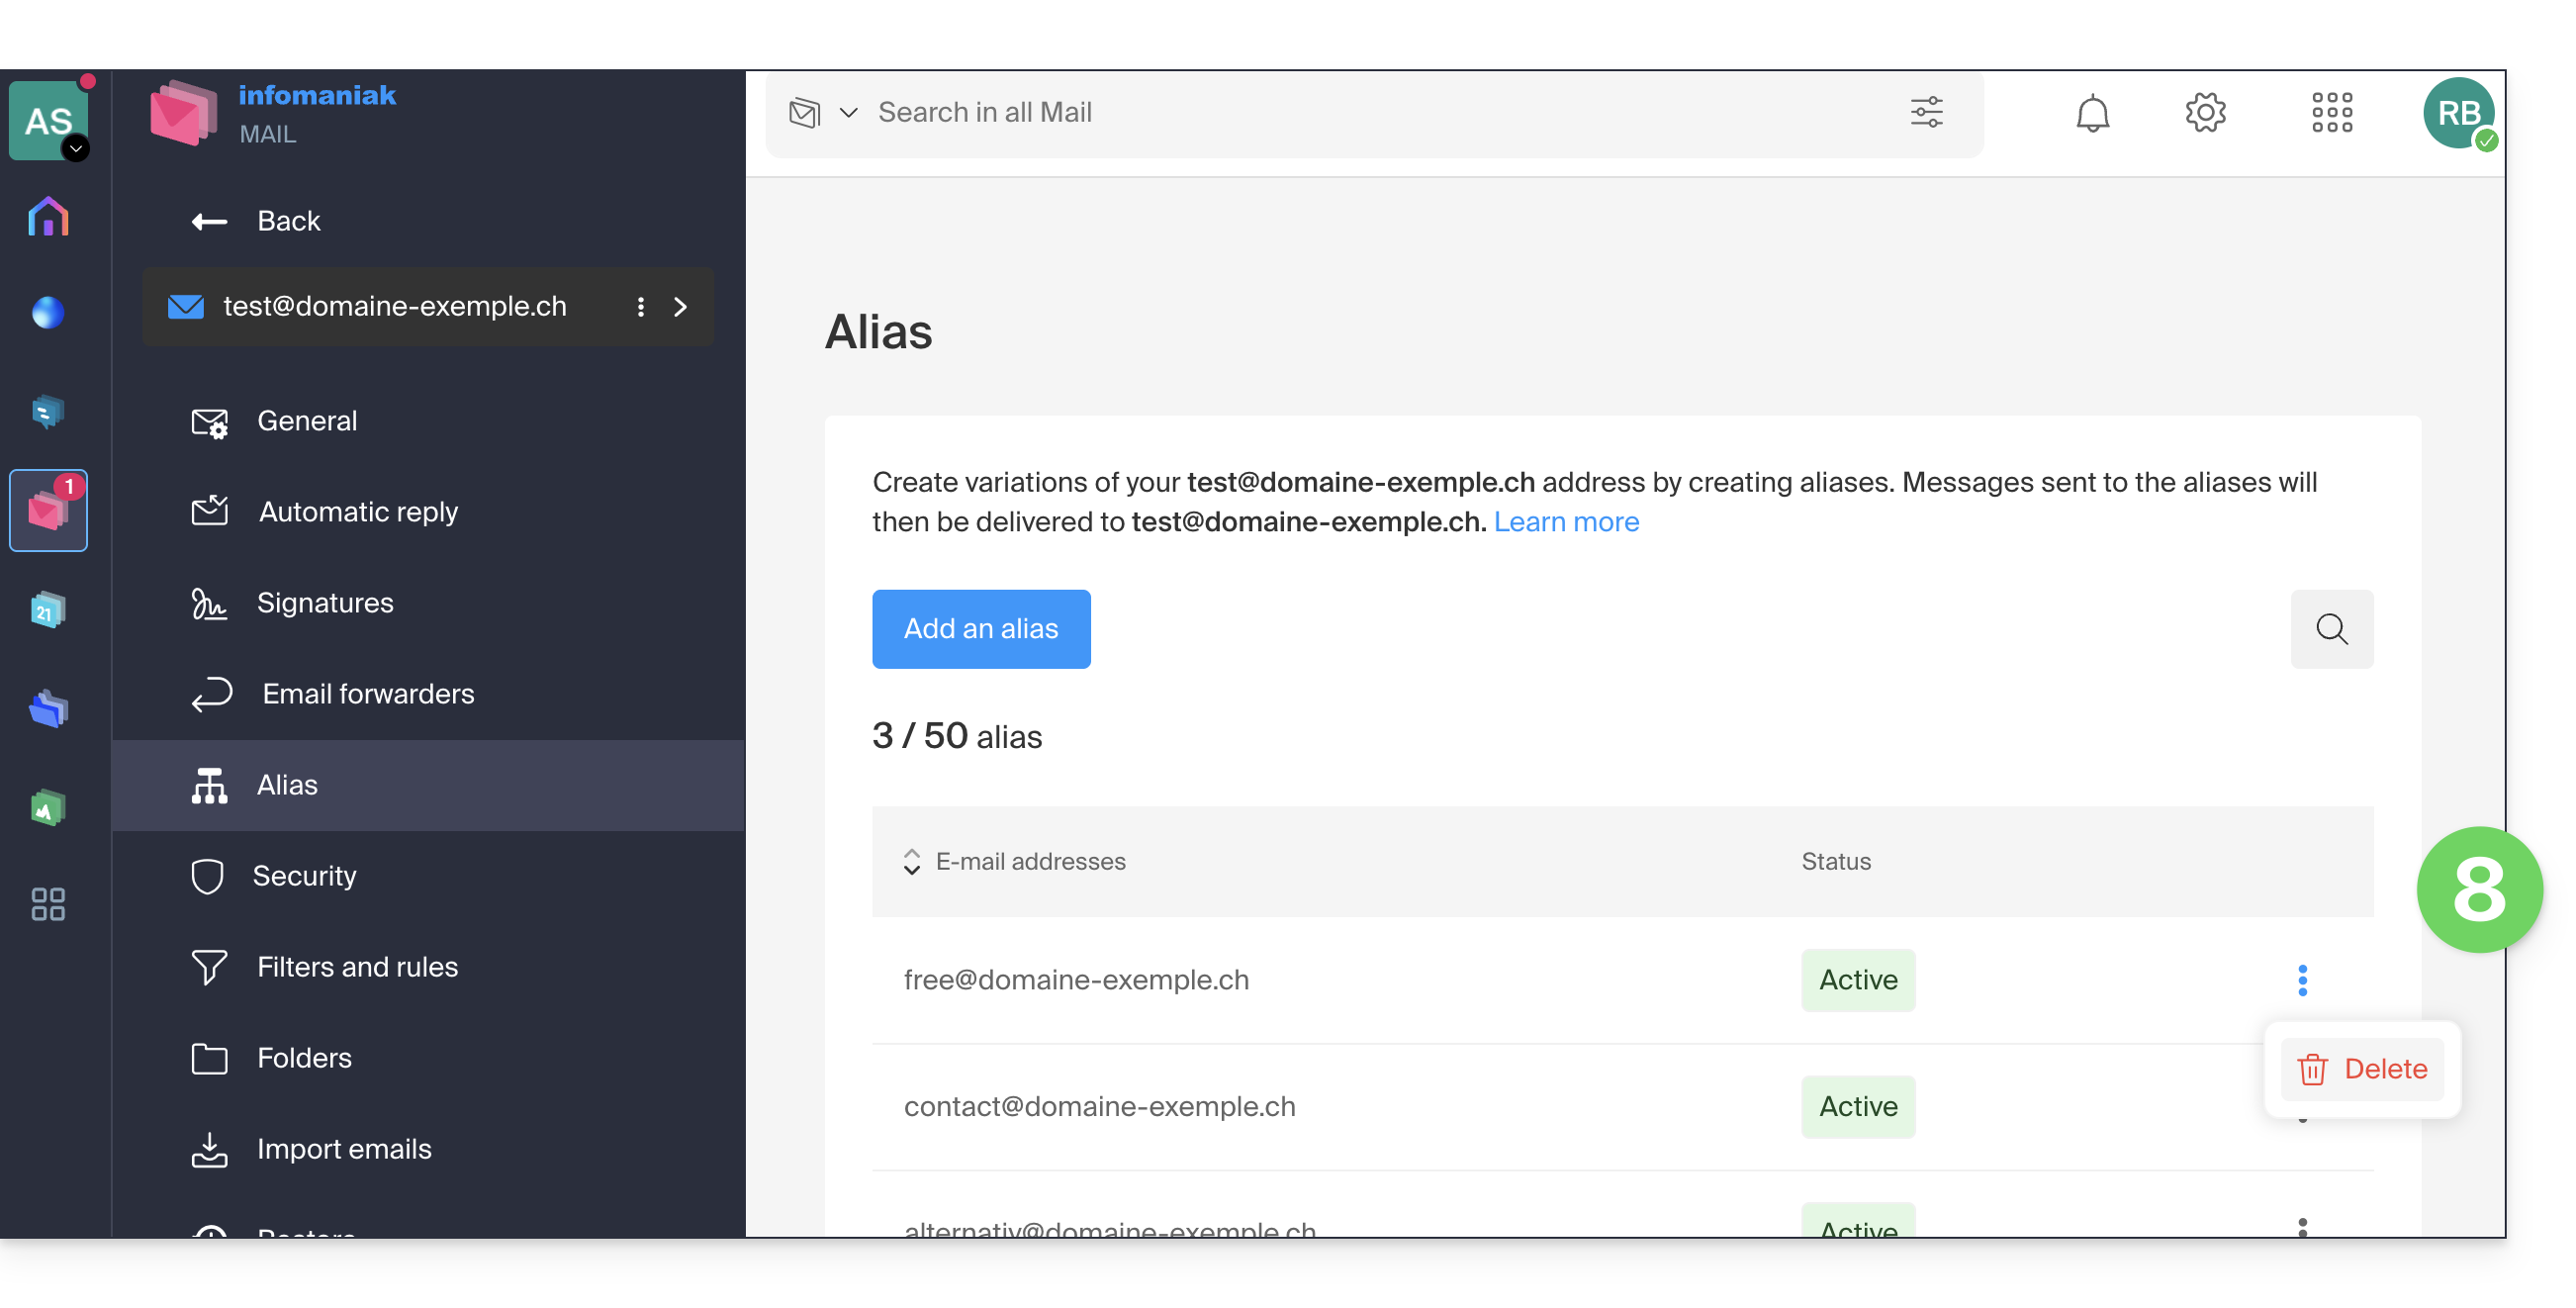
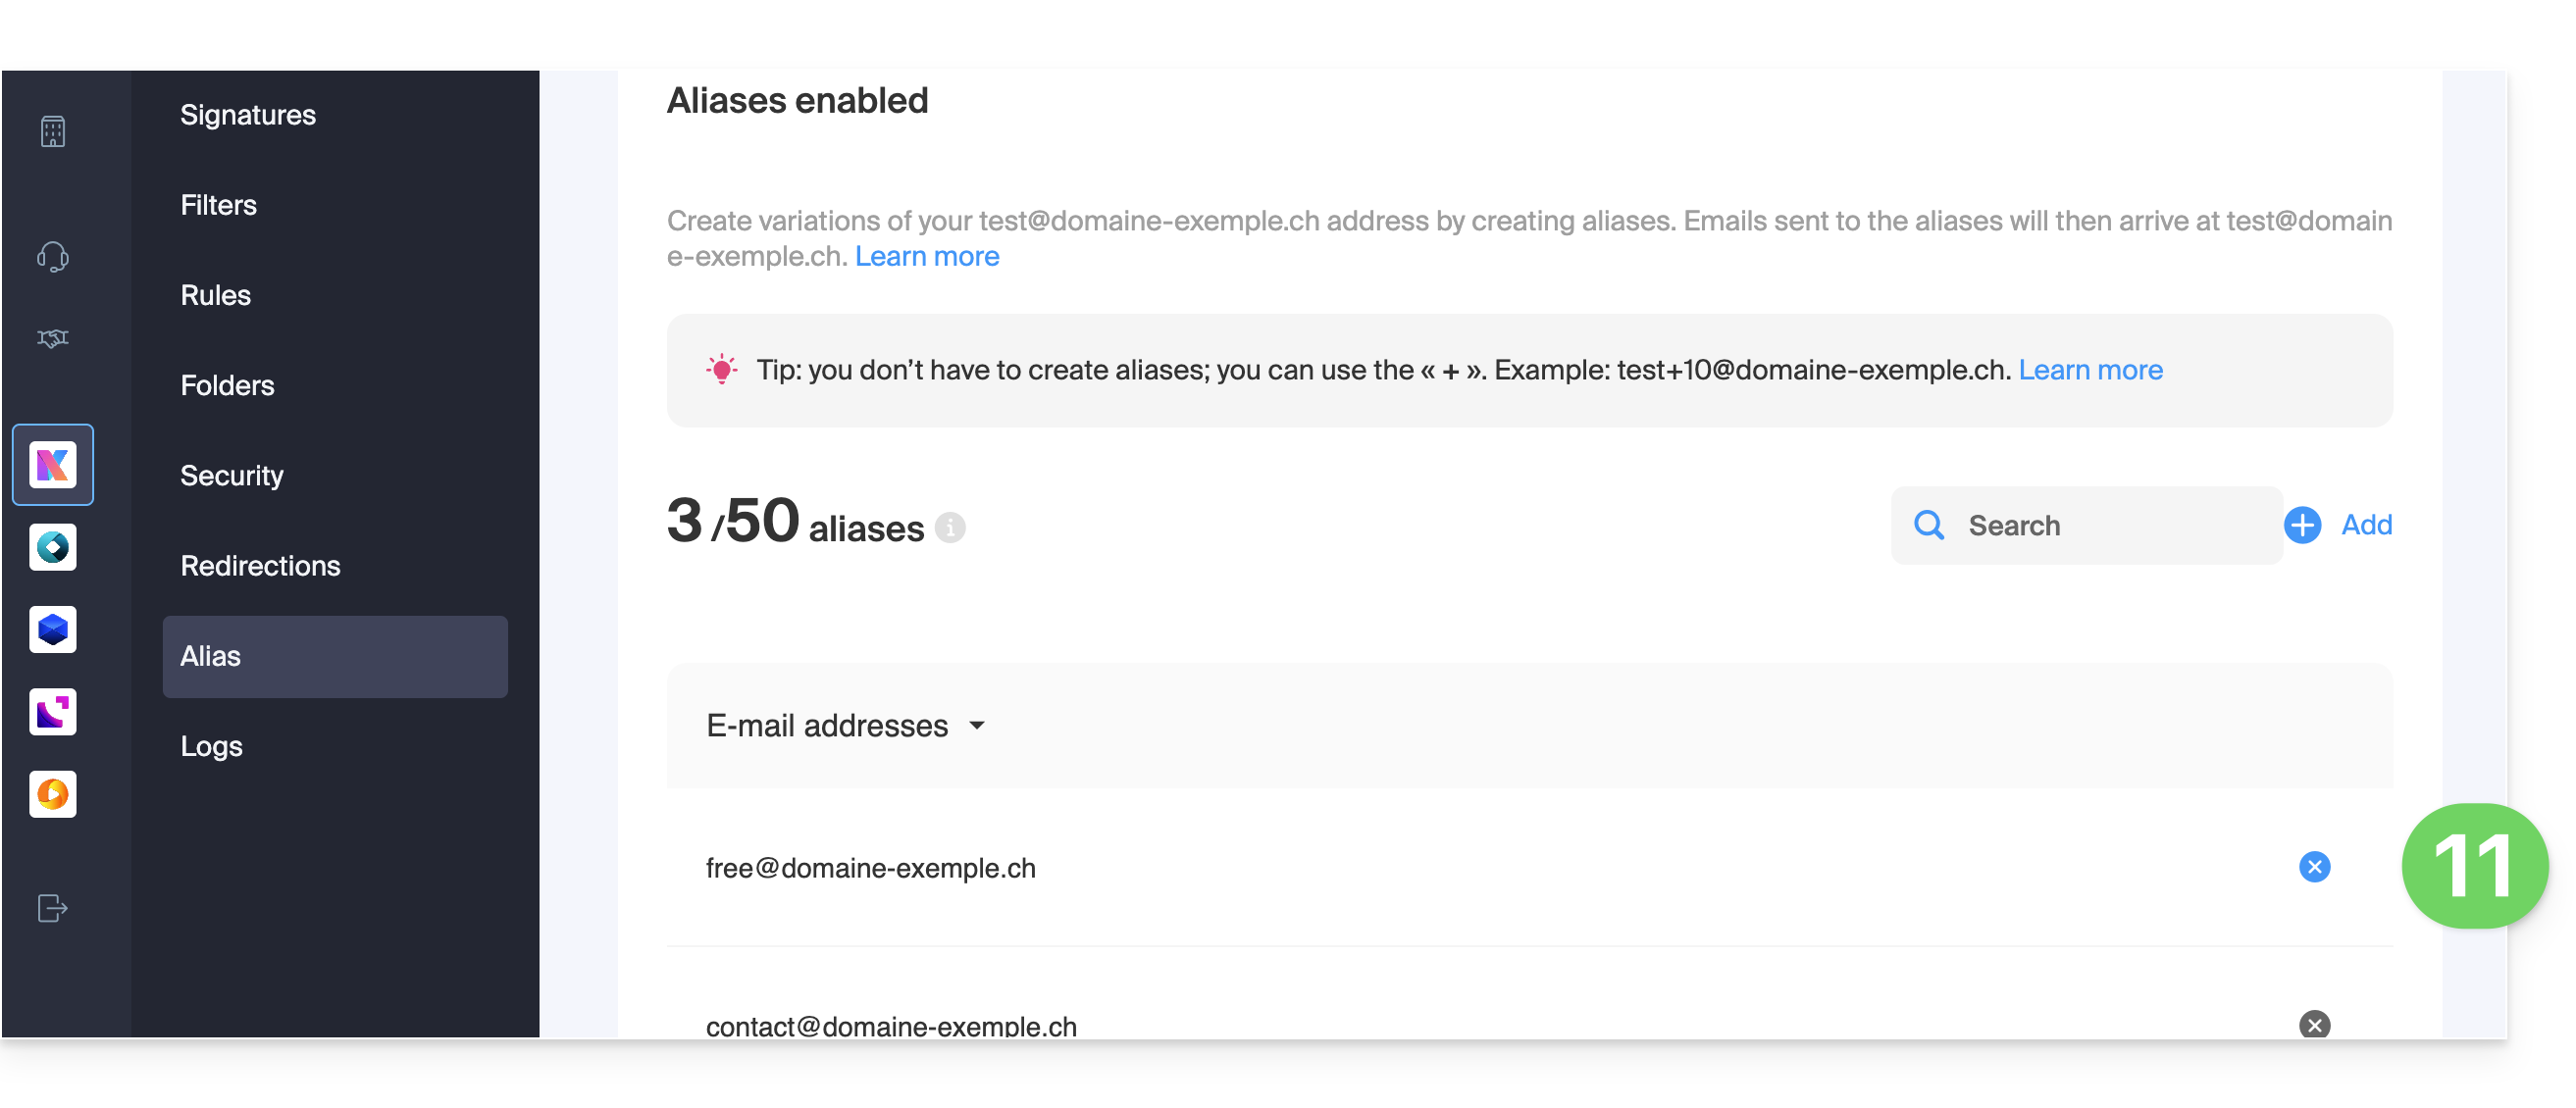
- The alias is added (users of the address receive an email each time an alias is added or removed), and you can delete it if needed:
Add an alias from the Mail Service
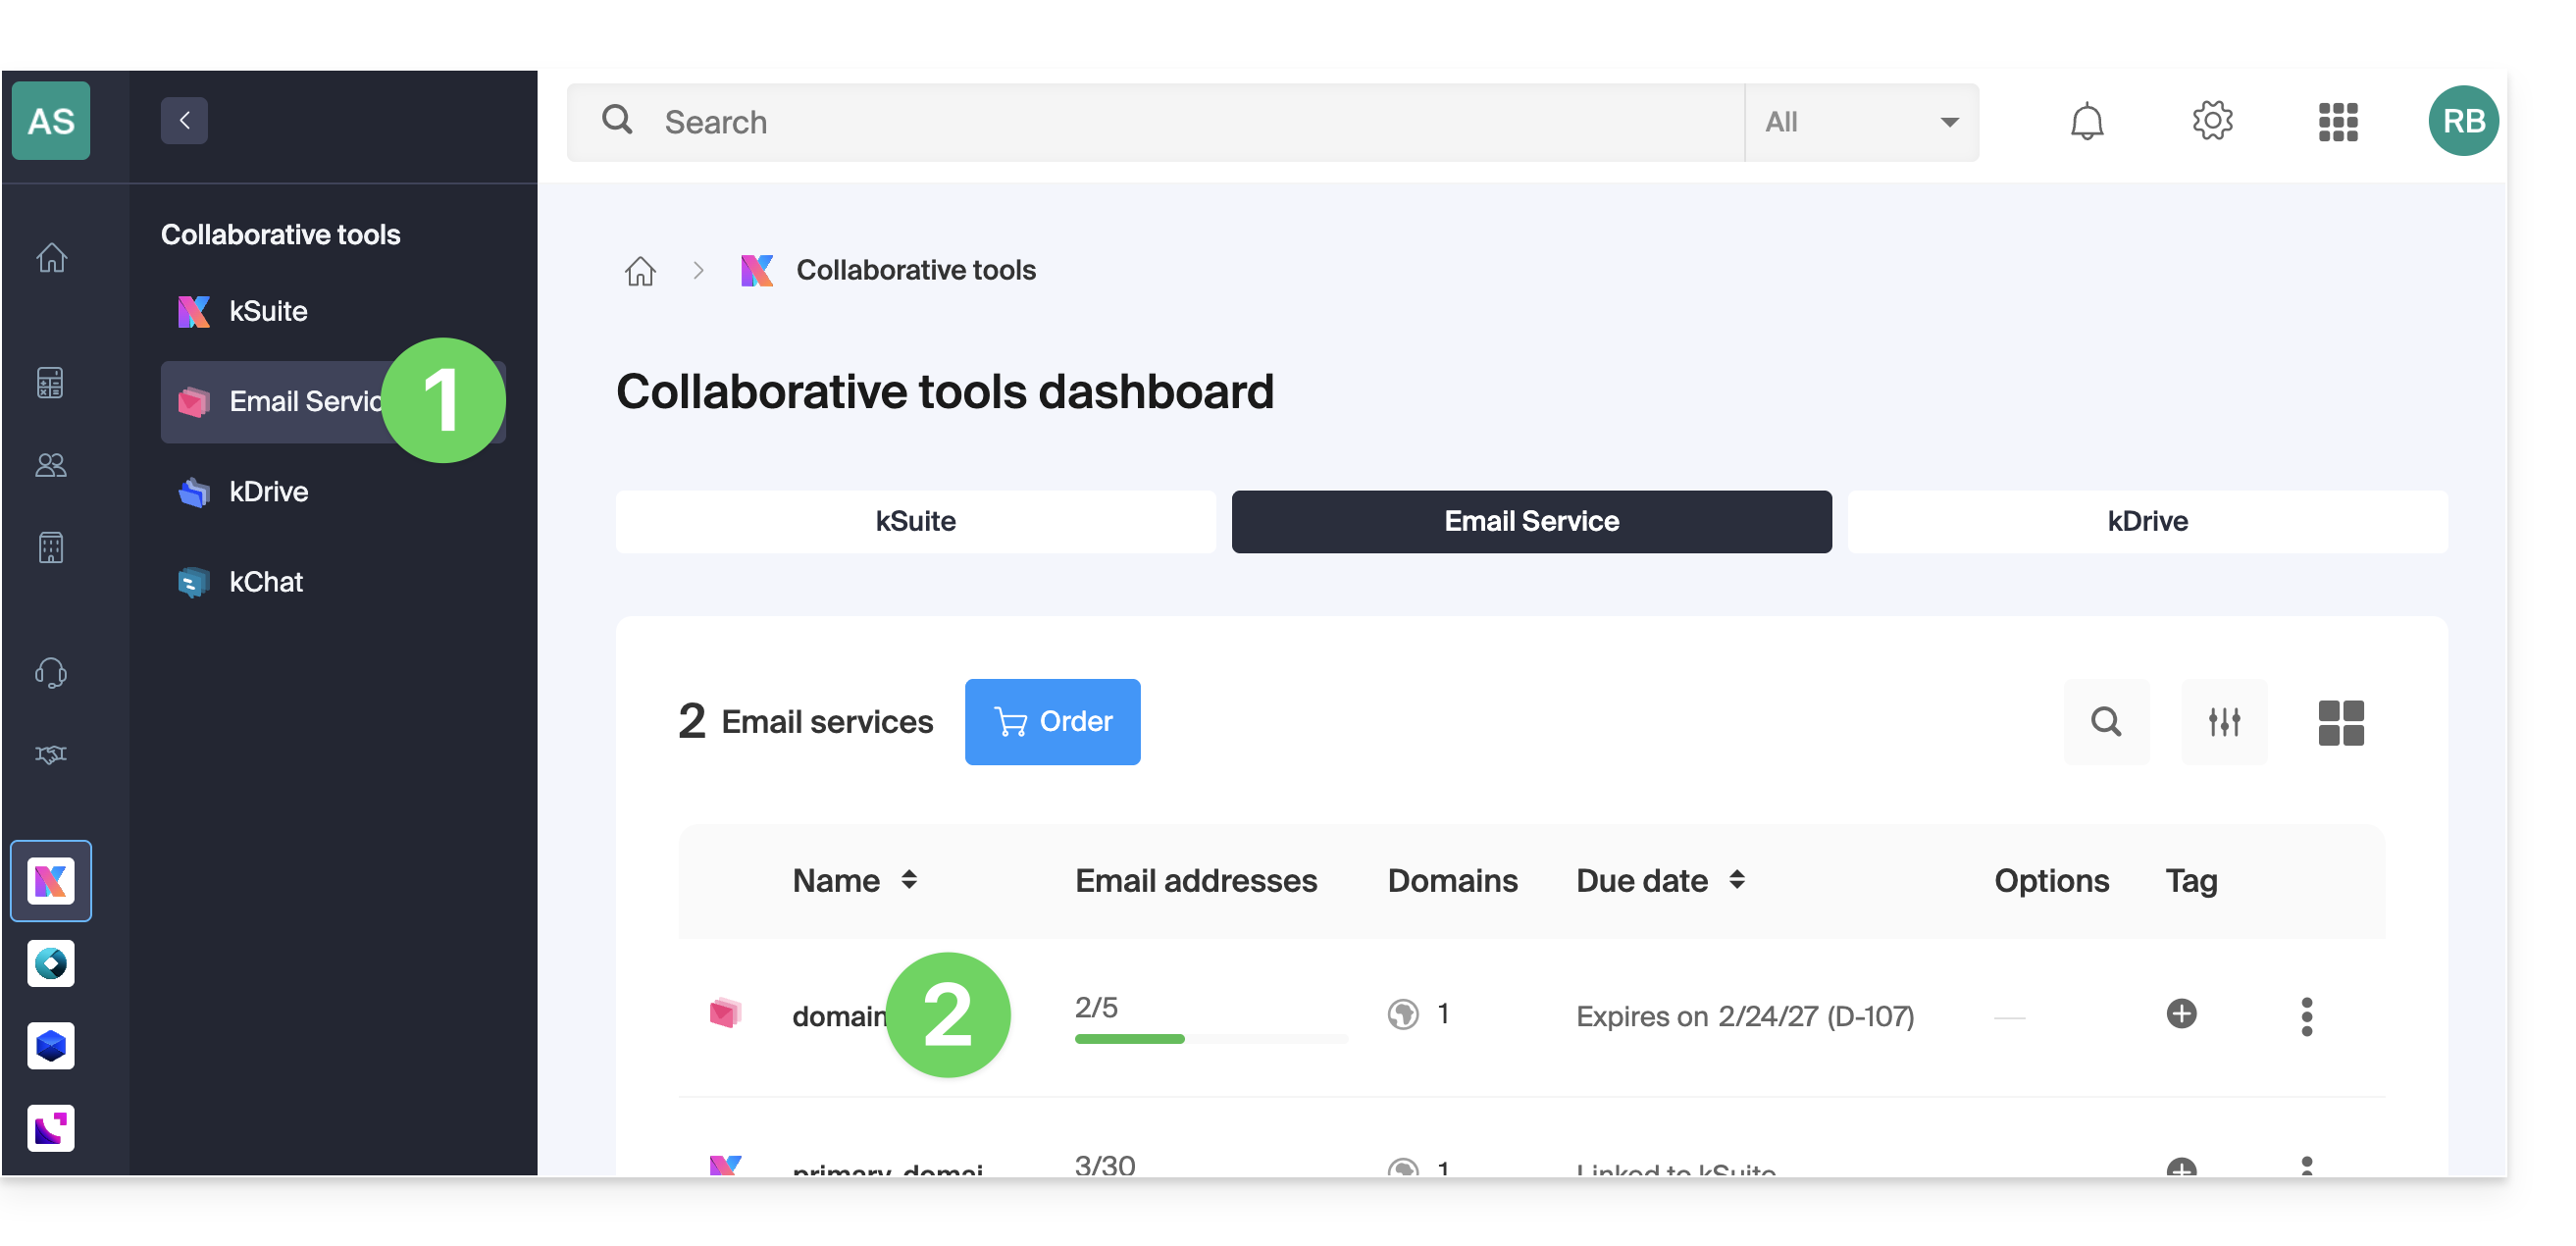
To access the Mail Service:
- Click here to access the Mail Service management in your Infomaniak Manager (❓: help).
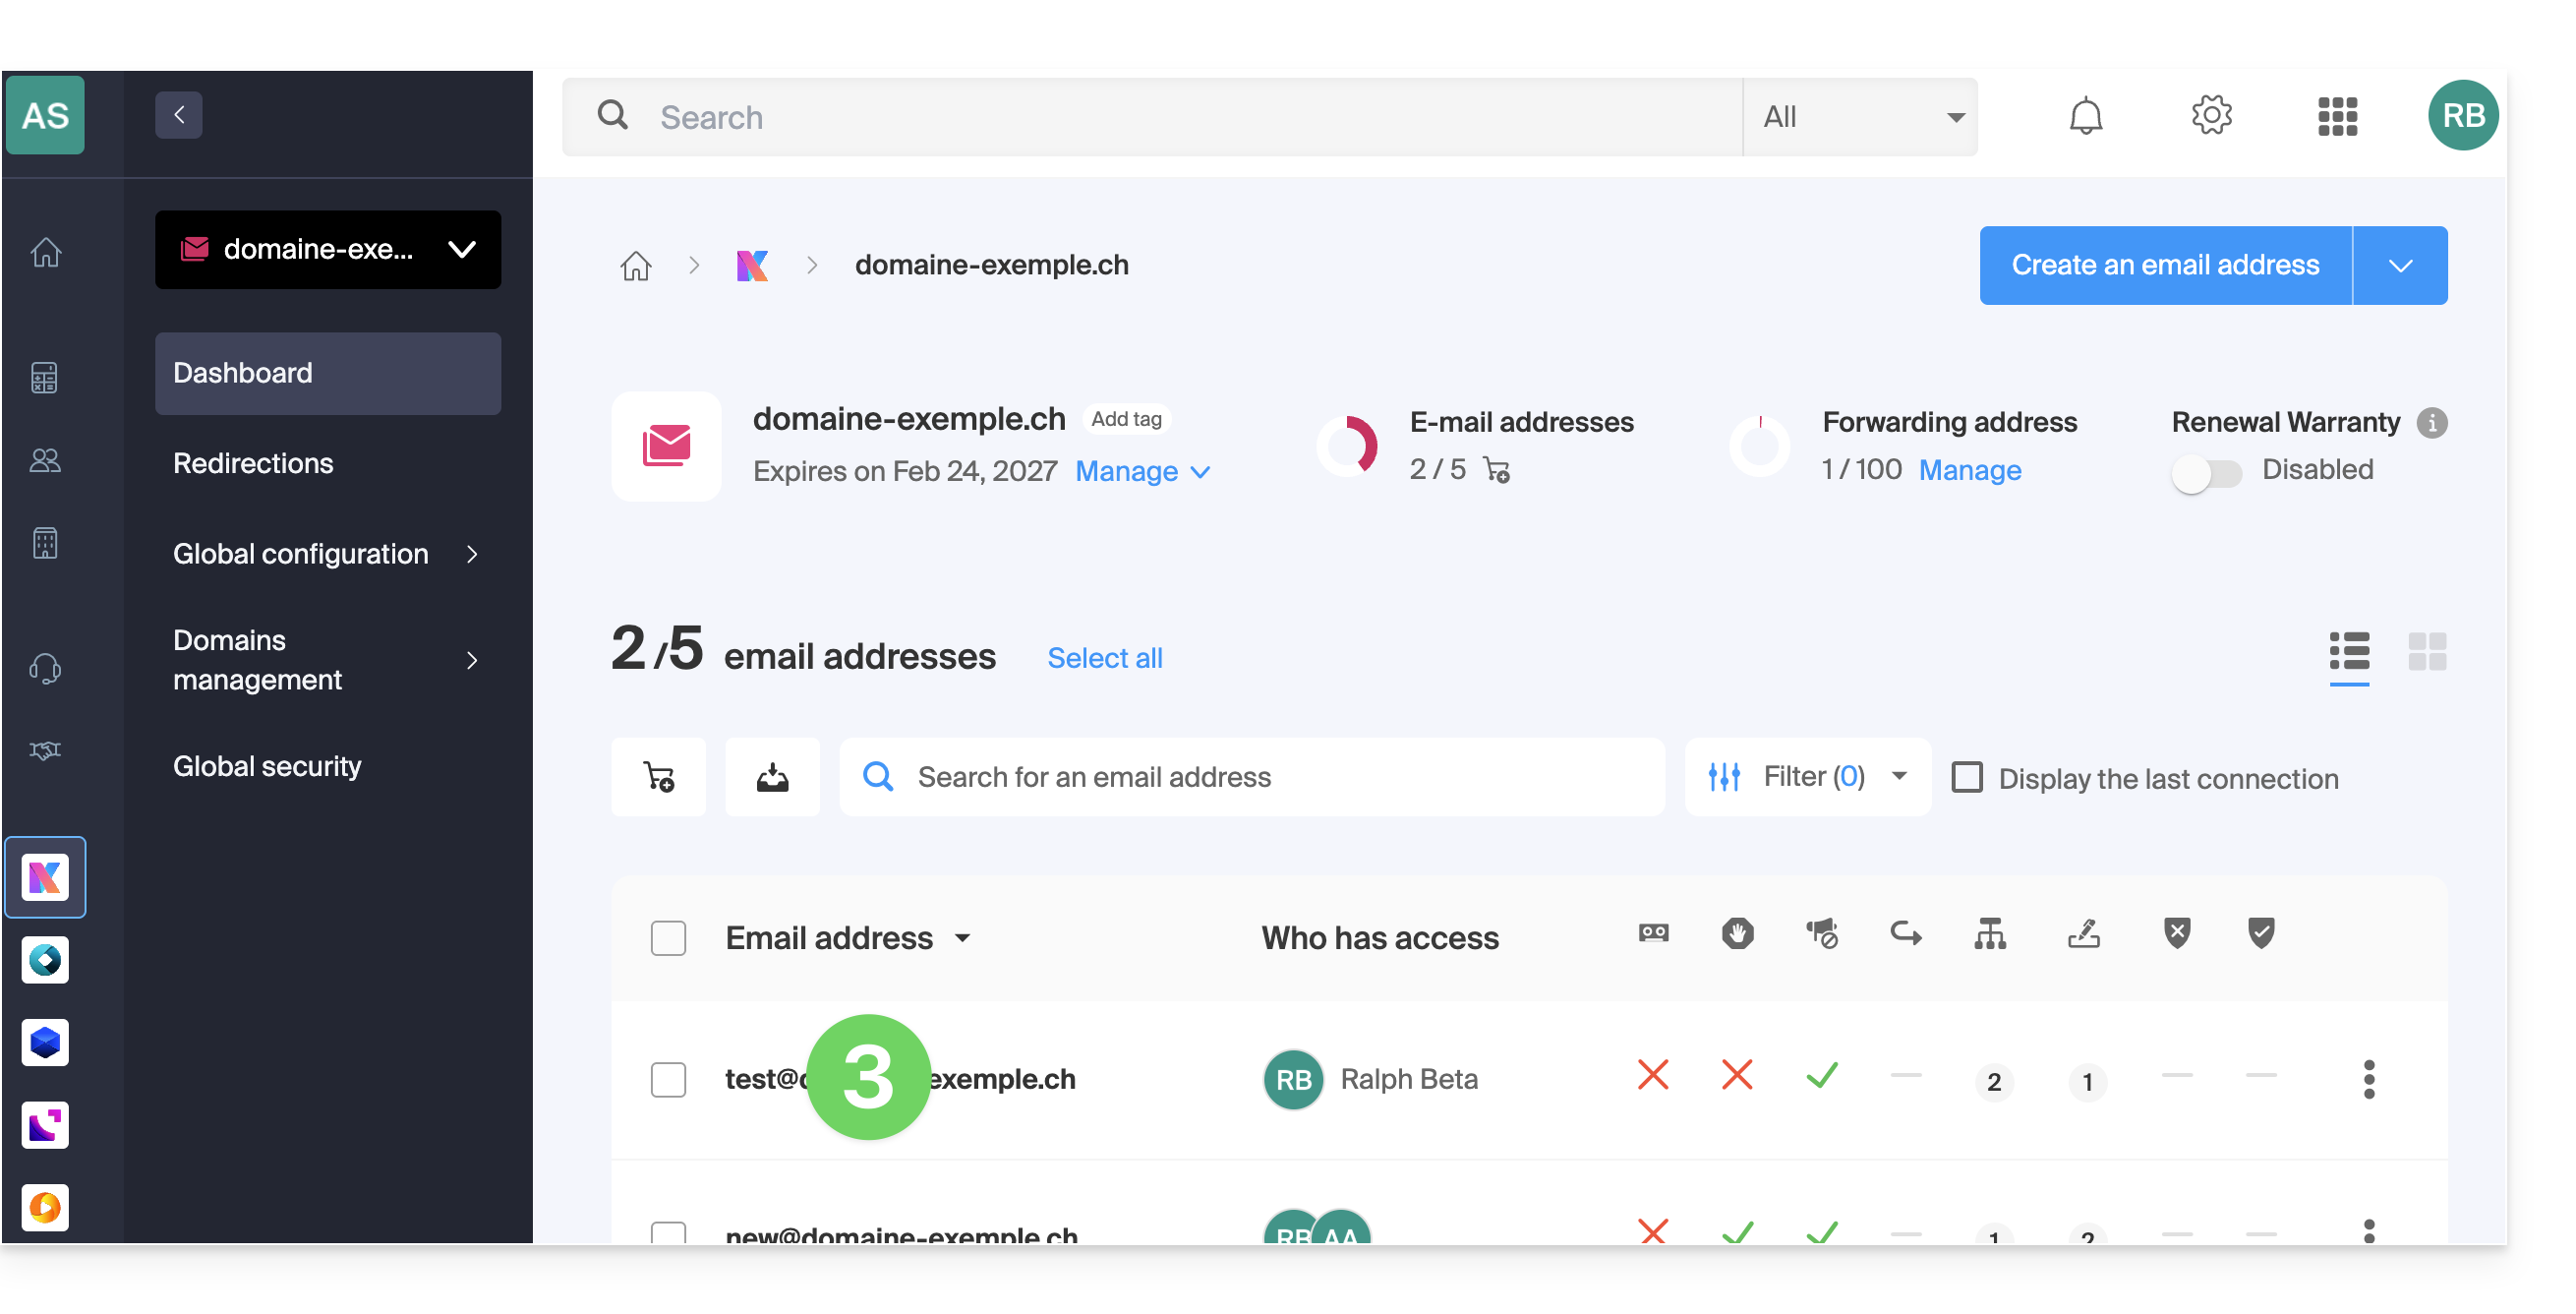
- Click on the name of the Mail Service in question:
- Click on the email address in question in the table that appears:
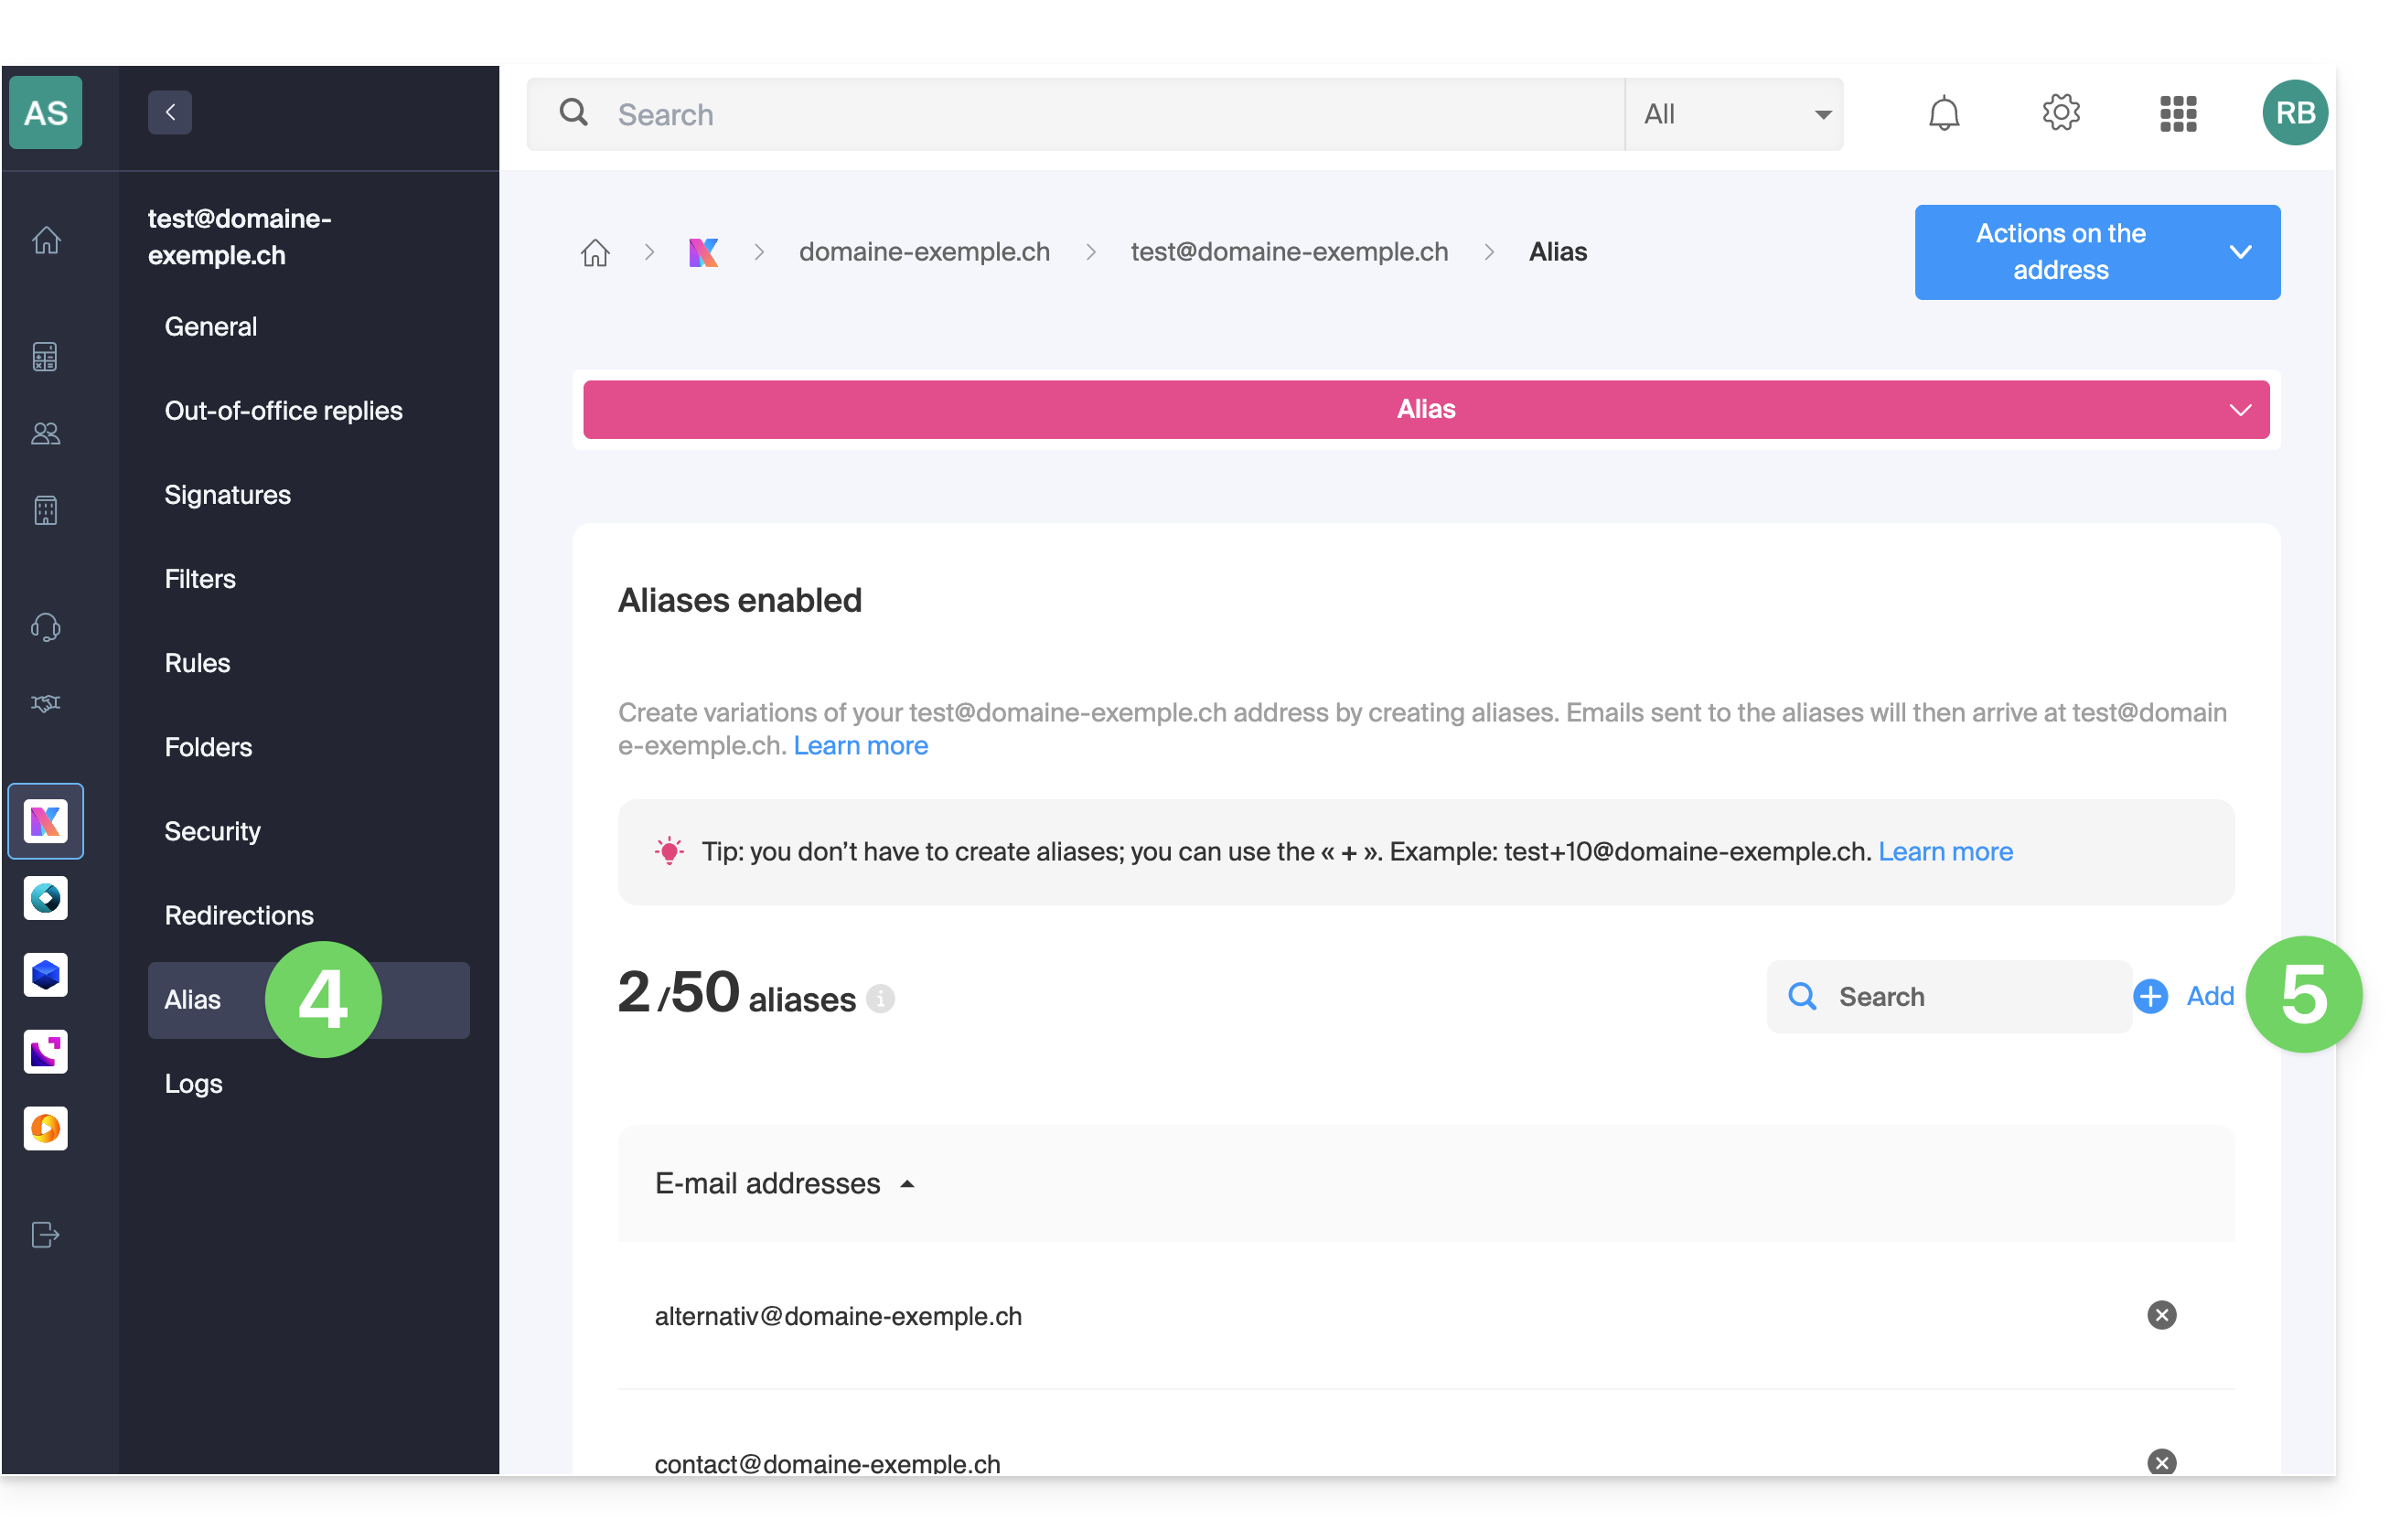
- Click on the Alias tab or, from the left-hand menu, click on Alias.
- Click on the blue Add an alias button:
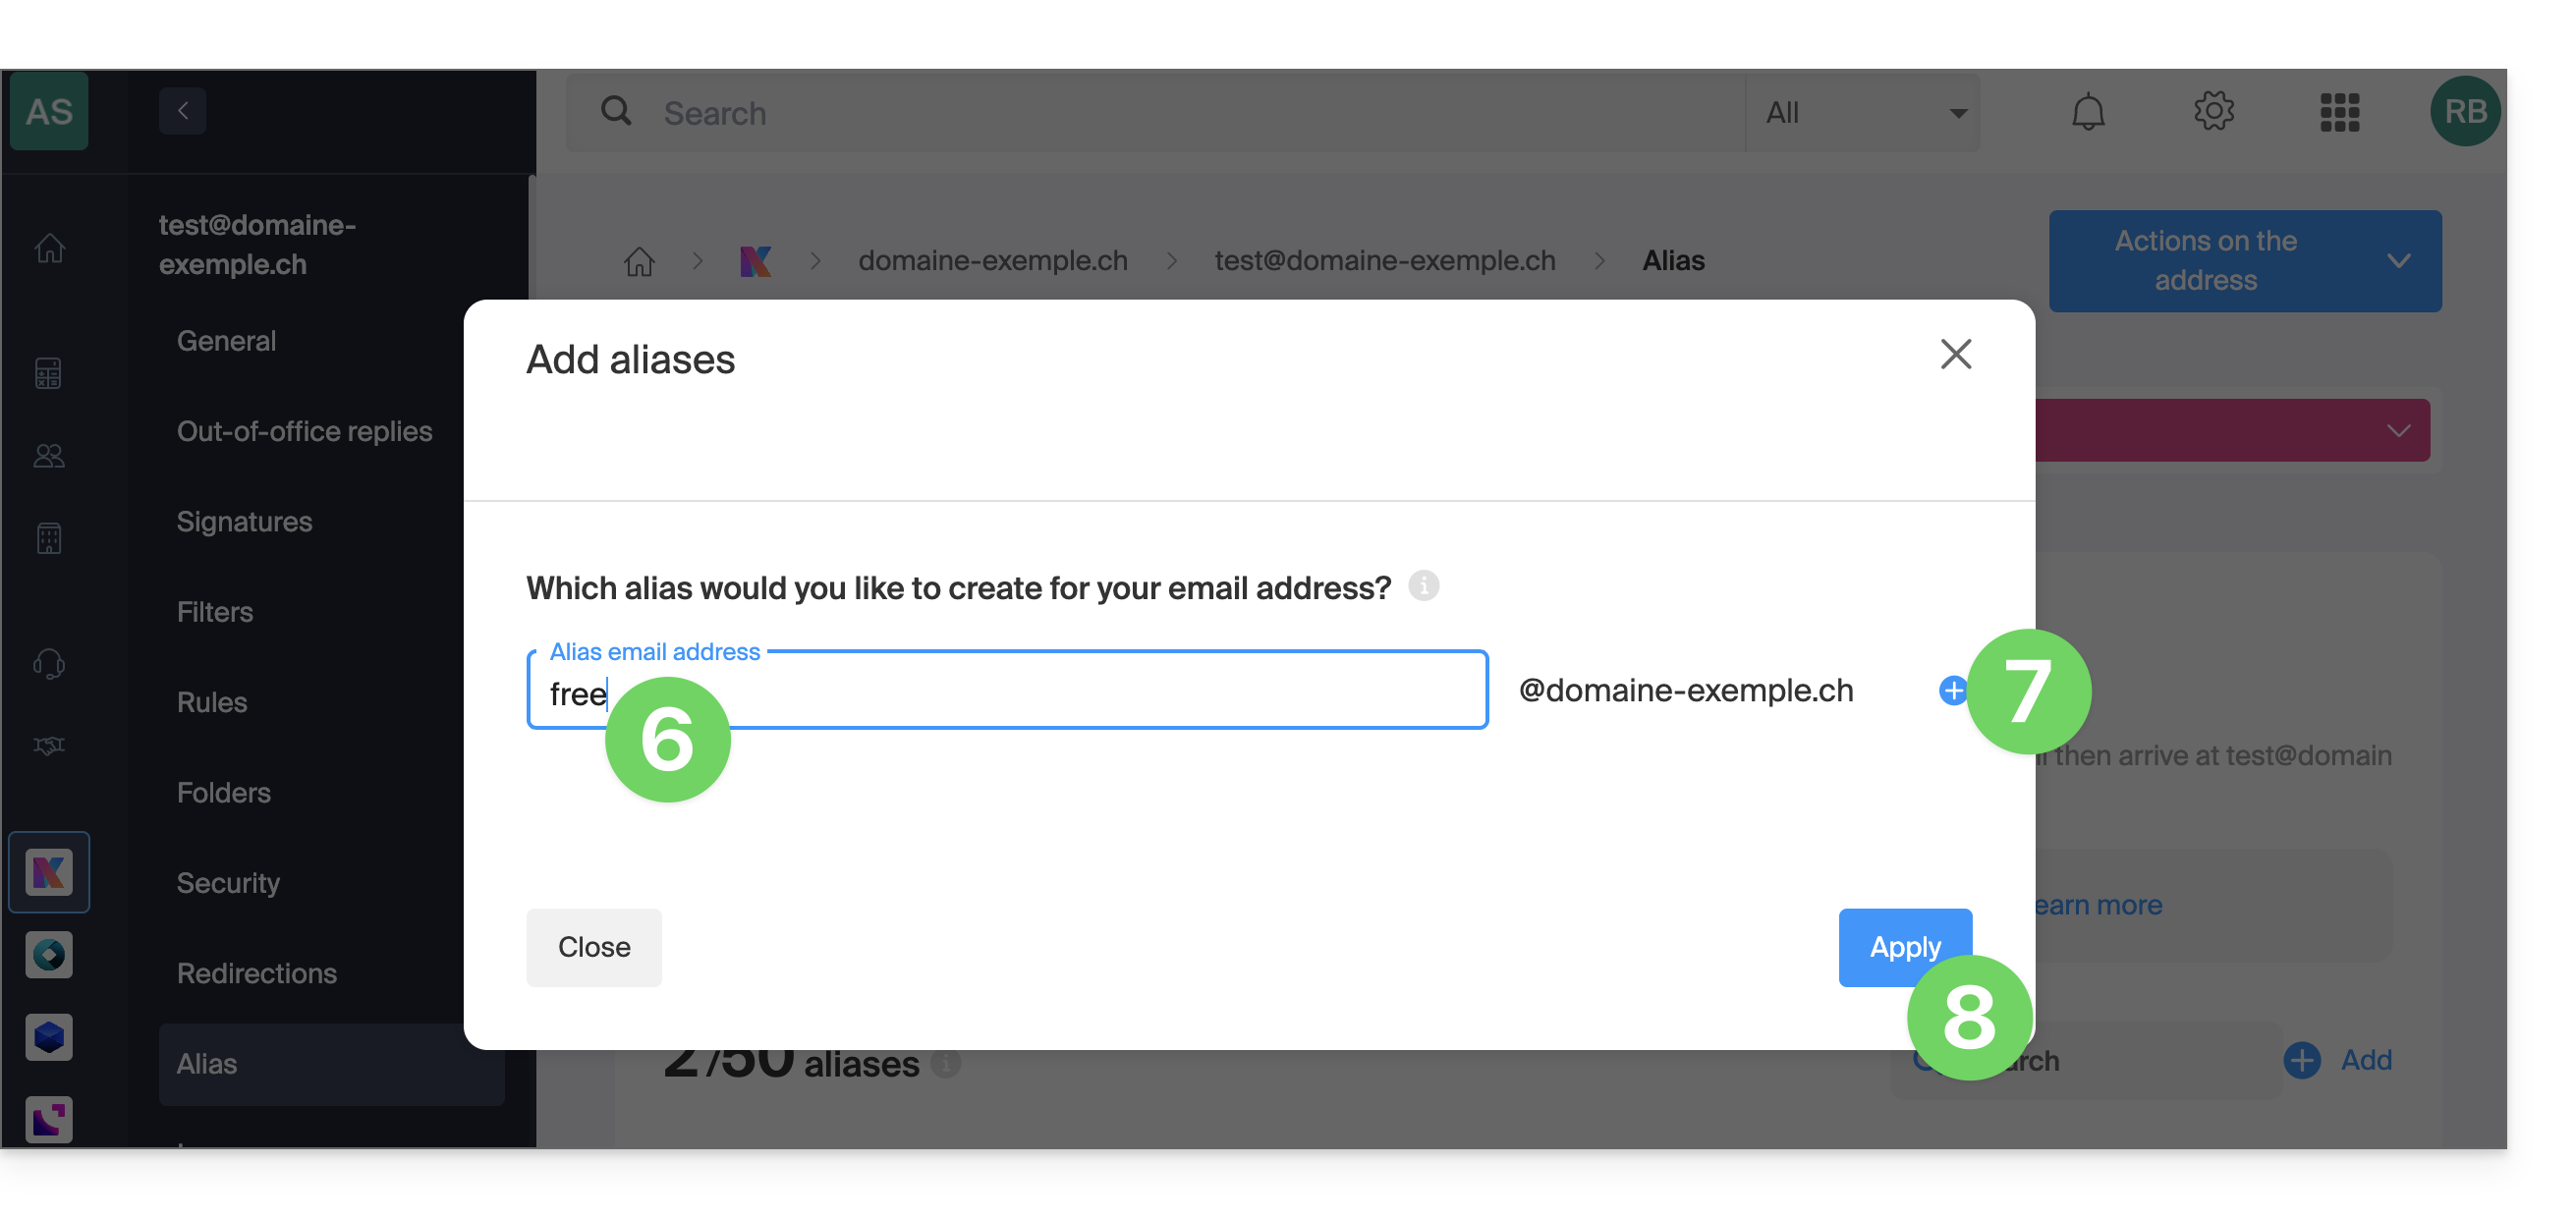
- Enter the desired alias (the part before the @ symbol).
- Click on to add it and, if necessary, define other additional aliases based on availability.
- Click Apply to save the changes:
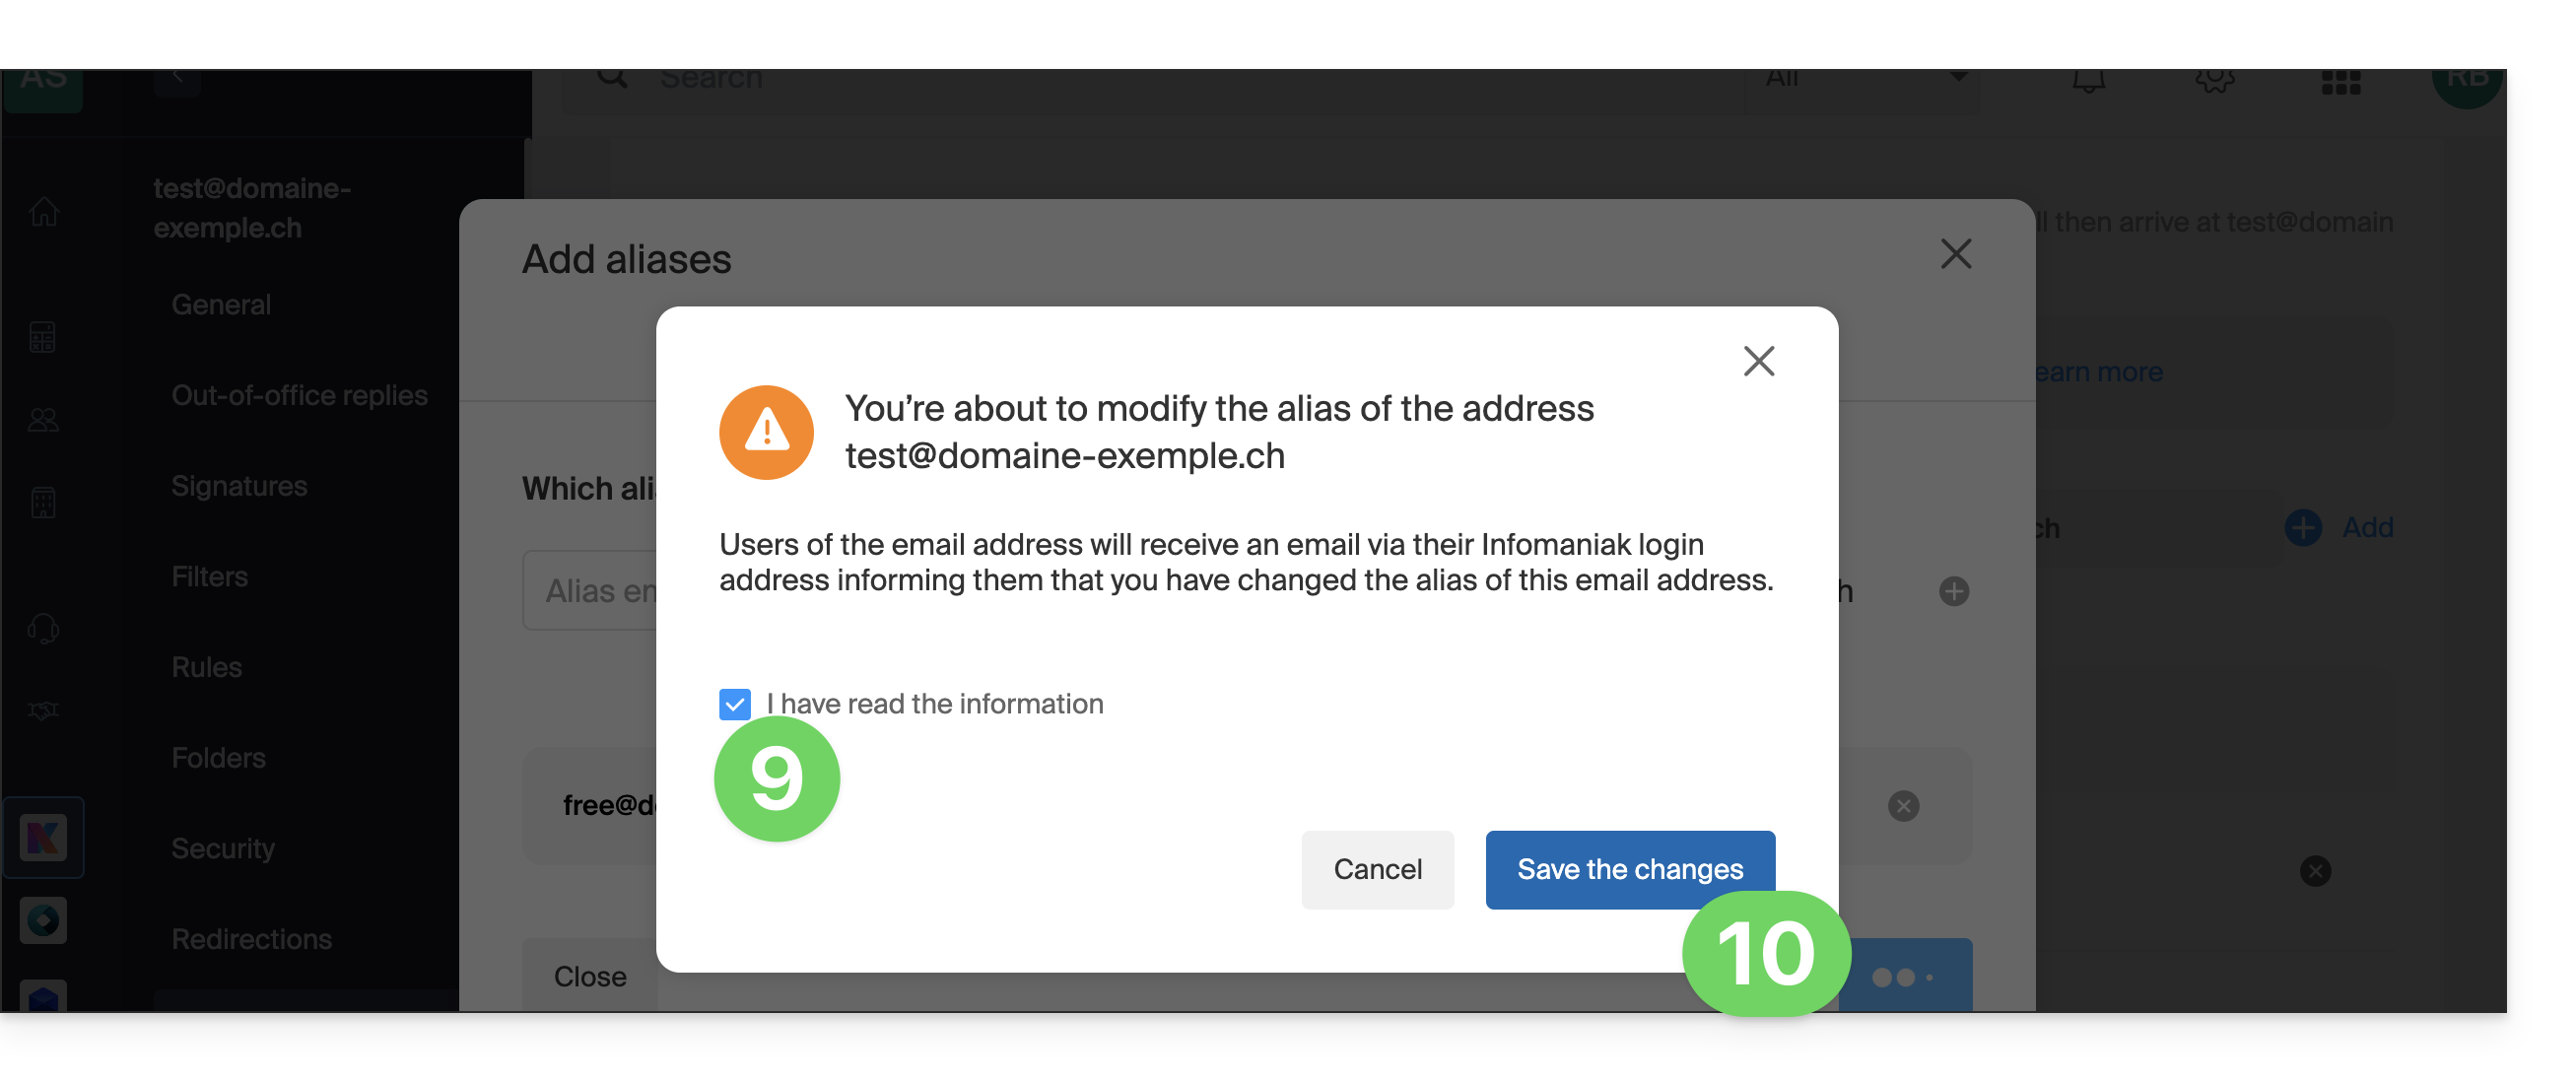
- Confirm the action.
- Confirm to add the alias (users of the address receive an email each time an alias is added or removed):
- The alias has been added (users of the address receive an email each time an alias is added or removed), and you can delete it if needed:
Link to this FAQ: https://faq.infomaniak.com/2129
Has this FAQ been helpful?