Knowledge base
1000 FAQs, 500 tutorials and instructional videos. Here, there are only solutions!
Manage CNAME & DNAME records
Update 10/13/2026
This guide explains how to add or modify one or more records of type CNAME and DNAME in the DNS zone (of a domain name) managed on the Infomaniak Manager.
Introduction
- The
CNAMErecord type allows you to point a subdomain to a website address.- This is the method generally used to make the
wwwsubdomain work with your site, or to redirect a subdomain to a folder on the web server where your website is hosted.
- This is the method generally used to make the
- The
DNAMErecord type, for "delegation name", is particularly useful when reorganizing domains or for smooth transitions of part of your infrastructure to another, while preserving the hierarchical structure of the subdomains.- A
DNAMEcreates an alias for an entire domain and all its subdomains.
- A
- Unlike a
CNAME, which only applies to a single, specific hostname, aDNAMEautomatically redirects all subdomains. For example:- A
DNAMEforabc.site1.compointing tosite2.comwill automatically linkxyz.abc.site1.comtoxyz.site2.com,new.login.abc.site1.comtonew.login.site2.com, and so on.
- A
- ⚠ A
DNAMErecord cannot be used at the root zone of a domain (likesite1.comdirectly). It is generally used on a subdomain. If you want to redirect the main domain itself, you will need to use other types of records, such as anA,AAAA, orCNAME(with some restrictions for the latter).
Modify the DNS zone
To manage this type of record in a DNS zone:
- Click here to access the domain management section in your Infomaniak Manager (❓: help).
- Click on the name of the domain in question.
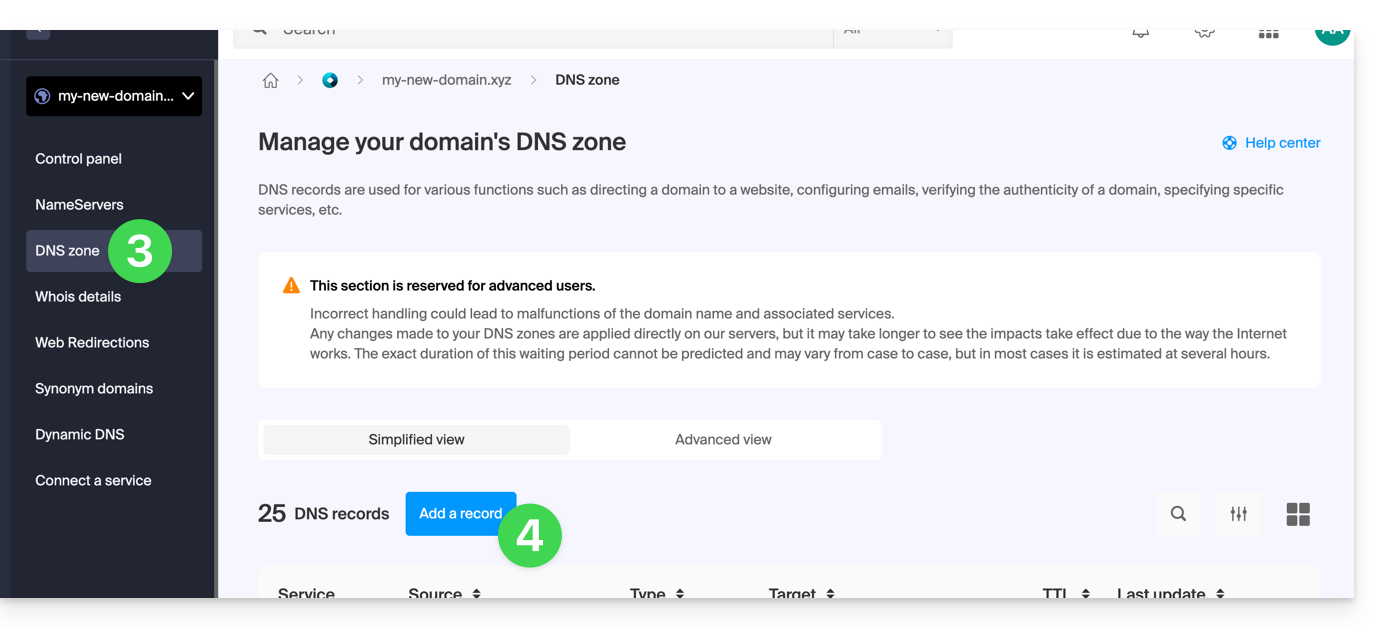
- Click on DNS Zone in the left-hand menu.
- Click the button to add a record:
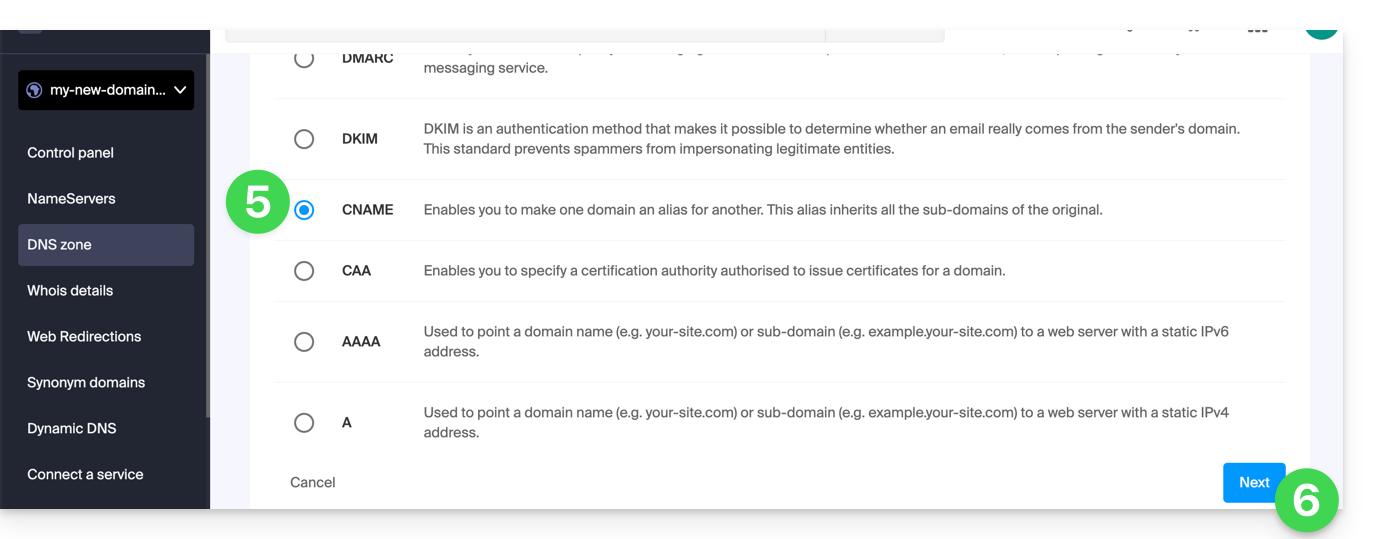
- Click the corresponding radio button to add a record.
- Click the Next button:
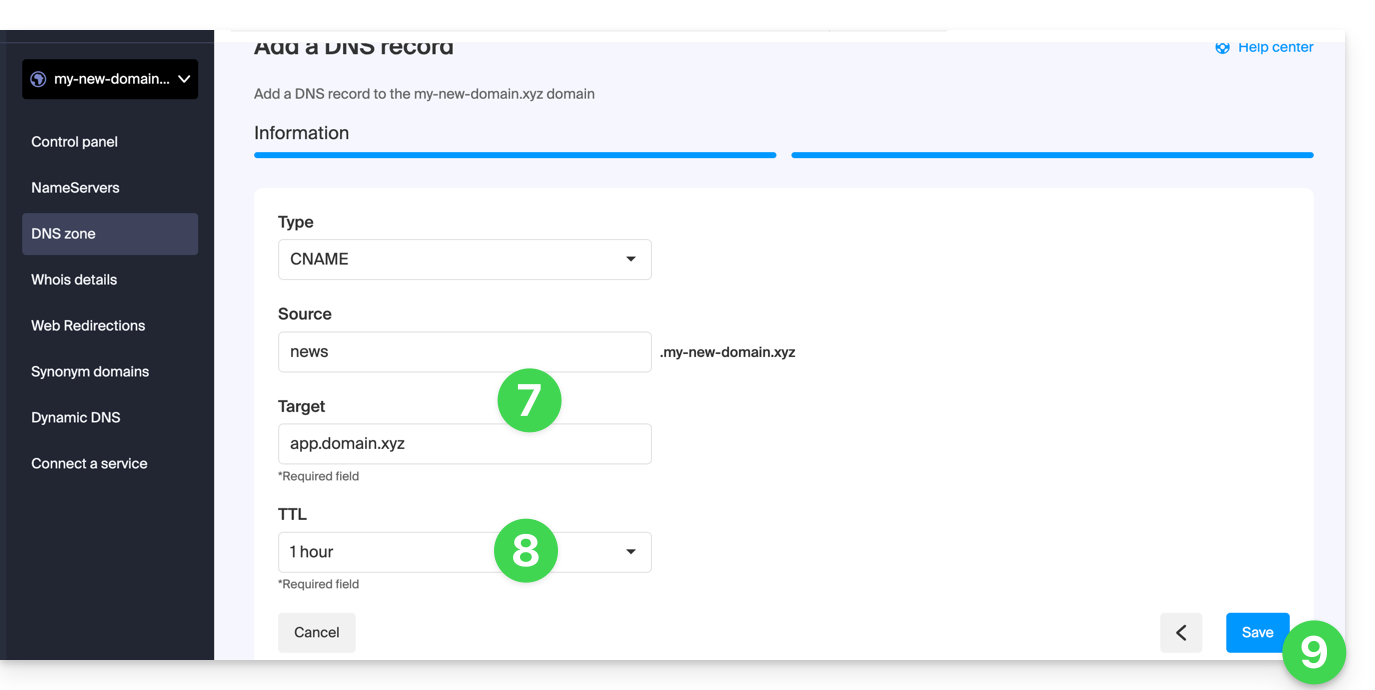
- Enter the values required for your DNS zone.
- Leave the default value for the TTL.
- Click on the Save button:
Link to this FAQ: https://faq.infomaniak.com/2033
Has this FAQ been helpful?