Knowledge base
1000 FAQs, 500 tutorials and instructional videos. Here, there are only solutions!
Import a custom SSL certificate
This guide explains how to…
- …generate a
CSRand private key to request a third-party certificate from a certificate authority (CA), - … import this certificate for your Infomaniak site, using the
CRTfile obtained from theCA.
Introduction
- Although Infomaniak offers all the SSL certificates you might need…
- free Let's Encrypt certificates for personal websites (only possible with websites hosted at Infomaniak),
- DV certificates from Sectigo for professional/personal websites that are not registered in the trade register,
- EV certificates from Sectigo for companies registered in the trade register,
- … it is also possible to install an SSL certificate obtained elsewhere (intermediate certificate from a certification authority of your choice), custom or self-signed certificates.
1. Generate a CSR (Certificate Signing Request)
A CSR (Certificate Signing Request) is an encoded file containing the information needed to request an SSL/TLS certificate.
It must be generated on your end to ensure that the private key remains under your control, using OpenSSL, for example.
Adapt and run the following command from a Terminal application (command-line interface, CLI) on your device:
openssl req -utf8 -nodes -sha256 -newkey rsa:2048 -keyout domain.xyz.key -out domain.xyz.csr -addext "subjectAltName = DNS:domain.xyz, DNS:www.domain.xyz"
Explanation
newkey rsa:2048: Generates a new 2048-bit RSA key.keyout domain.xyz.key: Specifies the file where the private key will be saved.out domain.xyz.csr: Specifies the file where the CSR will be saved.addext “subjectAltName = ...”: Adds additional domains via theSAN (Subject Alternative Name)extension, which is necessary to include all desired domains in the certificate (the main domain domain.xyz + any other associated domain or subdomain, such as www.domain.xyz).
After generation, you can verify the content of the CSR with the following command:
openssl req -in domain.xyz.csr -noout -textThis ensures that all domains listed in subjectAltName are correctly included.
Once the CSR is generated, you can submit it to the certificate authority (CA) to obtain your SSL/TLS certificate.
2. Import the external certificate
Once validated, the CA issues a certificate (domain.xyz.crt) and sometimes an intermediate certificate (ca_bundle.crt).
To access SSL certificate management:
- Click here to access your website management in the Infomaniak Manager (need help?).
- Click directly on the name assigned to the site in question:
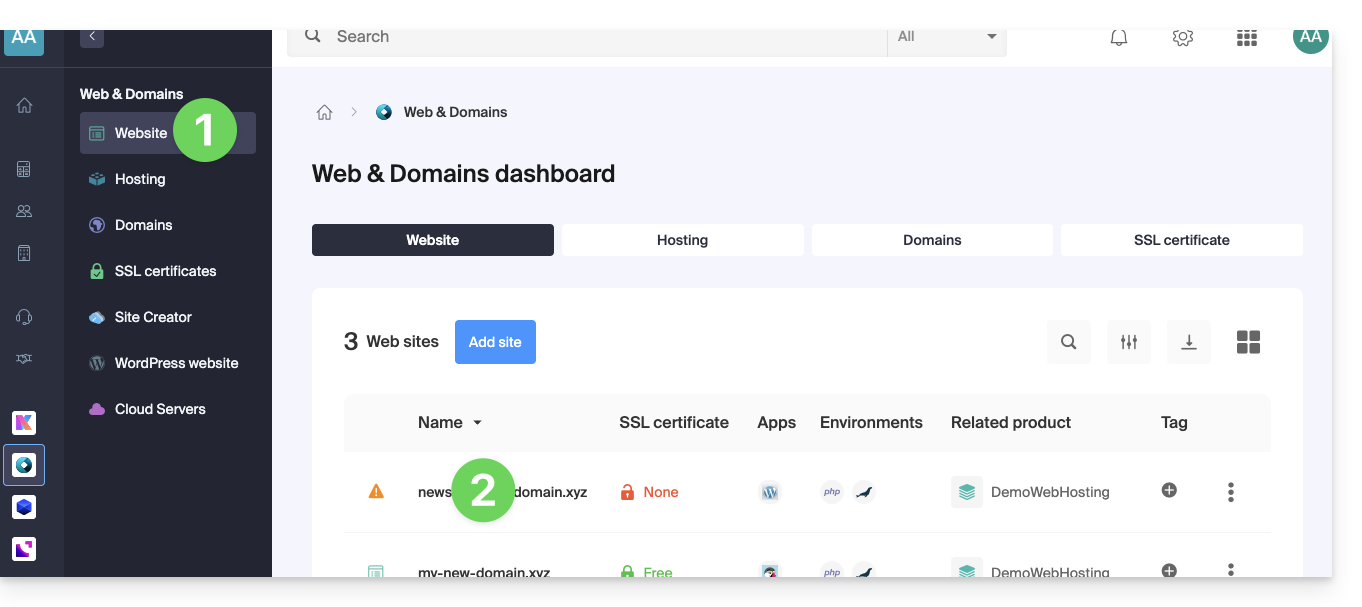
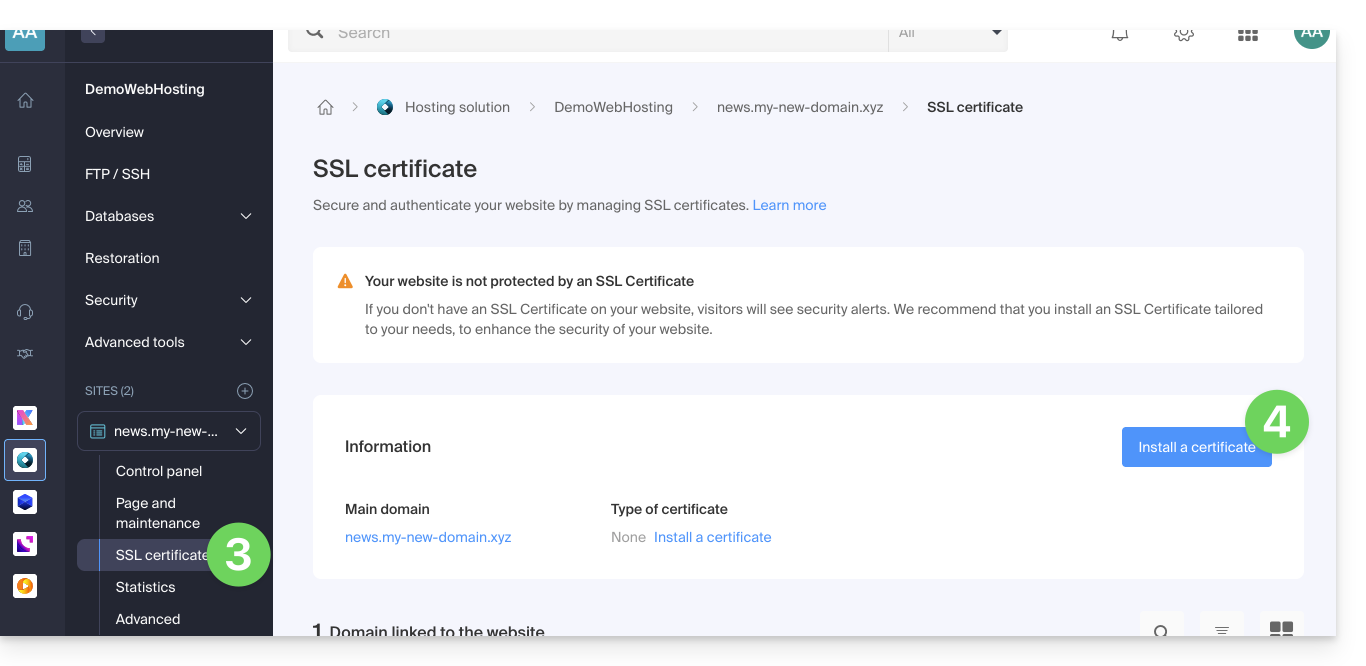
- Click on SSL Certificates in the left-hand menu.
- Click on the blue Install a certificate button:
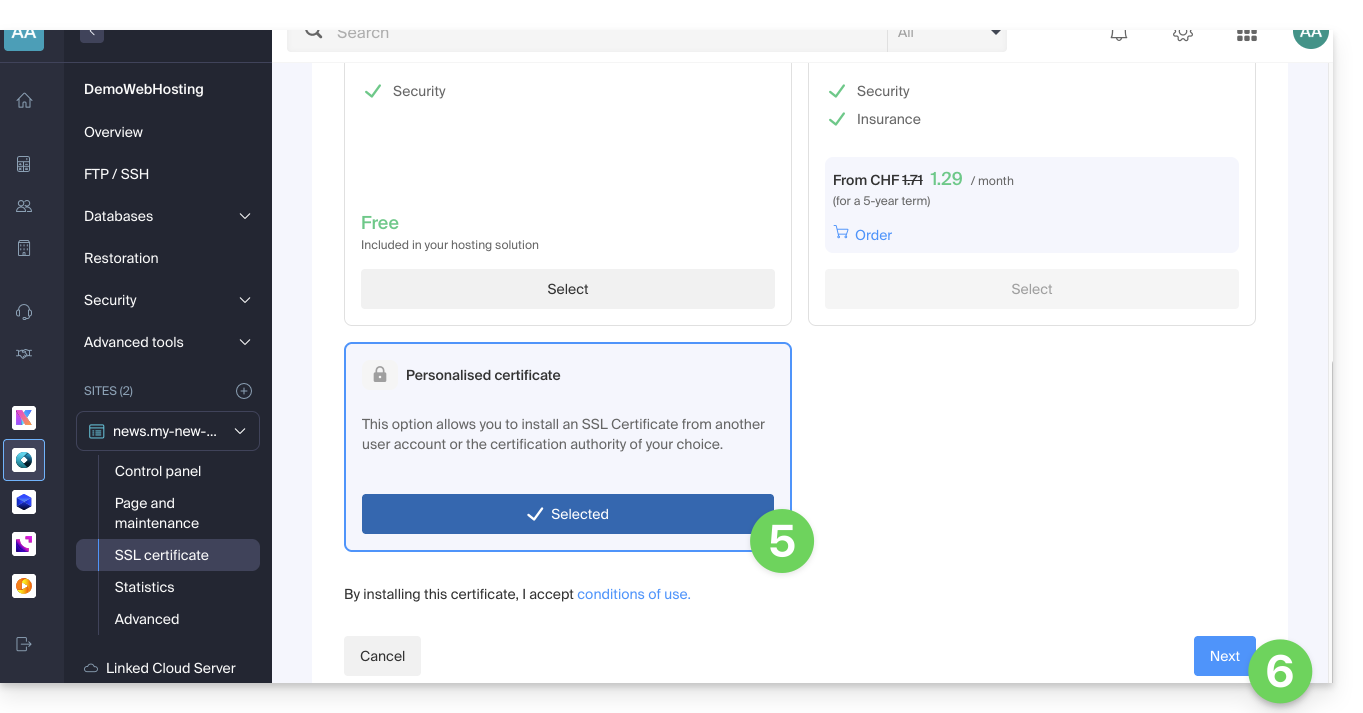
- Choose the custom certificate.
- Click on the Next button:
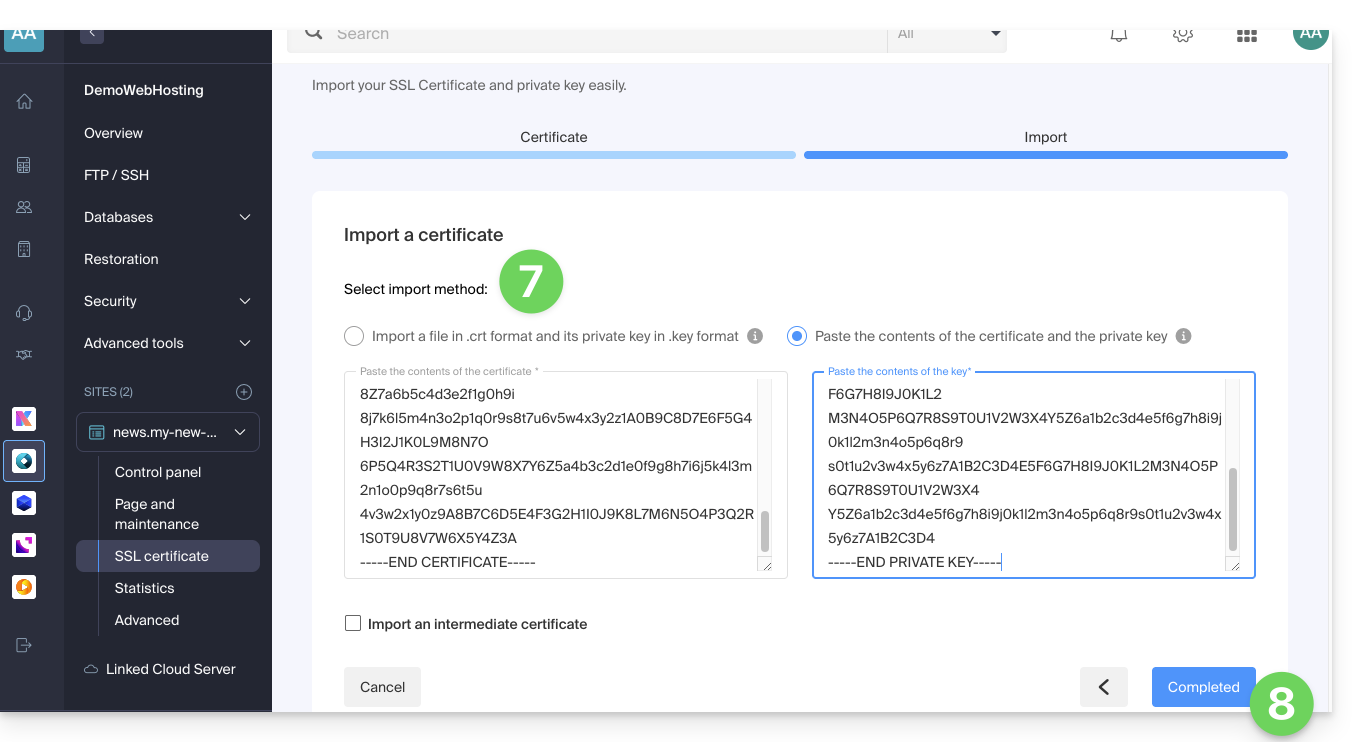
- Import your certificate and private key, either by importing the
.crtand.keyfiles or by copying and pasting. - Click on Complete:
Alternative command to generate a self-signed certificate (optional)
If you want a local certificate only for testing purposes or without going through a CA (not recommended for production), you can use this command:
openssl req -x509 -nodes -days 365 -newkey rsa:2048 -keyout domain.xyz.key -out domain.xyz.crt -addext “subjectAltName = DNS:domain.xyz, DNS:www.domain.xyz”This generates both a self-signed certificate (domain.xyz.crt) and a private key (domain.xyz.key). However, self-signed certificates are not recognized as valid by browsers or public systems. They are only suitable for internal or development environments.
Import an intermediate certificate
When adding a custom SSL certificate, you can import the intermediate certificate (by importing the .crt file or by copying and pasting the data provided by the certification authority):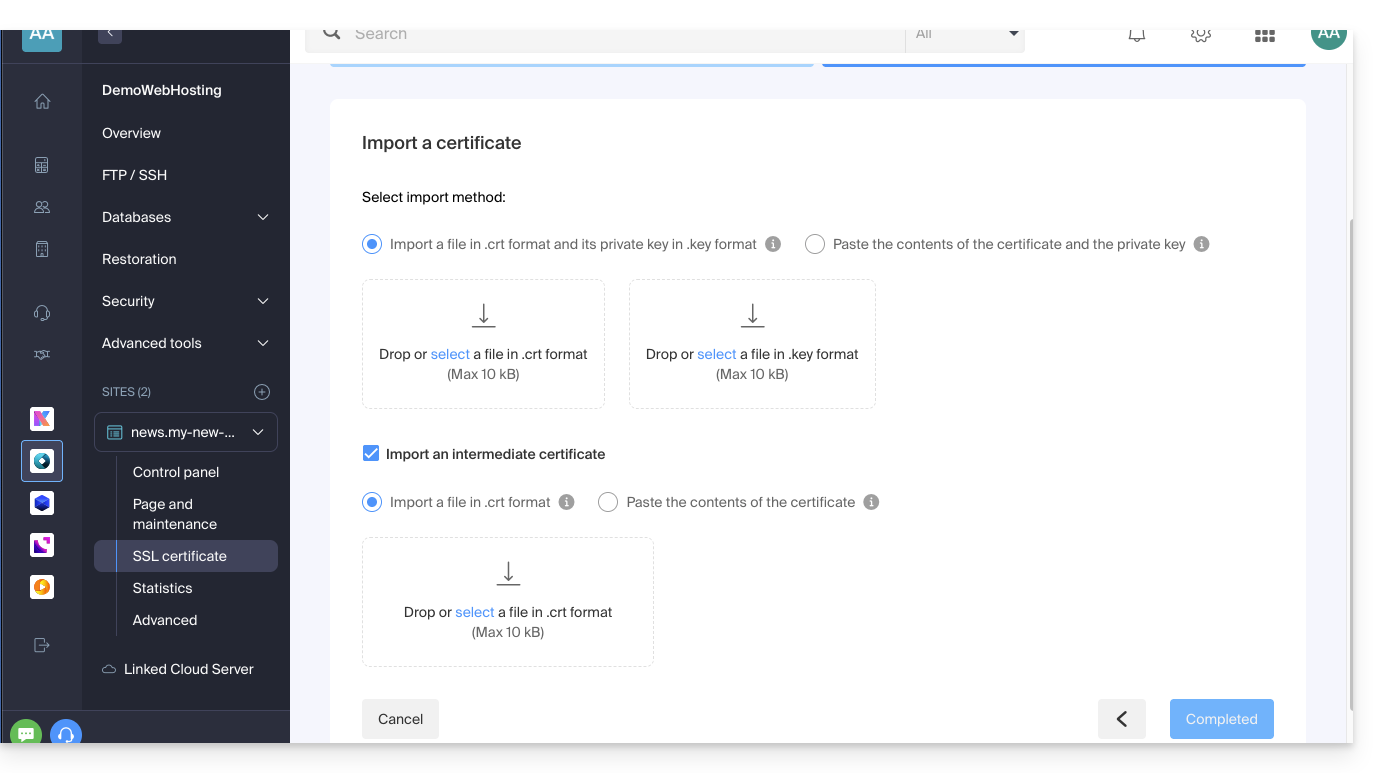
Link to this FAQ: https://faq.infomaniak.com/2027
Has this FAQ been helpful?