Knowledge base
1000 FAQs, 500 tutorials and instructional videos. Here, there are only solutions!
Import a custom SSL certificate
This guide explains how…
- … generate a
CSRand private key to request a third-party certificate from a certification authority (CA), - … import this certificate for your Infomaniak site, using the
CRTobtained from theCA.
Preamble
- Although Infomaniak offers all the SSL certificates you might need…
- free Let's Encrypt certs for personal sites (only possible with sites hosted by Infomaniak),
- DV certs from Sectigo for professional/personal sites that are not registered in the trade register,
- EV certs from Sectigo for companies registered in the trade register,
- … it is also possible to install an SSL certificate obtained elsewhere (intermediate certificate from a certification body of your choice), custom or self-signed certificates.
1. Generate a CSR (Certificate Signing Request)
A CSR (Certificate Signing Request or Certificate Signing Request) is an encoded file containing the information necessary to request an SSL/TLS certificate.
It must be generated on your side to ensure that the private key remains under your control, using OpenSSL, for example.
Adapt and run the following command from a Terminal type application (command line interface, CLI / Command Line Interface) on your device:
openssl req -utf8 -nodes -sha256 -newkey rsa:2048 -keyout domain.xyz.key -out domain.xyz.csr -addext "subjectAltName = DNS:domain.xyz, DNS:www.domain.xyz"
Explanations
newkey rsa:2048: Generates a new 2048-bit RSA key.keyout domain.xyz.key: Specifies the file where the private key will be saved.out domain.xyz.csr: Specifies the file where the CSR will be recorded.addext “subjectAltName = ...”: Adds additional domains via theSAN (Subject Alternative Name)extension, necessary to include all desired domains in the certificate (main domain domain.xyz + any other associated domain or subdomain, such as www.domain.xyz).
After generation, you can check the contents of the CSR with the following command:
openssl req -in domain.xyz.csr -noout -textThis allows you to verify that all domains listed in subjectAltName are correctly included.
Once the CSR is generated, you can send it to the certification authority (CA) to obtain your SSL/TLS certificate.
2. Import the external certificate
Once validated, the CA issues a certificate (domain.xyz.crt) and sometimes an intermediate certificate (ca_bundle.crt).
To access SSL certificate management:
- Click here to access your site management on the Infomaniak Manager (need help?).
- Click directly on the name assigned to the site concerned:
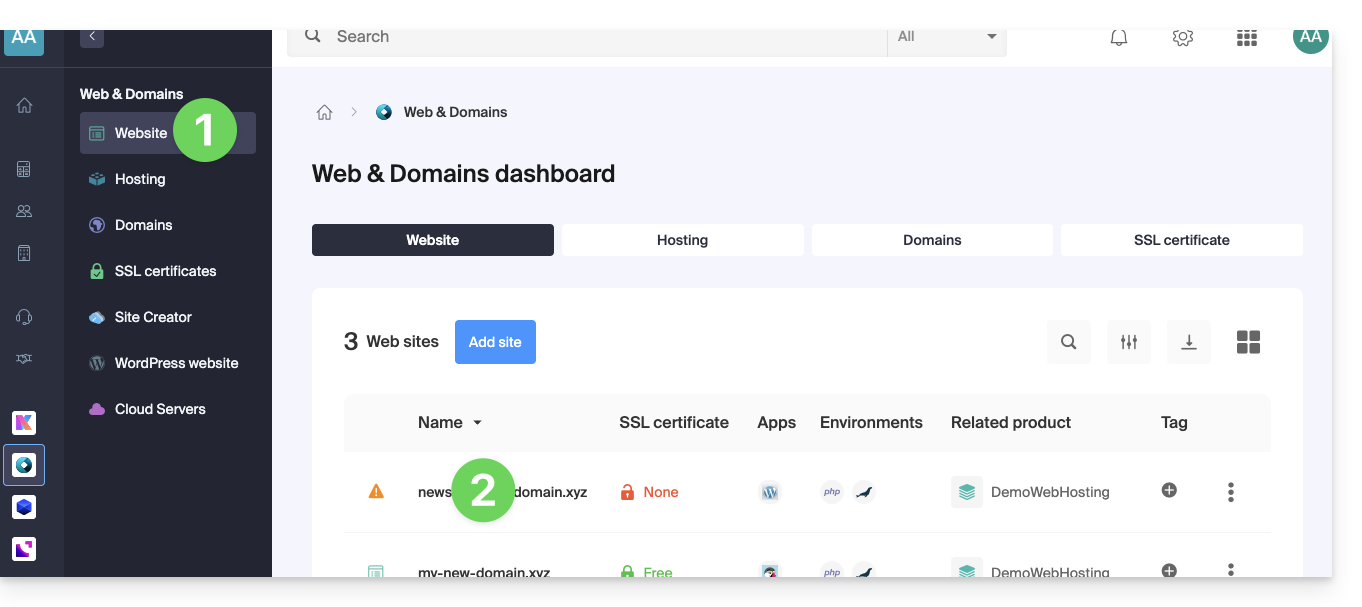
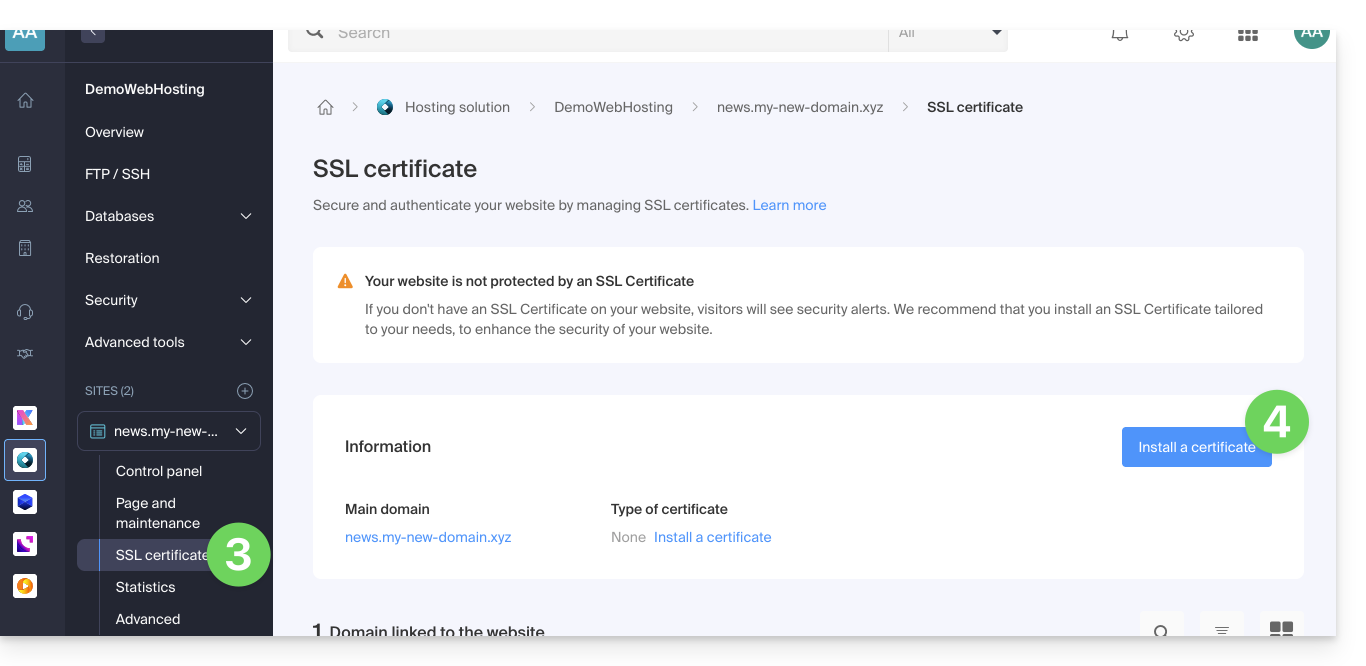
- Click on SSL Certificates in the left sidebar menu.
- Click the blue button Install a certificate:
- Choose the custom certificate.
- Click the Next button:

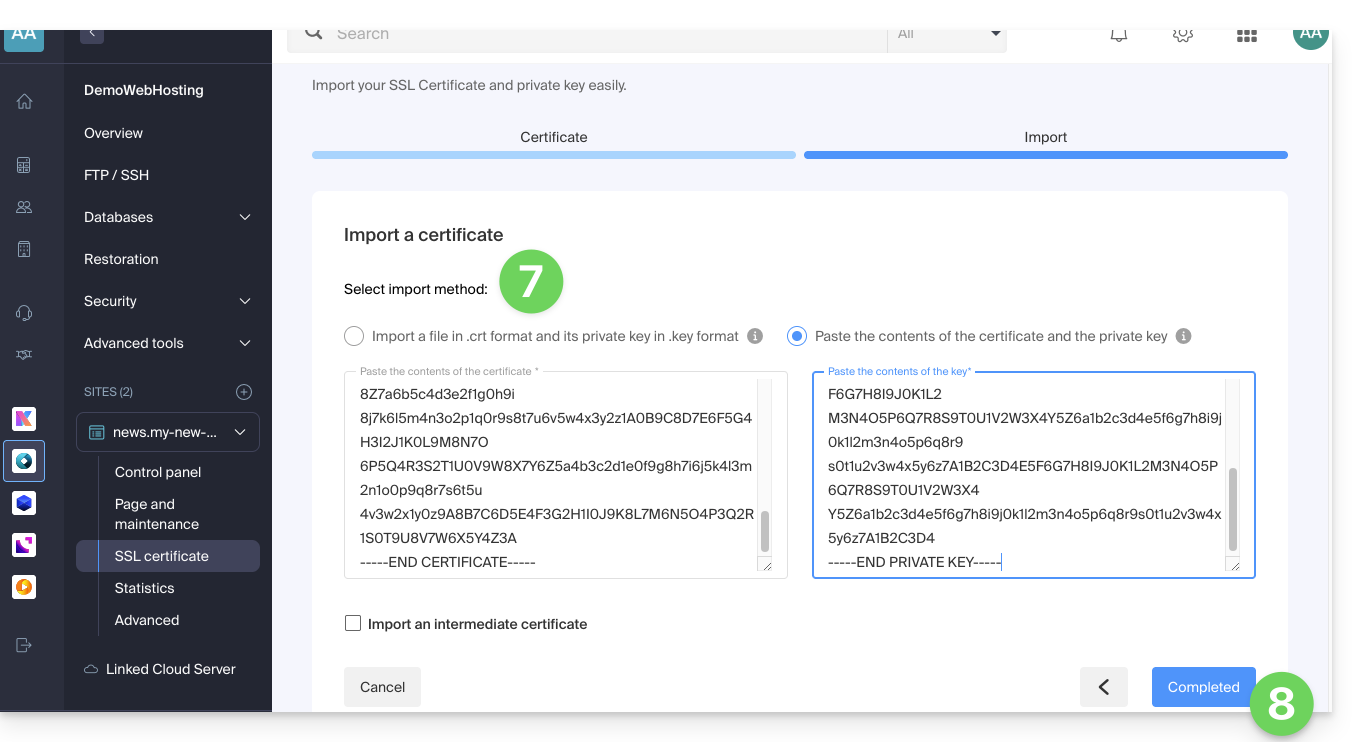
- Import your certificate and private key, either by importing the
.crtand.keyfiles or by copy-pasting. - Click Complete:
Alternative command to generate a self-signed certificate (optional)
If you want a local certificate only for testing or without going through a CA (not recommended for production), you can use this command:
openssl req -x509 -nodes -days 365 -newkey rsa:2048 -keyout domain.xyz.key -out domain.xyz.crt -addext “subjectAltName = DNS:domain.xyz, DNS:www.domain.xyz”This generates both a self-signed certificate (domain.xyz.crt) and a private key (domain.xyz.key). However, self-signed certificates are not recognized as valid by public browsers or systems. They are only suitable for internal or development environments.
Import an intermediate certificate
When adding a custom SSL certificate, it is possible to import the intermediate certificate (by importing the .crt file or copy-pasting the data provided by the certification authority):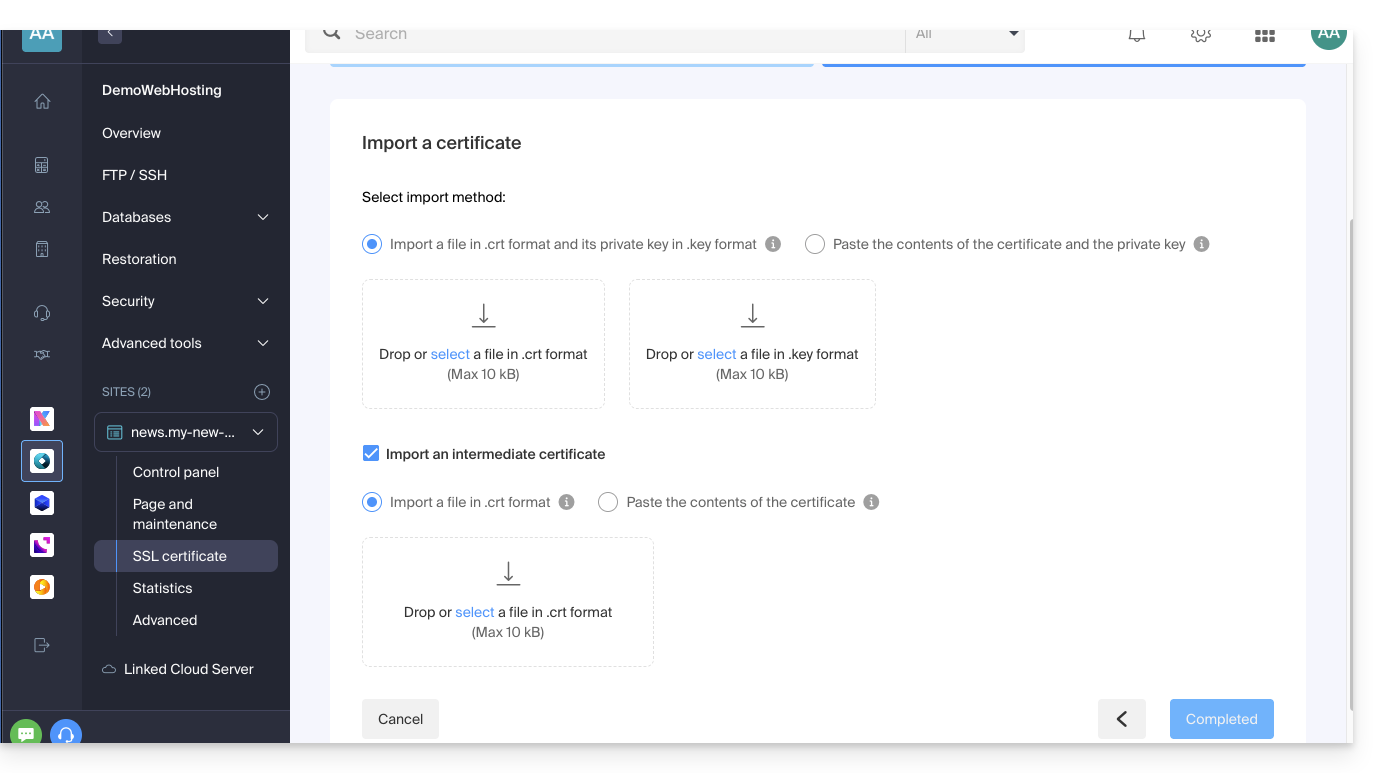
Link to this FAQ: https://faq.infomaniak.com/2027
Has this FAQ been helpful?