Knowledge base
1000 FAQs, 500 tutorials and instructional videos. Here, there are only solutions!
Manage the permissions for a specific mail user
This guide explains how to manage and modify user permissions (assigning an additional password, setting up an alias, etc. see below for the complete list) for an Infomaniak user, so that they can manage more or fewer configuration elements in the Infomaniak Mail web app (online service ksuite.infomaniak.com/mail).
Introduction
- The email address is first created within a Mail Service and can then be used within one or more Infomaniak Mail interfaces by one or more users.
- The creator (or manager) of the address may want to limit the possible actions for one or more of the users who will use the email address.
- This granular permission management can be done when creating an address or later, and you can also define what the default permissions should be, which will always be applied.
List of user email permissions
When you view the users with access to a specific email addresswithin a Mail service, a column allows you to quickly identify the type of permissions granted to the user: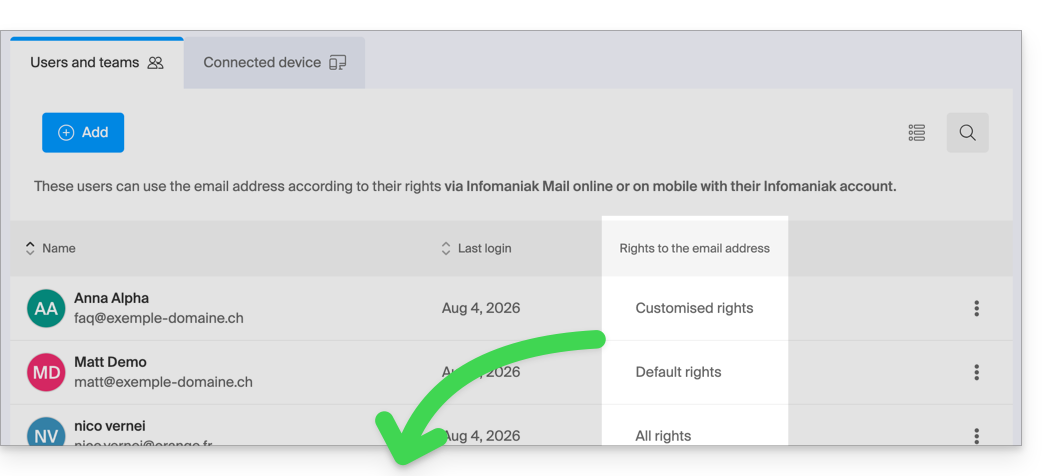
“All rights” is displayed when the user has all possible permissions.
“Default rights” is displayed when the permissions are identical to those specified in the global configuration.
“Custom rights” is displayed as soon as not all permissions are granted and they differ from the default template (global configuration).
Click on the indication to access the user's permission management, detailed below:
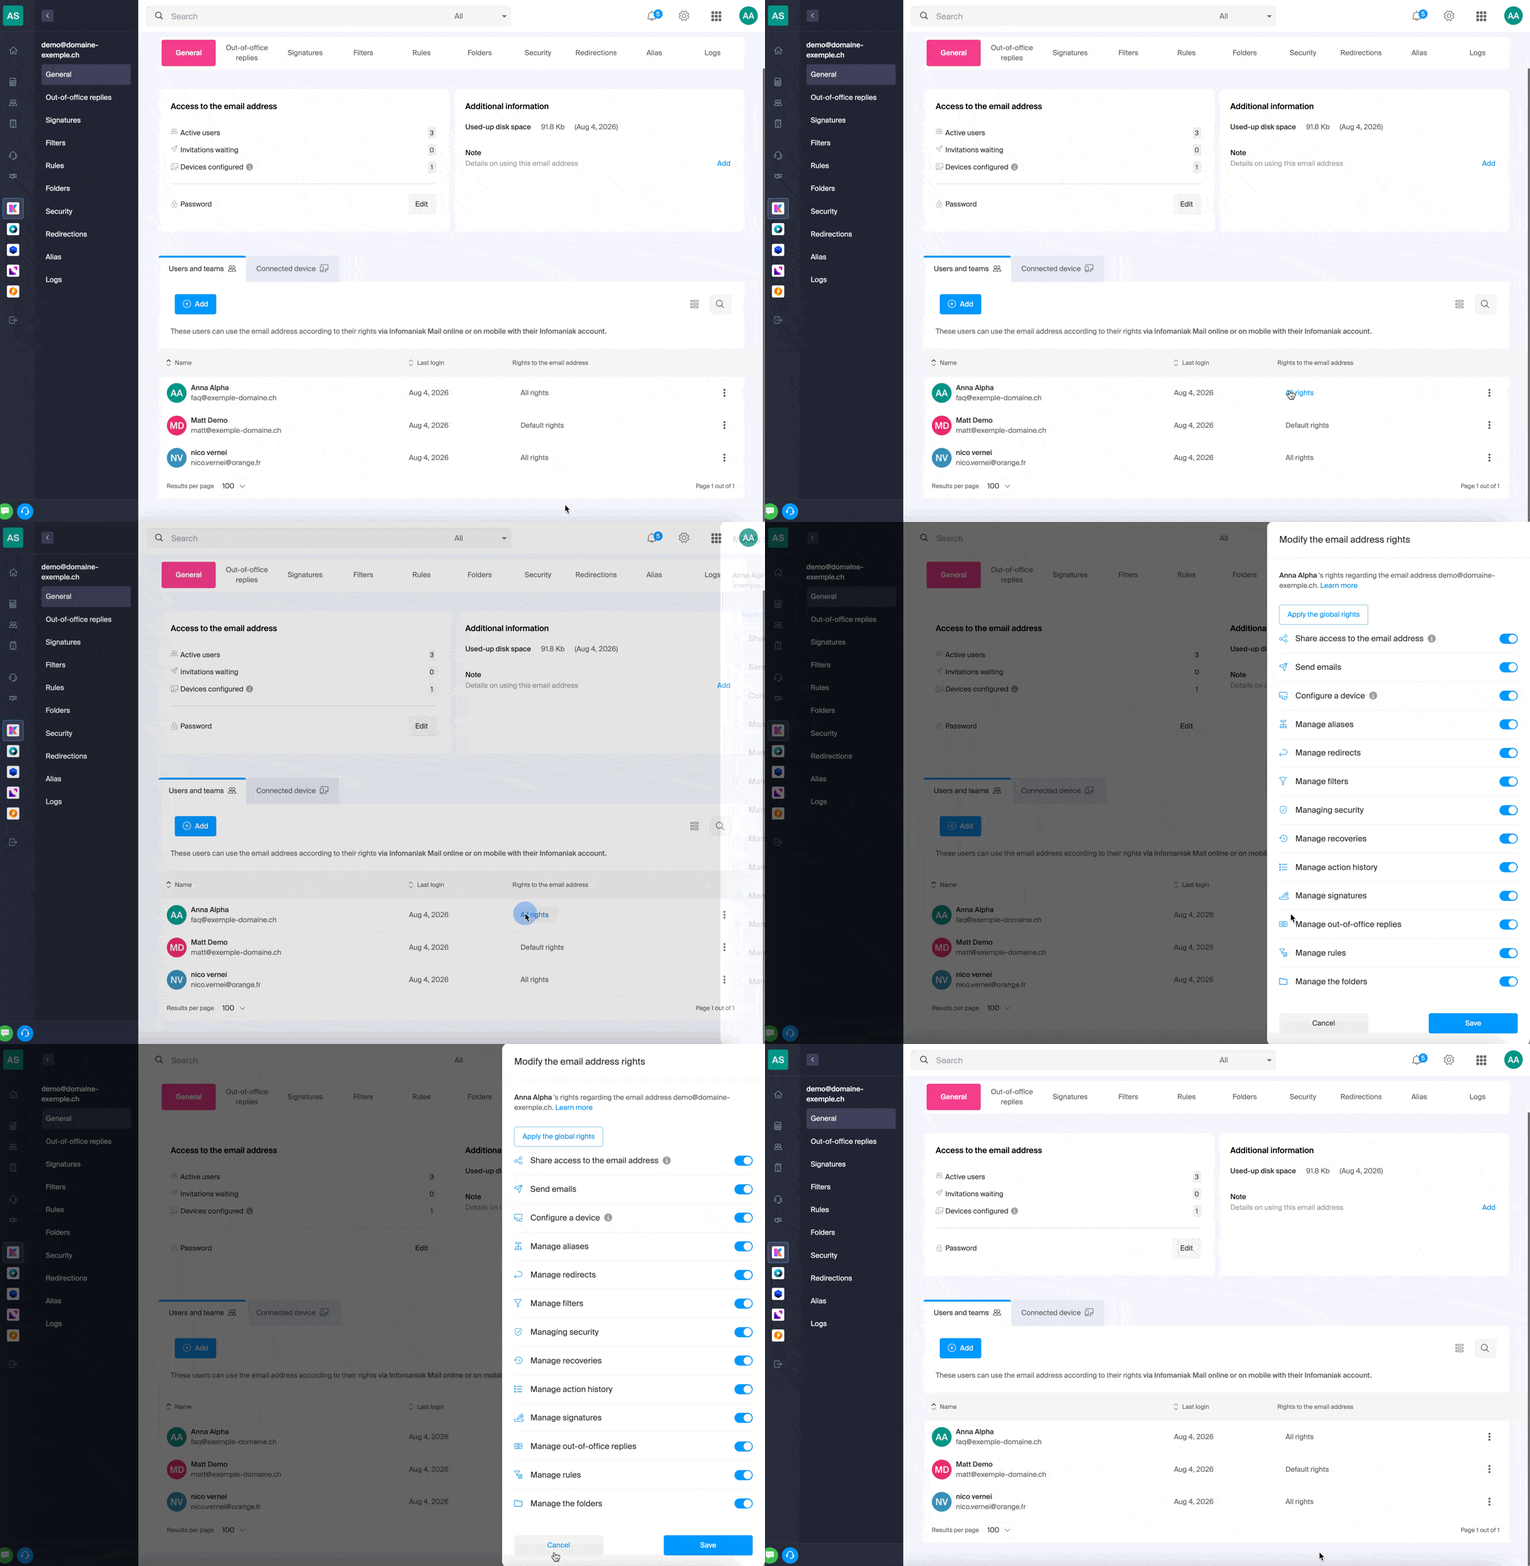
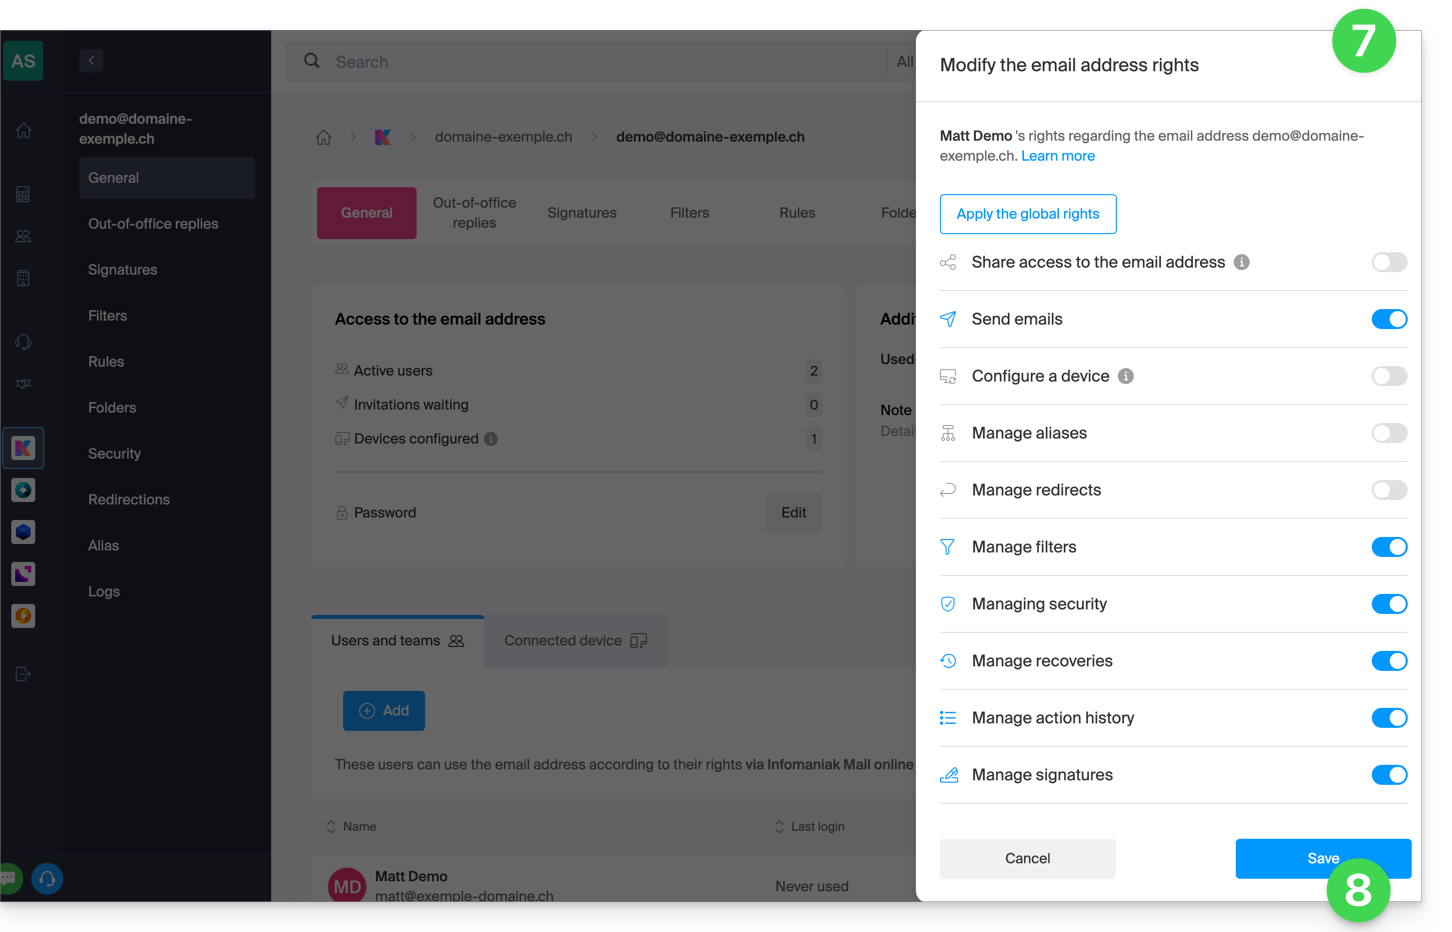
Simply click on the corresponding toggle switch to enable or disable the specific permission. Here is the list:
| Type / Icon | Description of the permission granted to the user |
|---|---|
| Share access to the email address | Manage users (ability to delegate mail access to another user in the Organisation) |
| Configure a device | Manage devices (ability to create a dedicated password) |
| Manage voicemail | Create an automatic reply (e.g., configure an out-of-office message) |
| Manage signatures | Add signatures and manage reply email addresses |
| Manage forwarding | Forward emails to one or more other addresses |
| Manage aliases | Create variations of your email address (by changing what comes before the @) |
| Manage the action history | Access the logs for the email address |
| Manage restores | Access backups and restores |
| Manage filters | Access SPAM and other filters |
| Manage rules | Automatically sort and categorize new incoming emails |
| Manage folders | Customize IMAP folders |
| Manage security | Manage blocked and approved addresses |
| Manage email sending | Enable sending emails (allow global SMTP) |
Manage permissions granted to a user
You may be asked for your Infomaniak account login password to make changes to the permissions.
… from the Mail Service
- Click here to access the management of your Mail Service in the Infomaniak Manager (need help?).
- Click directly on the name assigned to the Mail Service in question.
- Click on the email address in question in the table that appears.
- There are several ways to modify the permissions of an email address:
- When adding a user to an email address:
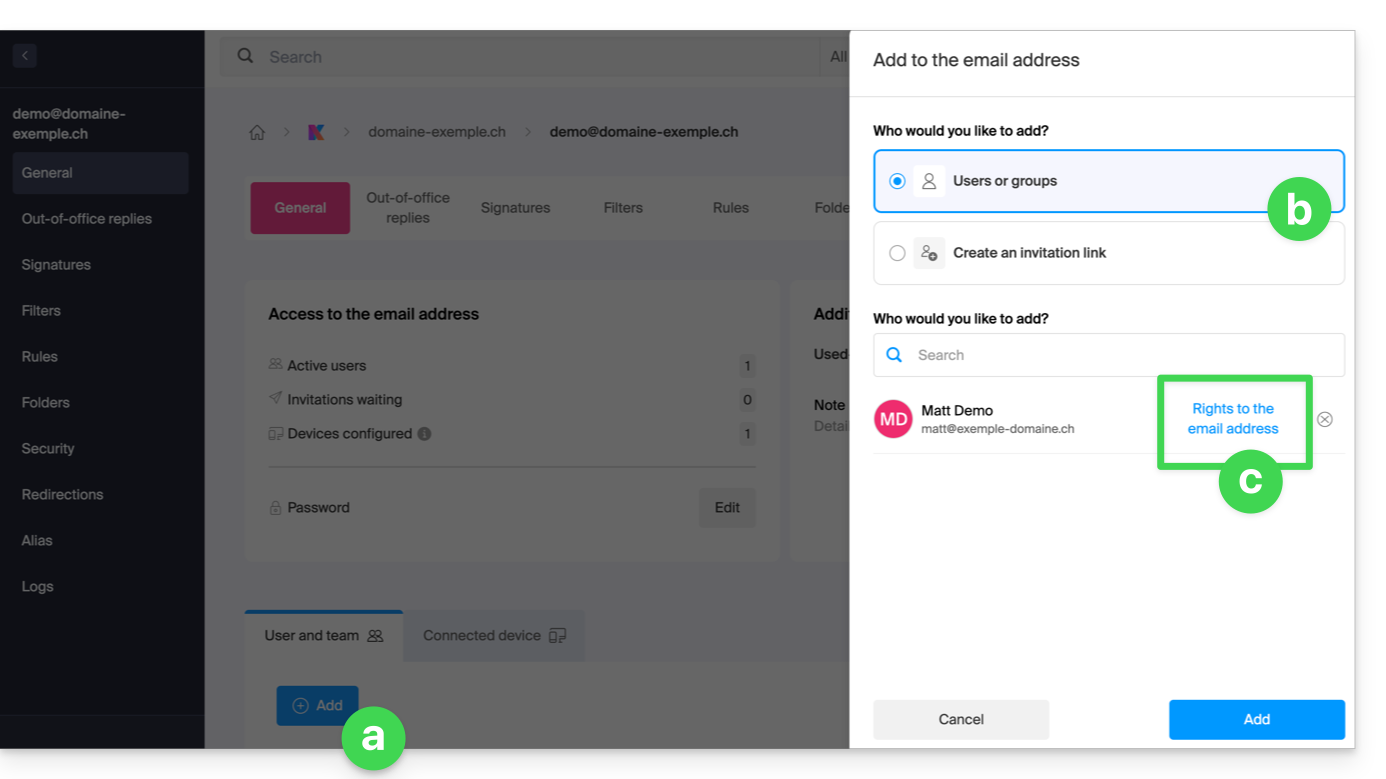
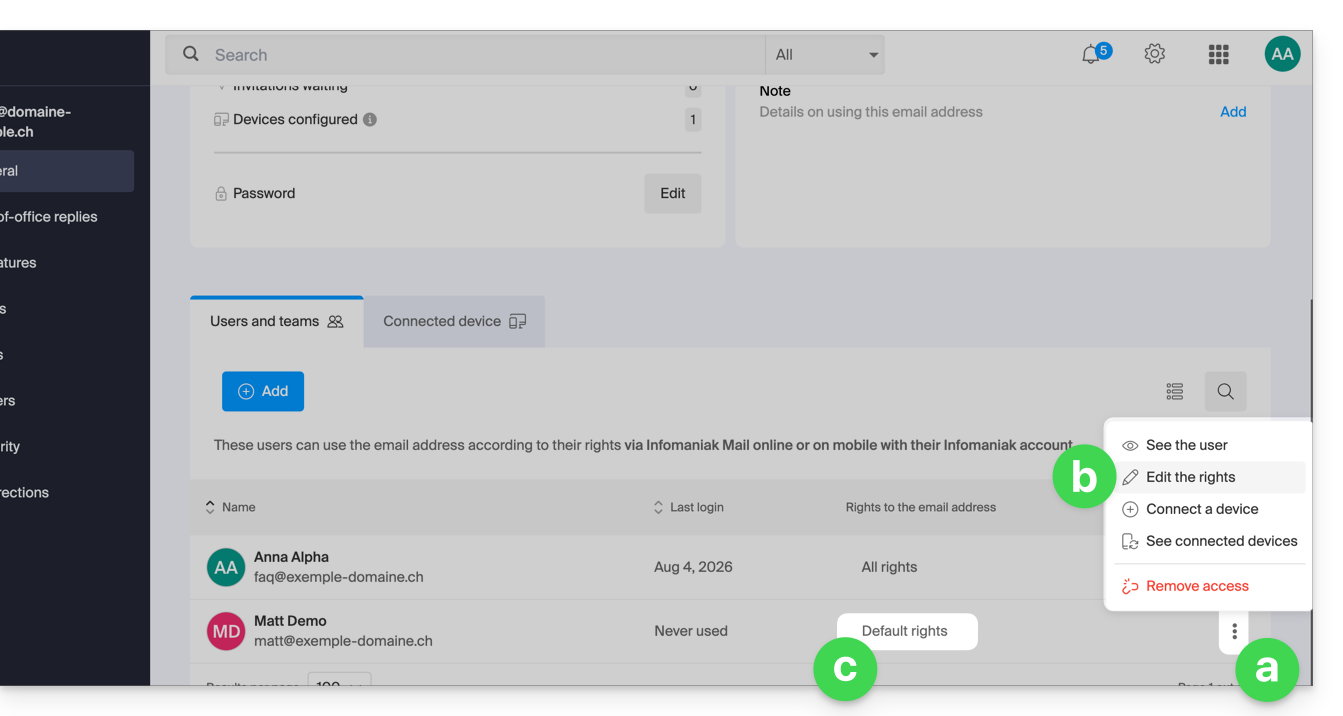
- Once the user has been added:
- Click on the action menu ⋮ located to the right of the user's name for the email address.
- Select ✎ Edit permissions.
- Or click directly on the indication regarding their permissions:
- When adding a user to an email address:
… from the Manager (user management)
- Click here to access user management in the Infomaniak Manager (need help?).
- Click on the relevant user in the table that appears.
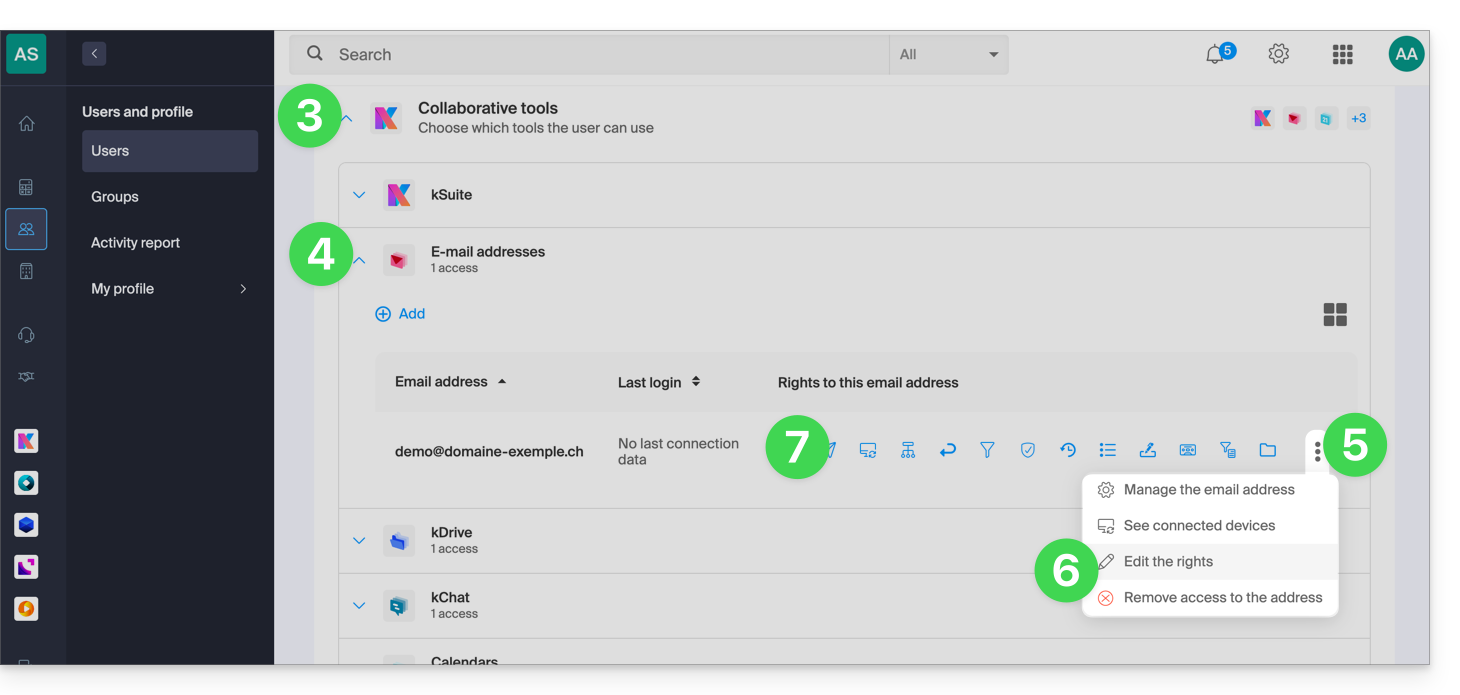
- Expand the collaborative tools section by clicking on the chevron .
- Expand the section displaying the email addresses accessible to the user by clicking on the chevron .
- Click on the action menu ⋮ located to the right of the email address in question.
- Select Edit permissions.
- Or click directly on the icons visible in the table:
… from the Web Mail app
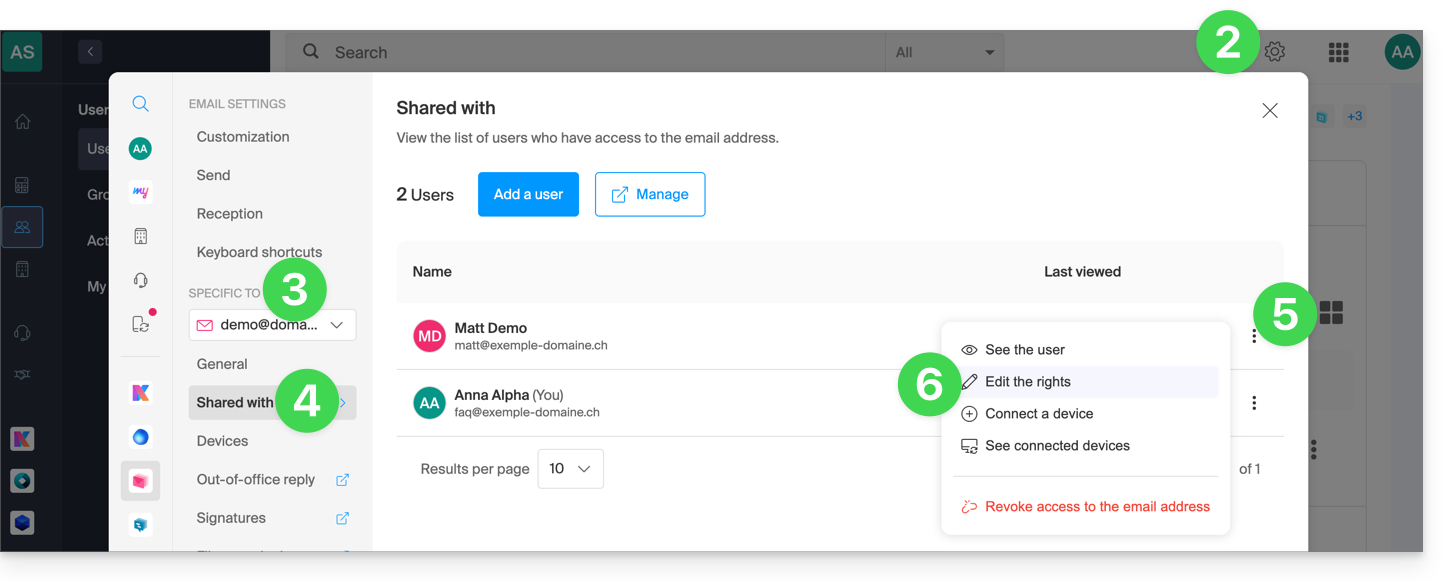
- Click here to access the Infomaniak Mail web app (online service ksuite.infomaniak.com/mail).
- Click on the Settings icon in the top right corner of the interface.
- Check or select the relevant email address from the dropdown menu in the left sidebar.
- Click on Shared with.
- Click on the action menu ⋮ located to the right of the email address user name.
- Select ✎ Edit permissions:
- You will be redirected to the settings for your email address in the Mail service, specifically to the permissions section for the user in question.
- Adjust the permissions and save at the bottom of the page:
Result for the user
The user whose permissions are revoked will no longer see certain corresponding menus in their email address settings.
For certain features, even if the menu is still accessible, some buttons will be inoperative or grayed out: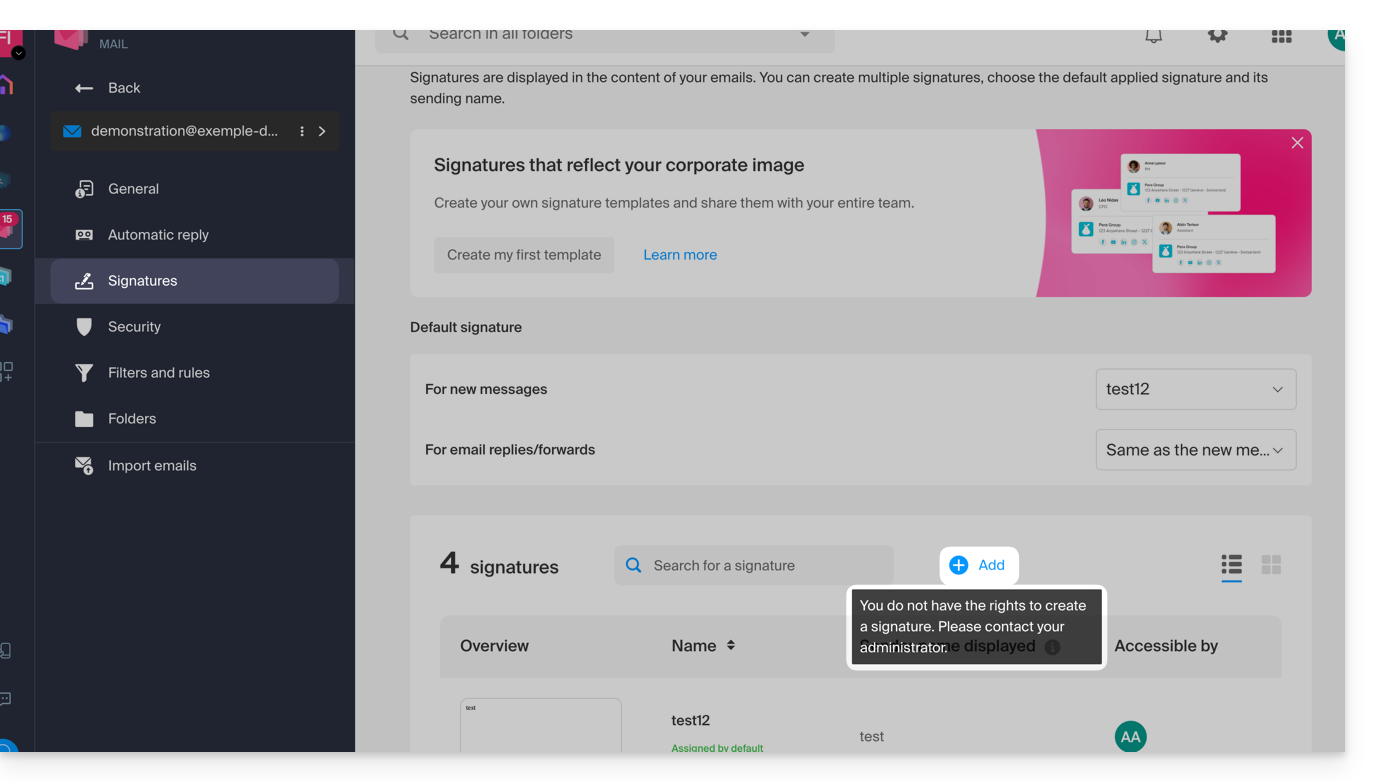
Link to this FAQ: https://faq.infomaniak.com/1811
Has this FAQ been helpful?