Knowledge base
1000 FAQs, 500 tutorials and instructional videos. Here, there are only solutions!
Manage folder sharing for your organization in kDrive
This guide illustrates the different types of sharing that can be performed within the shared folder named “Organisation Folders” on kDrive and explains how to limit access to the folder if certain users should not have access to everything it contains. It is very easy to modify a share at any time.
Also, consult this other guide about folder sharing.
Switching from a simple share to a kSuite invitation
Imagine…
- … a kDrive within a kSuite…
- … with 1 user out of 2…
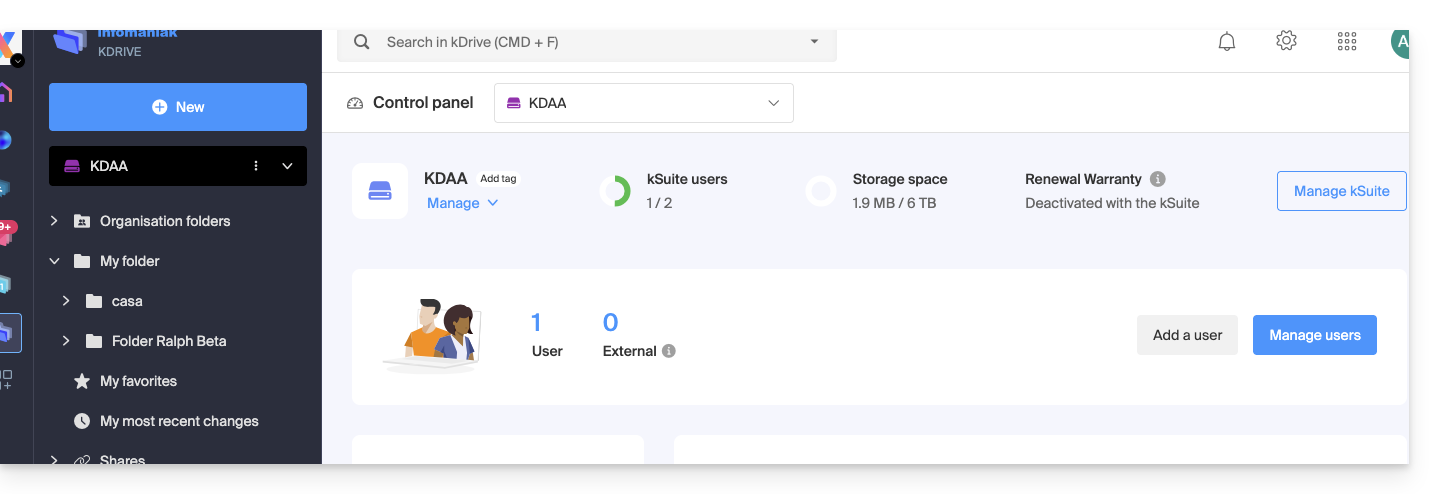
- … data in “Organisation Folders” and in “My Folder”:
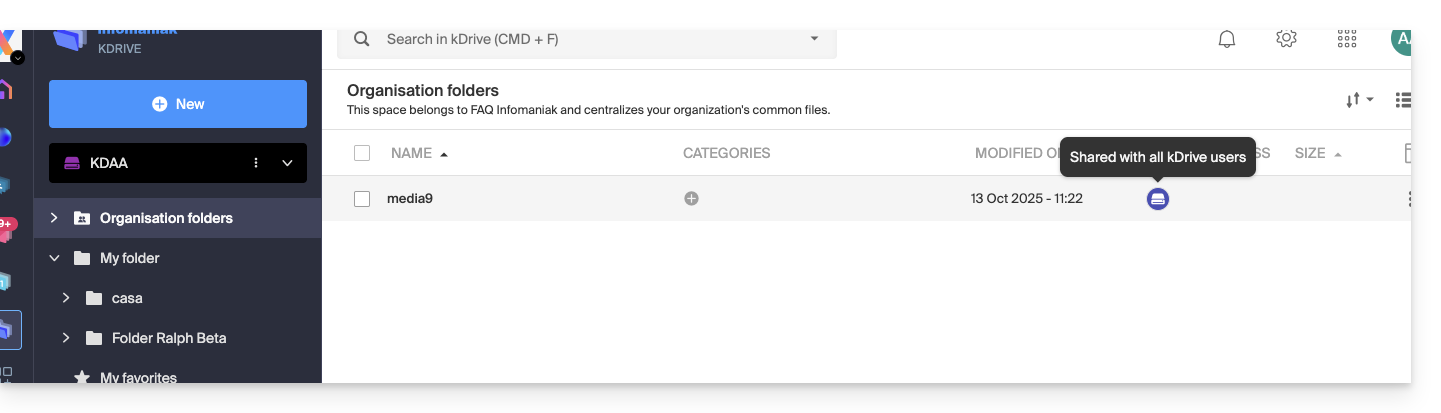
A. Result of a share without requiring registration for the invited user
A folder located in Organisation Folders is first shared with a new user who is completely external to this kDrive and to Infomaniak, via a public sharing link:
- Right-click on the folder or subfolder in question.
- Choose the Share option:
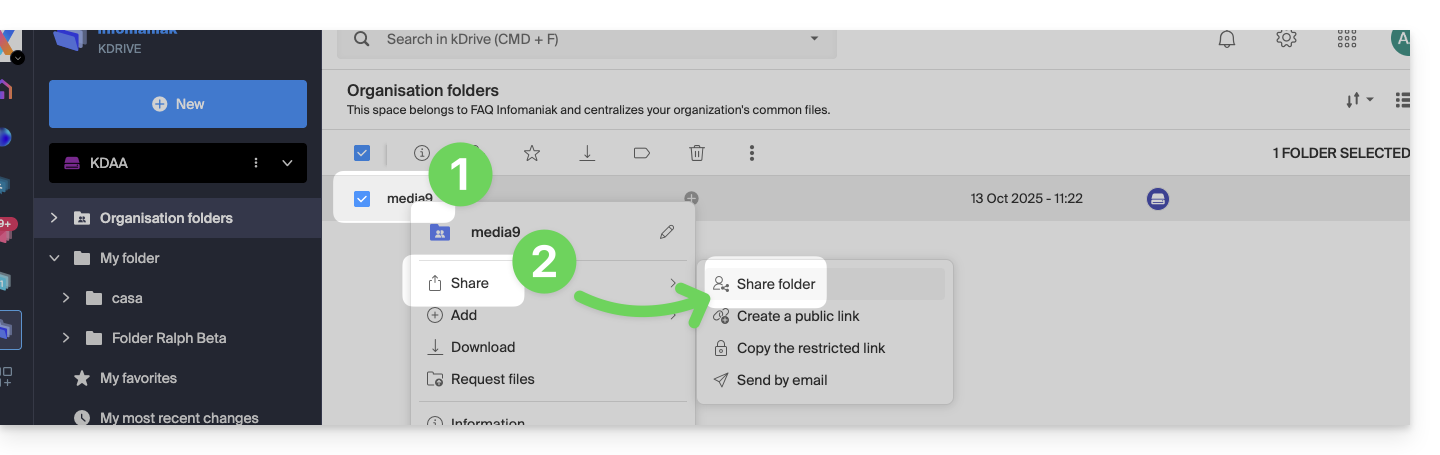
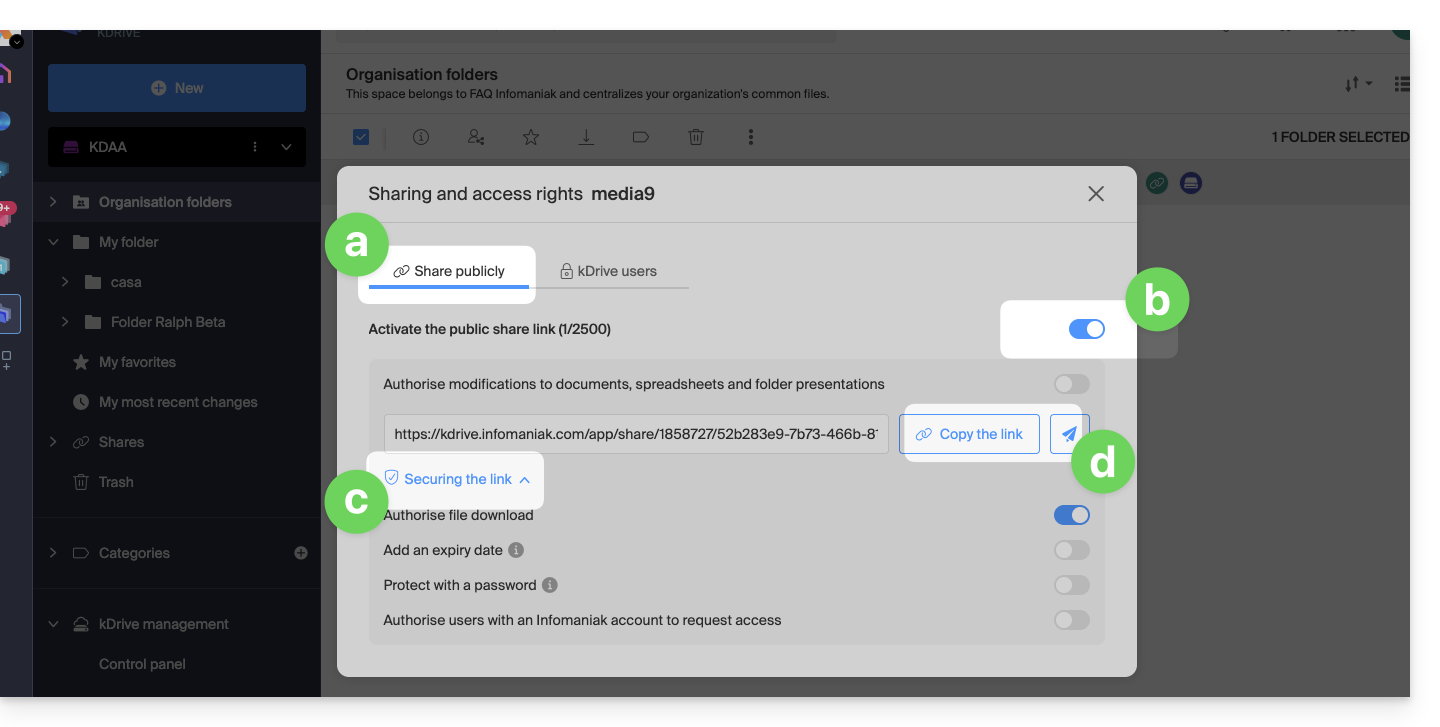
- Then:
- Stay on the first tab.
- Enable the public sharing link.
- Adjust the security settings as needed.
- Copy the link to share it, or send it directly from the window:
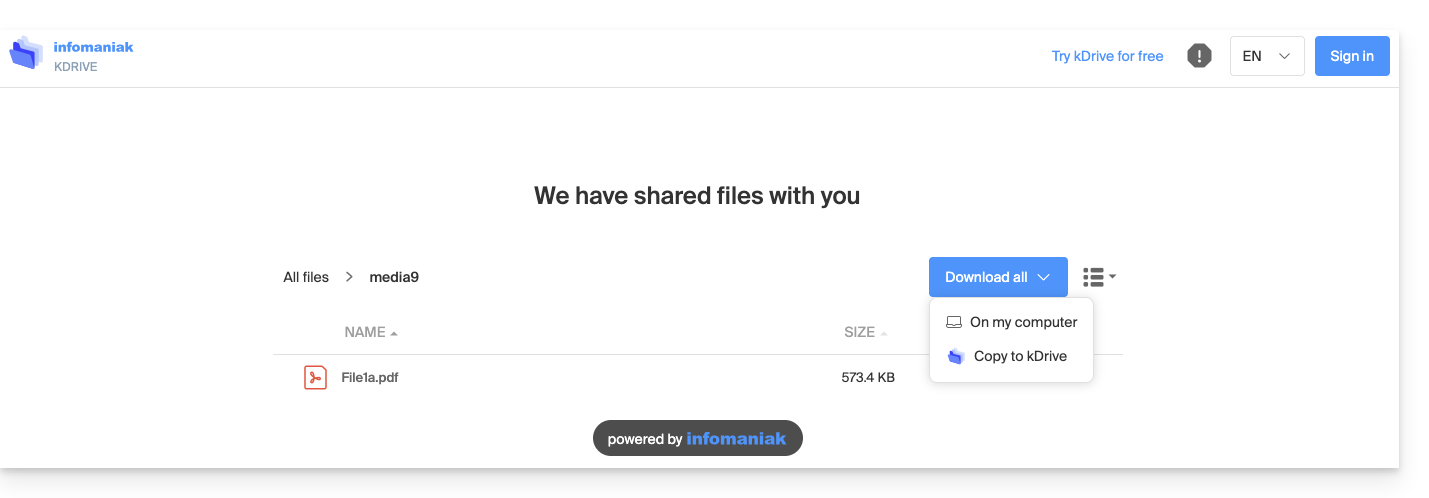
As a result, the user viewing this public link will see this type of view:
- They can browse, view, and download files, including to their own kDrive, all in read-only mode:
B. Result of sharing with registration (but not counted in kSuite)
A folder located in Organization Folders (or any folder in the kDrive, since this feature is also valid with a Solo kDrive) is now shared with an "external" user who will need to register or at least log in to their account if they already have one, and accept the invitation.
The user must be completely external to Infomaniak or at least not have an email address on the Mail Service linked to the kSuite to which the kDrive in question belongs.
To do this, you must this time choose the second sharing tab:
- Right-click on the folder or subfolder in question.
- Choose the Share option.
- Click on the second tab.
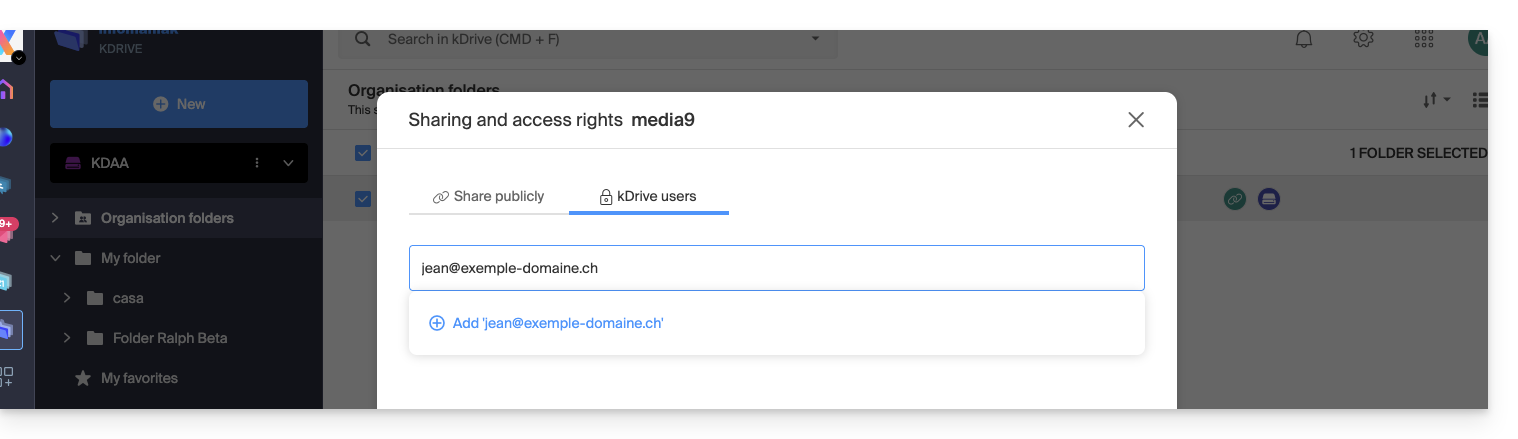
- Enter the email address of the user in question.
- Click to add (this can be done for multiple users at once):
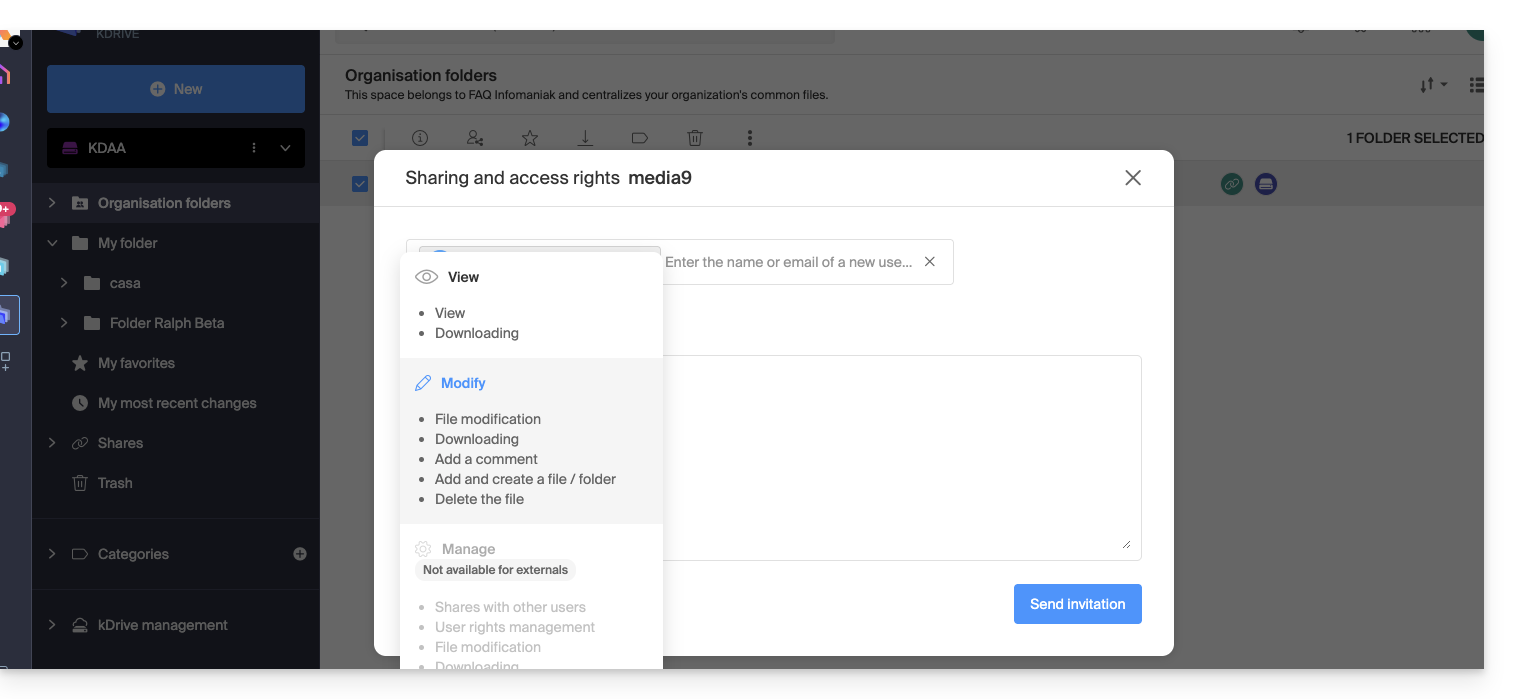
- Regarding the freedom given to the user to modify or not the part of kDrive to which they will have access, the choice made here is Modify.
- Click on Send invitation:
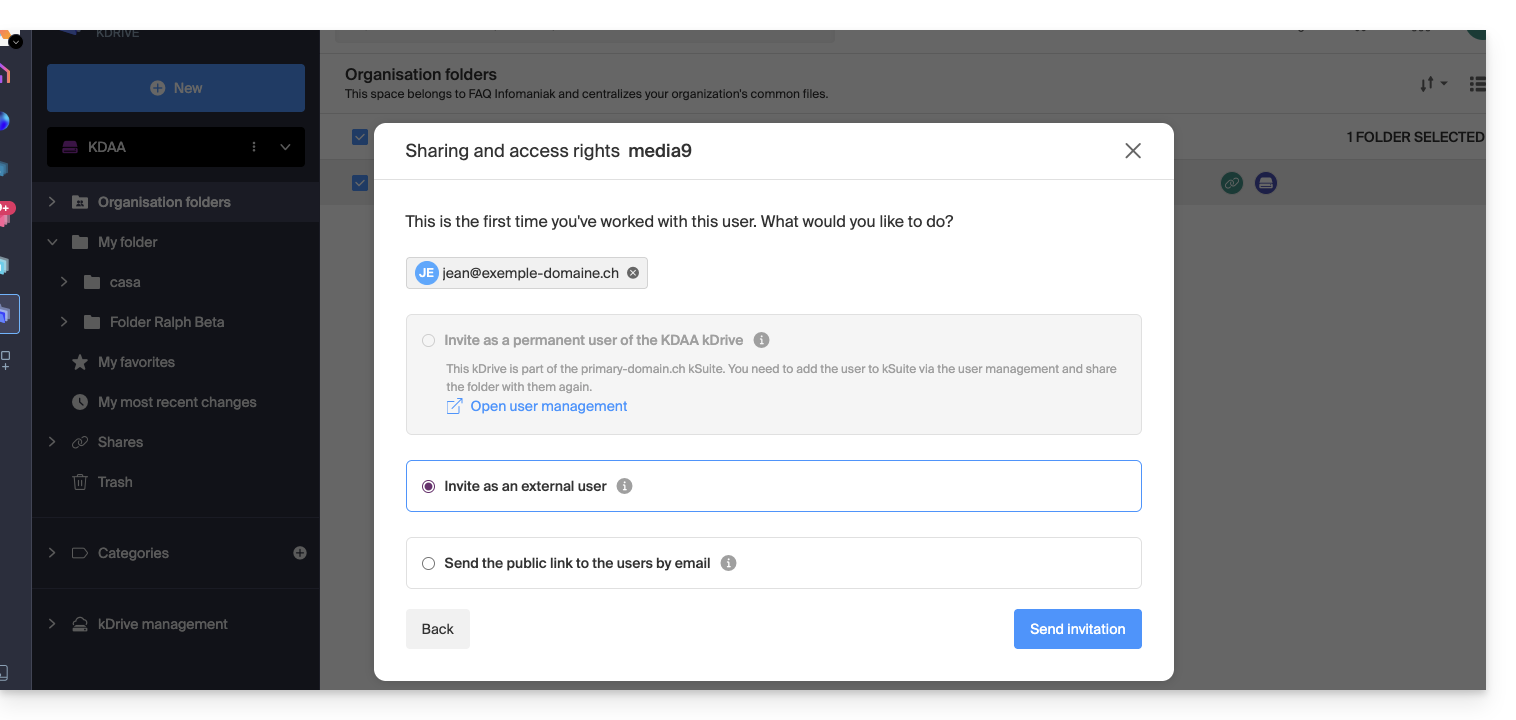
- This choice (see point 6 above) will allow you to invite this person as an external user initially (read more below for the complete kSuite invitation):
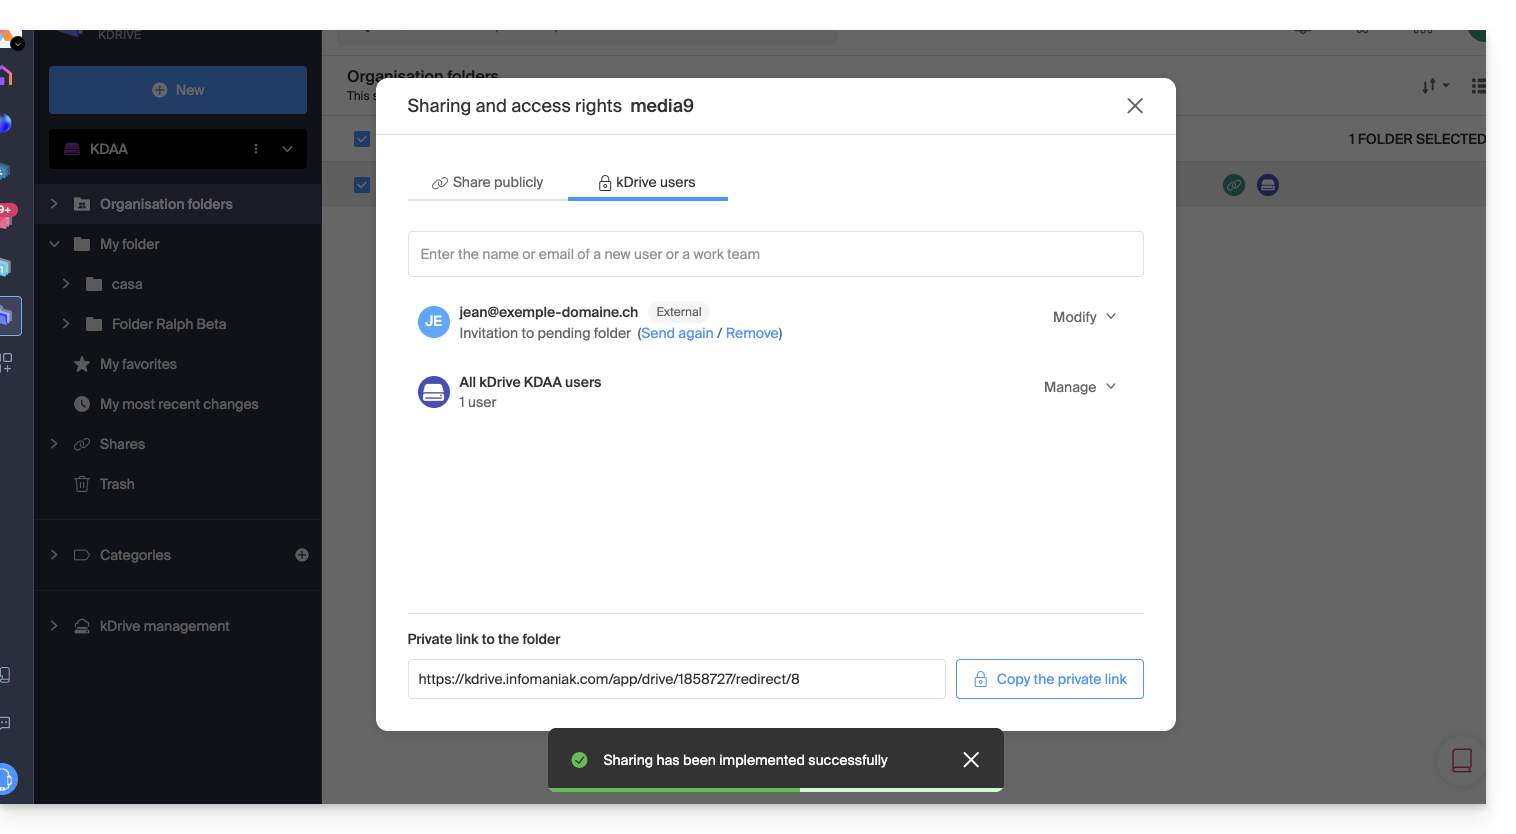
- The administrator can see the pending request and resend the invitation if necessary:
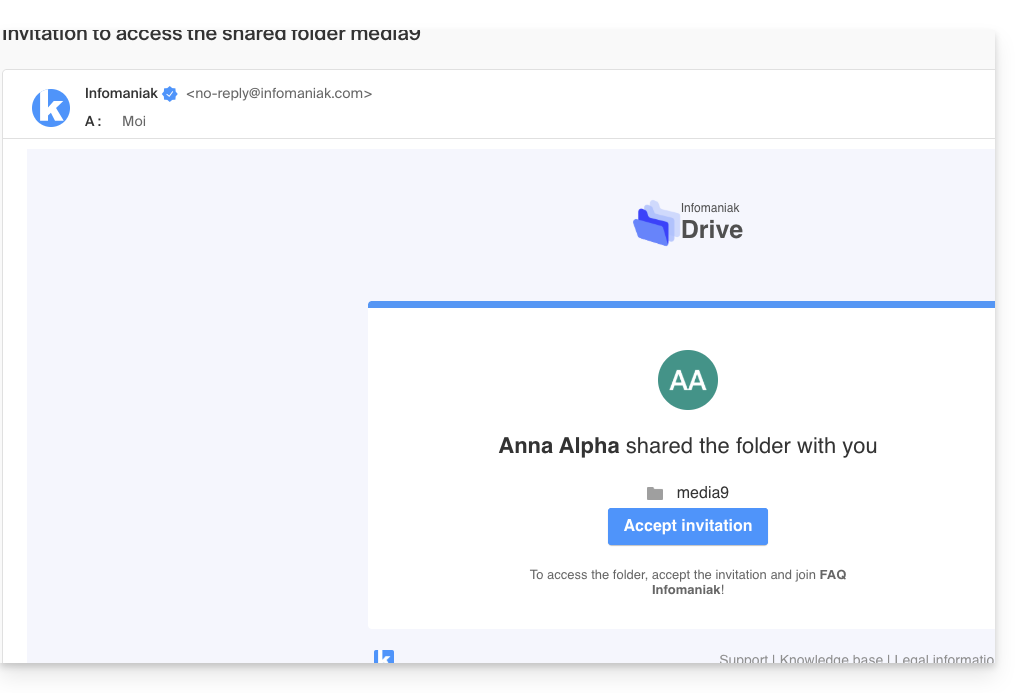
- The invited person receives an email to register as an Infomaniak user:
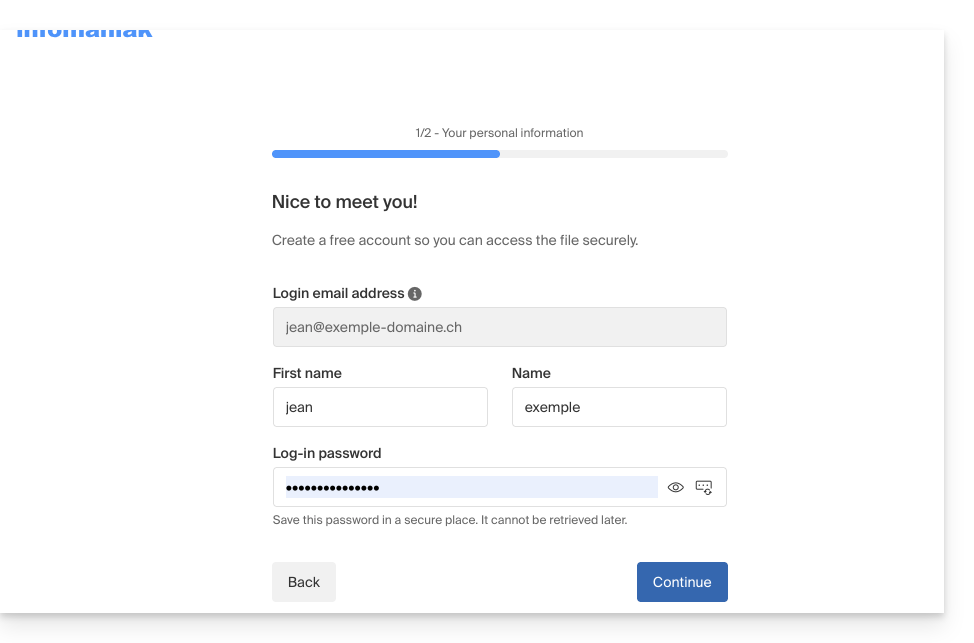
- The person fills out the form with their details and chooses a password; their email address is pre-filled; this will be their Infomaniak account login:
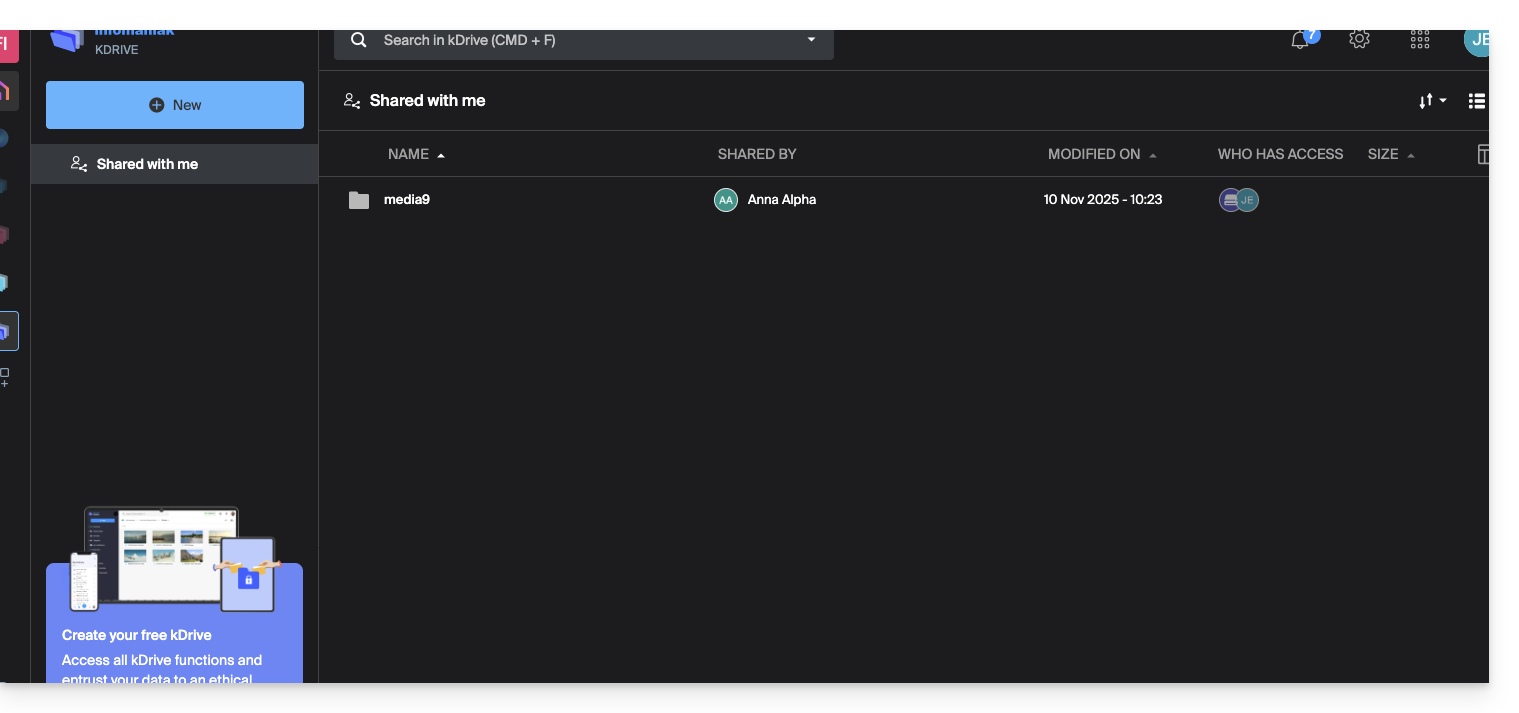
- Once registration is complete, a simplified kDrive interface with “Shared with me” on the left allows you to:
- access shared content (only the content that was initially shared, not the entire shared folder)
- modify the shared content (without being able to delete existing content at the time of sharing)
- add/delete your own content:
- Any changes made are shared with all users who have access to this part of the kDrive.
- The user does not have private/personal space.
- They can install the kDrive mobile/desktop app and log in, but no data will be visible:
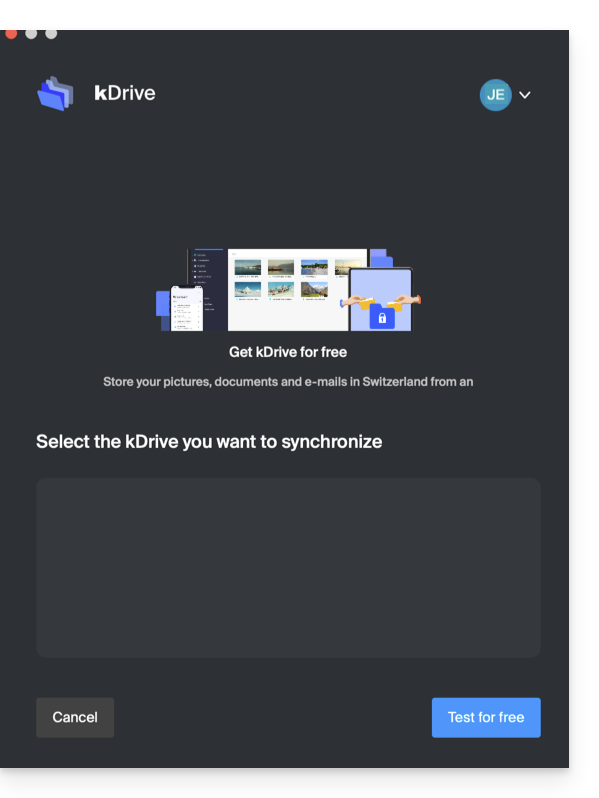
The user must use the online interface to access files shared with them, as long as they are an external user, even if they have a personal kDrive!
- On the kDrive administrator dashboard, users are displayed as follows:
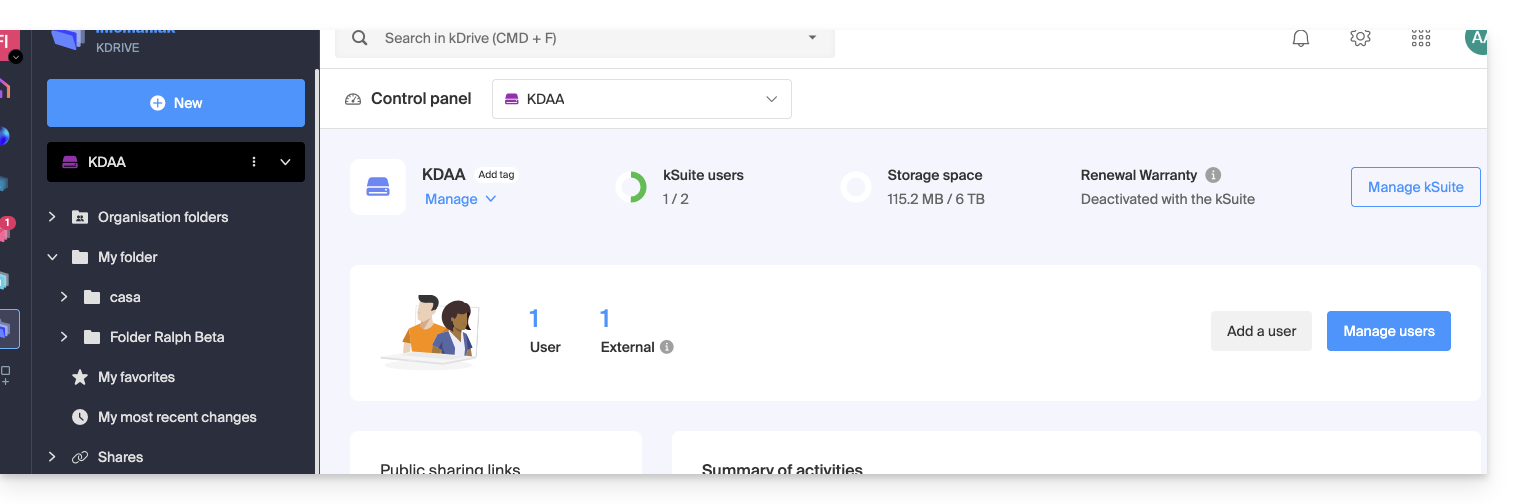
C. Result of sharing with registration as a kSuite user
Now imagine that no sharing or invitation has taken place yet. Repeat steps 1 to 7 above…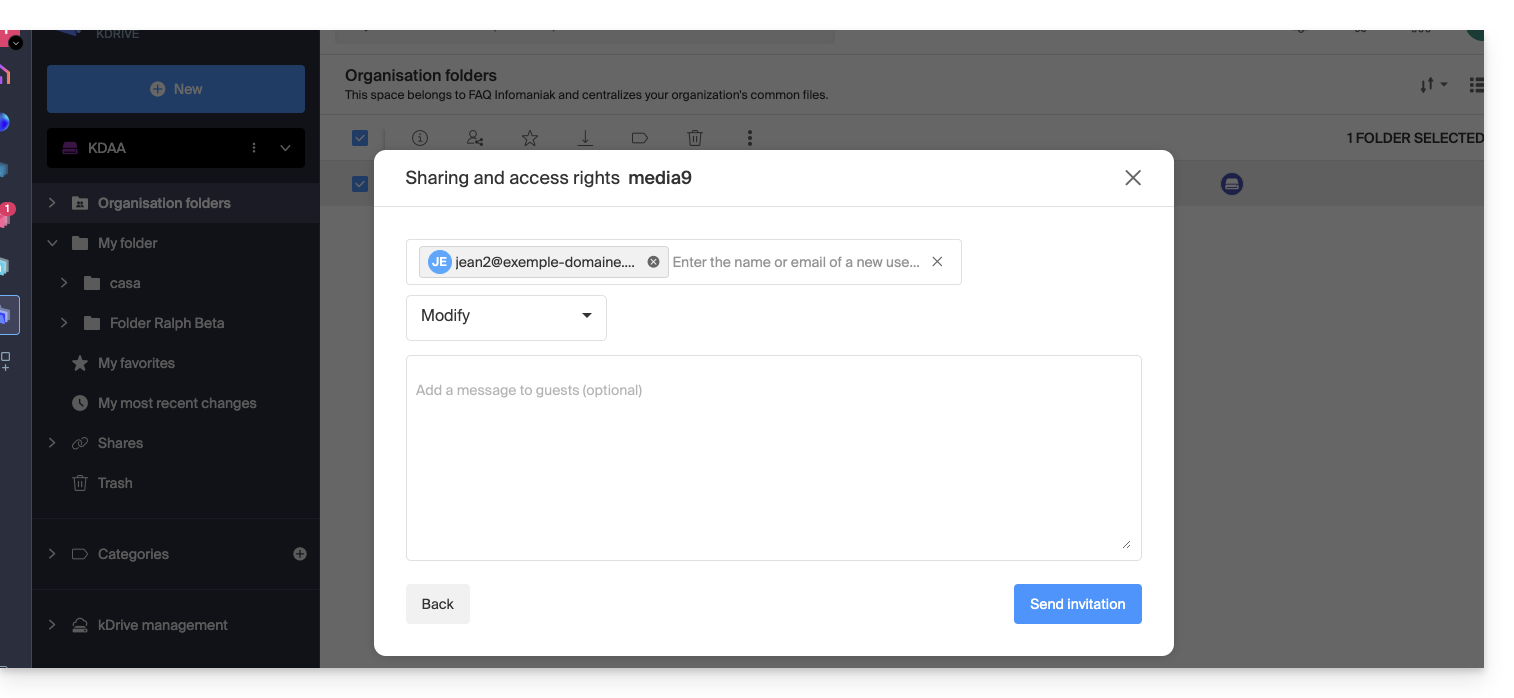 … then proceed to step 8:
- Invite this person as a kSuite user by clicking on the link that opens the user management page in a new tab:
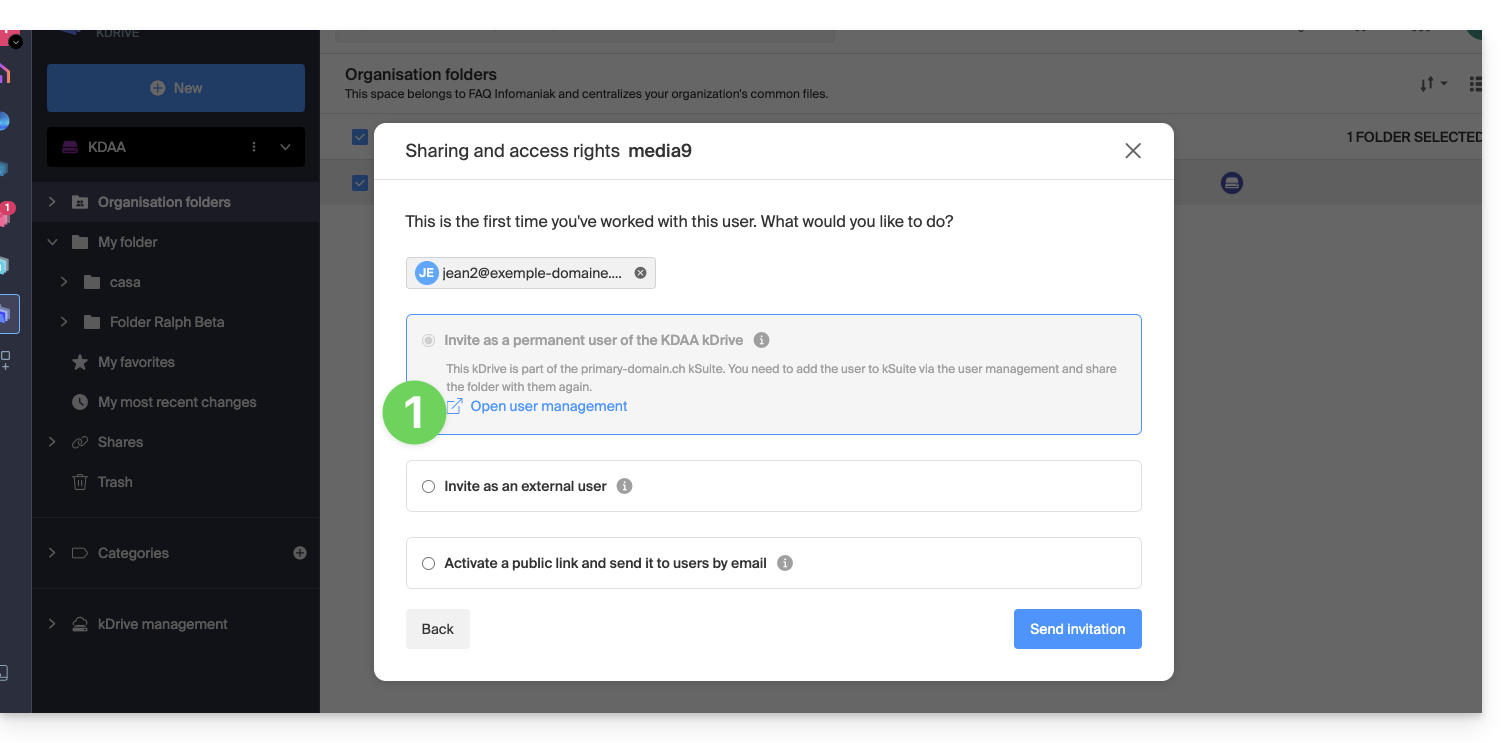
- Create the kSuite user (following the order A (if necessary) then B and C below):
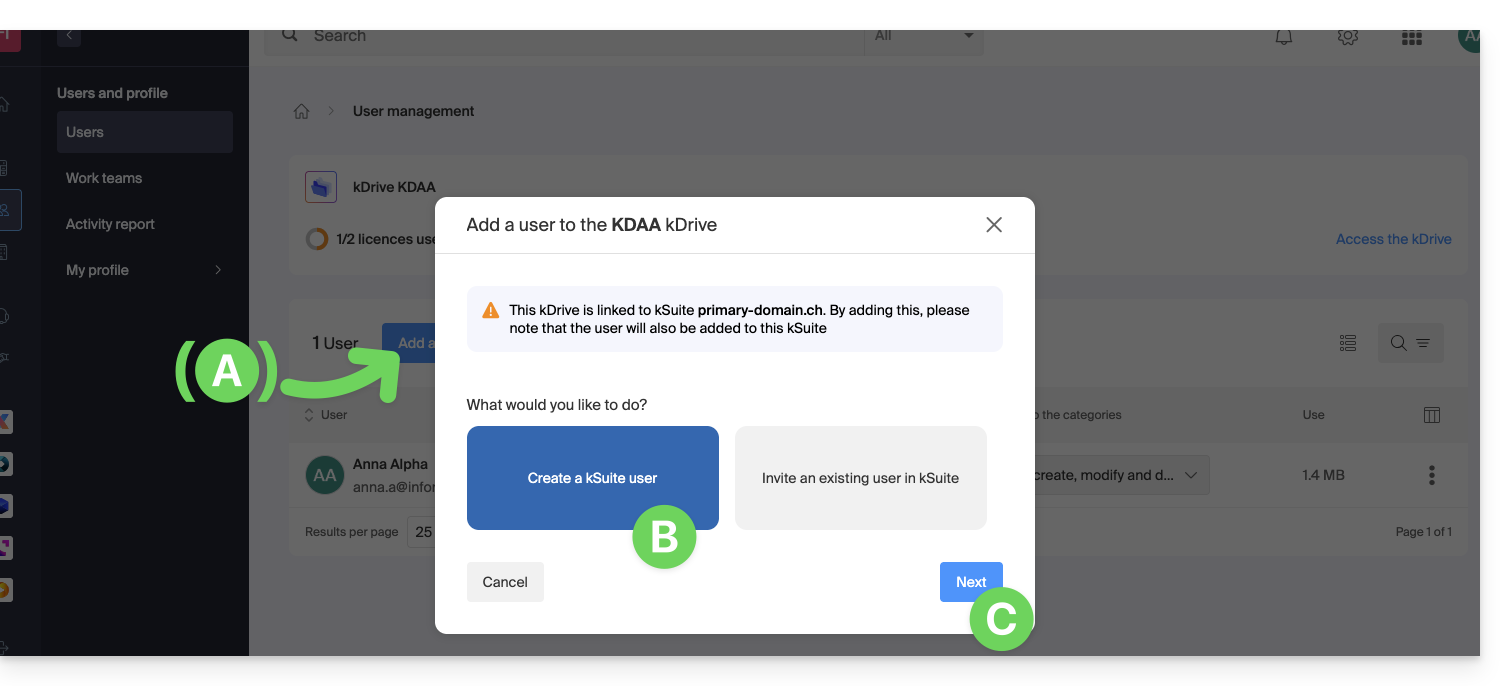
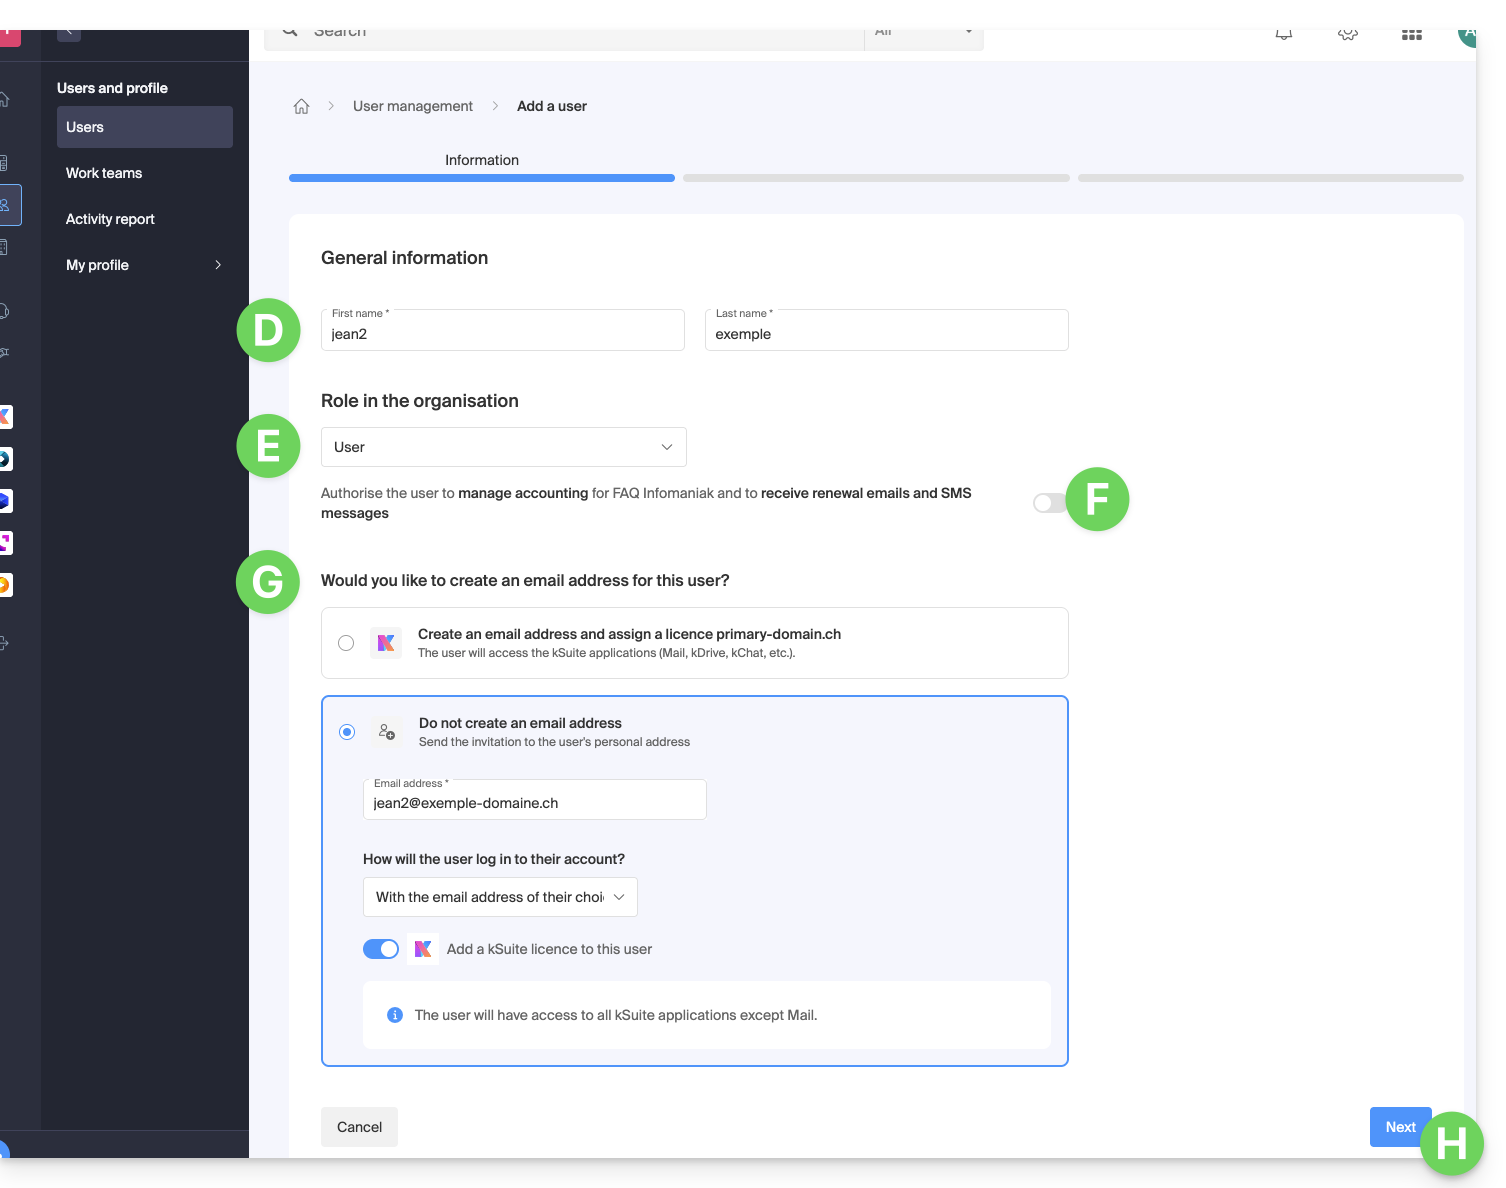
- Start creating the user (following the D-E-F-G-H order below):
- D — Enter a first name and last name.
- E & F — Depending on your needs, grant them extended or rather limited rights within the Organization; here, only a user status is assigned (learn about the different permissions (e.g., access to products) and administrative contact preferences for a user within an Organization).
- G — Choose whether or not to create an email address for the user; this influences how the user can log in (here, with the email address of their choice - while sending the invitation to another email address).
- H — The next step allows you to add the user to a possible Group:
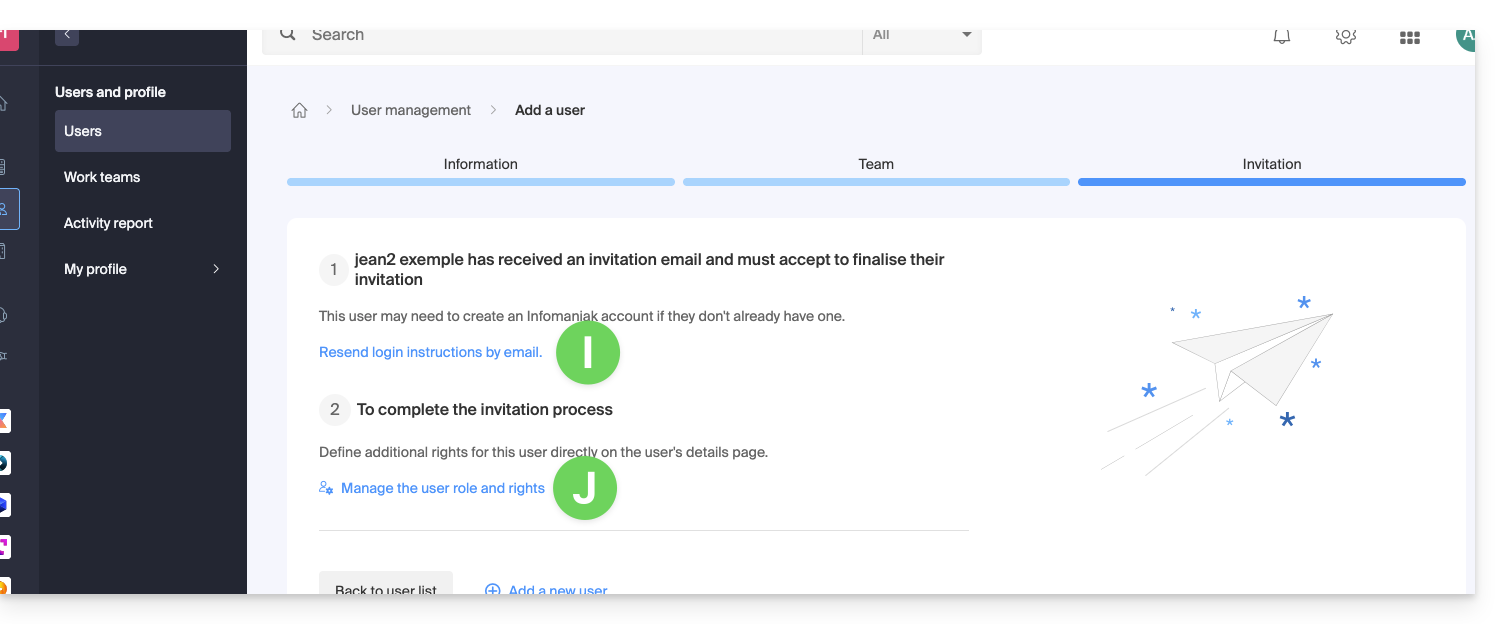
- Once the procedure is complete:
- I — The invited person receives an email to register as an Infomaniak user, and you can resend it here if needed.
- J — Depending on the role assigned to the invited person (see point E above), you can define at any time which products they can manage in the Infomaniak Manager:
D. Restrict user access
Once the registration is complete, the new user's kDrive interface usually allows access to all content that has been shared with all kDrive users.
Organization folders are shared folders, but this does not necessarily mean that all kDrive users have access to them.
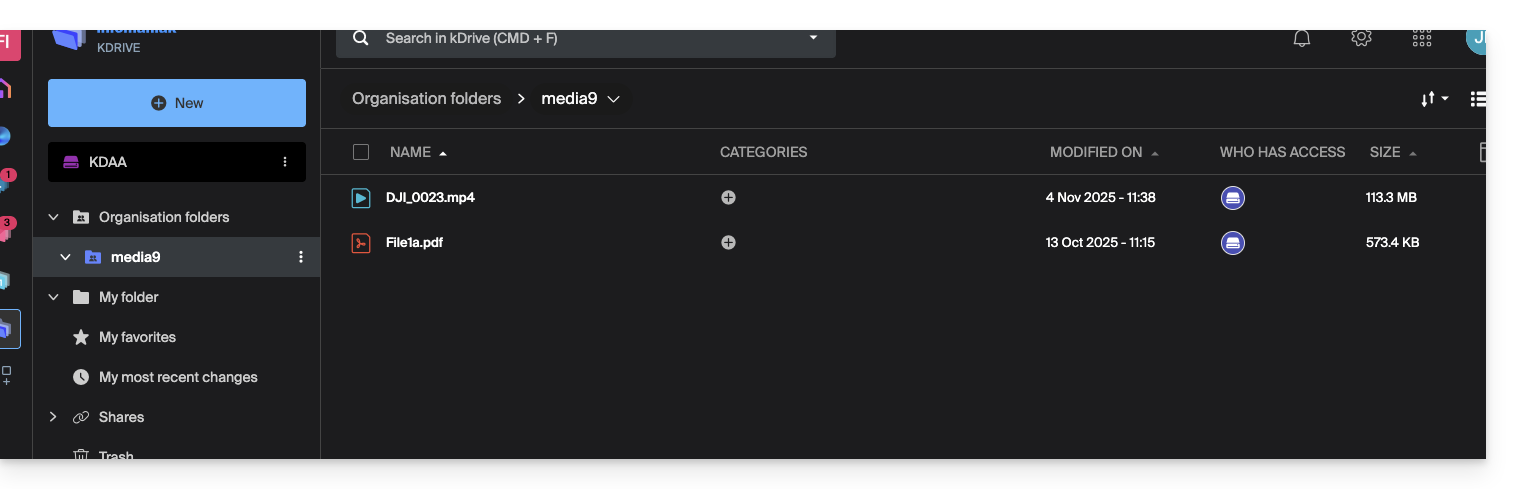
If the invited user does not see anything in this shared folder, check from the administrator account whether the sharing permissions have been extended to all kDrive users: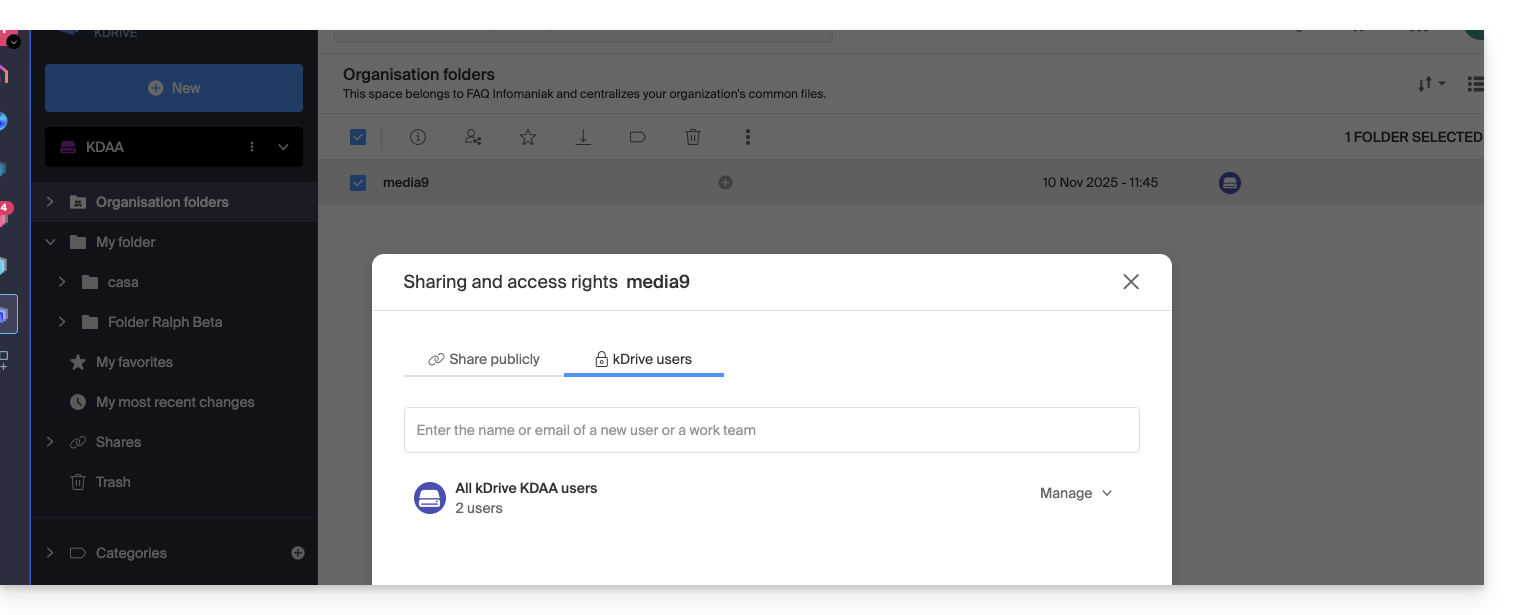
The opposite is also possible: if the new kSuite user has access to all Organization folders and this is not desired, the administrator must modify the sharing of the parent folder (the folder at the root of the shared folder, for example):
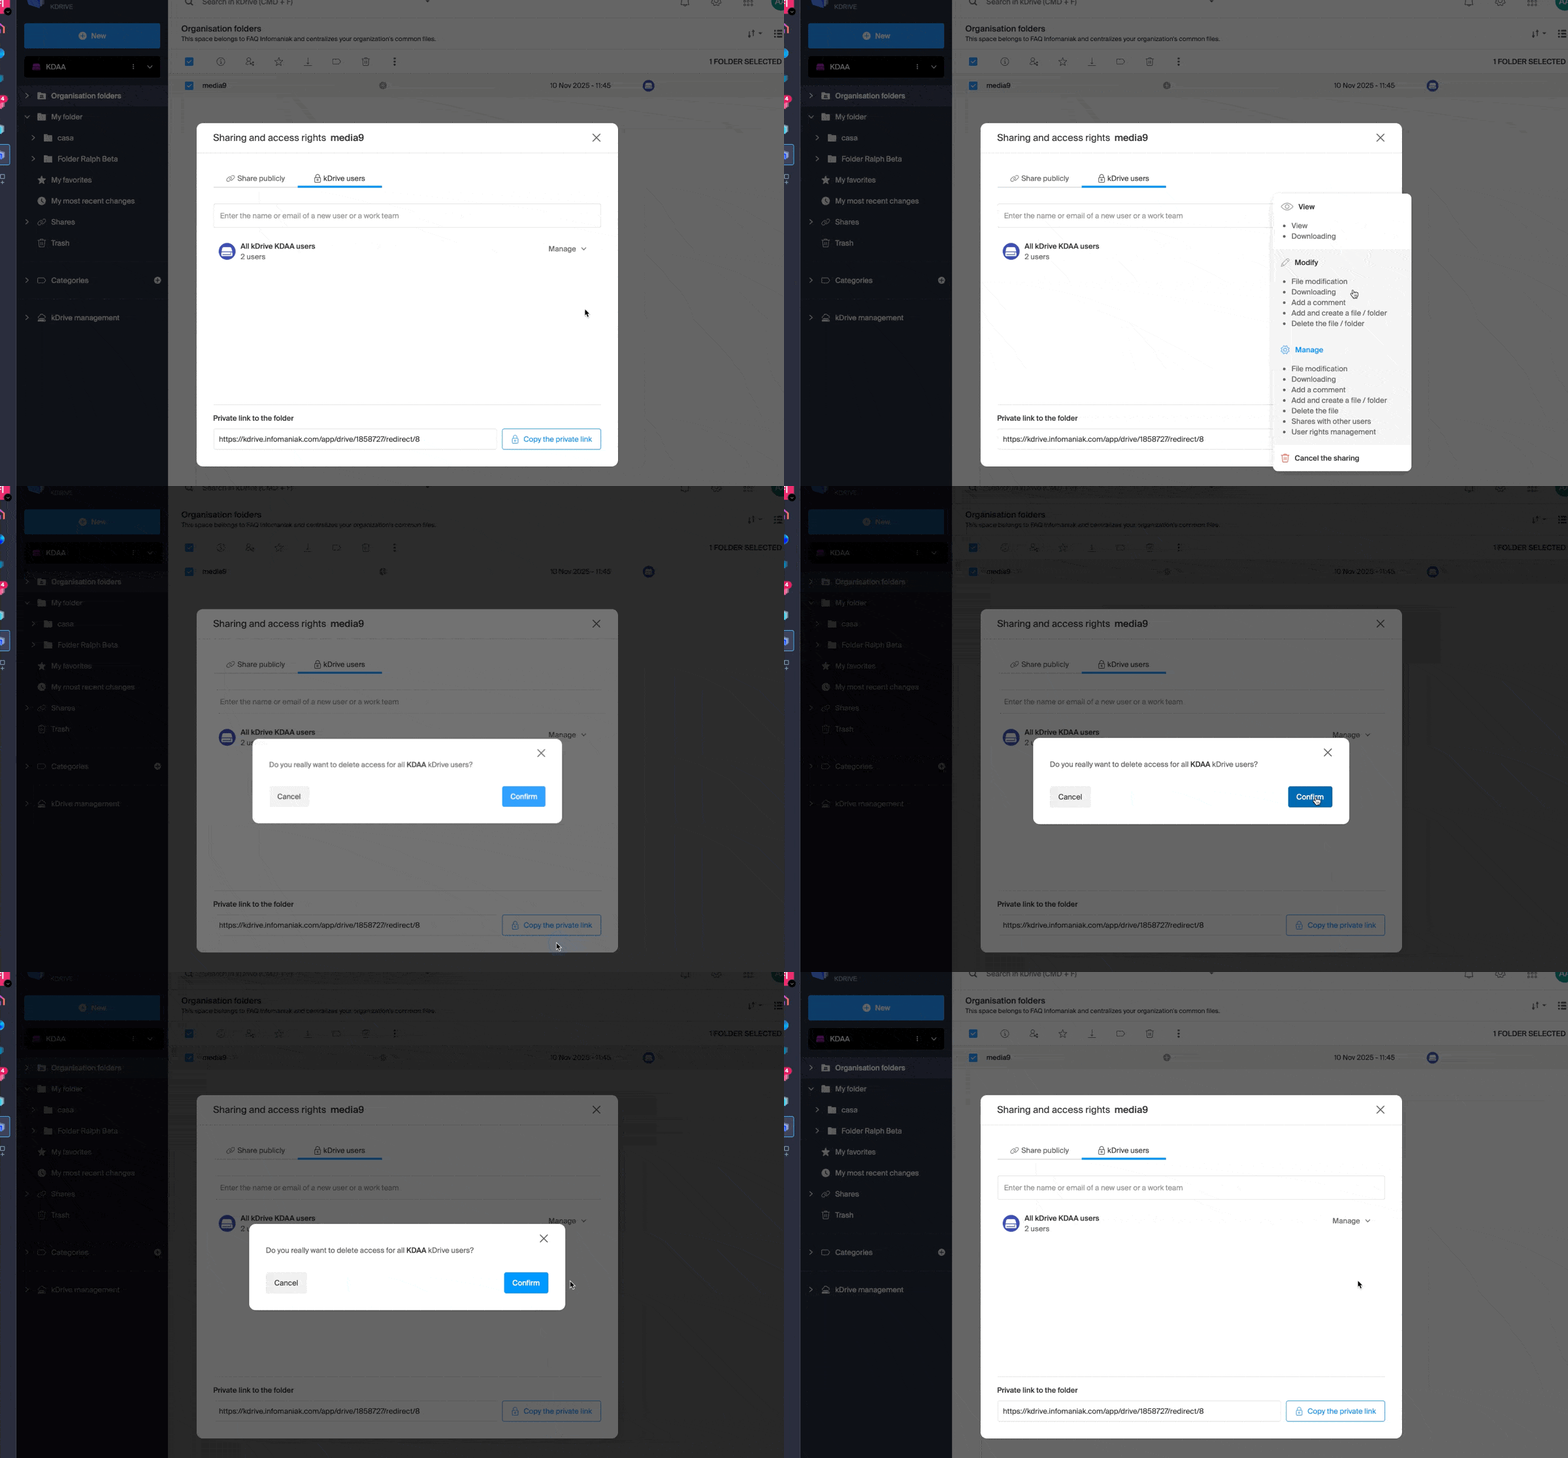
- Right-click on the parent folder, choose Share, then choose the second sharing tab and click Manage on the right to select the removal of the sharing (the effect is recursive and therefore applies to all elements contained within the parent folder):
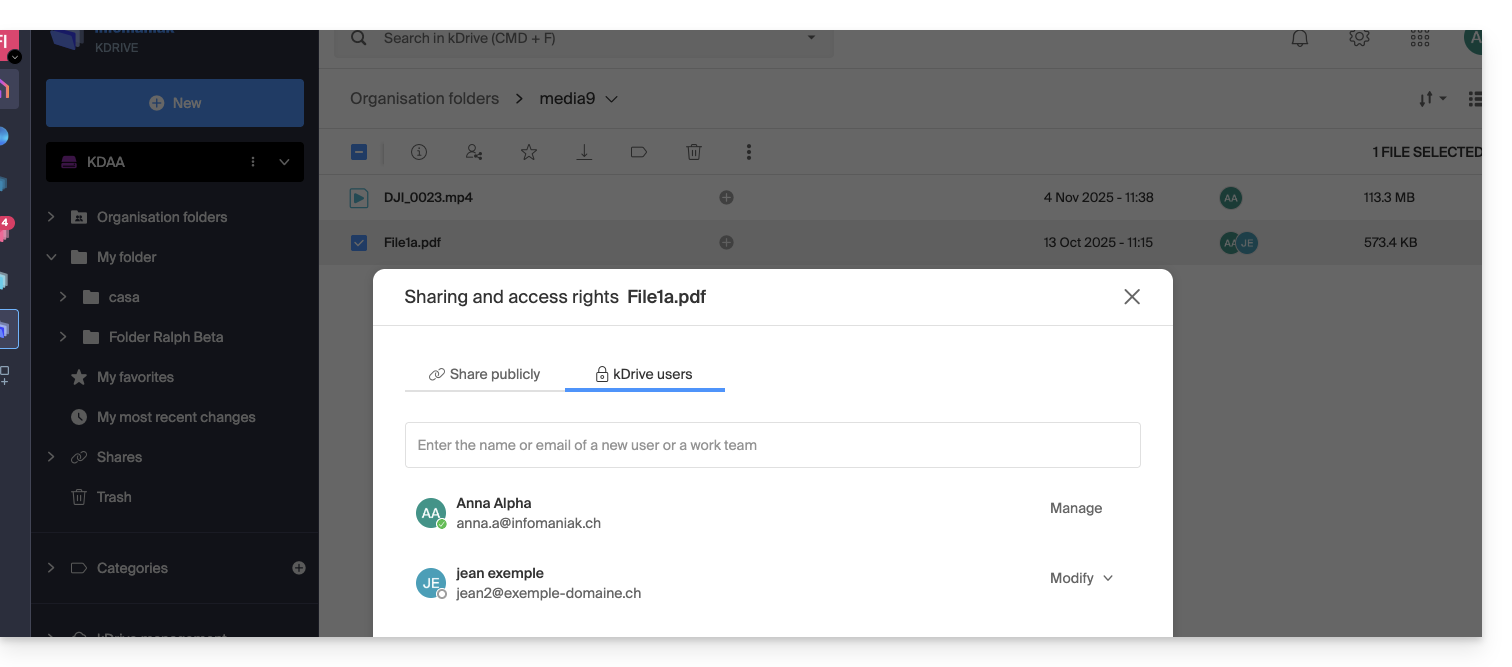
- Then, share it again, but with more restricted permissions, from the folder in question:
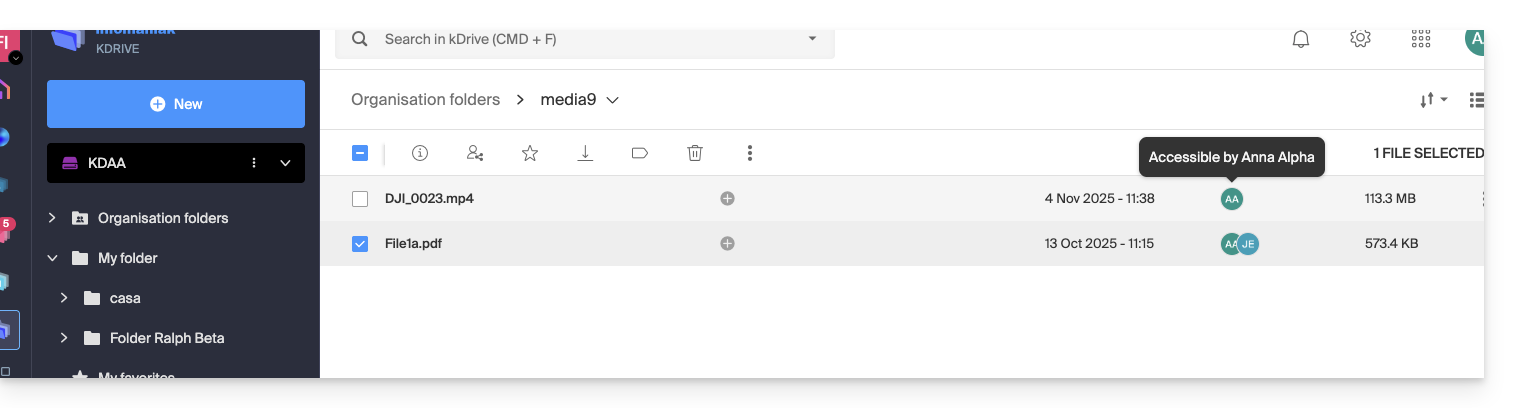
- Check the access column in the kDrive tree:
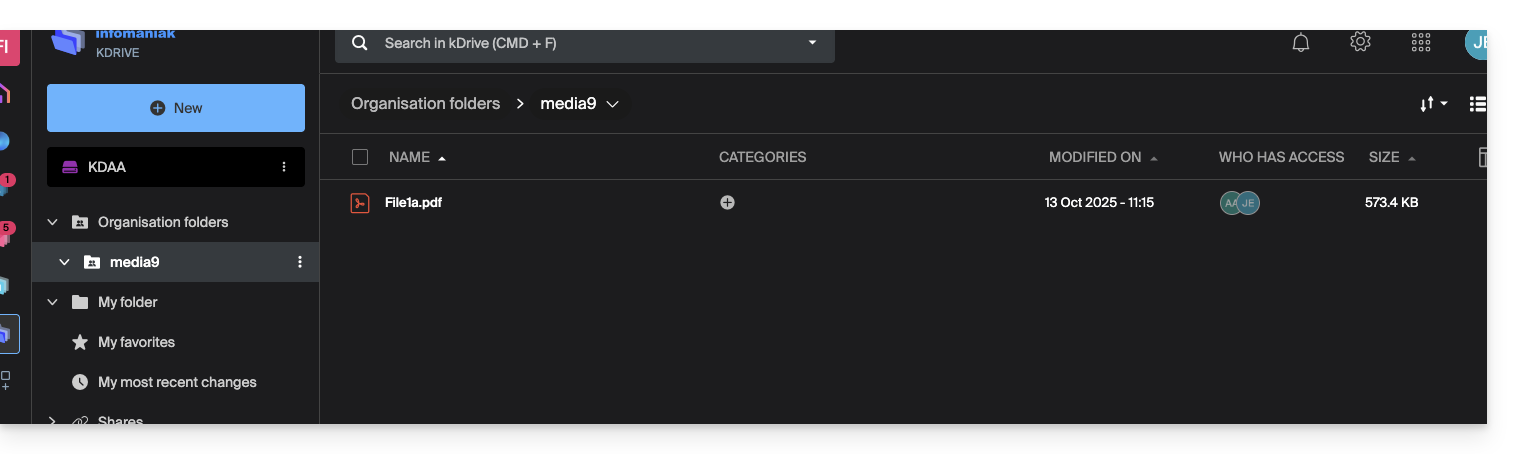
- As a result, the user only sees a portion of the folder, even though it is a shared folder:
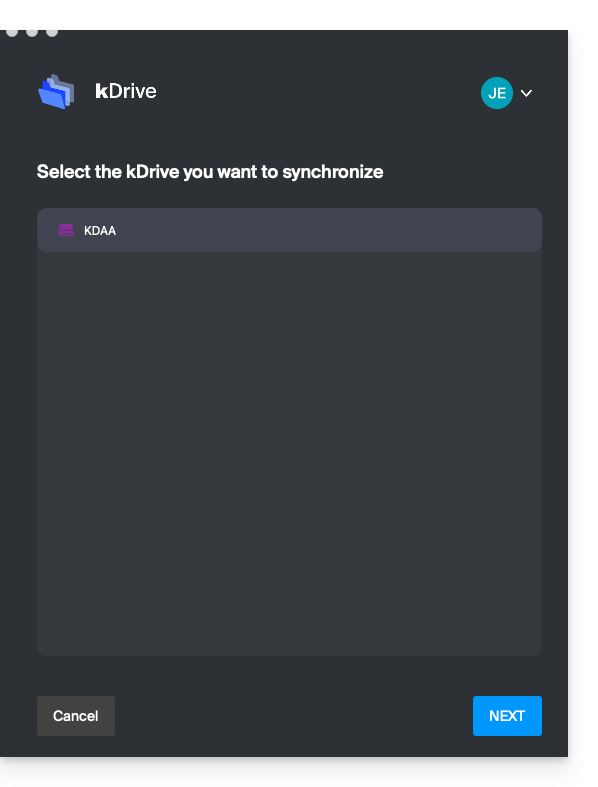
- This time, if the user installs the kDrive app, they can choose the specific kDrive:
and access the files on the computer: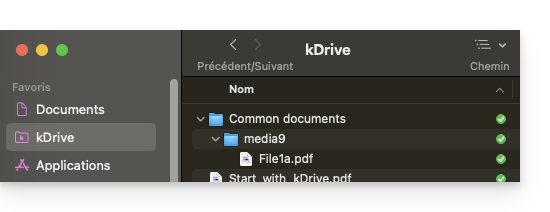
Link to this FAQ: https://faq.infomaniak.com/1793
Has this FAQ been helpful?