Knowledge base
1000 FAQs, 500 tutorials and instructional videos. Here, there are only solutions!
Schedule an out-of-office message (auto-reply)
This guide explains how to activate an auto-reply (automatic "out of office" email message) for an email address managed with Infomaniak. This way, you can inform your contacts that you are unable to respond to them immediately because you are away, on vacation, etc.
Introduction
- The automatic reply for when you are away can be activated from the Infomaniak Mail web app (online service ksuite.infomaniak.com/mail) and from the Manager, where all the addresses of a Mail Service are managed.
- You can activate or deactivate an already saved message, but there can only be one active auto-reply on the same email address: activating one message deactivates any other, if applicable.
Enable the auto-reply from the Infomaniak Web Mail app
Prerequisites
- Having permission to manage the voicemail: if you were invited to the Infomaniak Mail web app (online service ksuite.infomaniak.com/mail) to manage your address, it is possible that the Mail Service administrator has remove this permission from their admin account (❓: help).
To enable the out-of-office message:
- Click here to access the Infomaniak Mail web app (online service ksuite.infomaniak.com/mail).
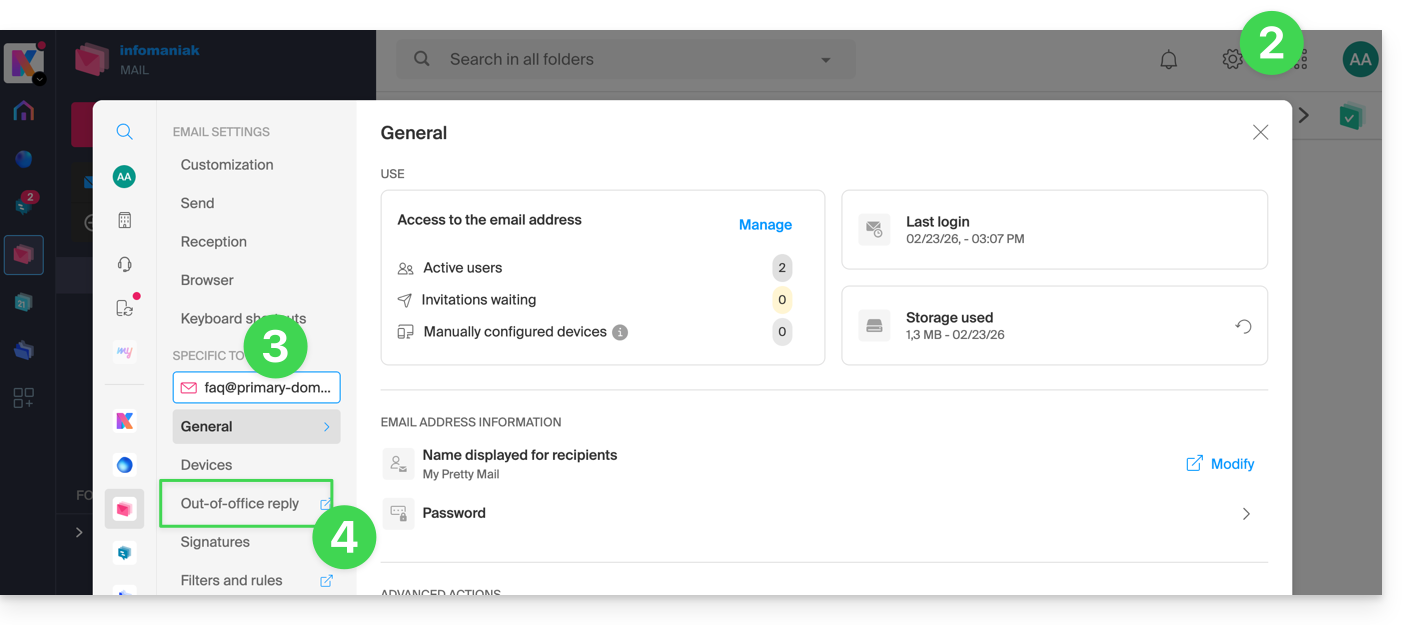
- Click on the Settings icon in the top right corner.
- Check or select the relevant email address from the dropdown menu in the left-hand sidebar.
- Click on Voicemail:
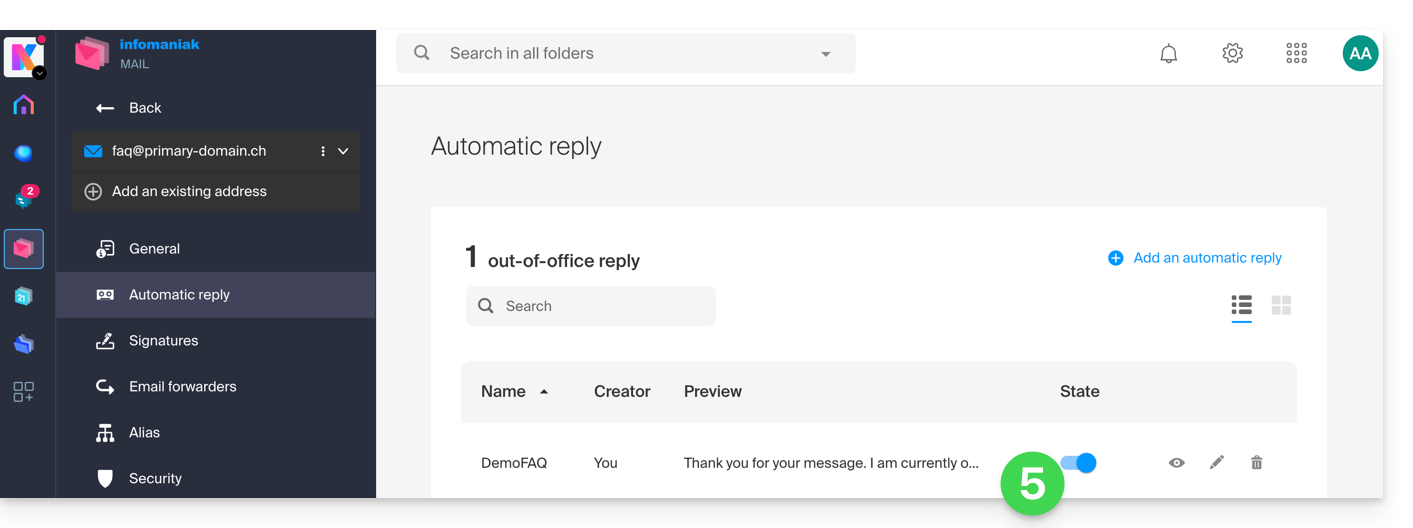
- Enable the auto-reply message if needed, or read more below:
Enable the auto-reply from the Infomaniak Manager
To enable the out-of-office message from the Manager:
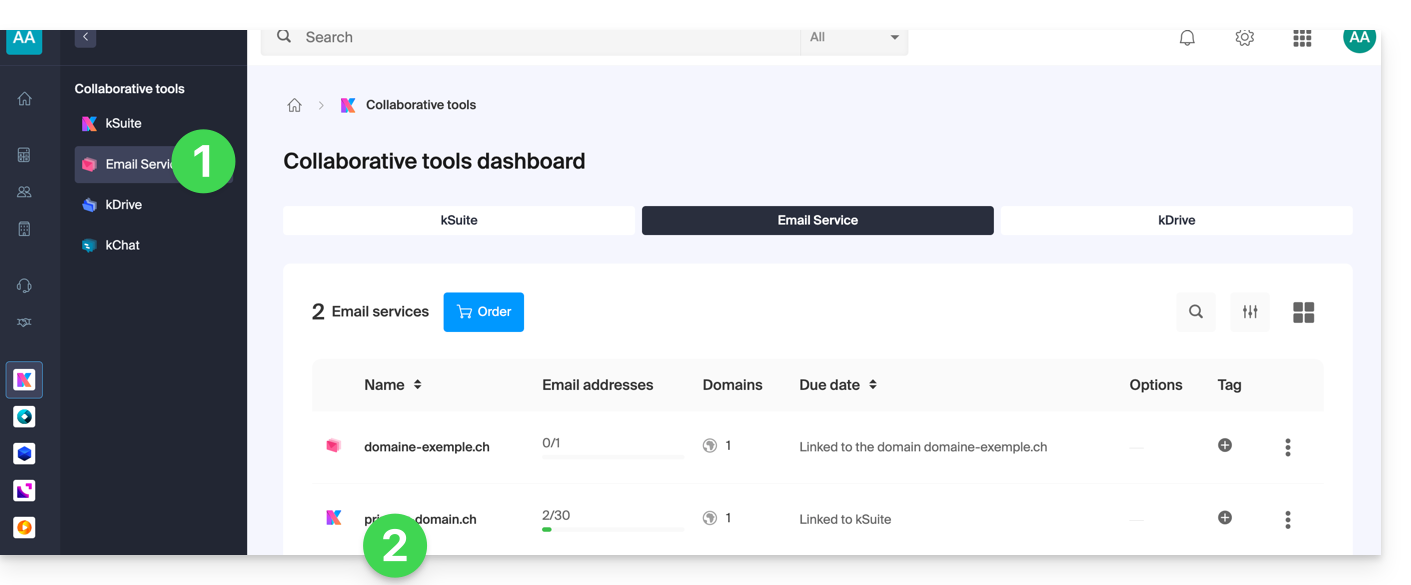
- Click here to access your product management interface in the Infomaniak Manager (❓: help).
- Click directly on the name assigned to the product in question:
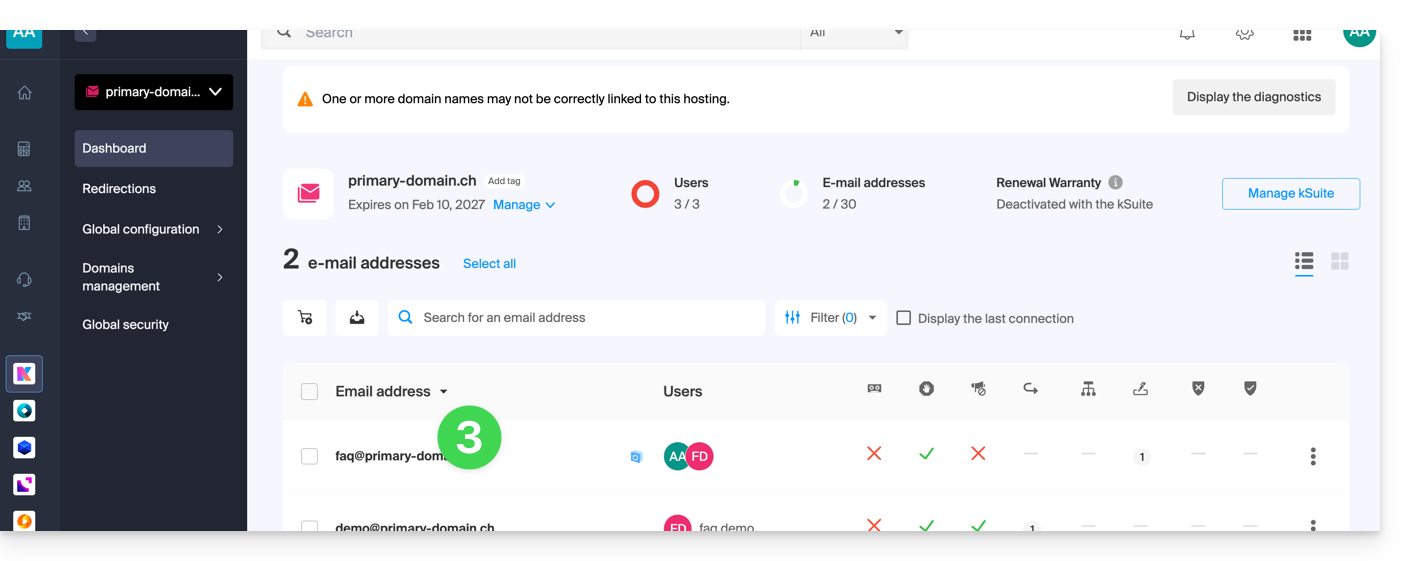
- Click on the email address in question in the table that appears:
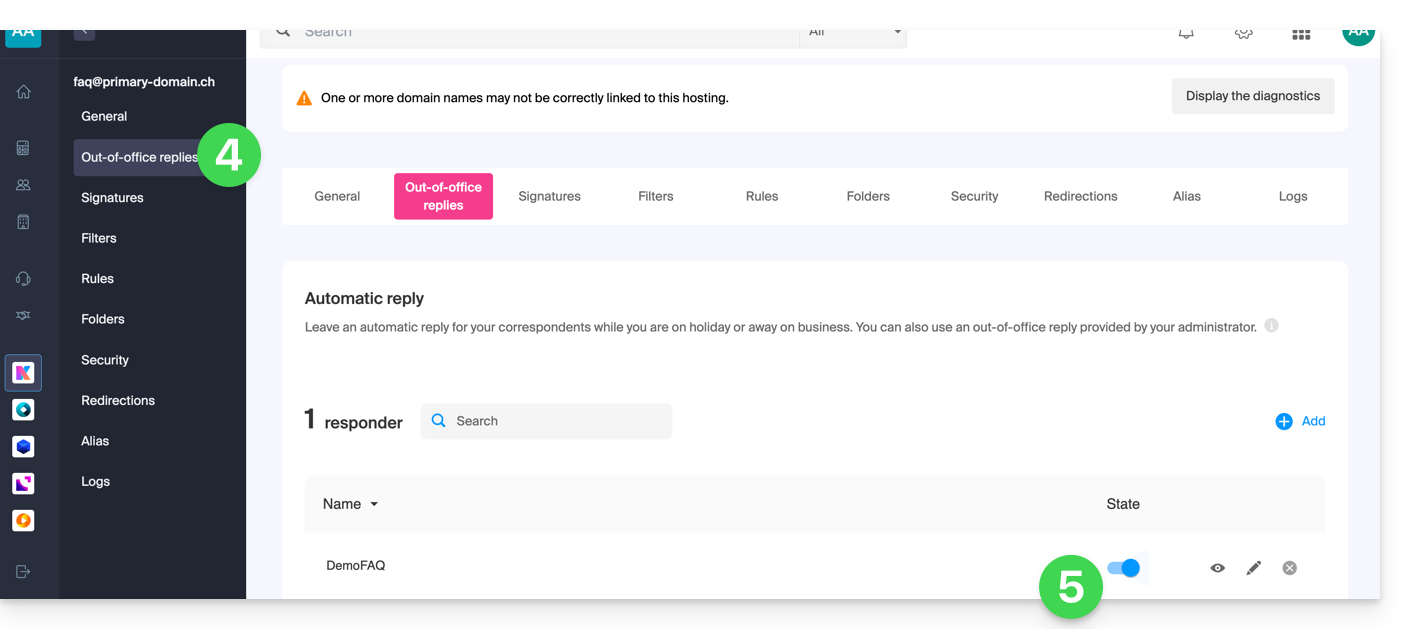
- Click on the Voicemail menu in the left-hand menu.
- Enable the automatic message if applicable, or read more below:
Compose your out-of-office message
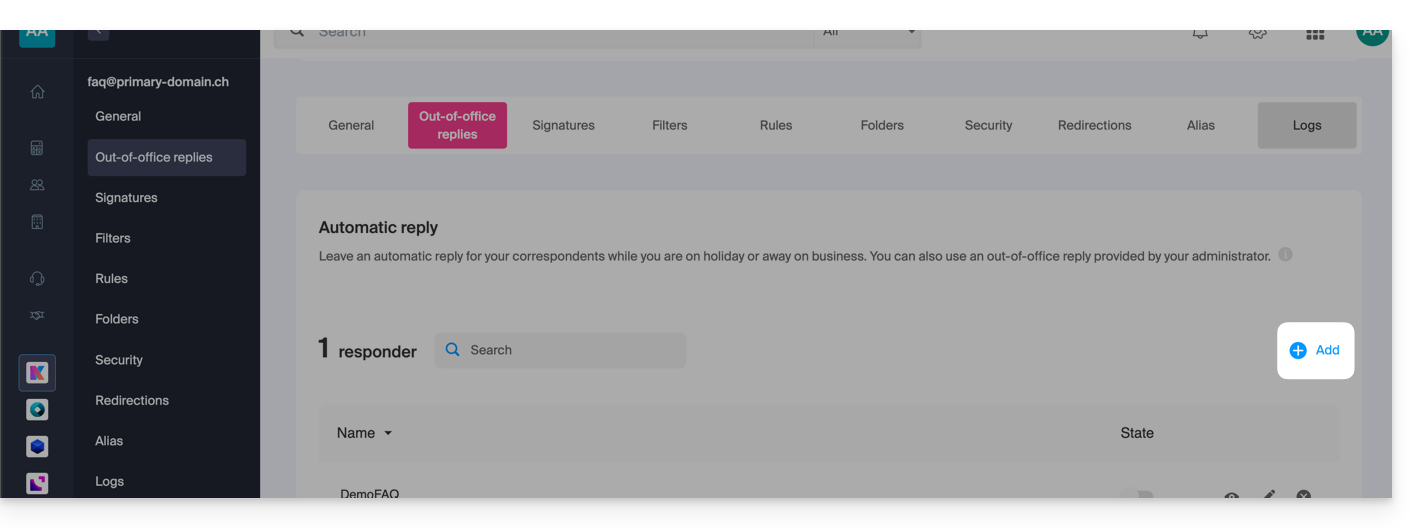
To manage the message that will be automatically sent in response:
- Click on Add:
Then: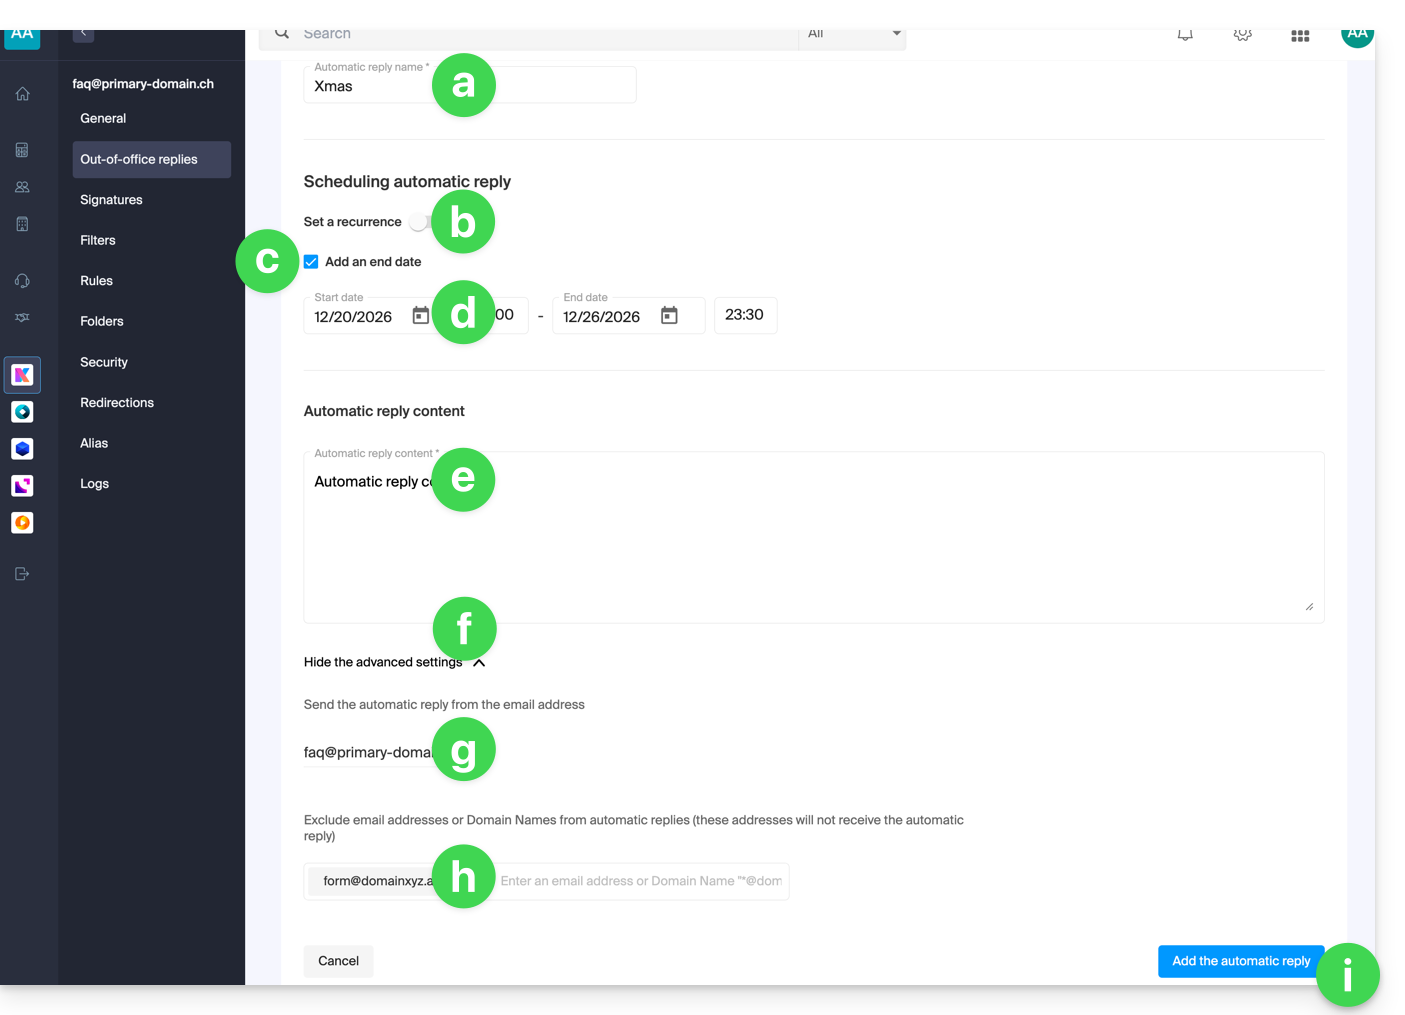
- Enter a name for your auto-reply (to distinguish it from other messages if you create several).
- Define whether the automatic reply should be sent repeatedly on specific days of the week.
- Define an end date/time if the message should no longer be sent after a certain period.
- Define a start date/time if the message is scheduled in advance for a specific period in the future.
- Write your out-of-office message.
- Display the advanced settings.
- Define another email address that will be used to send your automatic out-of-office message; only the following types of addresses will appear:
- Enter specific email addresses (or
@domain.xyzfor an entire domain) to prevent them from receiving this out-of-office message. - Click the blue button at the bottom right to Add the message.
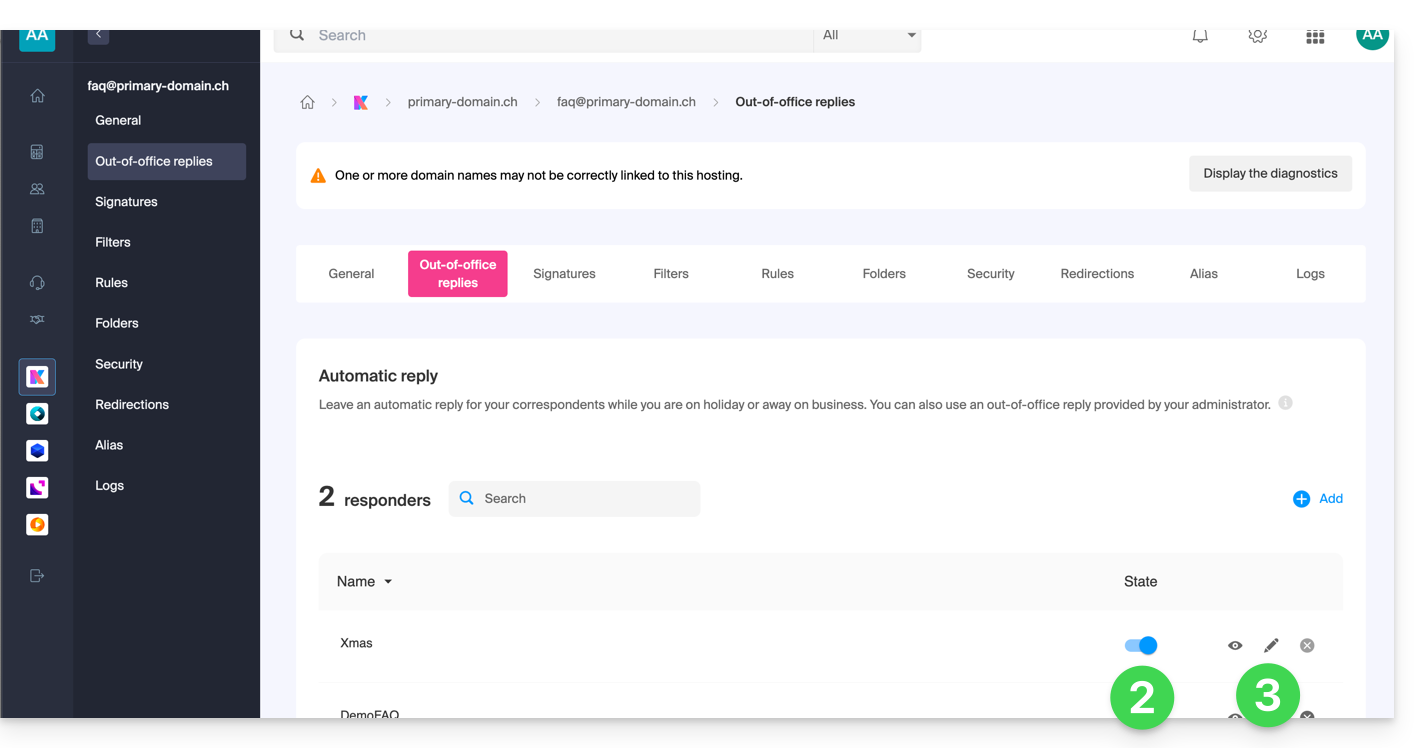
- Once added, you can enable or disable it.
- You can also edit a message that has already been saved using the pencil ✎ icon on the right:
How often is the auto-reply sent?
Your auto-reply is sent only once to people who send you messages.
However, if the same sender sends you a new email 7 days after the previous one, and your auto-reply is still enabled, an automatic reply will be sent to them again to remind them that you do not have access to your email.
Therefore, be aware that if you test this feature on your address, it will only work the first time. During subsequent tests, the auto-reply will no longer send the message when it detects that the message comes from an address that has already sent a message. You will therefore need to try again from a different email address.
You can reset the 7-day counter by clicking on Reset when editing your message: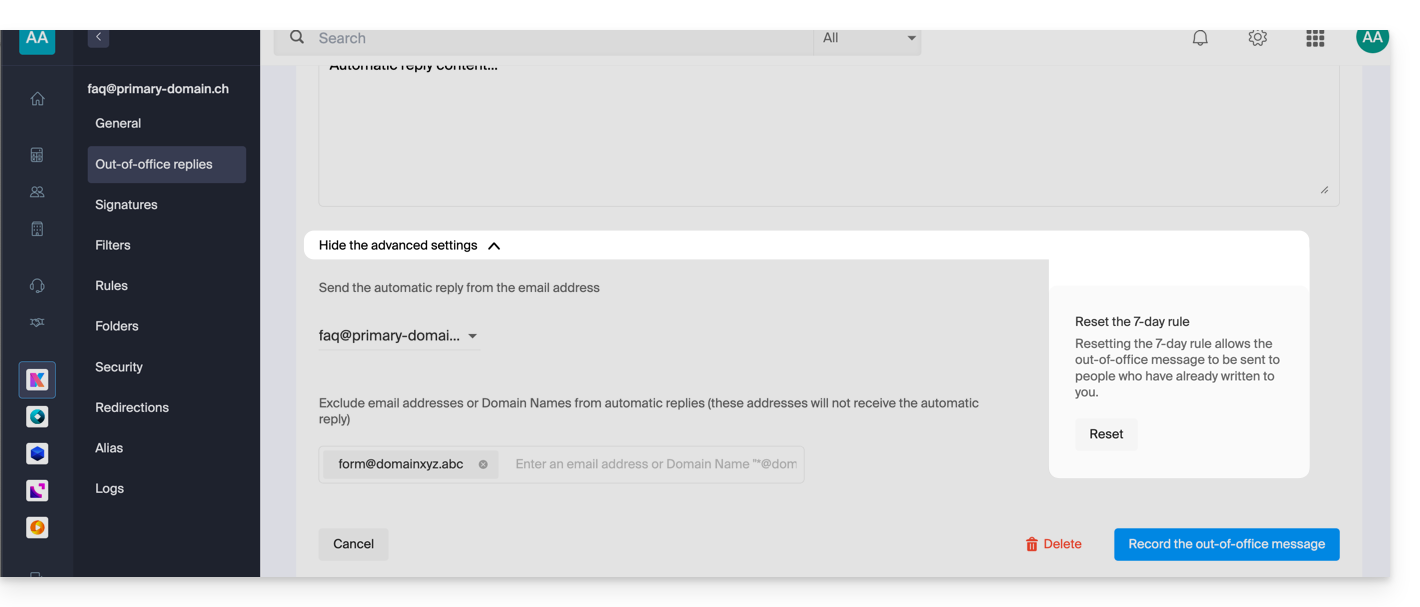
Go further with templates
Custom templates can be applied when creating a new email address on your Mail service, for example, or in bulk to all addresses in your domain (❓: help).
Link to this FAQ: https://faq.infomaniak.com/1759
Has this FAQ been helpful?