Knowledge base
1000 FAQs, 500 tutorials and instructional videos. Here, there are only solutions!
Renew a "wildcard" certificate using DNS challenge
This guide explains how to generate and automatically renew a wildcard certificate via a DNS challenge using Certbot and the dns-infomaniak plugin.
1. Installing the tools
Install certbot and its extension (❓: help). Select the Wildcard tab; this will prevent the plugin does not appear to be installed error.
2. Preparing the Infomaniak API
To automate the process, generate an API token (❓: help). Search for "dns" and be sure to check both scopes: dns:read and dns:write: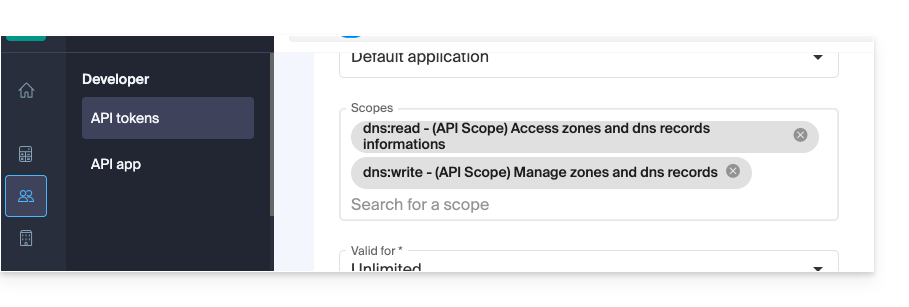
These permissions are required for Certbot to read your DNS zones and create/delete the validation TXT record.
3. Initial Manual Generation and Validation
Start the first certificate generation:
certbot certonly --manual \
-d *.example.com \
--preferred-challenges dns-01 \
--server {{URL_3}}
Next, access the Manager and create the requested TXT record (Name: _acme-challenge, Value: the one provided by Certbot) to prove that you own the domain (❓: help).
4. Automation scripts
Create the authentication script /root/infomaniak-auth.sh:
#!/bin/bash

# API Token for Infomaniak
INFOMANIAK_API_TOKEN="YOUR_API_TOKEN_HERE"

# Update DNS record via Infomaniak API plugin
/usr/bin/certbot \
  --authenticator dns-infomaniak \
  --server {{URL_6}} \
  -d "$CERTBOT_DOMAIN" \
  --agree-tos
Create the cleanup script /root/infomaniak-clean.sh:
#!/bin/bash

# Optional: Cleanup operations after challenge
exit 0
Make these two scripts executable:
chmod +x /root/infomaniak-auth.sh /root/infomaniak-clean.sh
5. Configuring automatic renewal
Edit or create the configuration file /etc/letsencrypt/renewal/example.com.conf:
cert = /etc/letsencrypt/live/example.com/cert.pem
privkey = /etc/letsencrypt/live/example.com/privkey.pem
chain = /etc/letsencrypt/live/example.com/chain.pem
fullchain = /etc/letsencrypt/live/example.com/fullchain.pem

[renewalparams]
authenticator = manual
manual_auth_hook = /root/infomaniak-auth.sh
manual_cleanup_hook = /root/infomaniak-clean.sh
server = {{URL_7}}
pref_challs = dns-01
account = YOUR_ACCOUNT_ID
key_type = rsa
6. Testing and Automation (Cron)
Check that everything is working correctly with a renewal simulation:
certbot renew --dry-runIf the test is successful, add this Cron task to automate the renewal (here, a check every 30 days):
0 0 */30 * * /usr/bin/certbot renew --quiet --config /etc/letsencrypt/renewal/example.com.confLink to this FAQ: https://faq.infomaniak.com/1708
Has this FAQ been helpful?