Knowledge base
1000 FAQs, 500 tutorials and instructional videos. Here, there are only solutions!
Add a signature to emails
This guide explains how to create and automatically add a signature to messages sent from the Infomaniak Mail web app (online service ksuite.infomaniak.com/mail).
Refer to this other guide regarding the limitations of the my kSuite offer.
Introduction
- The signature will also be visible when you send emails from the Infomaniak Mail app (iOS / Android).
- It will not be present when using another sending method (such as Outlook, for example).
- It is also not added to the messages in the auto-reply; it is necessary to add one directly in the out-of-office message.
- One or more signatures can be added from Mail and from the Manager, where all the addresses of a Mail Service are managed; choose which signature to use when sending an email.
Access signatures from the Infomaniak Web Mail app
Prerequisites
- You must have permission to manage signatures: if you were invited tothe Infomaniak Mail web app (online service ksuite.infomaniak.com/mail) to manage your address, the Mail Service administrator may have removed this permission from their admin account
- Click here to access the Infomaniak Mail web app (online service ksuite.infomaniak.com/mail).
- Click on the Settings icon in the top right corner of the interface.
- Check or select the relevant email address from the dropdown menu in the left-hand sidebar.
- Click on Signatures:
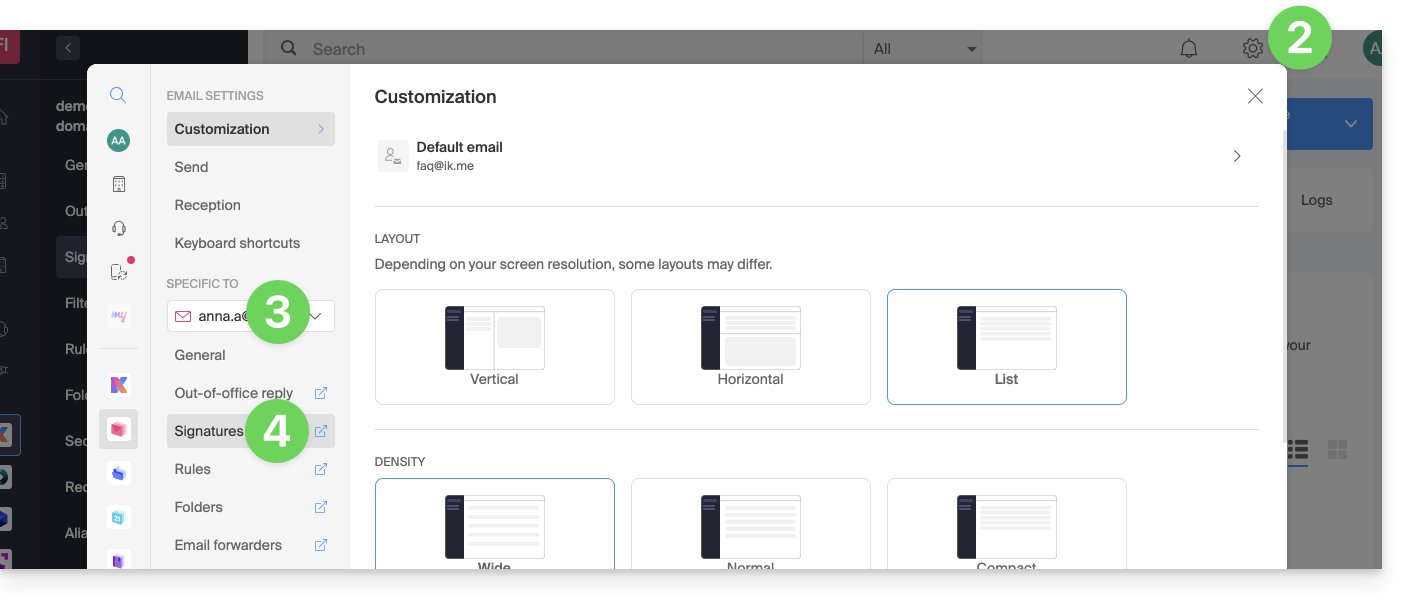
Accessing signatures from Mail Service
To access Mail Service and manage signatures:
- Click here to access the management of your product in the Infomaniak Manager (❓: help).
- Click directly on the name assigned to the product in question.
- Click on the relevant email address in the table that appears.
- Click on Signatures in the left-hand menu:
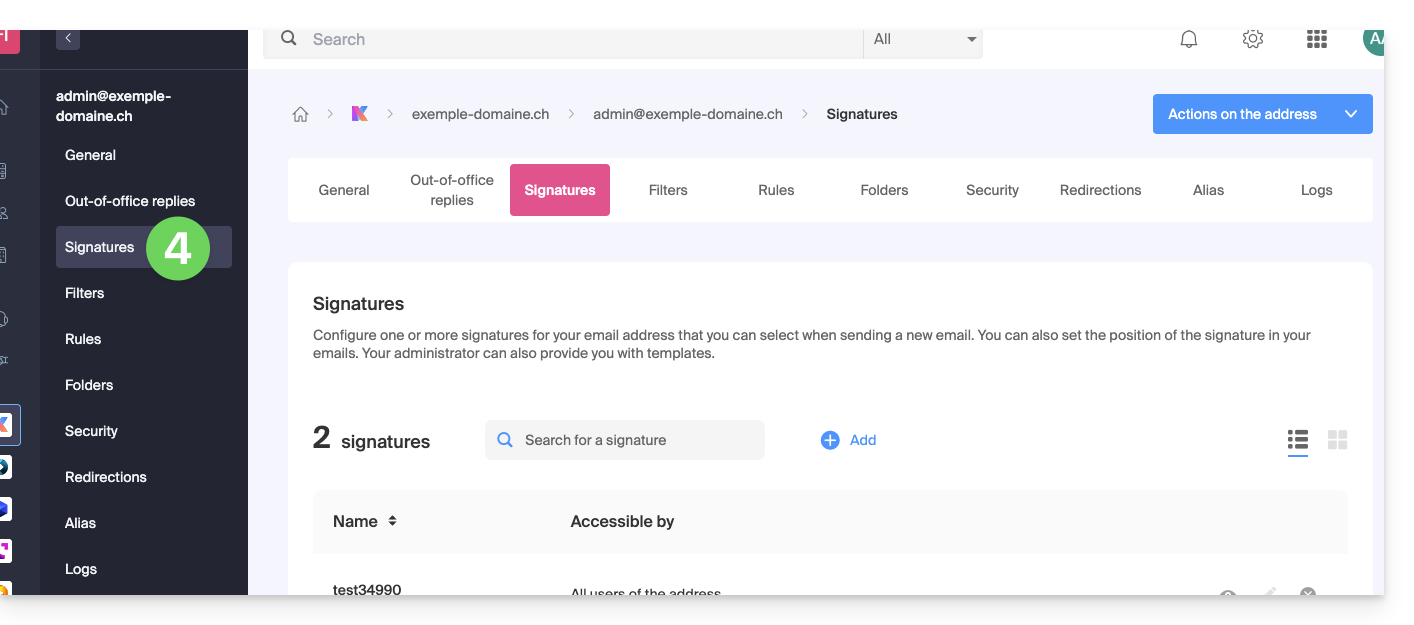
Create and edit your signature
You have two options:
- Click on Add to create a new signature.
- Click on the pencil icon ✎ next to an existing signature to edit it.
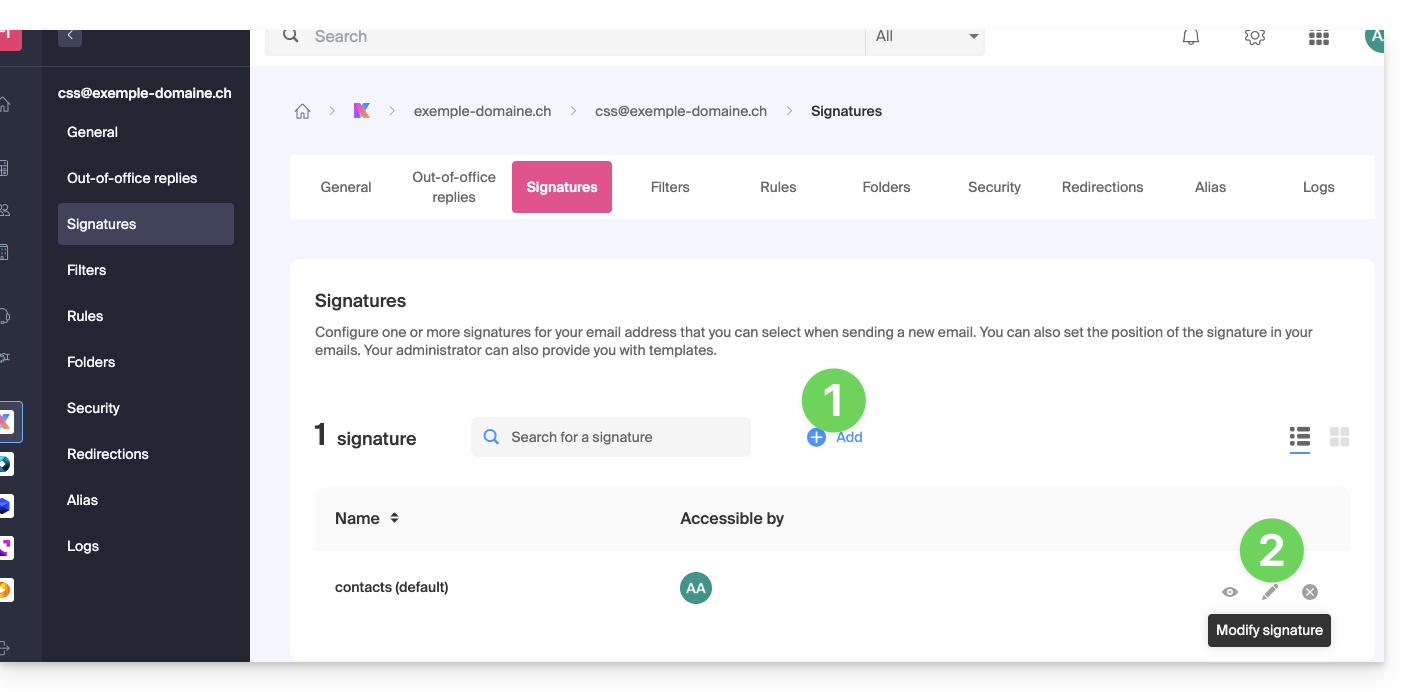
Next:
- Choose an existing template or create a new one:
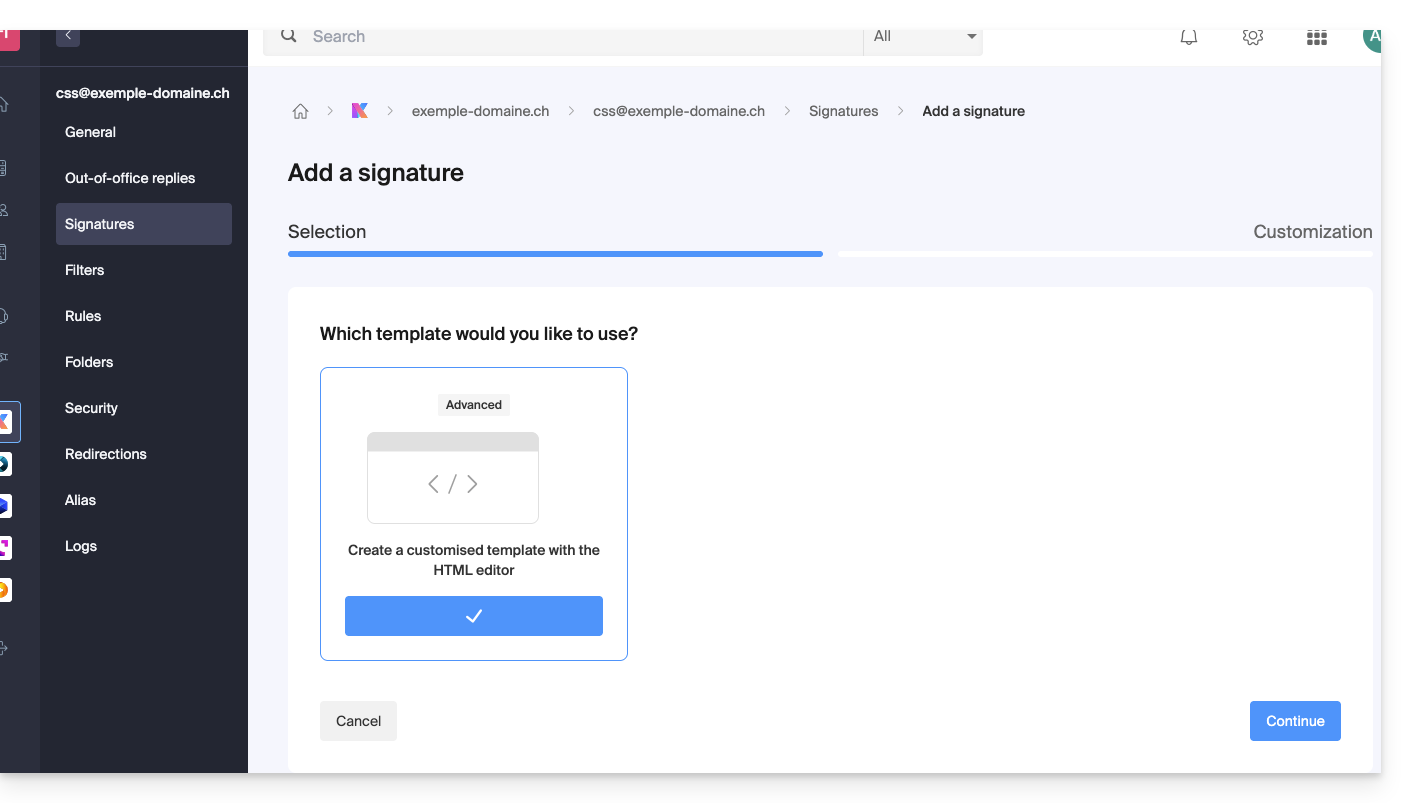
- Give your signature a name.
- Specify a name for your identity (it will be displayed next to your email address in messages received by your contacts).
- Create the signature content in the designated area (see below for formatting options).
- Choose whether or not to share the signature with all users of the Mail address.
- Click on Advanced Settings to choose where to insert your signature: before the message (i.e., at the top of the page) or after the message (i.e., as a signature).
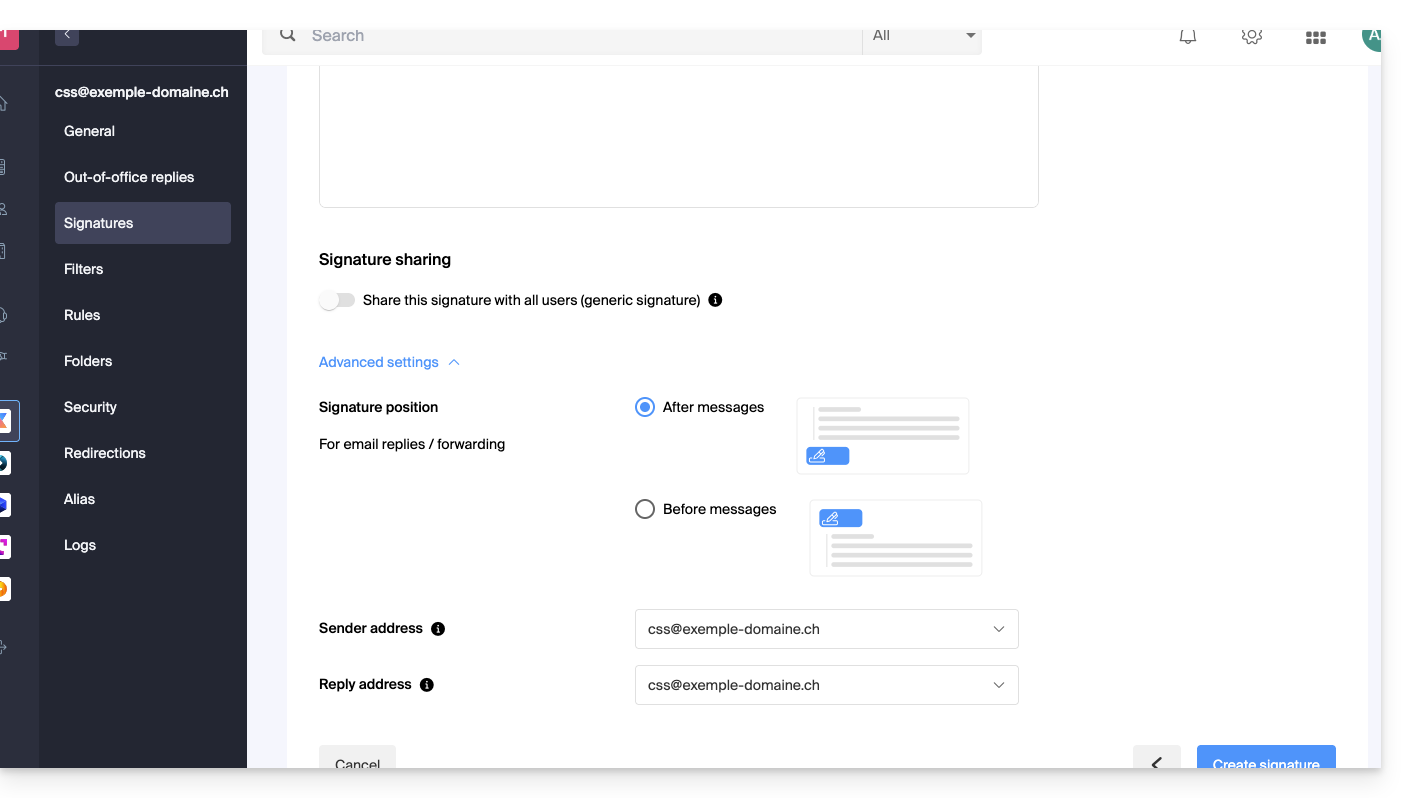
- Refer to this other guide regarding the selection of sending/reply addresses.
- Click on the Create signature button.
Signature formatting
You can use an image, edit the HTML source code, and format your text using a set of tools.
To avoid excessive line breaks, use the Shift key in conjunction with the Enter key on your keyboard, which will have the same effect as the HTML tag <br>, causing a line break instead of a new paragraph.
Define a default signature
To choose the signature used by default under certain conditions:
- Click here to access your signatures in the Infomaniak Mail web app.
- Check or select the relevant email address in the dropdown menu on the left-hand sidebar.
- Choose the signature that will be inserted by default when composing:
- a new message
- a reply / forward
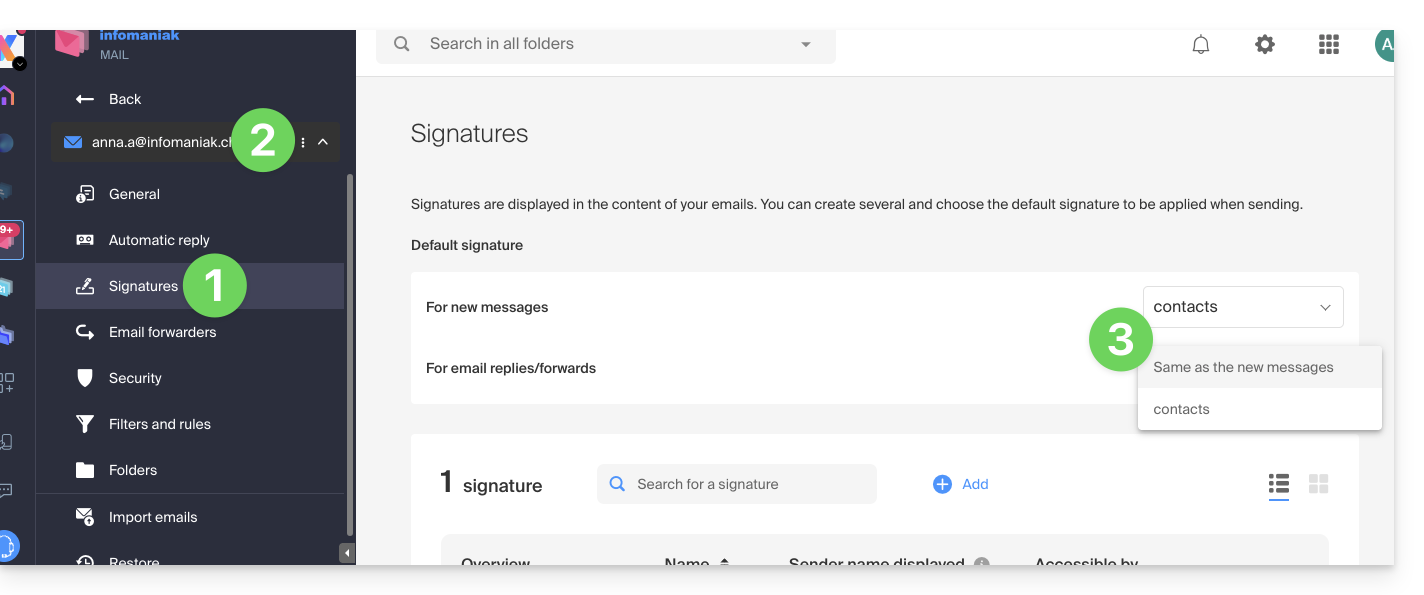
By defining a default signature, it will be automatically displayed in the body of the email when composing. You will still have the option to change the signature.
There is one case where the default signature will not be the one automatically inserted by default when composing a message: please refer to point 10 of this other guide.
Select or remove the signature while composing
When you start writing a new message:
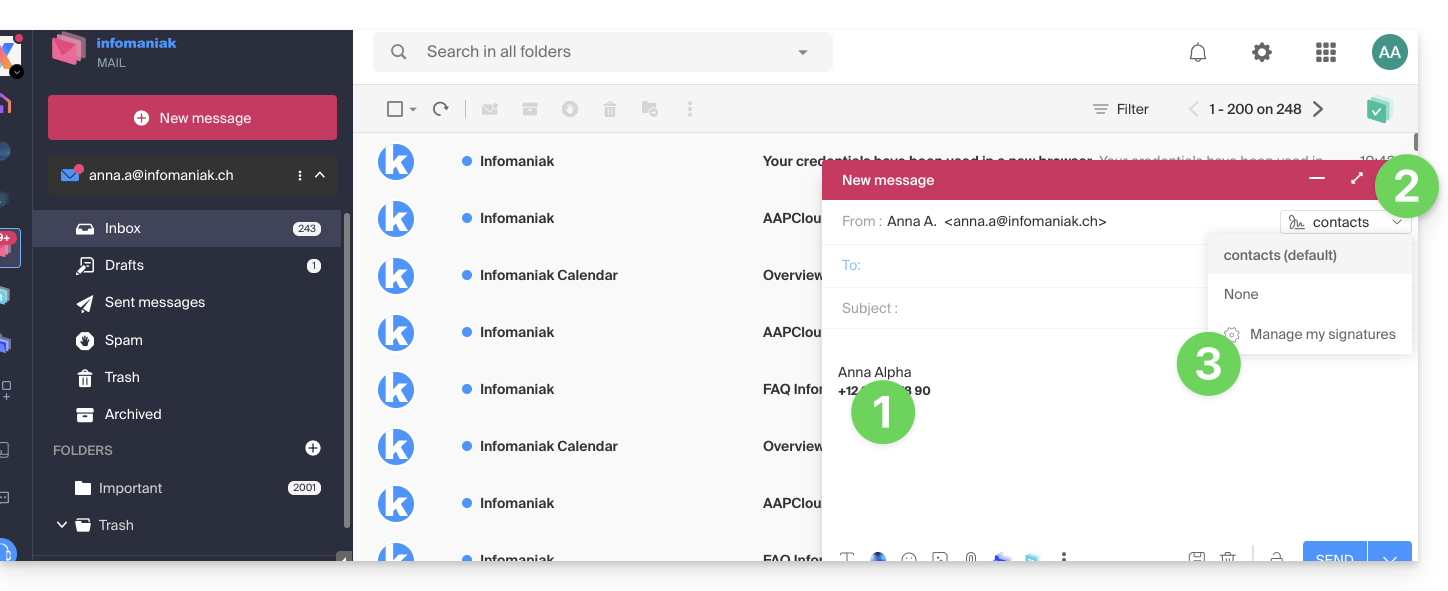
- The signature is inserted automatically.
- If multiple signatures exist, you can choose a different identity via the drop-down menu.
- You can also quickly access the signature settings via the button in the toolbar:
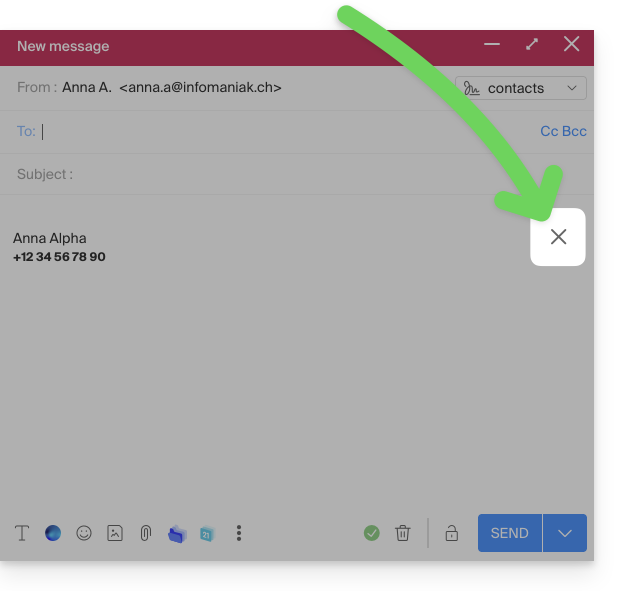
- You can remove the signature by hovering over it and clicking on the cross:
Associated addresses (multiple possible)
When a signature is based on a template (whether it was created from a template provided by Infomaniak or generated with the advanced editor):
- users do not have access to the signature content during editing,
- they can enter dynamic values such as the sender's name or personal data that may be requested, such as occupation or phone number,
- they can also modify the advanced settings of the signature (such as its position in a reply/forward), but to date, this setting is common to all users of the signature (1)
When a signature is created directly without using a template:
- if the signature is created from a predefined template:
- the behavior is the same as in the previous point, meaning a signature created from a template
- if the signature was created via the advanced editor:
- users have access to the signature content in edit mode, but be aware that this content is shared; if Morgane modifies the content, Vanessa will have the same content once she reloads her Infomaniak Mail interface,
- only the sender's name is specific to the user, and there are no dynamic values in this case,
- the advanced settings follow the same principle as in other cases: they are common to all users
In all cases, assigning a default signature to a mailbox is done at the user level. For example, within the same mailbox, the signature chosen by default by Morgane is independent of the one chosen by Vanessa.
Go further with templates
Refer to this other guide if you want to learn how to define custom templates that can be applied when creating a new email address on your Mail service, for example, or in bulk to all addresses in your domain.
Delete a signature
Users of the email address on the Mail web app receive an email each time a signature is deleted.
Link to this FAQ: https://faq.infomaniak.com/1700
Has this FAQ been helpful?