Knowledge base
1000 FAQs, 500 tutorials and instructional videos. Here, there are only solutions!
Using Infomaniak DynDNS and Home Assistant
Update 10/05/2026
This guide explains how to access your Home Assistant home automation box (which is located behind a dynamic IP address provided by your ISP) using a domain name with Infomaniak via the free DynDNS option and a free script (❓: help).
Introduction
- The integration you install acts as a messenger: it continuously monitors the IP address of your local network.
- As soon as it detects that your internet service provider has changed your IP address, it instantly sends a signal to Infomaniak.
- Infomaniak then updates your domain name (e.g.,
ha.domain.xyz) so that it points to the new IP address.
Install Infomaniak DynDNS — Home Assistant Integration
Prerequisites
- You must have a Home Assistant installation (e.g., on a Raspberry Pi 5) connected to the internet with a dynamic IP address.
- A dynamic DNS must have been created for the domain in question via the Infomaniak Manager (❓: help).
Next:
- Log in to your Home Assistant back office.
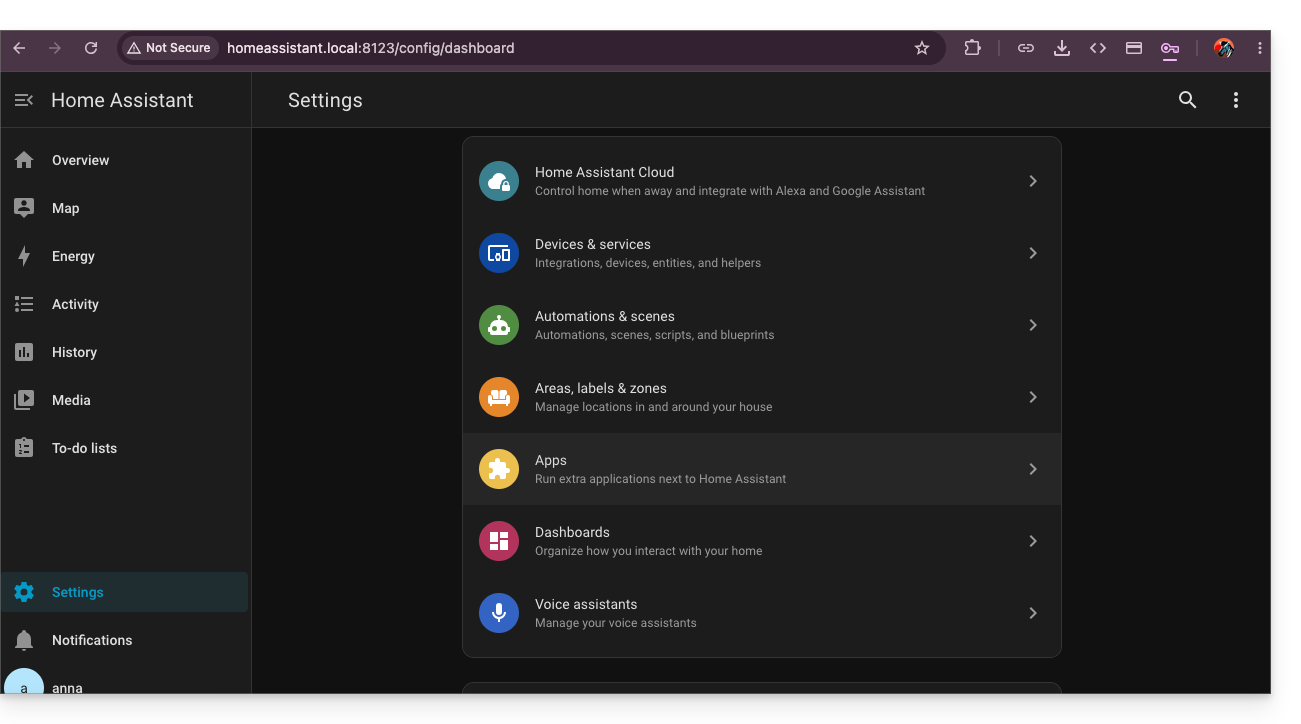
- Install HACS if you haven't already; go to the settings of Home Assistant:
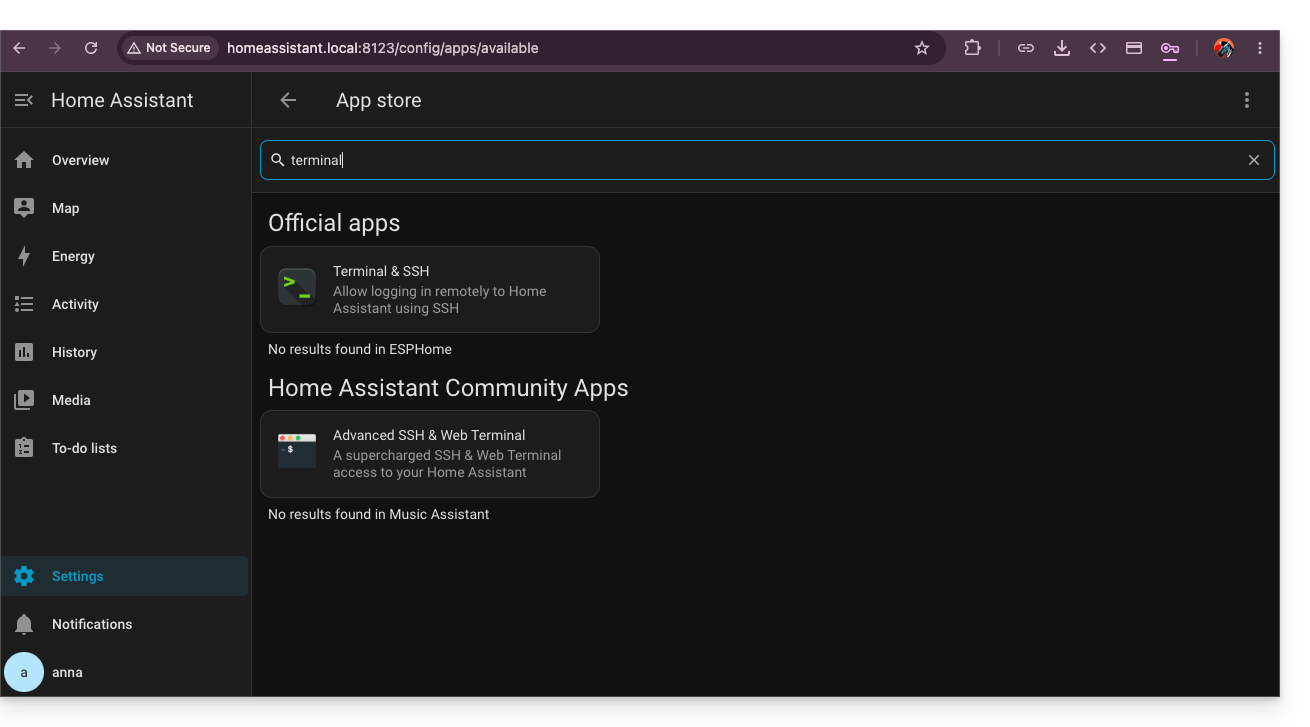
- Install the Terminal & SSH app:
- In this terminal, enter the command
wget -O - https://get.hacs.xyz | bash -: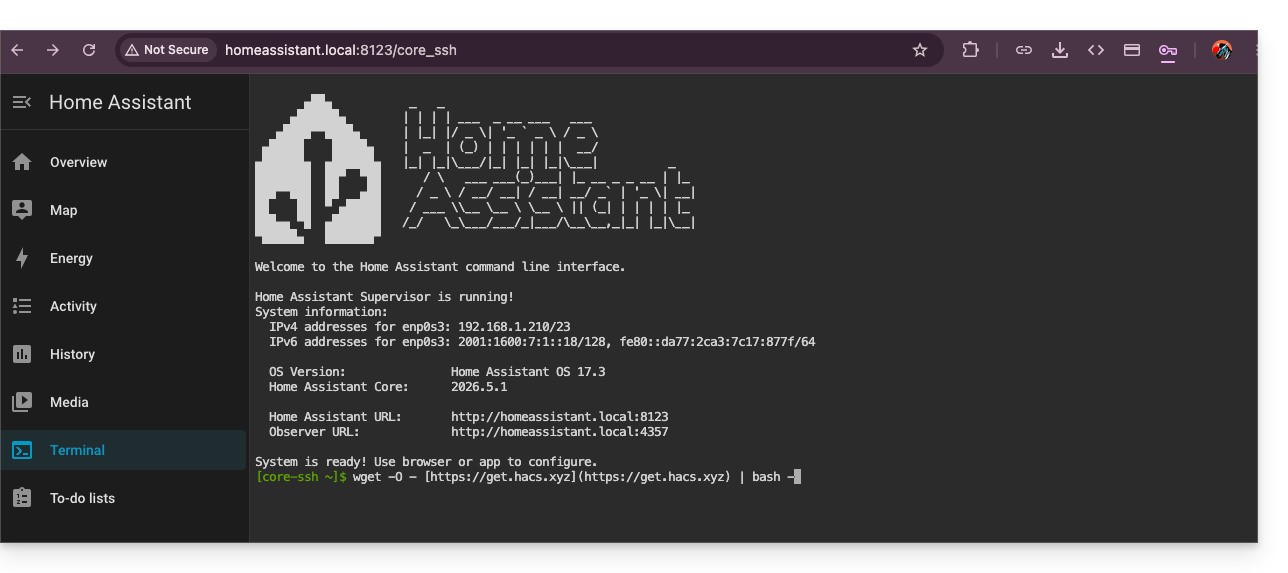
- Once HACS is installed, restart Home Assistant.
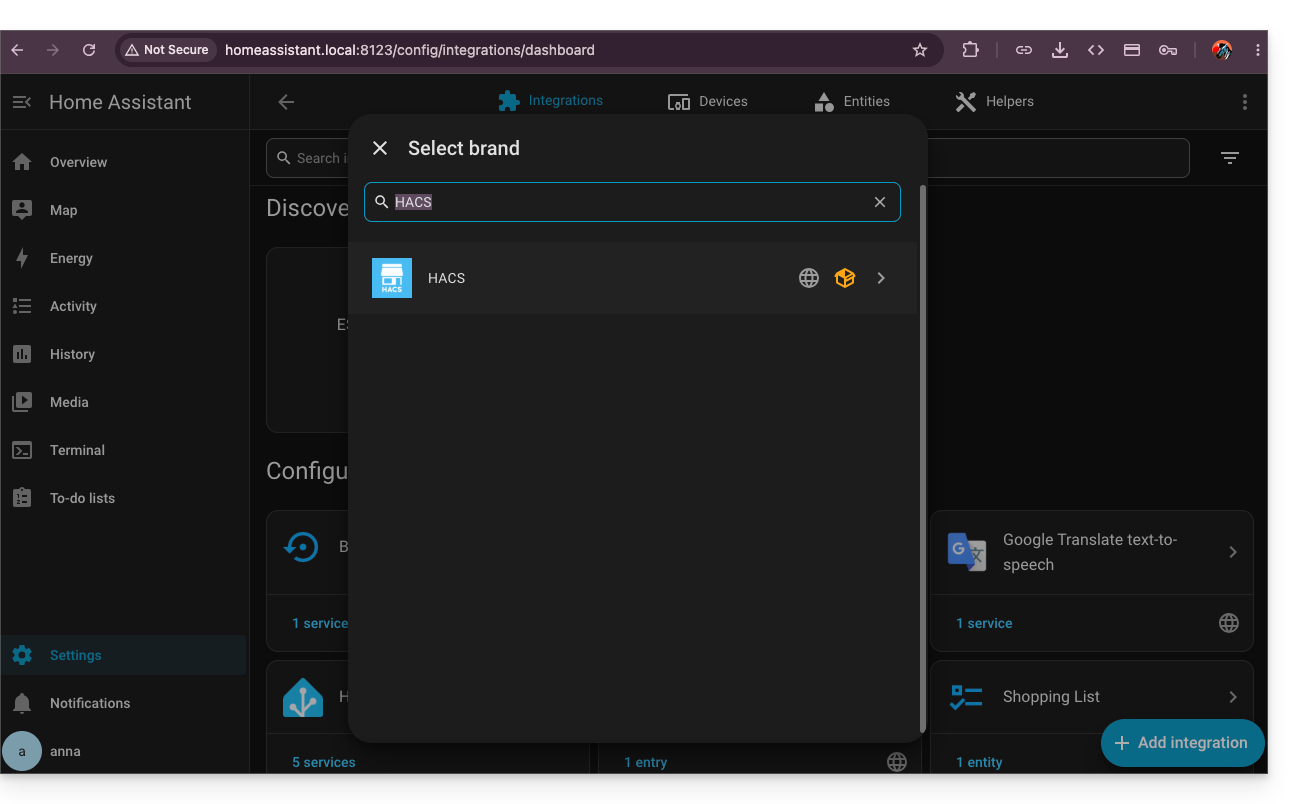
- Enable HACS by searching for it in the integrations:
- Once the validation via Github is complete, return to HACS installed in your left sidebar, then click on the action menu ⋮ in the upper right corner of the HACS interface to choose the custom repositories:
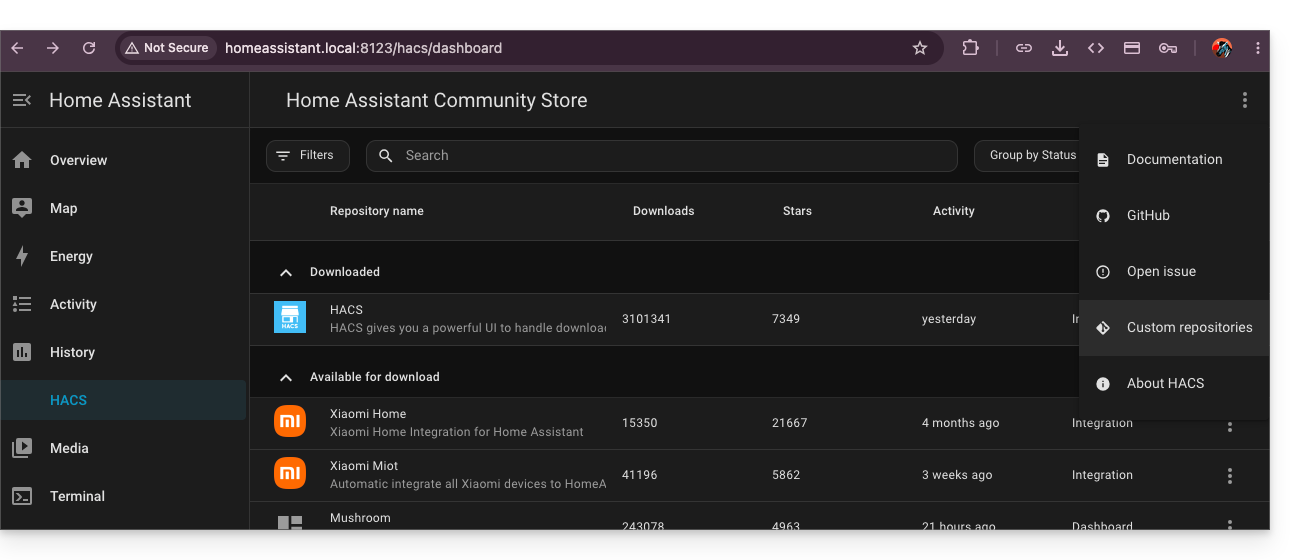
- Enter the URL
https://github.com/cy-bertrand/Infomaniak-dyndns-ha(❓: help) and choose the Integration type, before clicking on Add: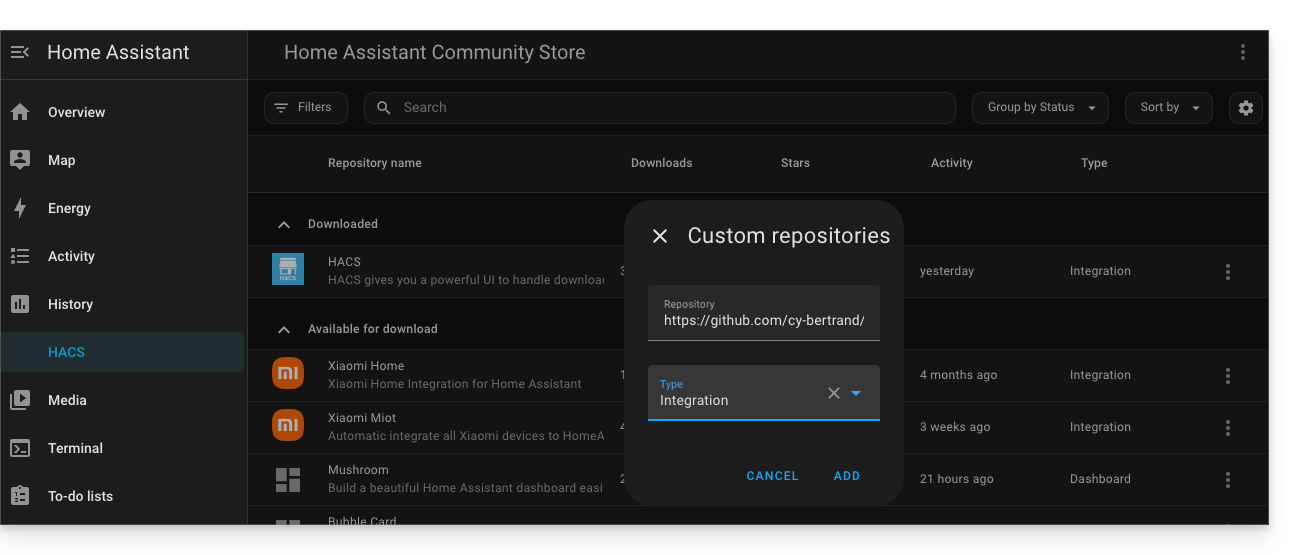
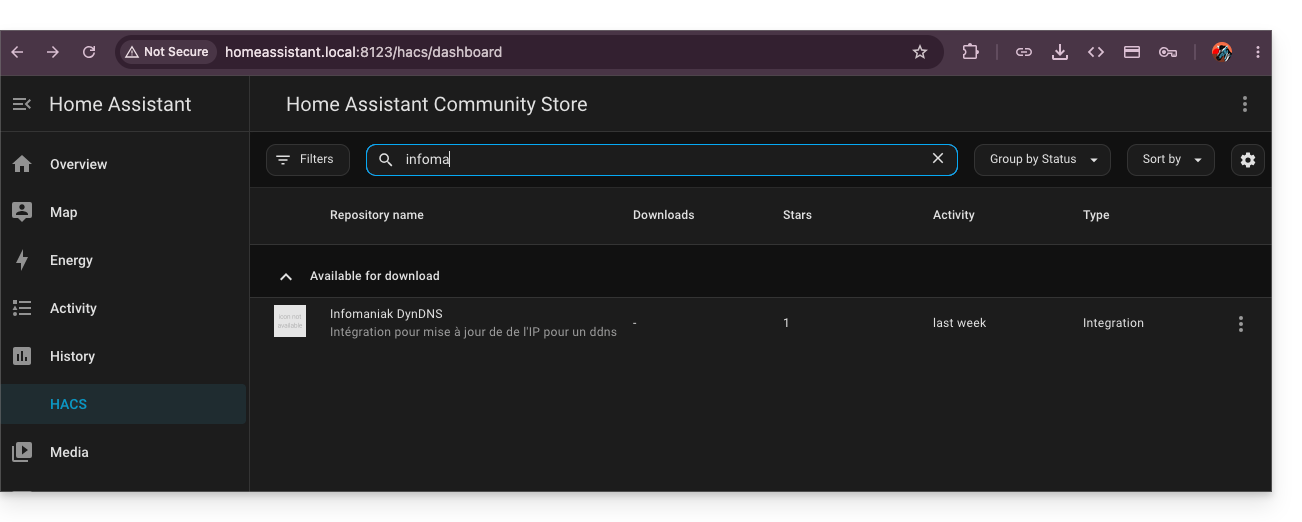
- Next, search for Infomaniak DynDNS and click on it:
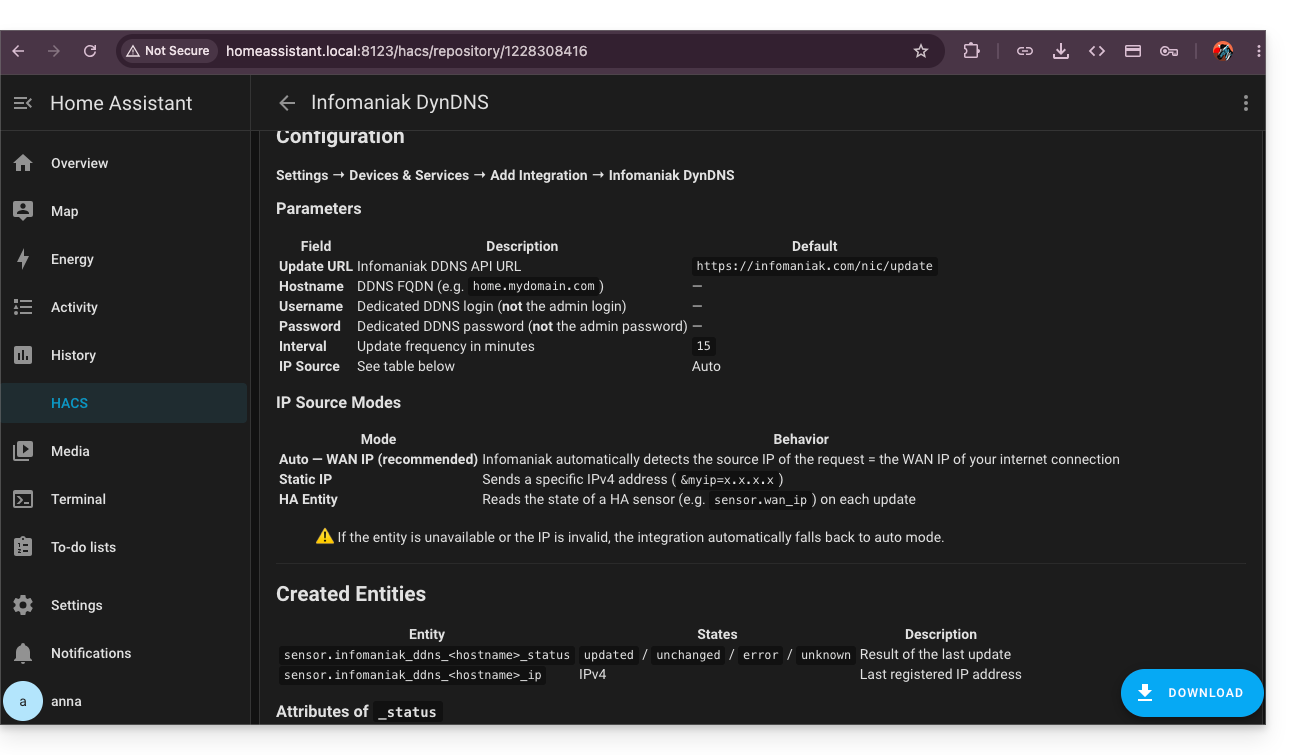
- Install this service by clicking the Download button in the bottom right corner:
- Restart Home Assistant.
Configure Infomaniak DynDNS — Home Assistant Integration
To do this:
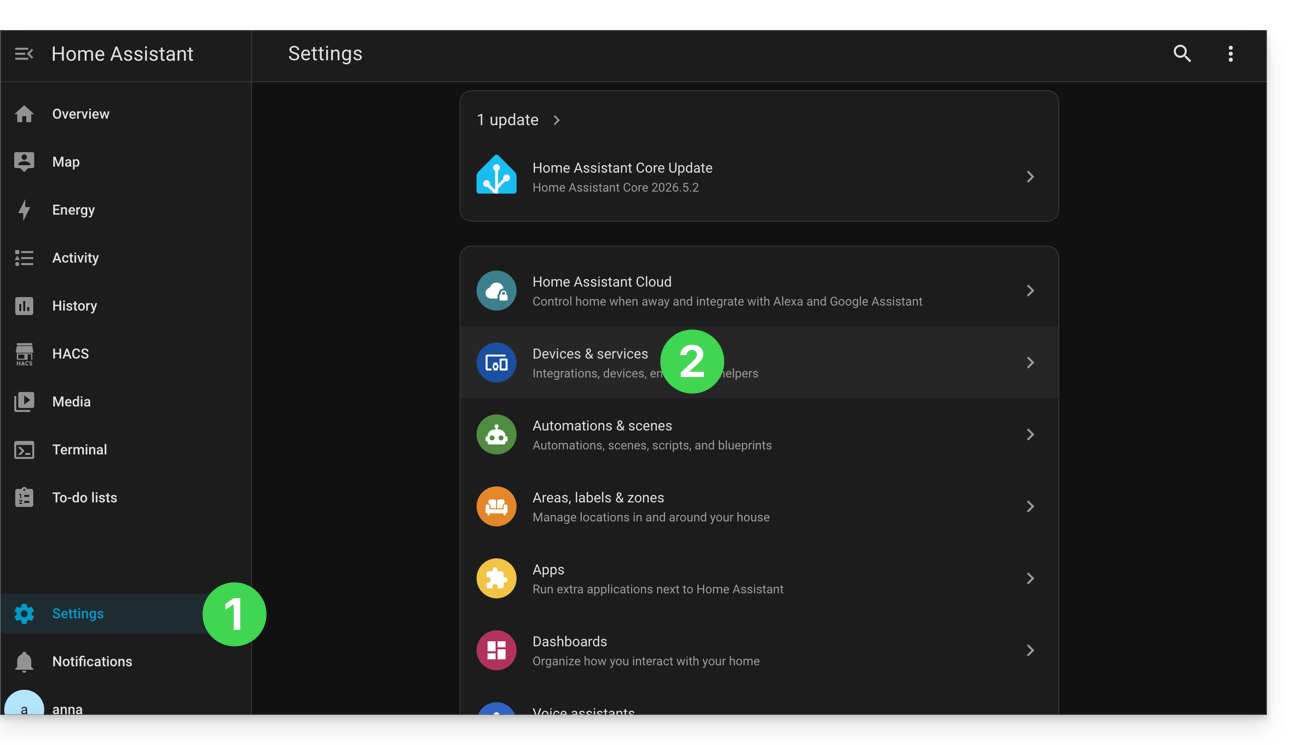
- Click on Settings in the left-hand menu of HA.
- Click on Devices & services:
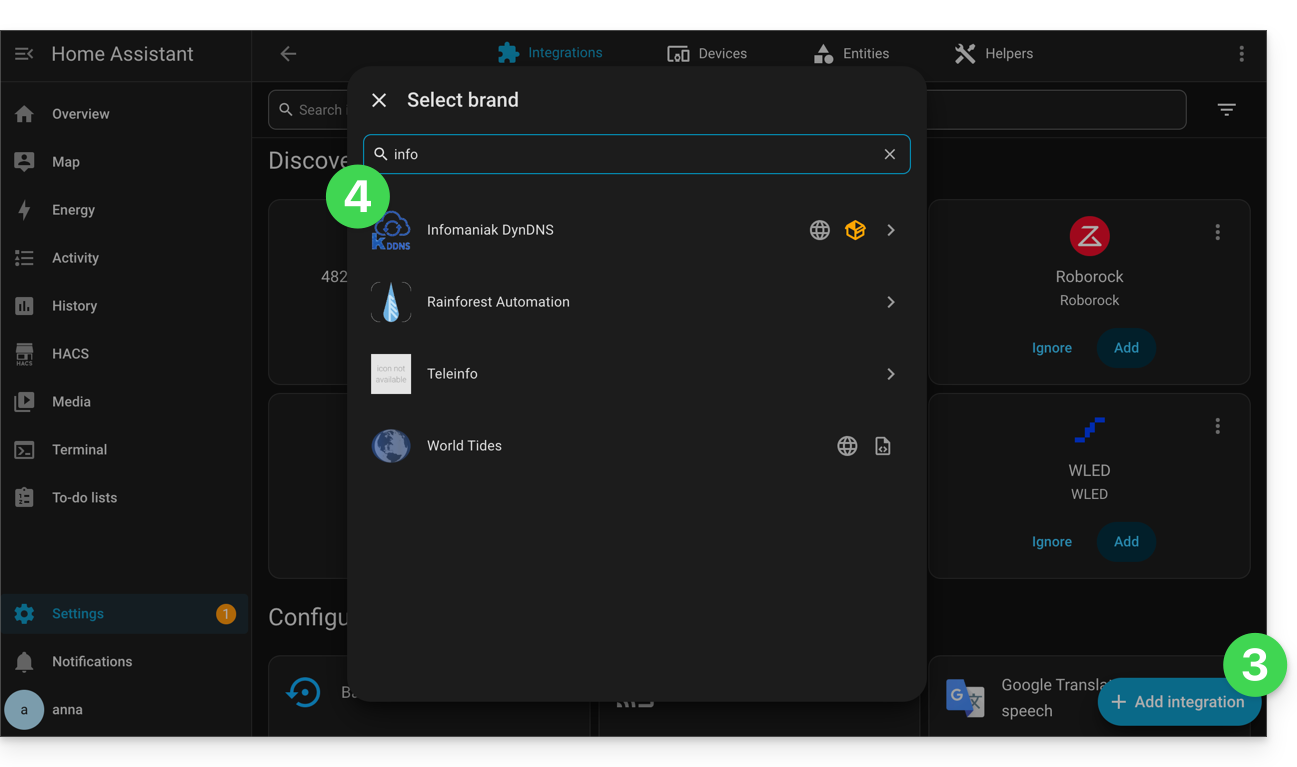
- Click on the button to Add an integration.
- Click on Infomaniak DynDNS:
- Configure your device:
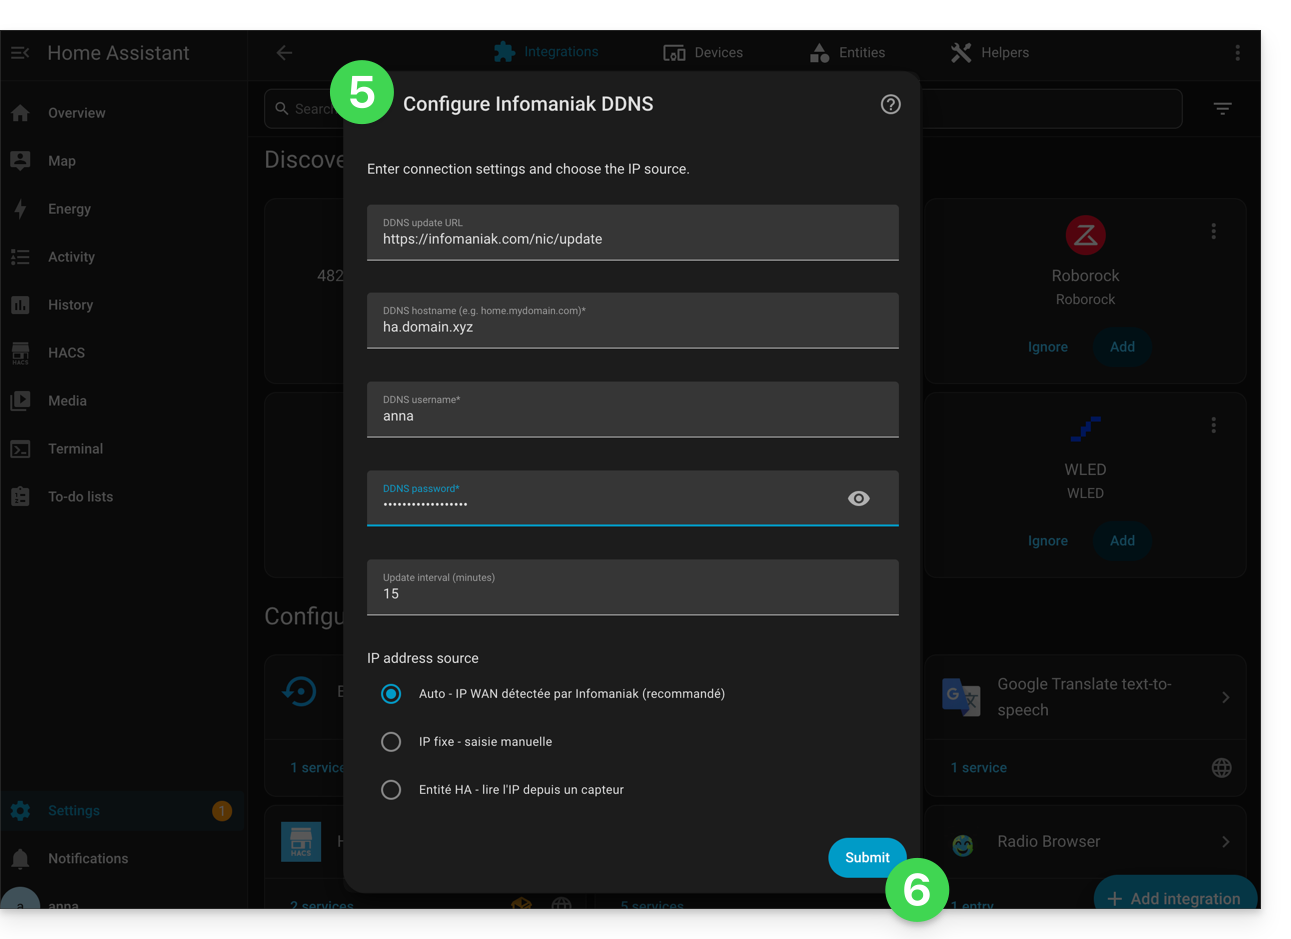
- Confirm at the bottom of the page.
- Give the entity a name and save your changes by clicking Finish:
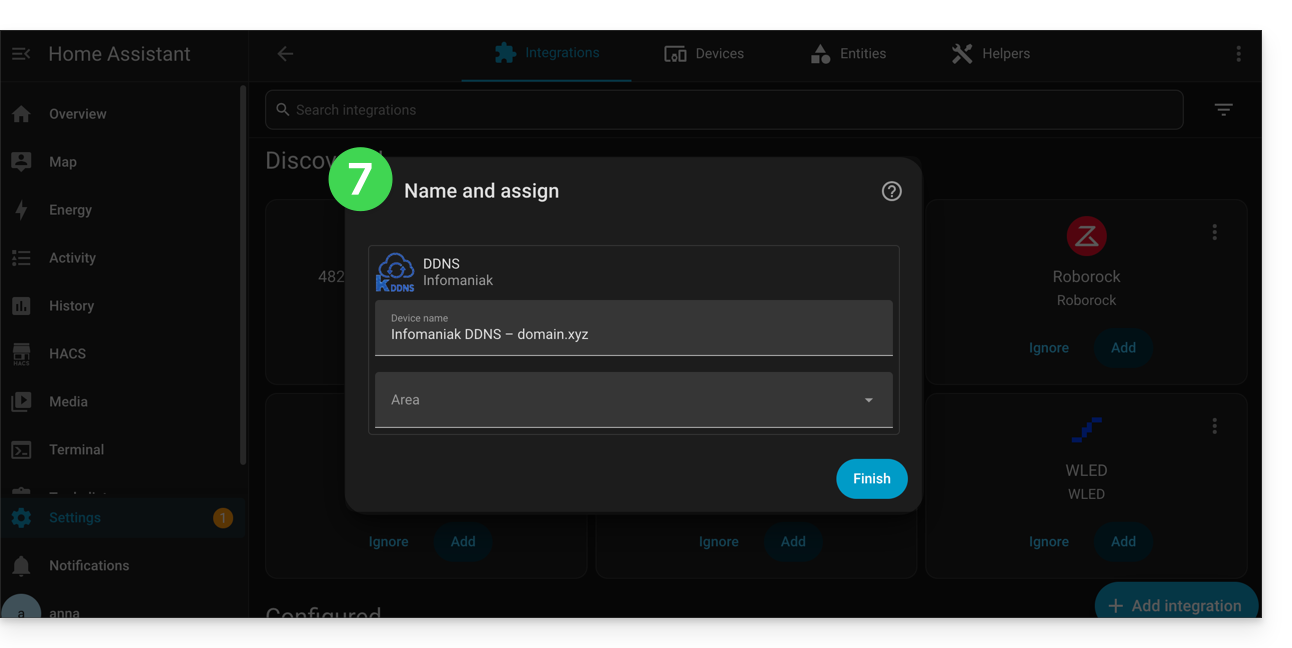
Home Assistant will check the external IP address every 15 minutes. If it has changed, the DNS will be updated. This way, your domain name will continuously point to your home automation setup, even if your Internet Service Provider changes your public IP address.
Link to this FAQ: https://faq.infomaniak.com/1665
Has this FAQ been helpful?