Knowledge base
1000 FAQs, 500 tutorials and instructional videos. Here, there are only solutions!
Schedule email sending on Mail Infomaniak
Update 10/12/2026
This guide explains how to schedule an email to be sent at a specific date and time in the future, using the Infomaniak Mail web app (online service ksuite.infomaniak.com/mail), even if you are no longer connected at that time.
Introduction
- Scheduling is also possible on the Infomaniak Mail mobile app (application for iOS/Android smartphones or tablets).
- kSuite Free / my kSuite / Mail Starter service does not allow for customization of the schedule when scheduling.
Scheduled sending: plan a message
To send an email at a later date/time:
- Click here to access your emails on your Infomaniak kSuite (❓: help).
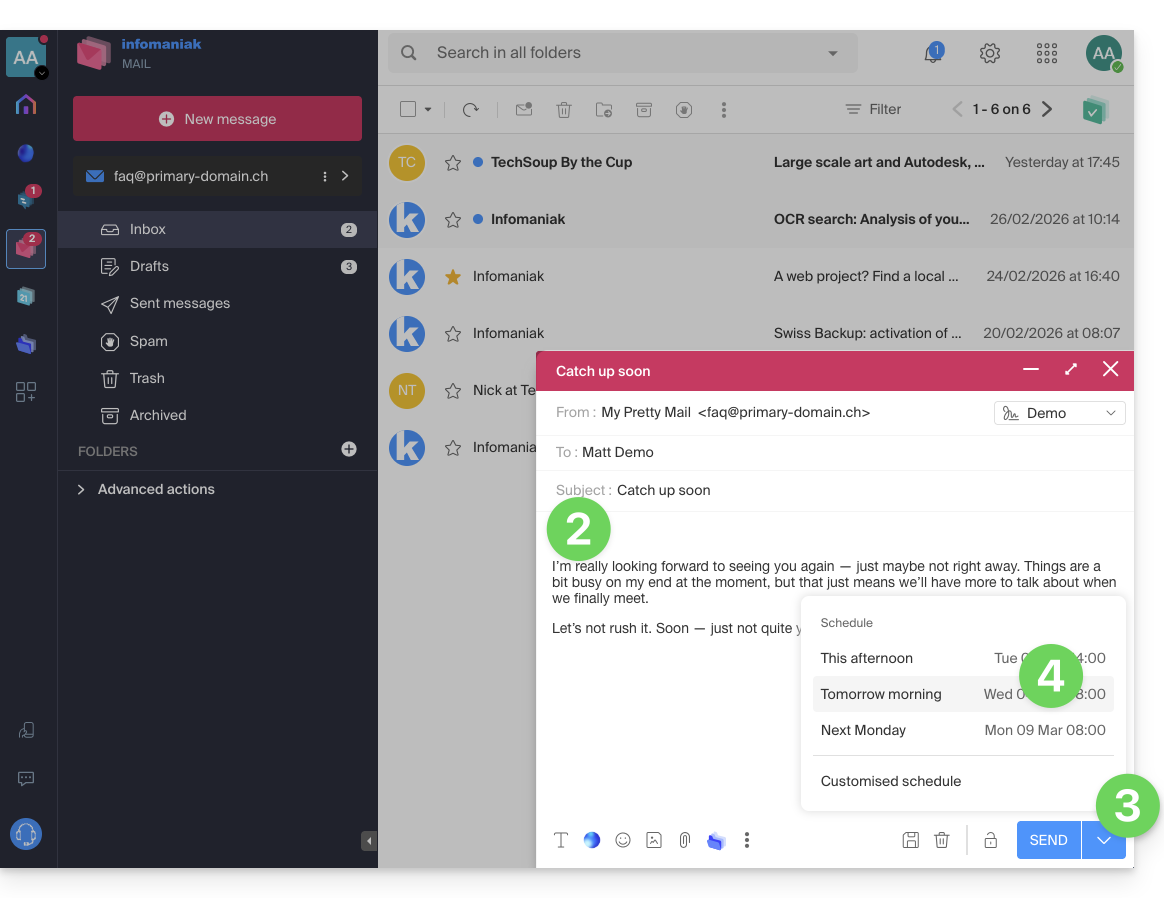
- Compose a new message as usual.
- Click on the chevron to the right of the Send button to access additional actions.
- Choose the time when the message should be sent, from the suggestions or by customizing the schedule (see introduction above):
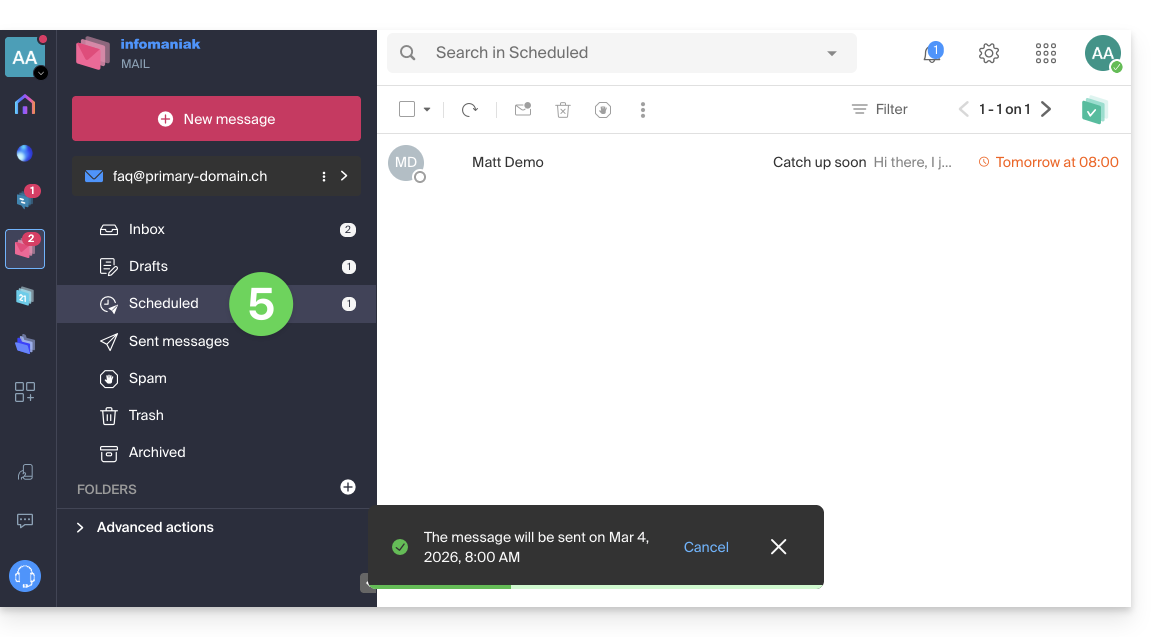
- You can then find your scheduled messages in a dedicated new section:
Reschedule or cancel a scheduled sending
To change the sending time of a message that has already been scheduled to be sent later:
- Click here to access the emails in your Infomaniak kSuite (❓: help).
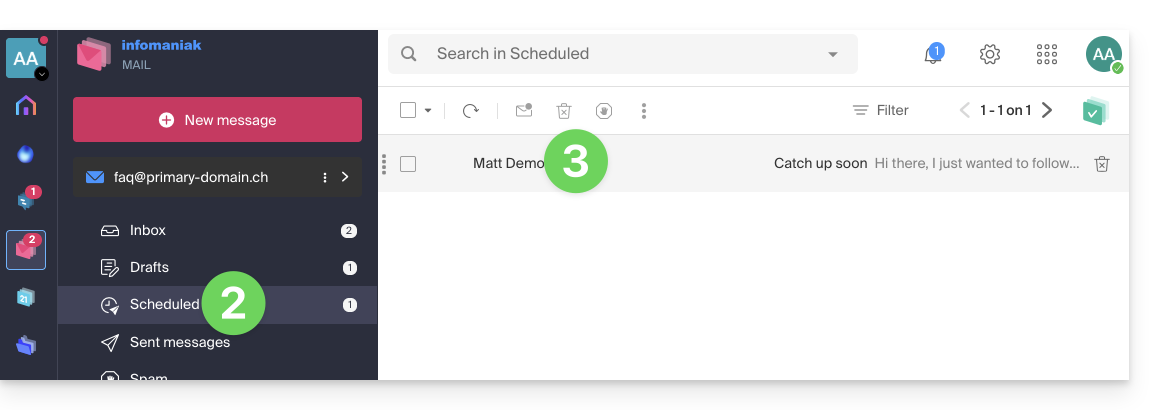
- Click on Scheduled sends in the left-hand menu.
- Open the message for which you want to modify the future send time:
- Click to Reschedule the sending to the time you specify using the drop-down menu...
- OR click the ✎ Edit draft button:
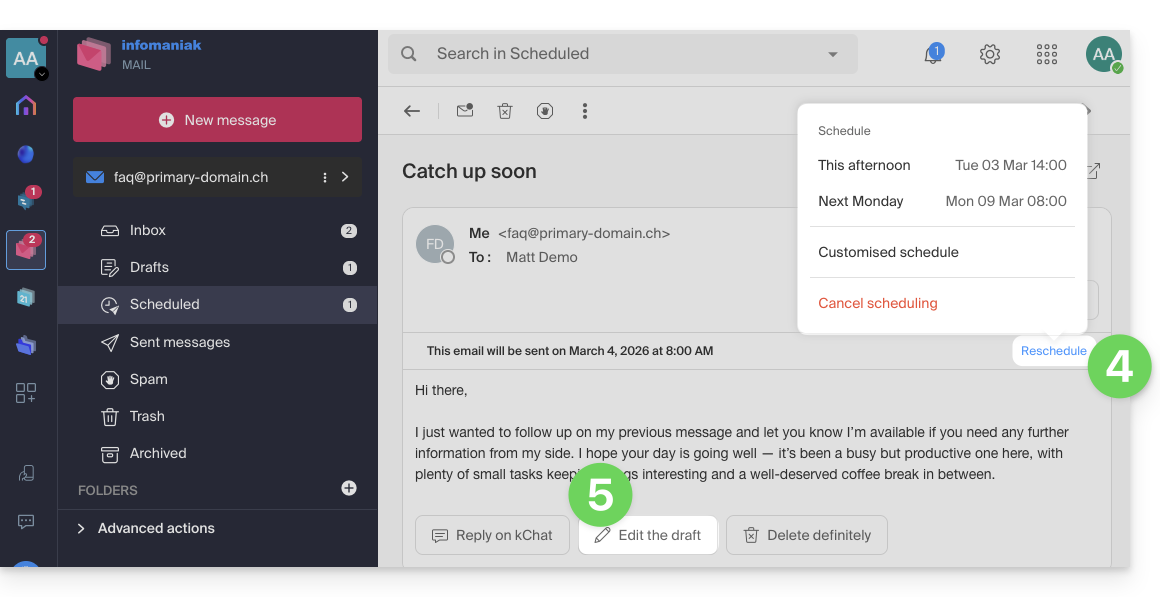
- Confirm that the message will be moved to Drafts and that the scheduled sending will therefore be canceled.
- Start again at step 3 of the first chapter above to reschedule sending for a future date.
Completely delete a scheduled message
To permanently delete a message without the possibility of recovering it:
- Click here to access your emails in your Infomaniak kSuite (❓: help).
- Click on Scheduled emails in the left-hand menu.
- Hover over the message you want to delete and click on the trash can:
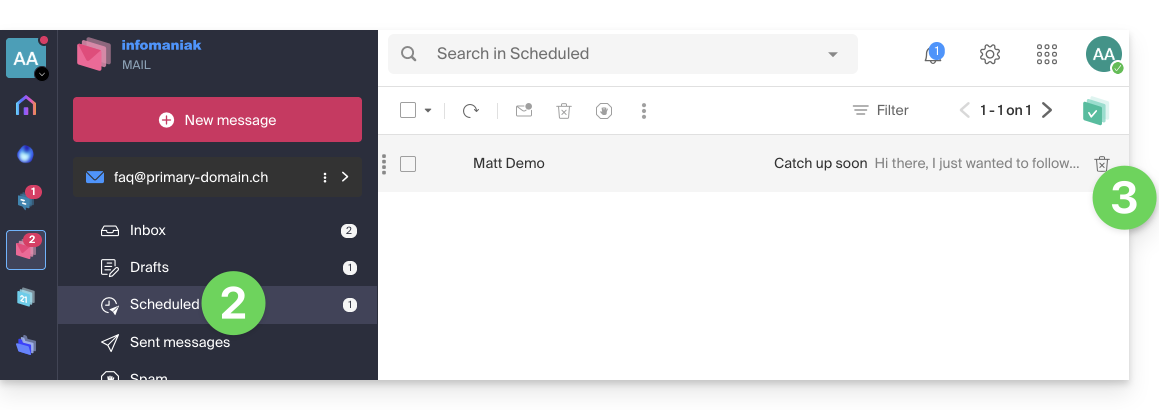
- Confirm the deletion to permanently remove the draft.
Link to this FAQ: https://faq.infomaniak.com/1449
Has this FAQ been helpful?