Knowledge base
1000 FAQs, 500 tutorials and instructional videos. Here, there are only solutions!
Manage address books in Infomaniak Contacts
This guide explains how to create, hide, or delete address books in the Infomaniak Contacts web app (online service ksuite.infomaniak.com/contacts).
Introduction
- To manage contacts, please refer to this other guide.
- To manage notebook sharing, please refer to this other guide.
- To learn more about Organization directories, please refer to this other guide.
Add a new address book
To create an additional address book:
- Click here to access the Infomaniak Contacts web app (online service ksuite.infomaniak.com/contacts).
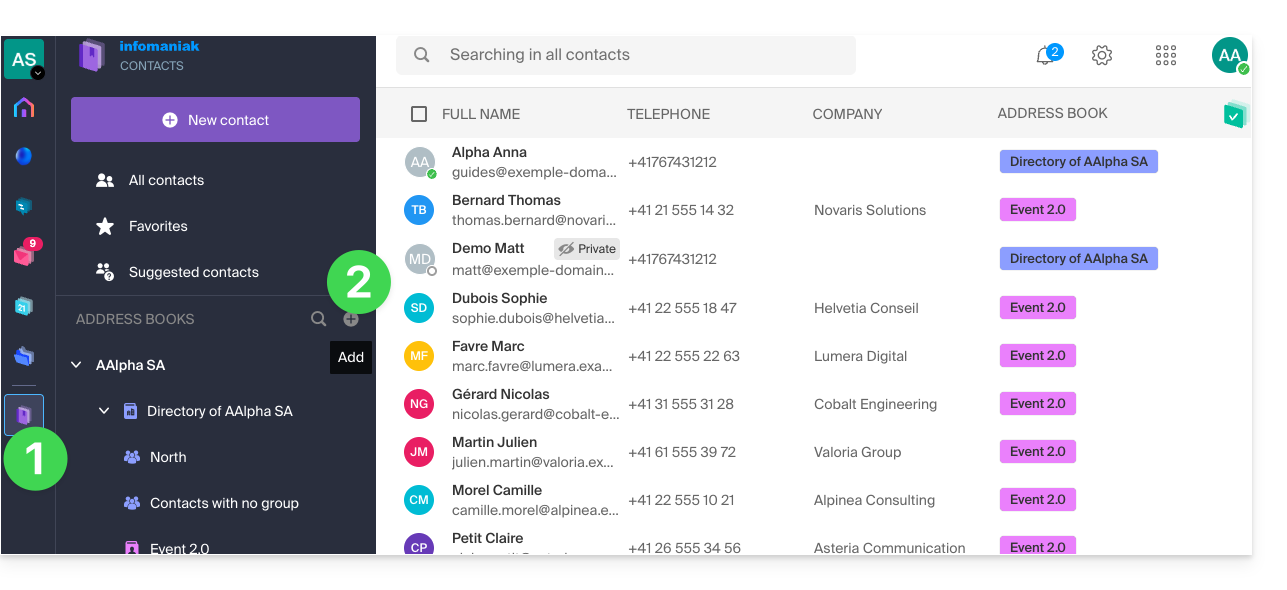
- Click on in the left-hand menu:
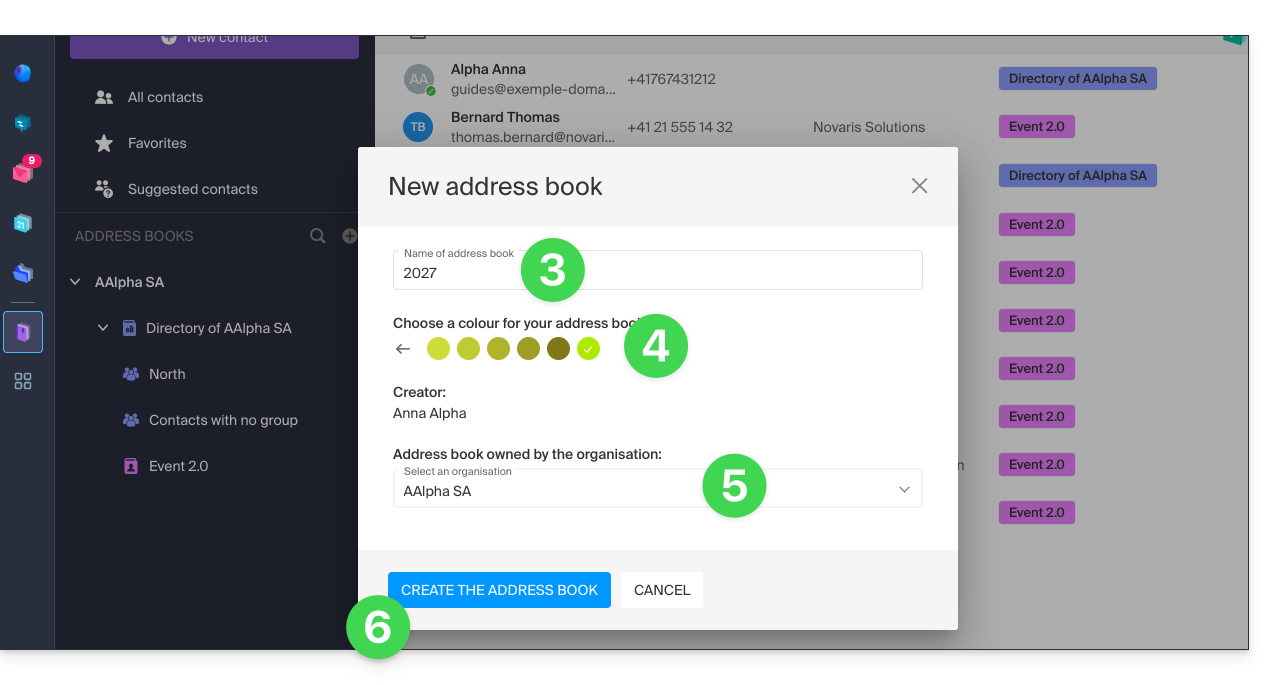
- Give the address book a name.
- Choose a color.
- Choose the Organization in which the notebook should be created.
- Click the button to finish:
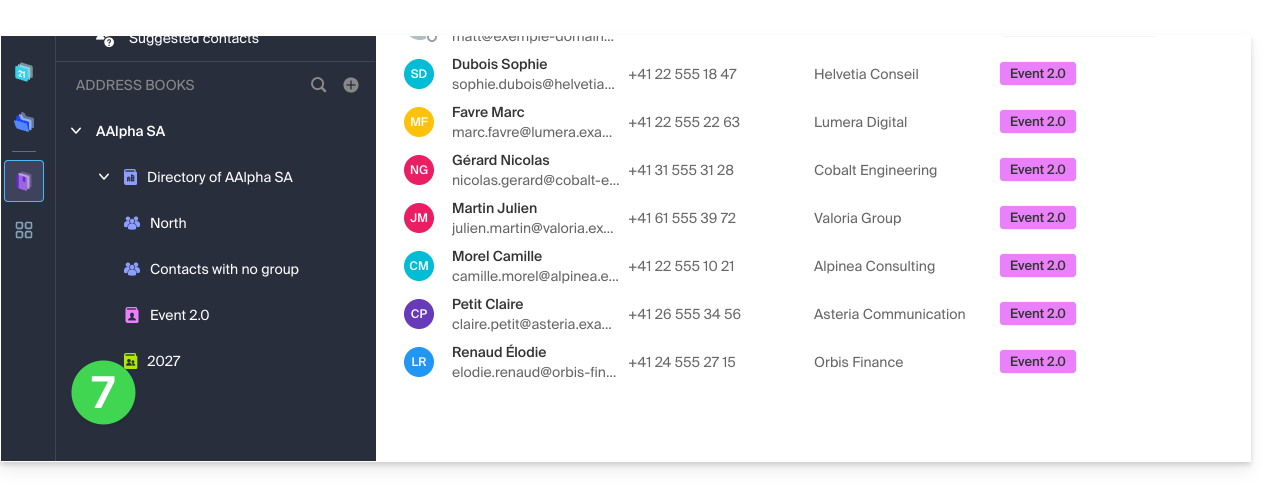
- The new, still empty notebook is added to the list in the left-hand menu:
- You can copy or move contacts to it.
New address book during import
You can also create a new address book directly during the import of new contacts: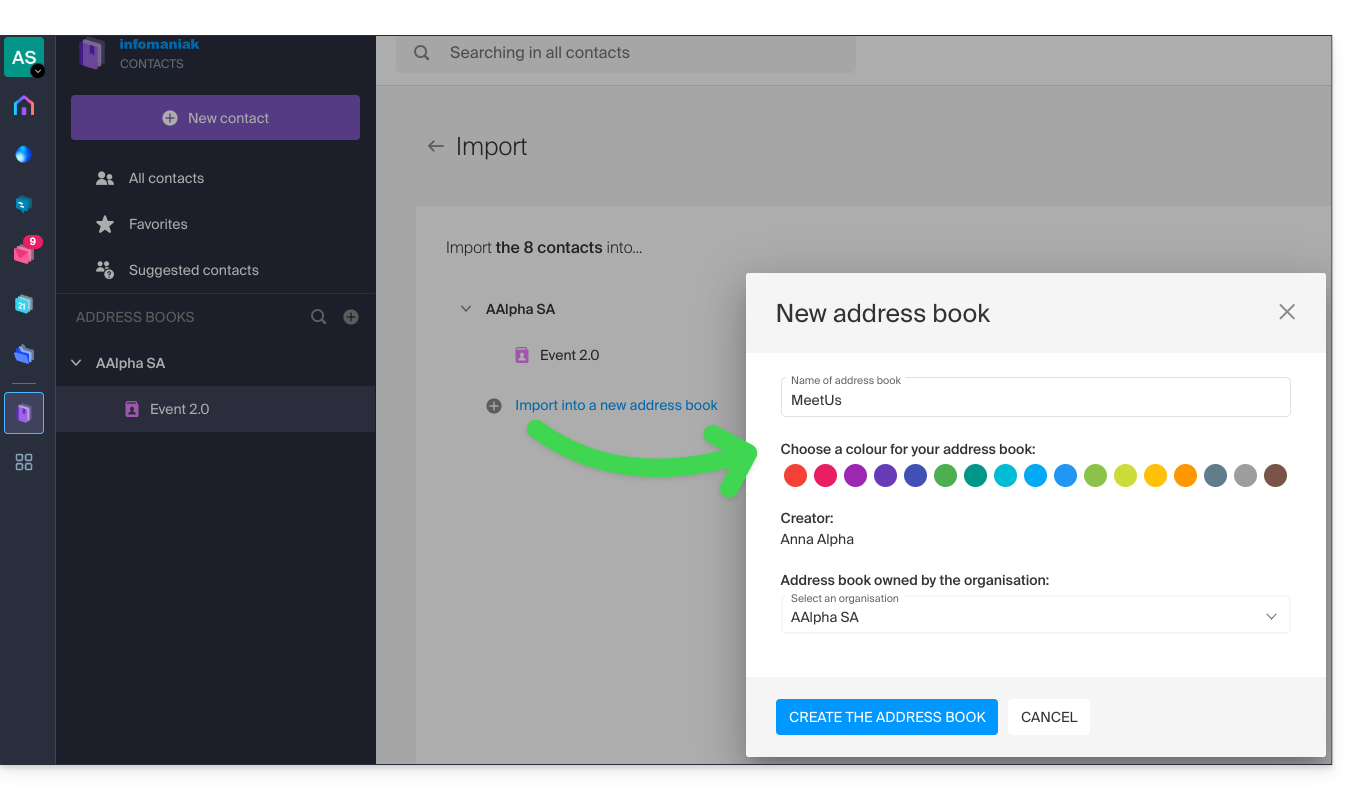
Here too, you can choose which Organization (from those already associated with your user) you want to create this new directory in to store your imported contacts.
Manage user address books within the Organization
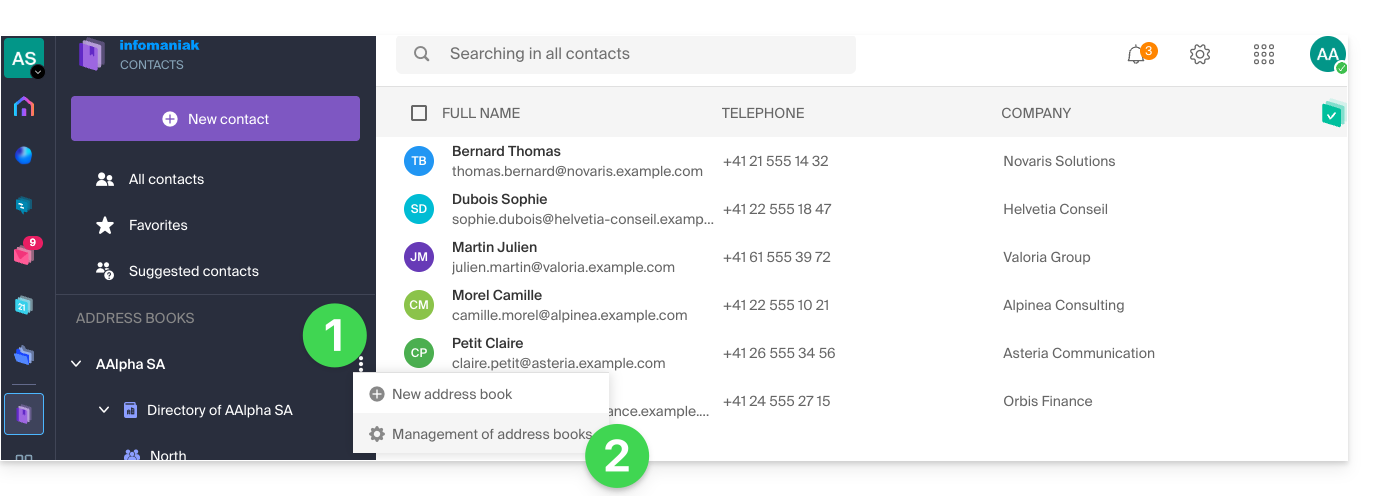
As an administrator within an Organization, you can manage the various address books of your users:
- Click on the action menu ⋮ to the right of the organization in question.
- Click on Manage address books:
- The list of all users' address books within the Organization is displayed, showing their name and the number of contacts they contain (by default, these contacts are not visible):
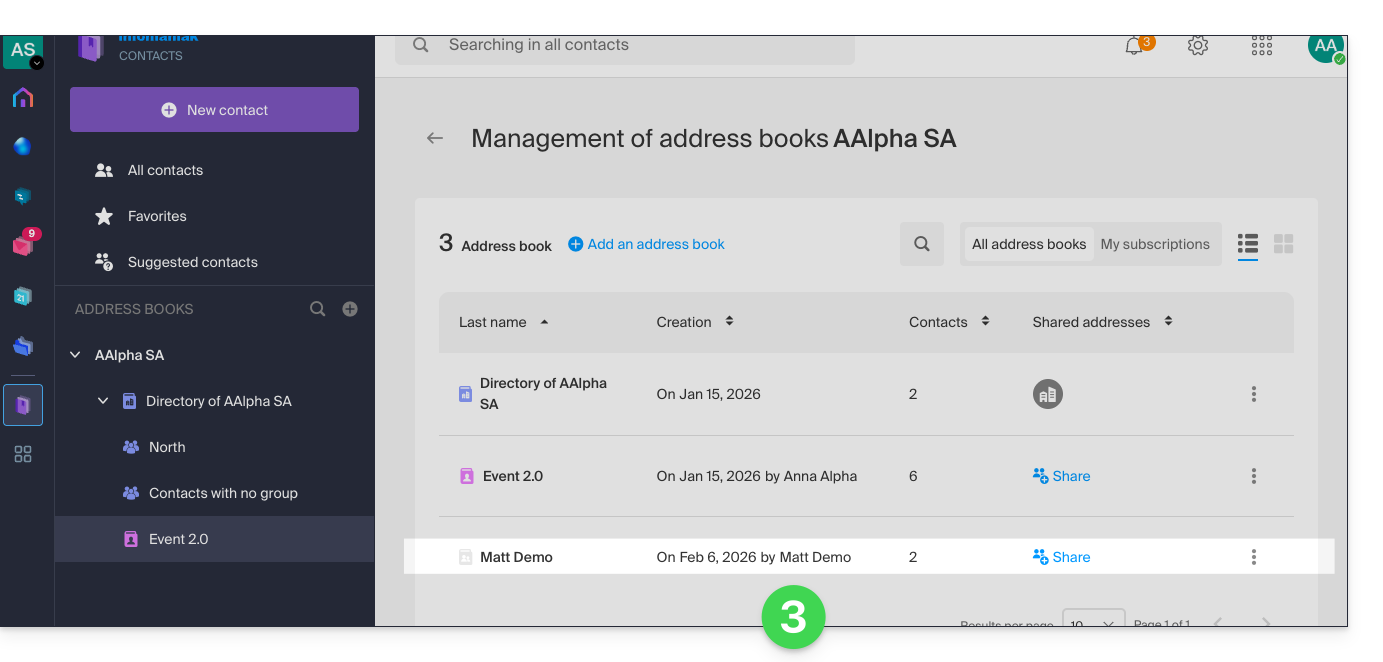
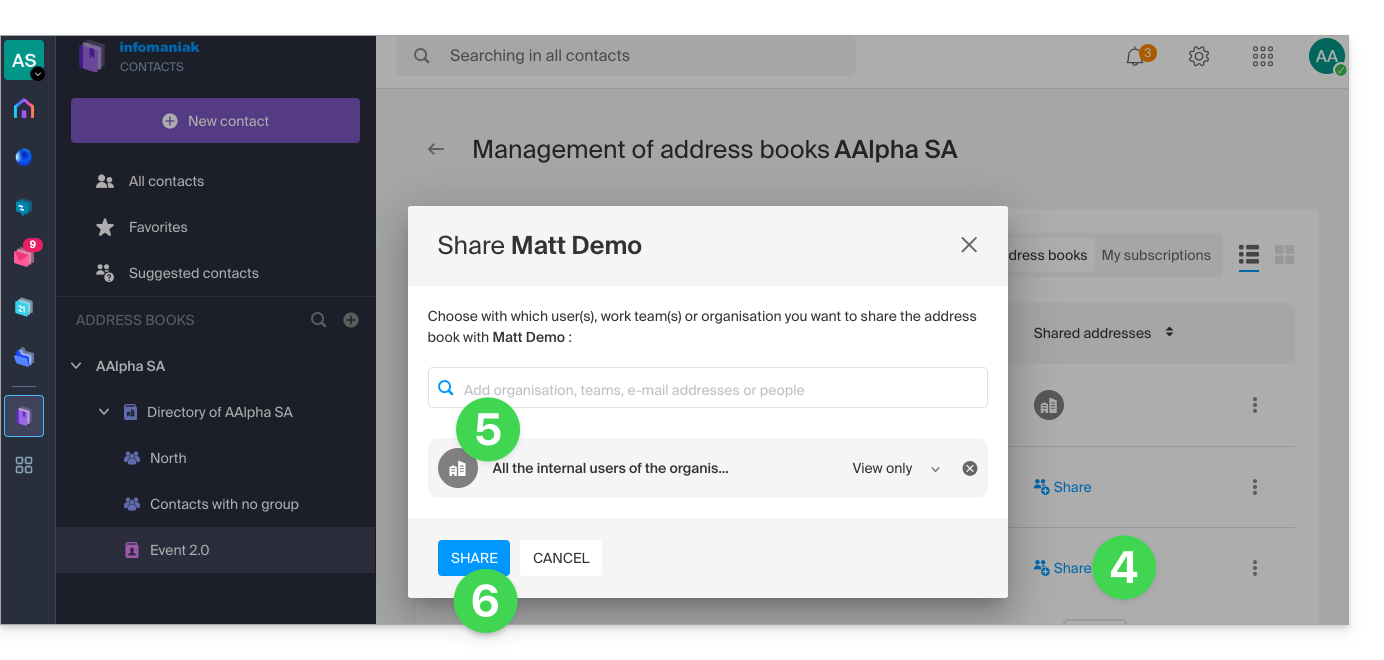
- Clicking on Share will grant you access to the contacts.
- You can even choose to grant access not only to your user, but to the entire Organization.
- Click the button to grant access (an informative email is sent to the user):
- Refresh the interface if necessary to display the address book.
Hide/re-display an address book
To hide the display of an additional notebook (it is not possible to hide the default notebook or an Organization notebook) only on your profile:
- Click on the action menu ⋮ to the right of the notebook in question.
- Click on Hide this address book:
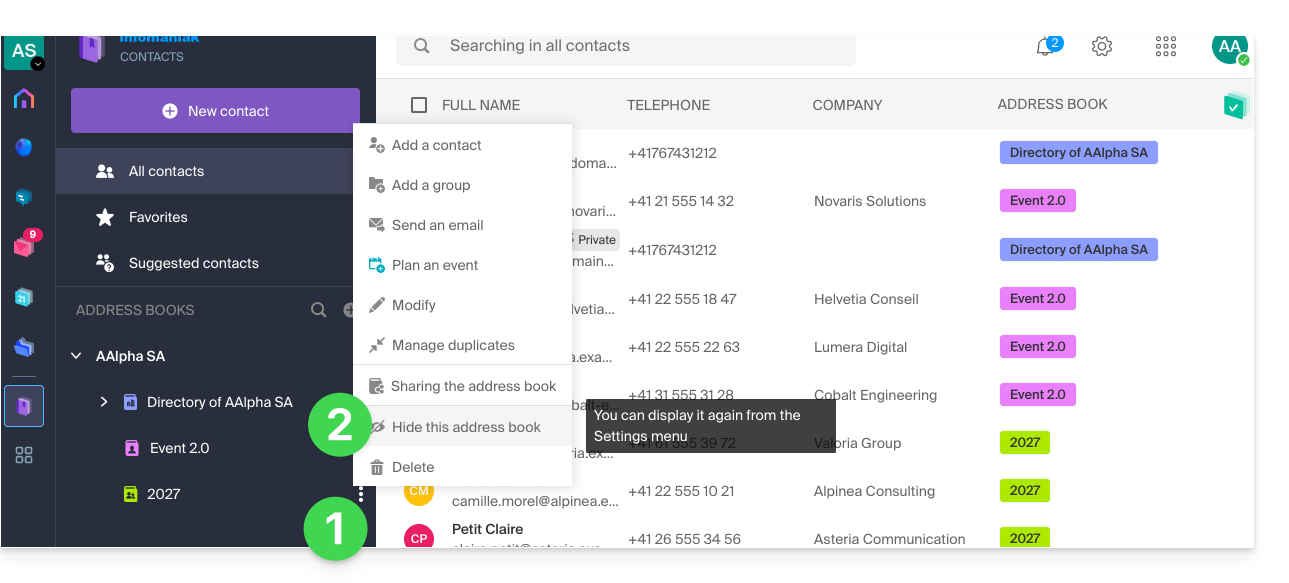
- The address book disappears from the list.
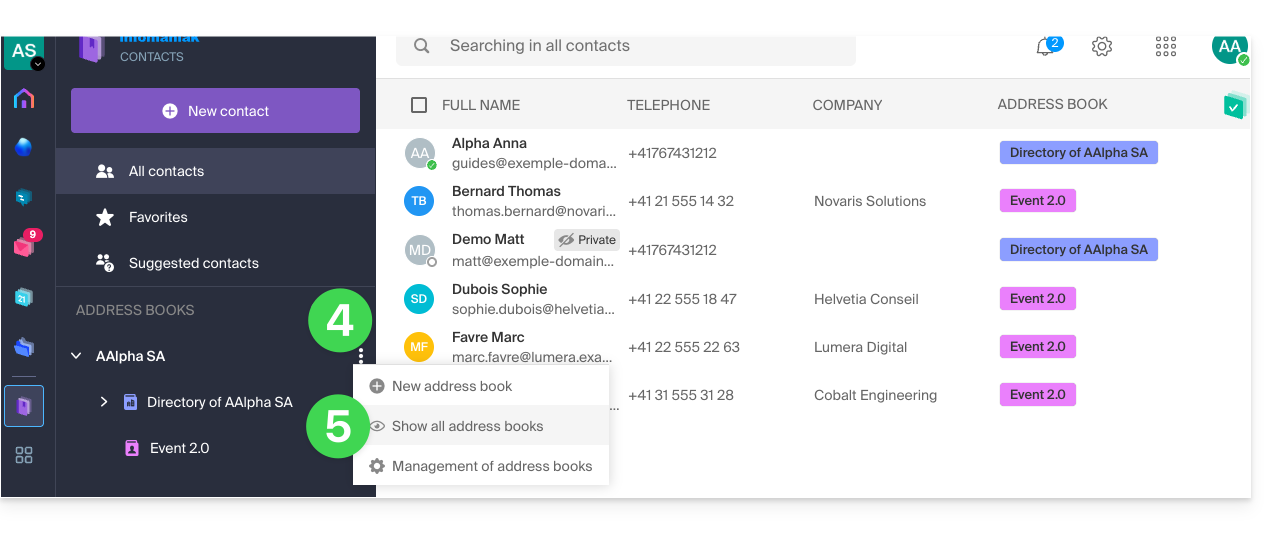
- Click on the action menu ⋮ to the right of the organization in question.
- Click on Show all address books:
Unshare instead of hiding
If the address book that you no longer want to see in the list is the result of a share initiated by another user, you can also unshare it, and you will no longer have access to the shared address book:
- Click on the action menu ⋮ to the right of the relevant notebook.
- Click on the share item.
- Click the icon to detach this share:
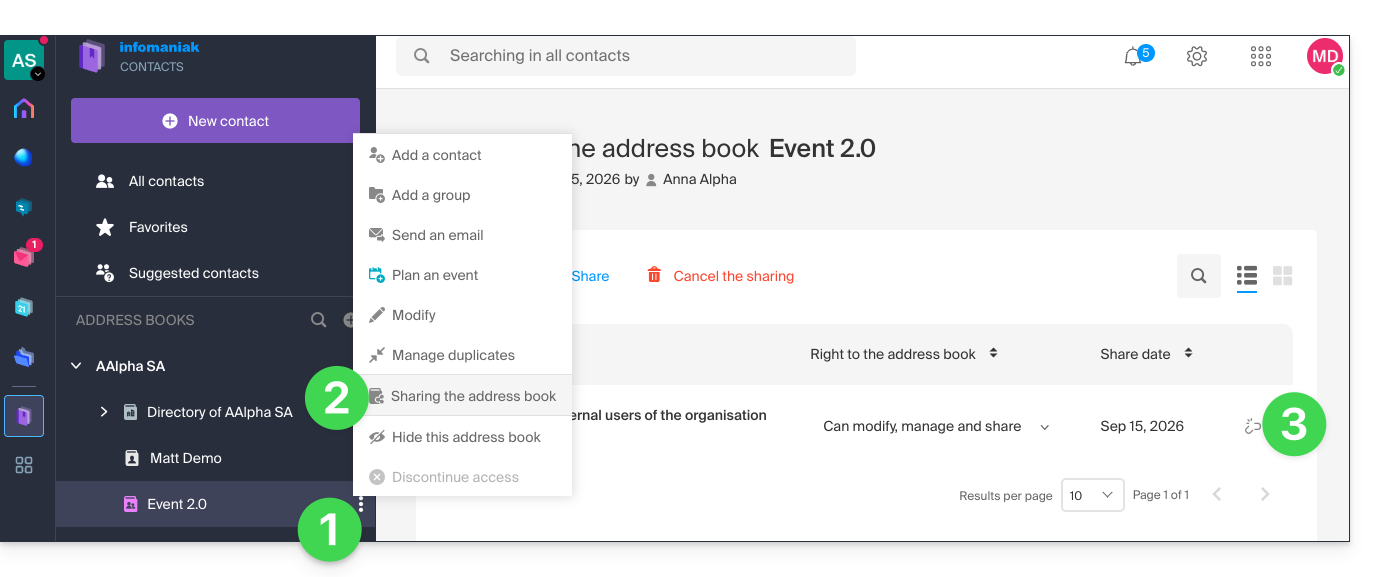
- Confirm the operation, then refresh the interface if necessary to make the widget disappear.
Link to this FAQ: https://faq.infomaniak.com/1340
Has this FAQ been helpful?