Knowledge base
1000 FAQs, 500 tutorials and instructional videos. Here, there are only solutions!
Manage room bookings on Infomaniak Calendar
This guide details the room booking feature (for meeting rooms, sports facilities, classrooms, etc.) available in the Infomaniak Web app Calendar (online service ksuite.infomaniak.com/calendar).
✘ NOT AVAILABLE with
my kSuite / my kSuite+ (ik.me, etik.com, ikmail.com)
Mail service Starter / Premium
Introduction
- You can create and associate physical meeting rooms with events in Calendar, for example, to organize an event in a specific location that has equipment and a limited number of seats.
- Each created room displays a dedicated calendar in the app, which can be shared (❓: help).
- Double (or multiple) room bookings are possible.
- Number of possible rooms per resource:
- kSuite Free = 1
- kSuite Standard = 2
- kSuite Business = 6
- kSuite Enterprise = 50
Configure meeting rooms
Prerequisites
- You must be at least an Administrator of the Organization (❓: help).
- Users with limited rights (collaborators and clients) who have access to this product will not be able to do this.
To create rooms that can be booked by employees:
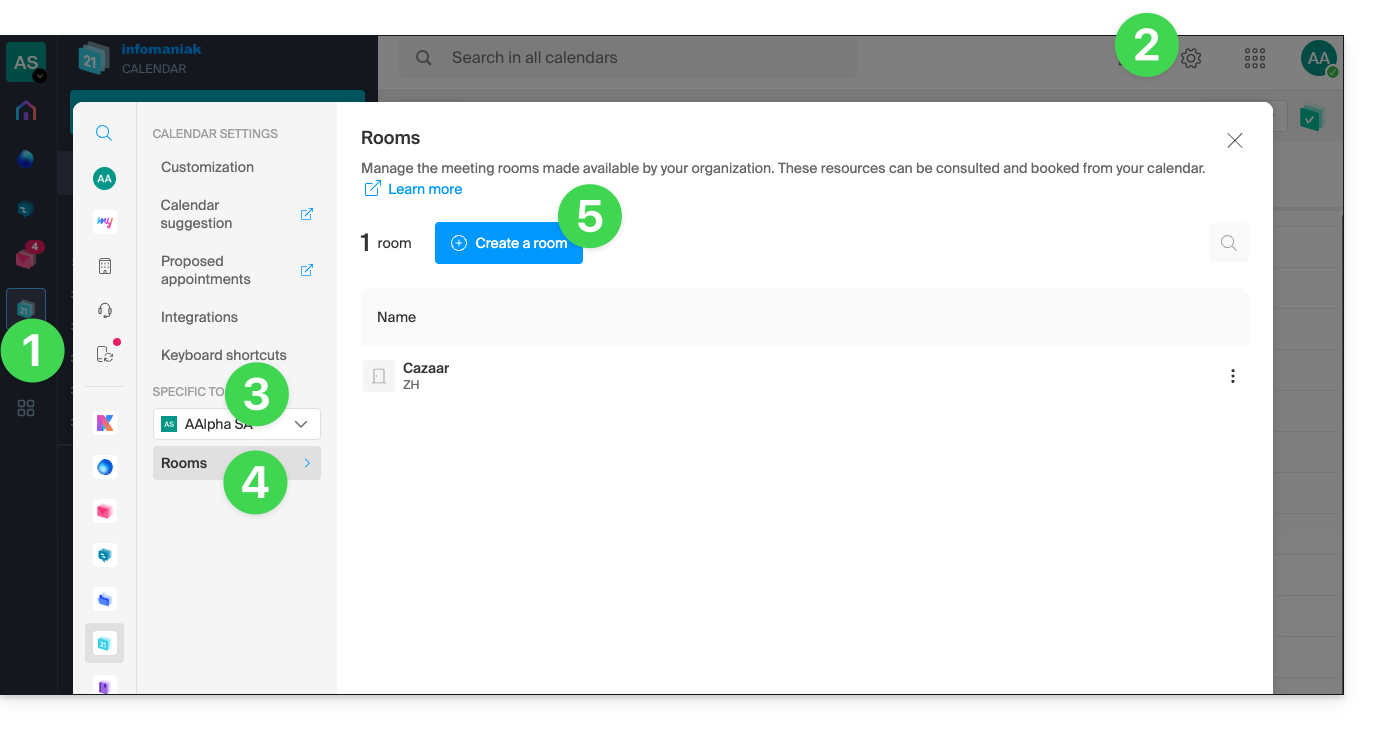
- Click here to access the Infomaniak Calendar web app (online service ksuite.infomaniak.com/calendar).
- Click on Settings in the top right corner.
- Check or select the relevant Organization from the dropdown menu in the left-hand sidebar.
- Click on Rooms in the left-hand menu.
- Click on the Create a room button:
- Enter the essential information, such as the name, precise location (full address, floor), a color, and the maximum number of people that can be accommodated:
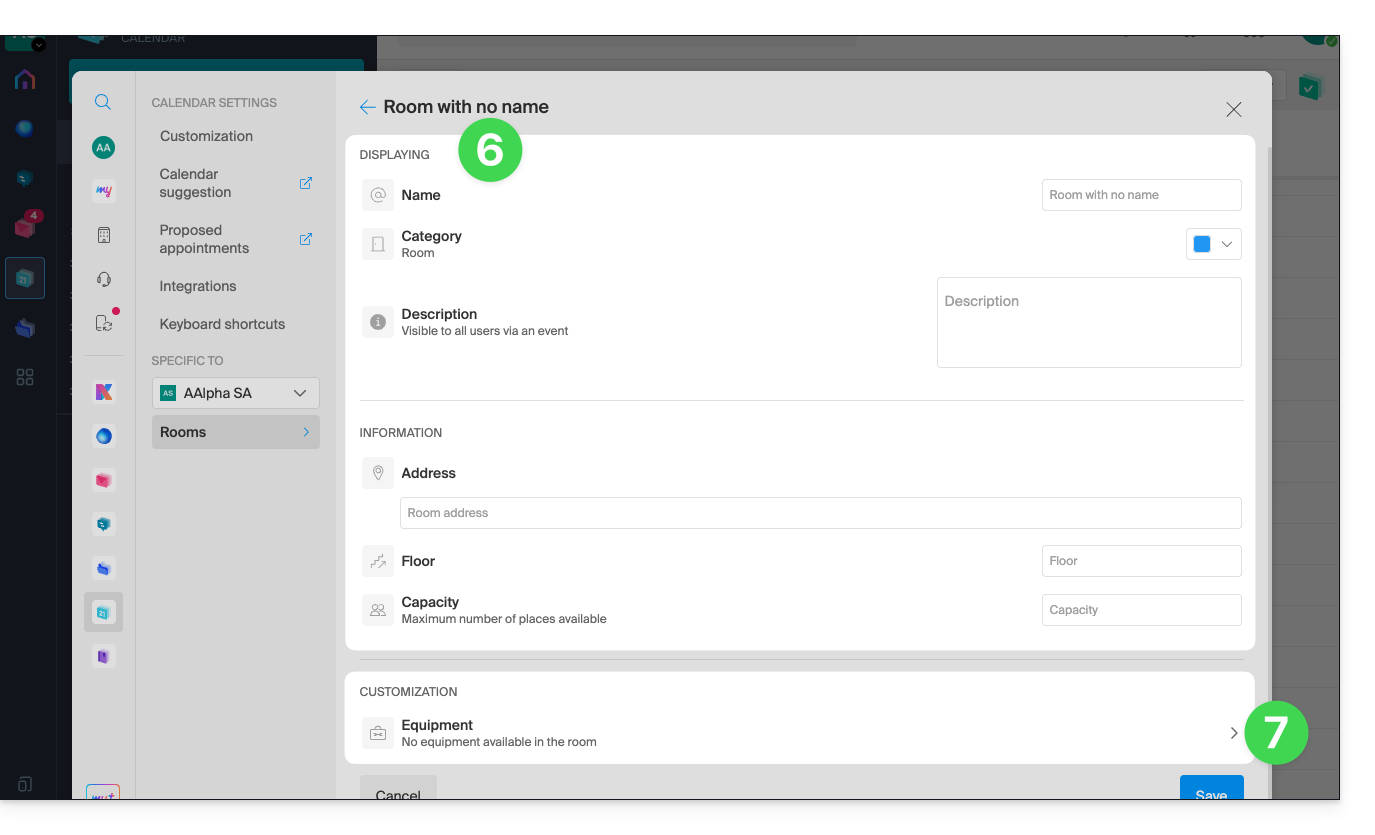
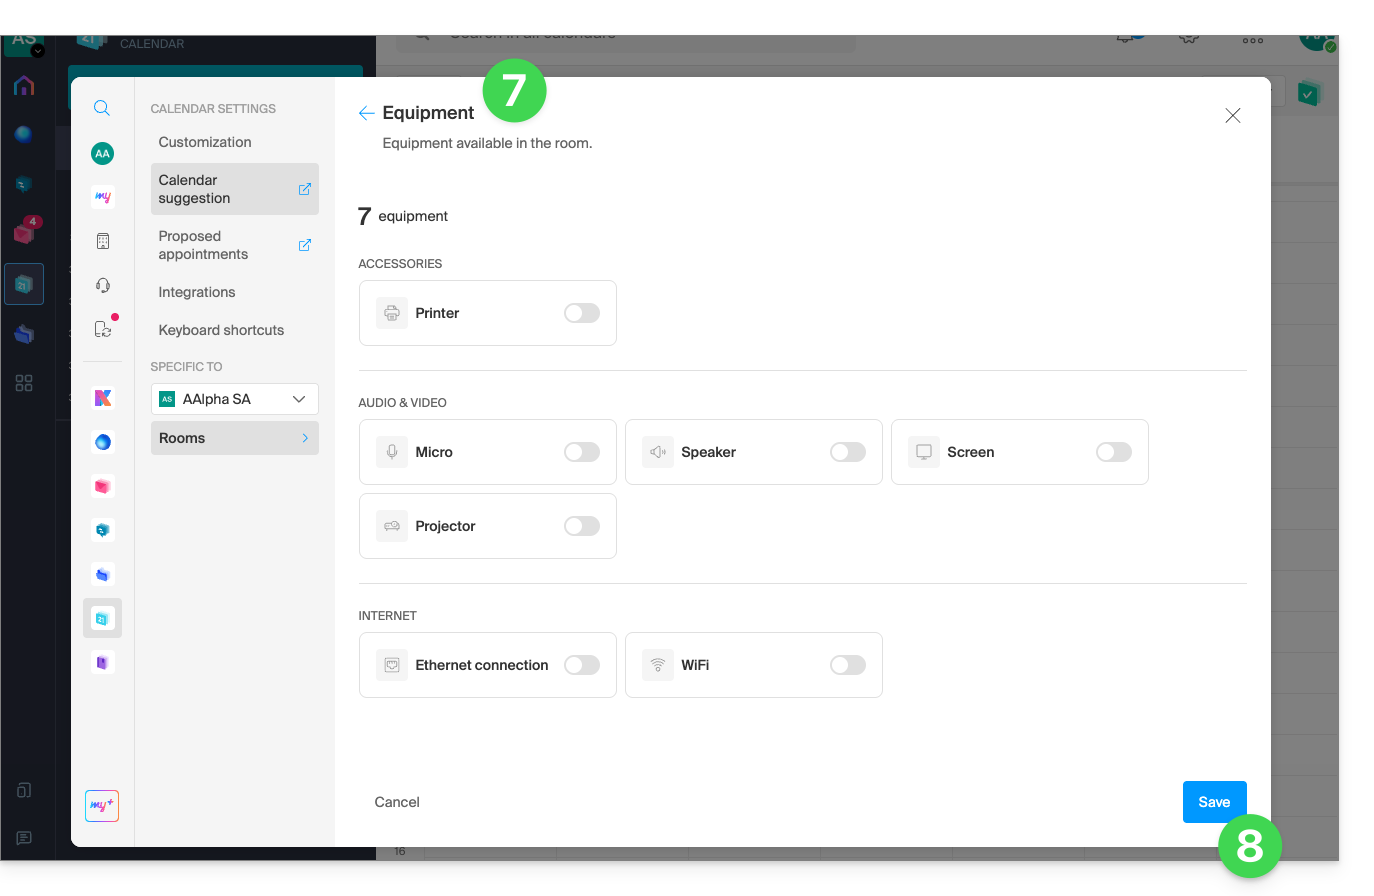
- Add any equipment that may be available in the room and on the floor in question.
- Click Save to save the material related to the room:
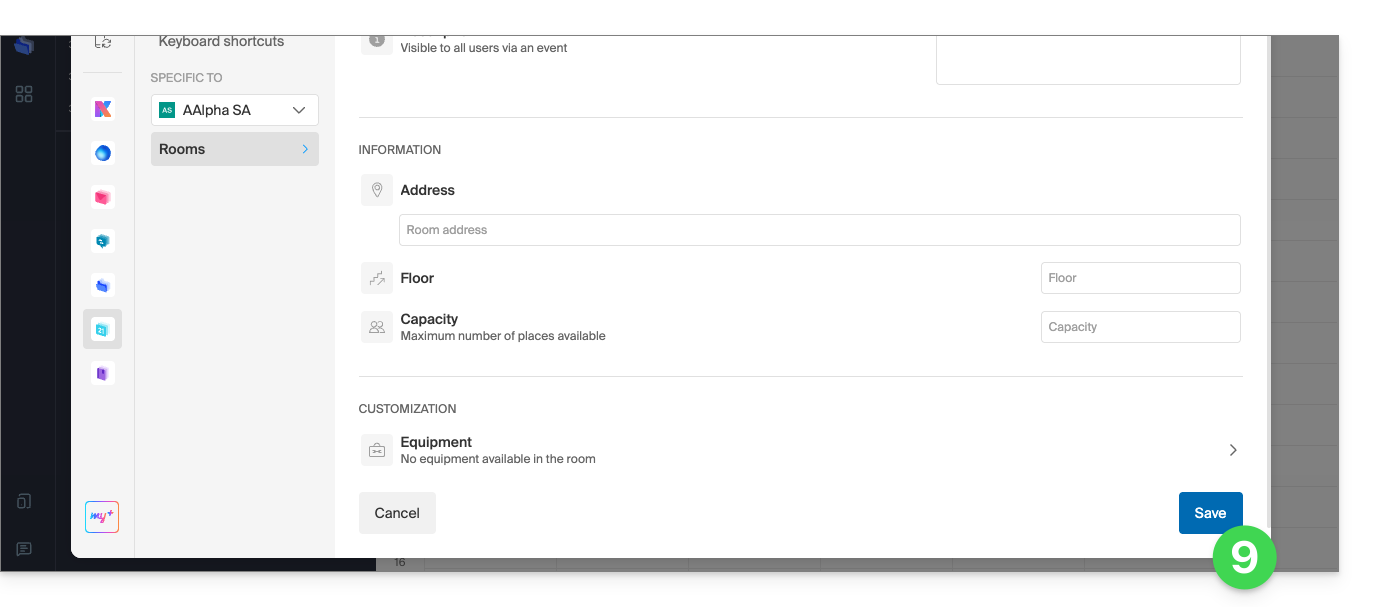
- Click Save to create the meeting room:
Actions on the created room
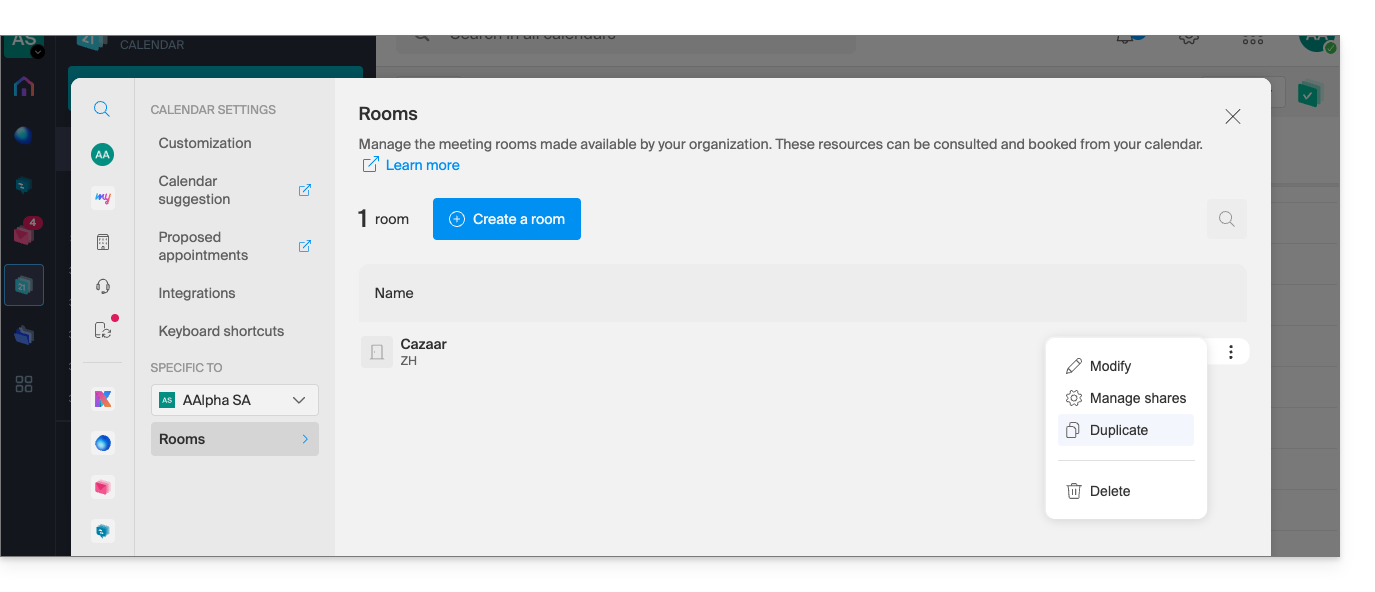
If you have several similar rooms, you can speed up their creation by duplicating the first one:
- Click on the action menu ⋮ to the right of the relevant room in the table that appears:
Create an event and associate it with a room
Once the room has been created and configured, simply create an event and associate it with the desired room:
- Click here to access the Infomaniak Calendar web app (online service ksuite.infomaniak.com/calendar).
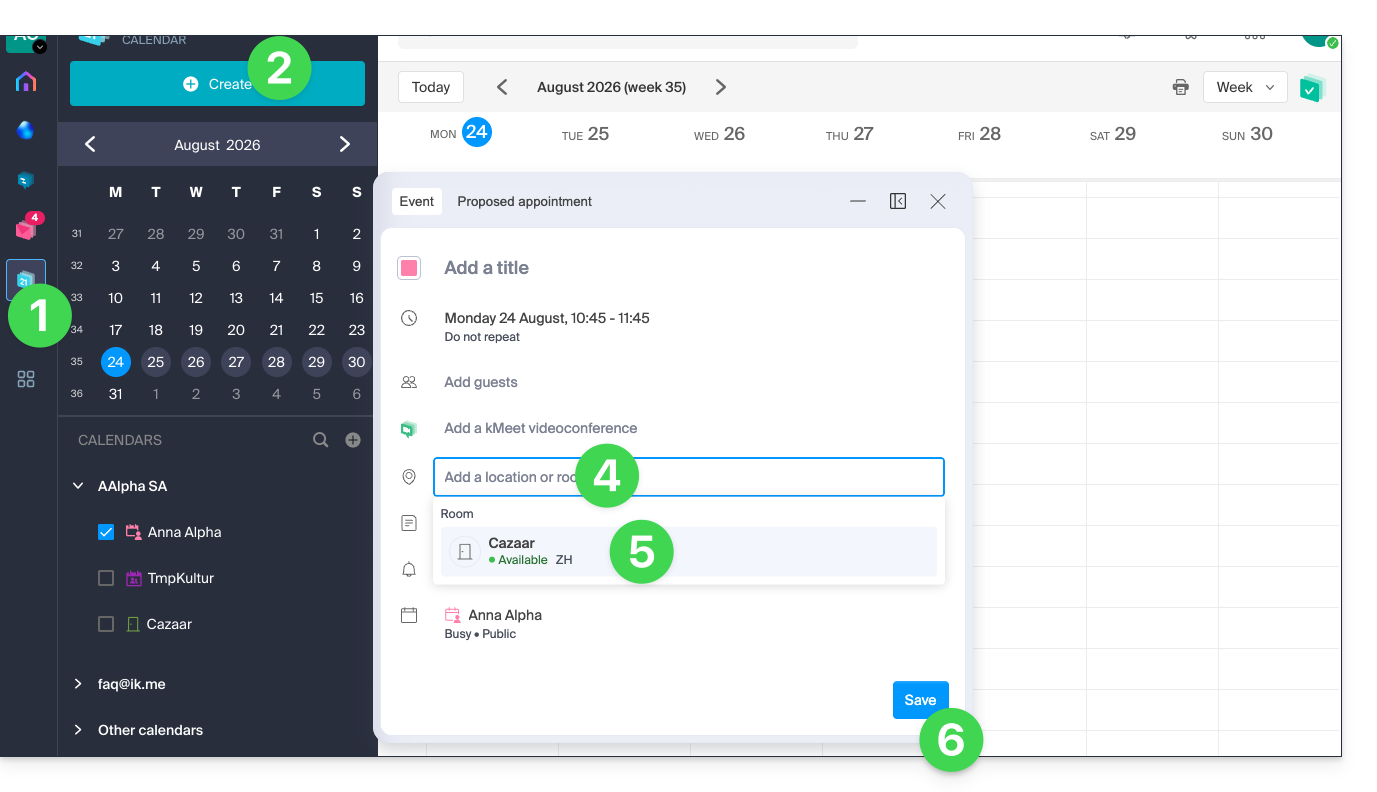
- Click on the Create button in the top left corner.
- Click on Event.
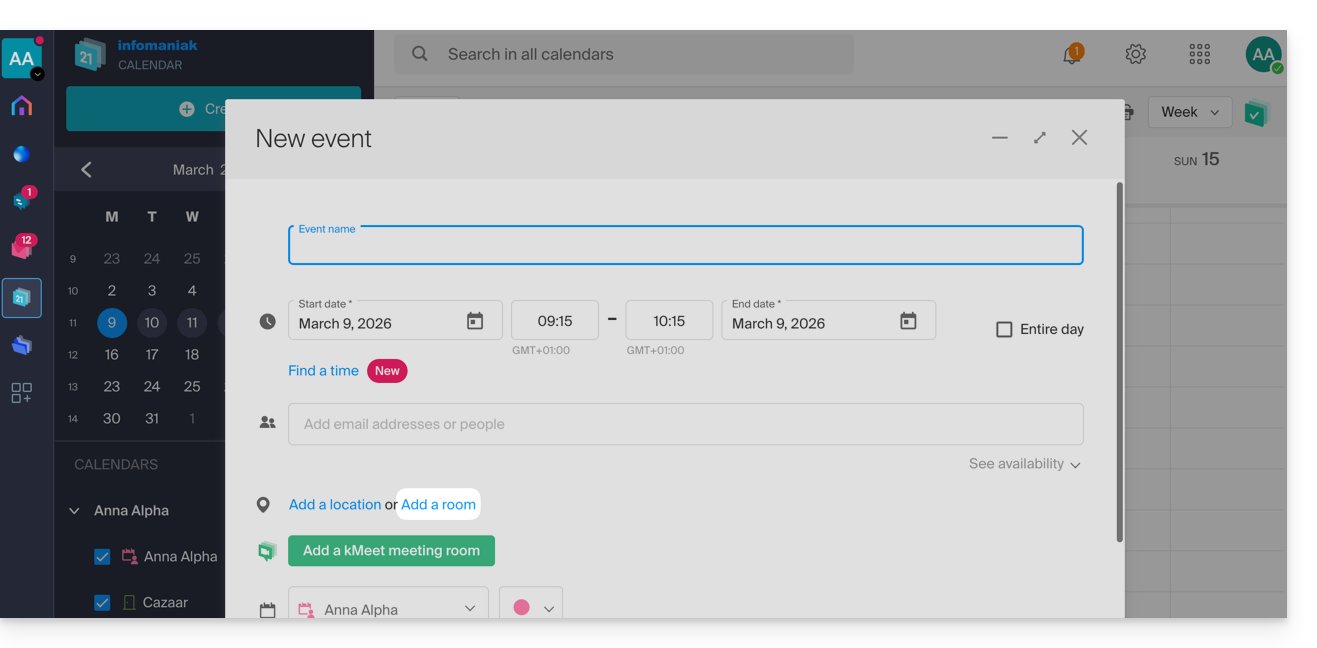
- Click on Add a room:
- Click in the Search for a room or location field to display the available rooms for the selected time slot (the 3 most recently booked rooms, from newest to oldest).
- Click Save to publish the event and its room in the calendar:
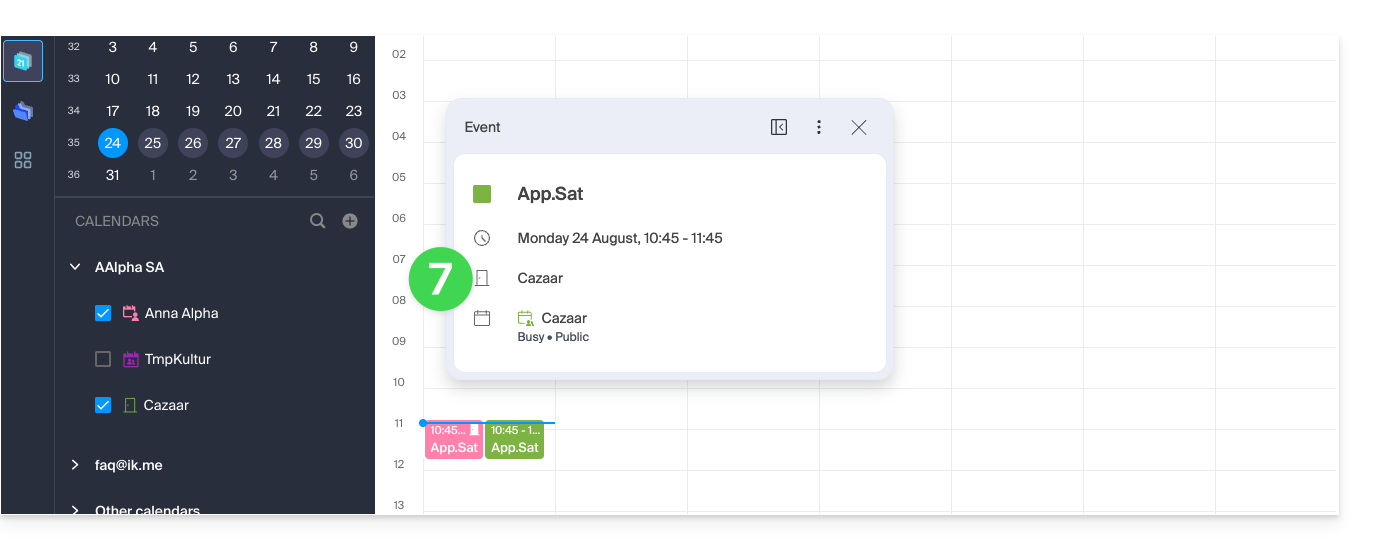
- You can find all the information about the chosen location on the event page in the calendar (and on the room's calendar - see below):
Overview of rooms and their occupancy
You can view an overview of each room's schedule to see its occupancy. When a room is created, a calendar associated with it is created in the Organization's calendars: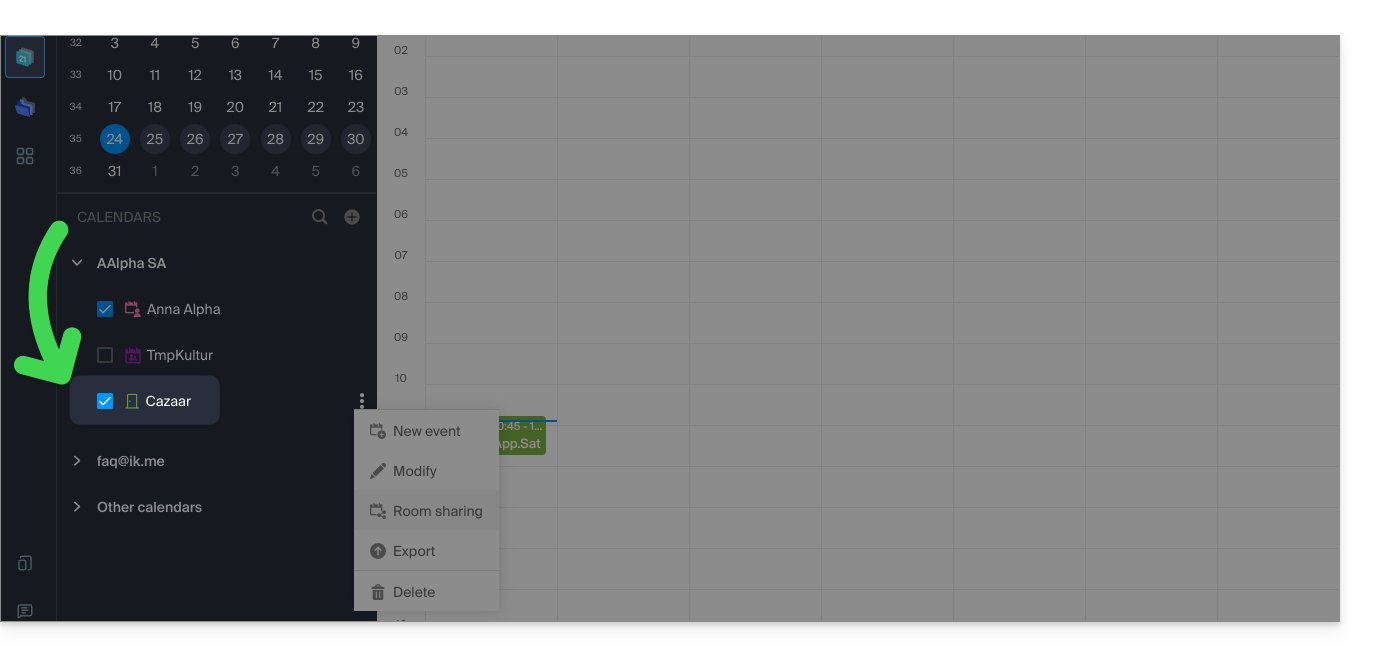
Your dedicated kSuite space also displays a real-time view of your room availability, with the option to book a room in just a few clicks, saving you time when organizing your meetings: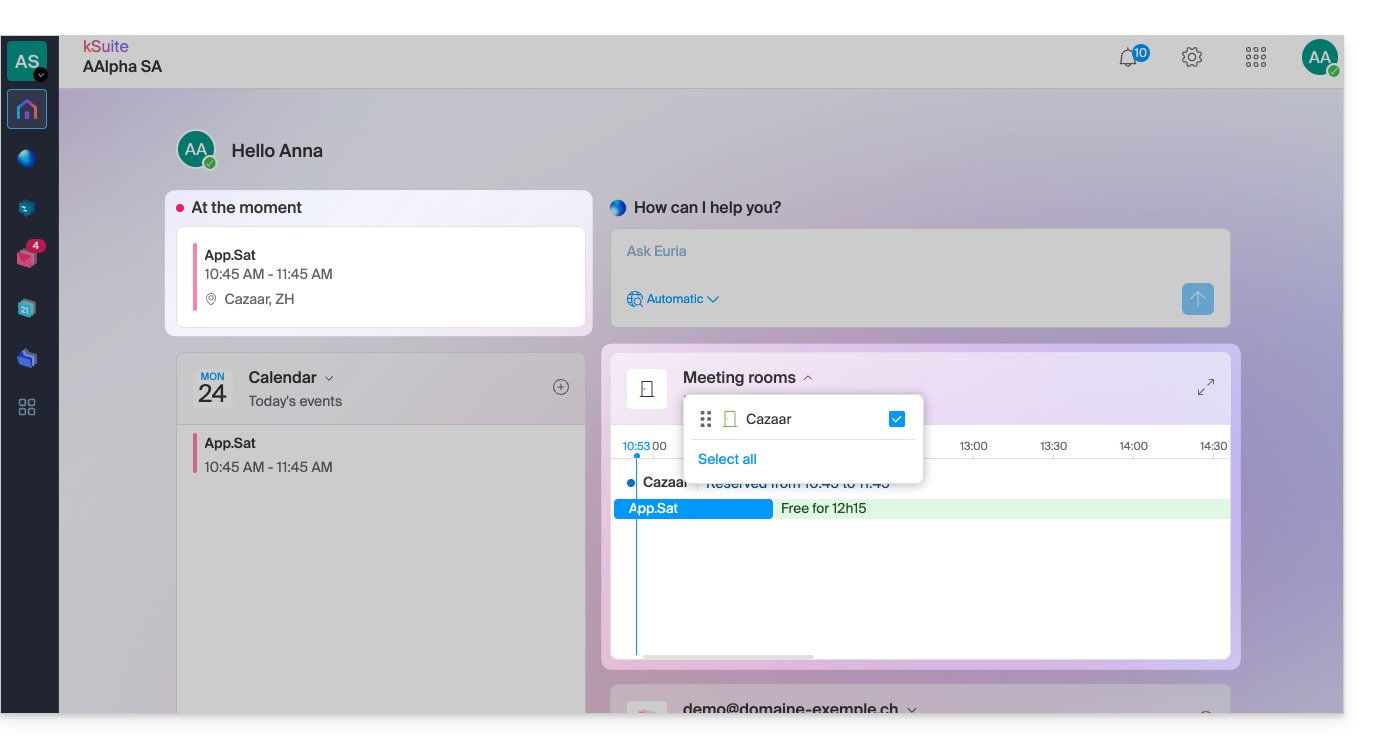
Link to this FAQ: https://faq.infomaniak.com/1329
Has this FAQ been helpful?