Knowledge base
1000 FAQs, 500 tutorials and instructional videos. Here, there are only solutions!
Configure Apple Mail (macOS) using a .mobileconfig profile (email)
This guide explains how to connect the Apple Mail desktop app on macOS (MacBook Pro, Neo, etc.) to an email address hosted by Infomaniak.
Introduction
- Your macOS computer will be automatically configured using Apple-compatible .mobileconfig configuration profiles, unlike a manual configuration.
- It is possible to delete a configuration profile once it has been installed (scroll to the bottom of this page for instructions).
Install a configuration profile
Prerequisites
- Create the email address within my kSuite or a Mail Service / kSuite.
- Check that the Mail Service is configured optimally.
You can download the profile from the device in question or send it from another device (if you already have an email address that works correctly, for example):
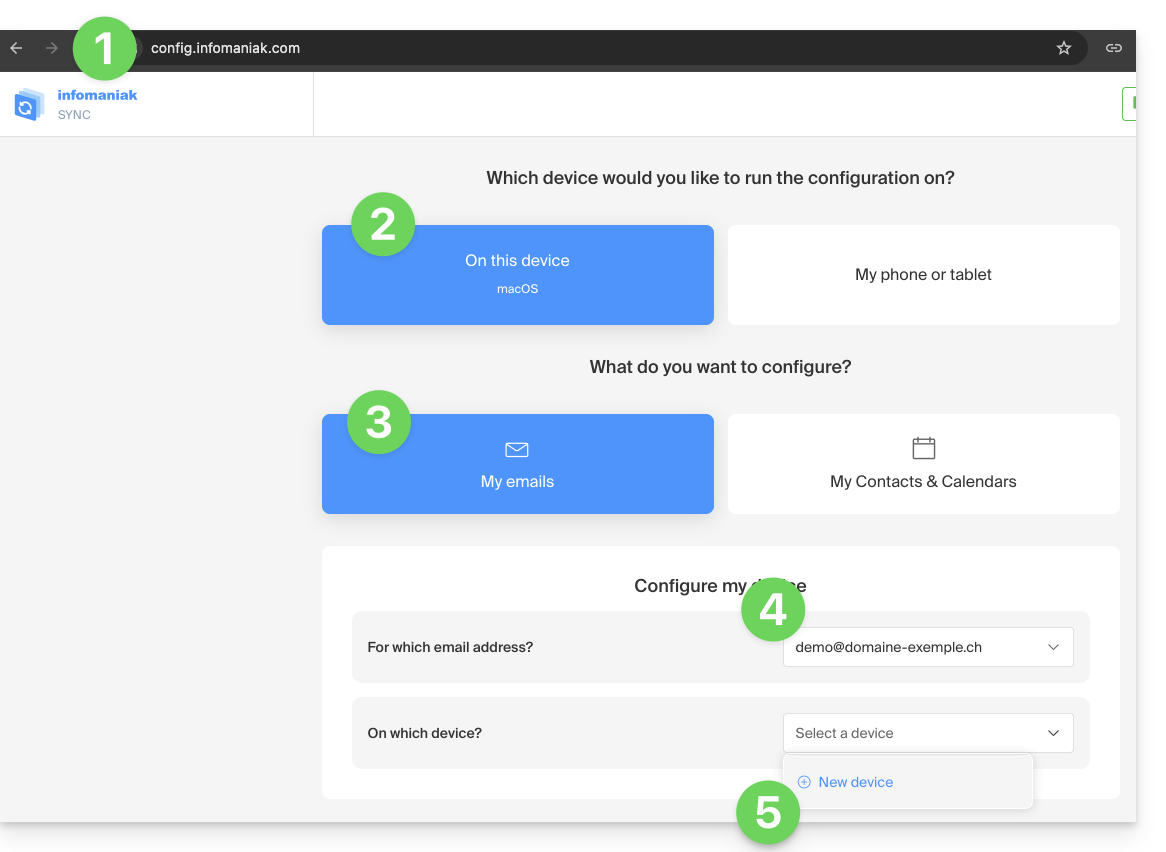
- Click here to access the Infomaniak configuration tool (online service https://config.infomaniak.com) — log in to your Infomaniak account on the Organization where your email address is managed, if necessary.
- Choose to install the profile on this device.
- Choose to synchronize emails.
- Choose the email address to configure in Apple Mail (from the ones you have access to).
- Create a new device:
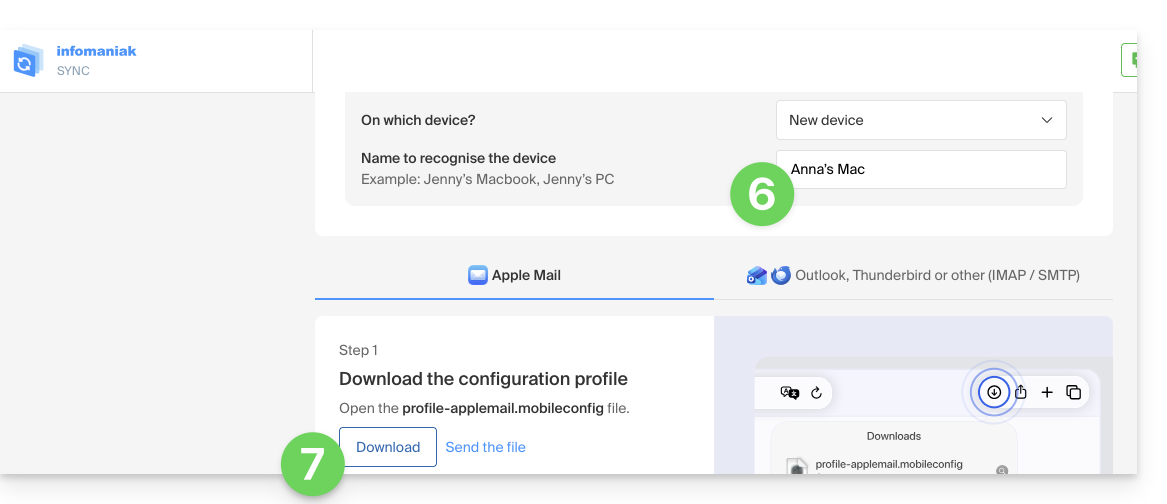
- Enter a descriptive name for the new device.
- Click the button to download the profile (you can also send it by email using the link on the right):
- Once the
profile-applemail.mobileconfigfile is on your computer, double-click it to open and run it. - Click OK:

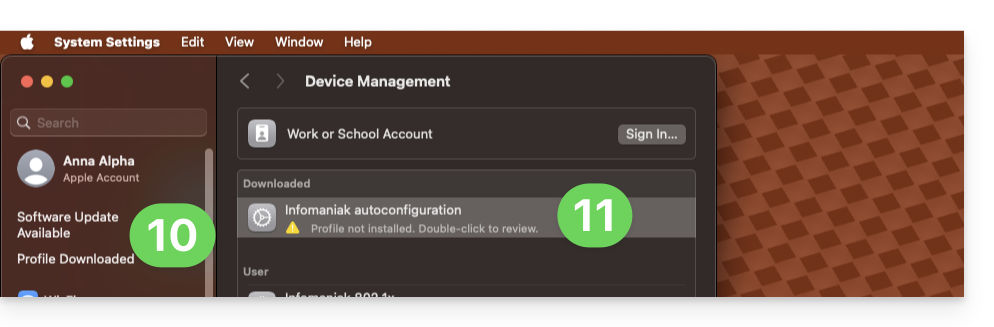
- Open the computer’s System Settings.
- Click on Downloaded Profile in the sidebar, then double-click the new profile to apply it:
- If you have an older version of macOS or cannot find the profile, search for “profile” in the settings, or consult the official documentation by changing the version of your system at the top of the page if necessary.
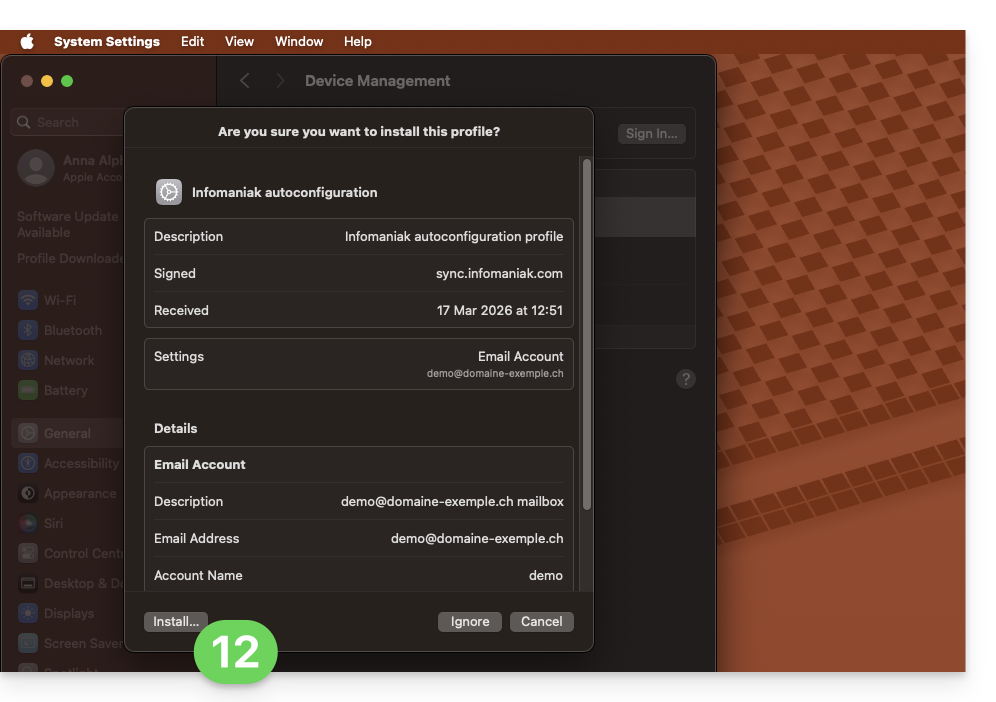
- Click on Install…:
- A password will then be requested…
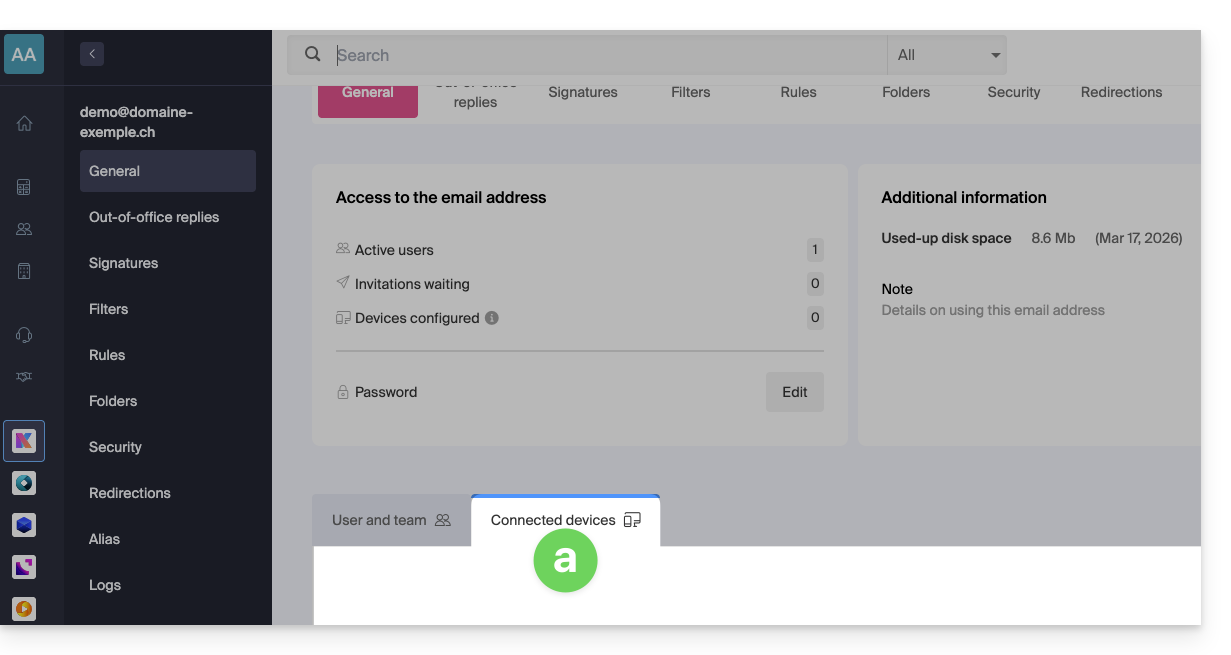
- either you know it because you have already created it in the Devices section of the Mail Service:
- or you can copy the new password that is located further down on the assistant page
config.infomaniak.comthat was opened previously: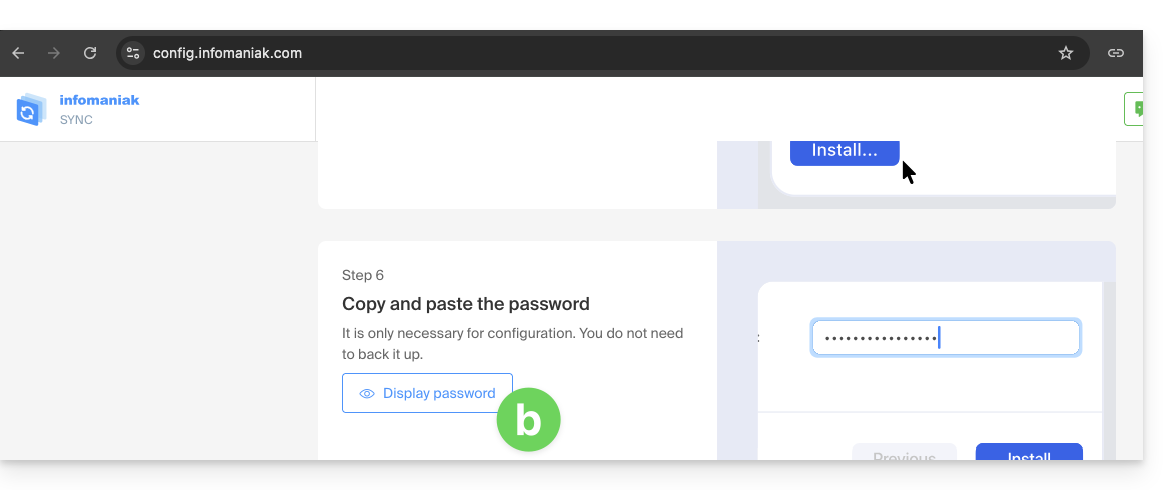
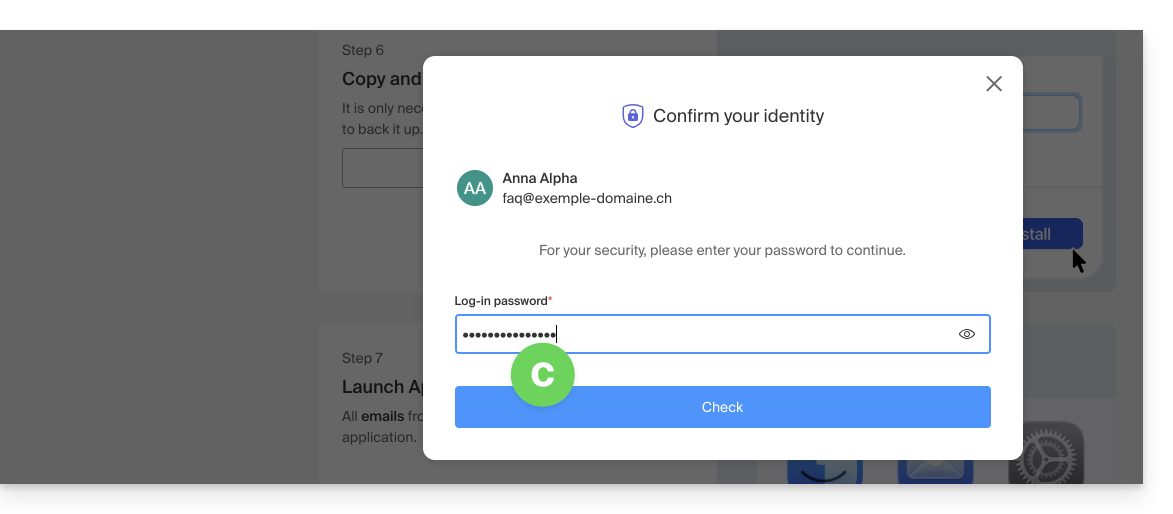
- Before the email address password is displayed, your Infomaniak account password may be requested for security reasons:
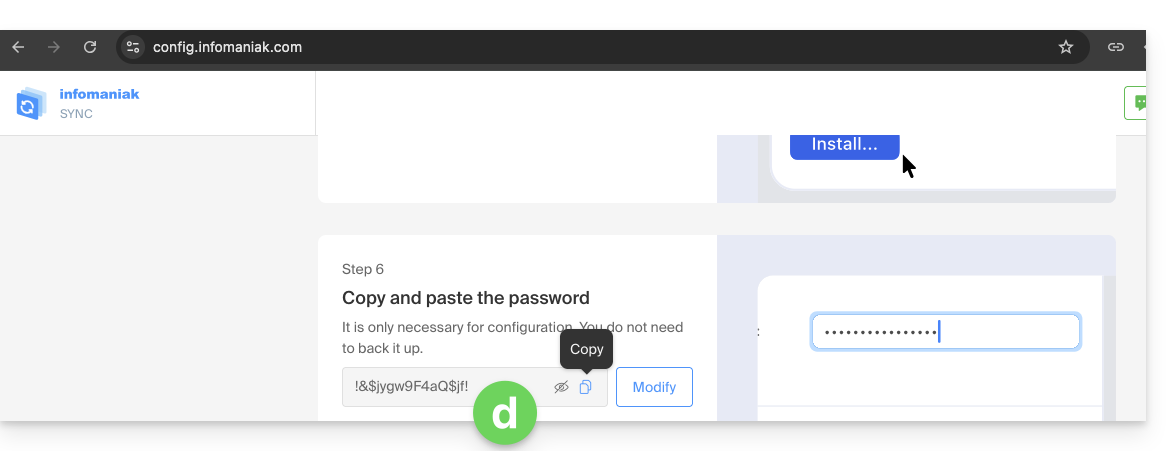
- There you go, the randomly generated password is displayed, simply copy it:
- either you know it because you have already created it in the Devices section of the Mail Service:
- Paste the password into the macOS window.
- Click Install to start installing the profile:
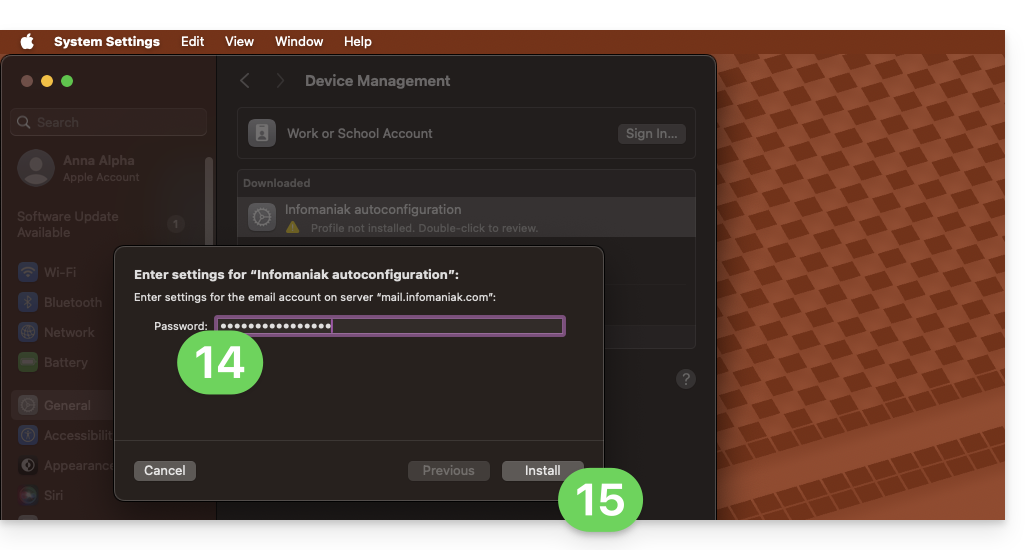
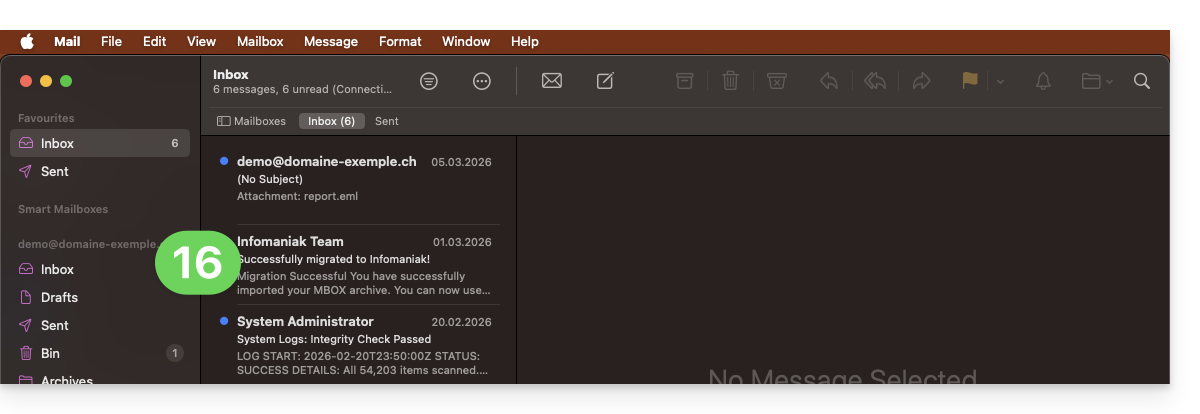
- That's it, your email address is now configured in the Apple Mail application, which you can open and manage:
Remove an IMAP account
Refer to the "Stop using an account" chapter. If necessary, change the version of your system at the top of the page*. (Note: Do not delete a POP-configured account without saving your messages beforehand).
Delete an Apple profile
Refer to the official documentation by changing the version of your system at the top of the page * if necessary.
*Why is it necessary to select the guide version that exactly matches your macOS / iOS system version?Apple introduces subtle changes with each new version of its system, for example, a path in iOS 15…
… becomes this in iOS 18…
Link to this FAQ: https://faq.infomaniak.com/1316
Has this FAQ been helpful?