Knowledge base
1000 FAQs, 500 tutorials and instructional videos. Here, there are only solutions!
Create an email signature template
This guide explains how to create a template for the signature tool for all your email accounts in the Infomaniak Mail web app (online service ksuite.infomaniak.com/mail).
Introduction
- A template allows you to create the basic structure of a tool that can then be used by multiple users of the same Infomaniak Mail service, and can even be customized according to the person who will be using it.
- In the case of a signature template, the template creator defines the signature's style and chooses the elements that must be included. The end user can then complete certain details of their signature from their Mail interface.
- You can also hide a template so that it is no longer used.
Choose the signature template type
To start creating a template:
- Click here to access the management interface for your product in the Infomaniak Manager (need help?).
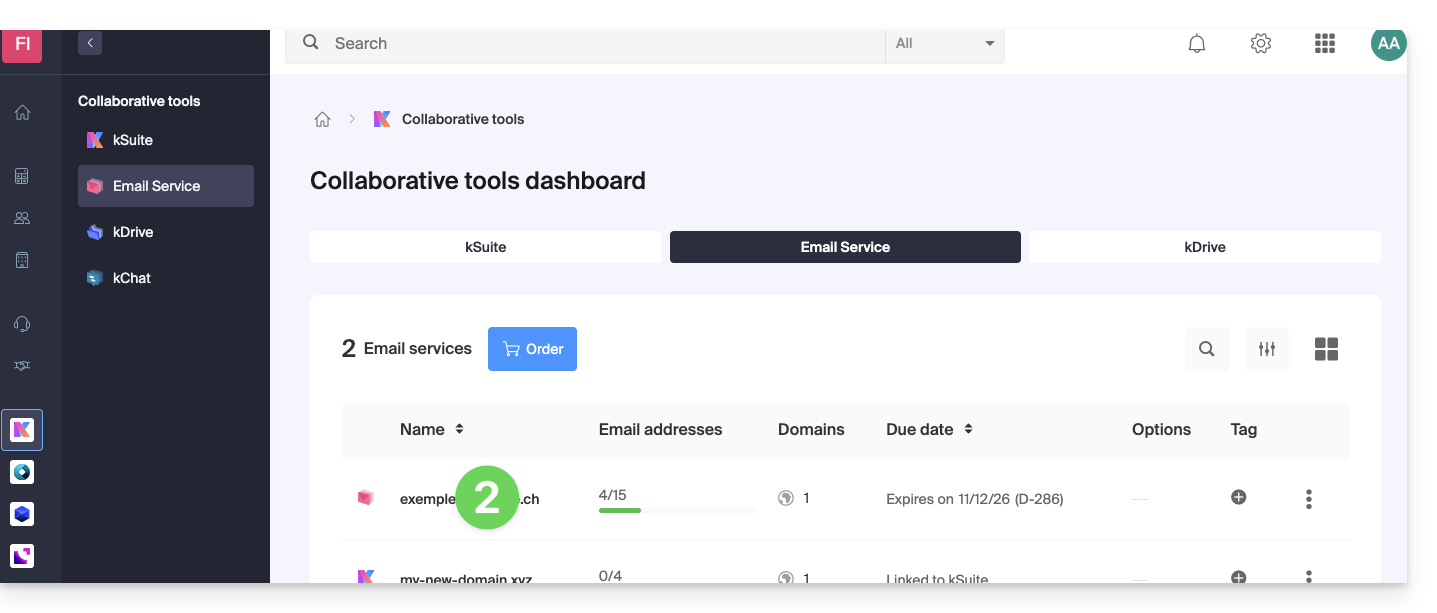
- Click directly on the name assigned to the product in question:
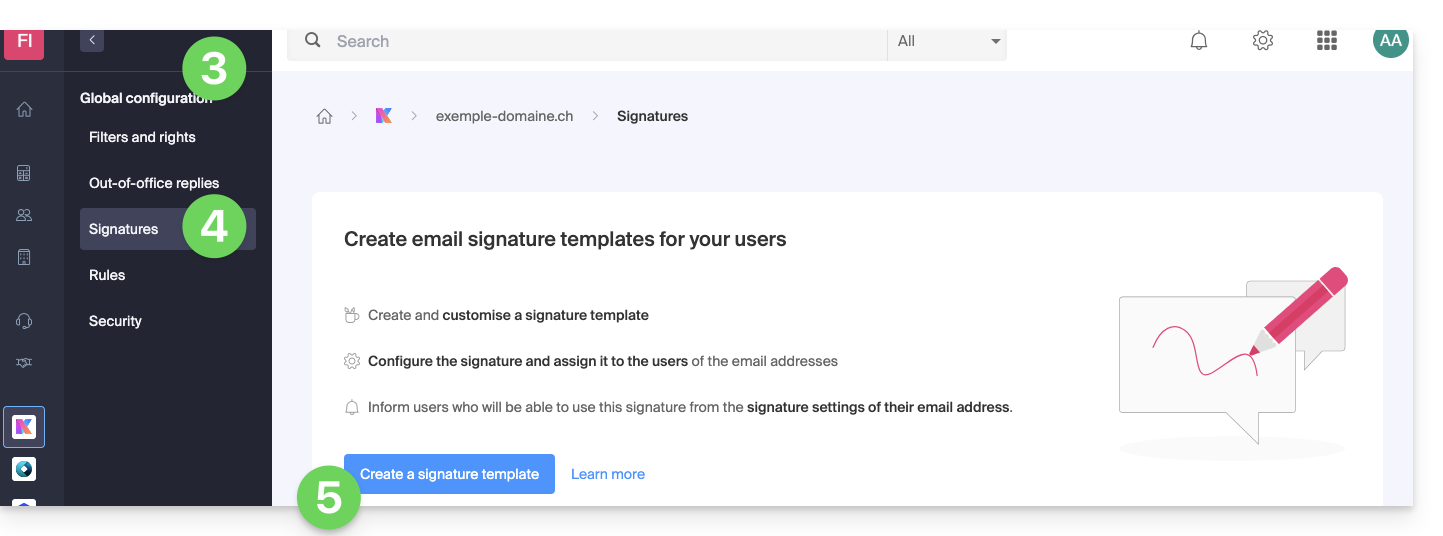
- Click on Global Configuration in the left-hand menu.
- Click on the Signature tab.
- Click on Add a signature template:
- Select the type of template (details below) and click the Continue (
d) button to access the template: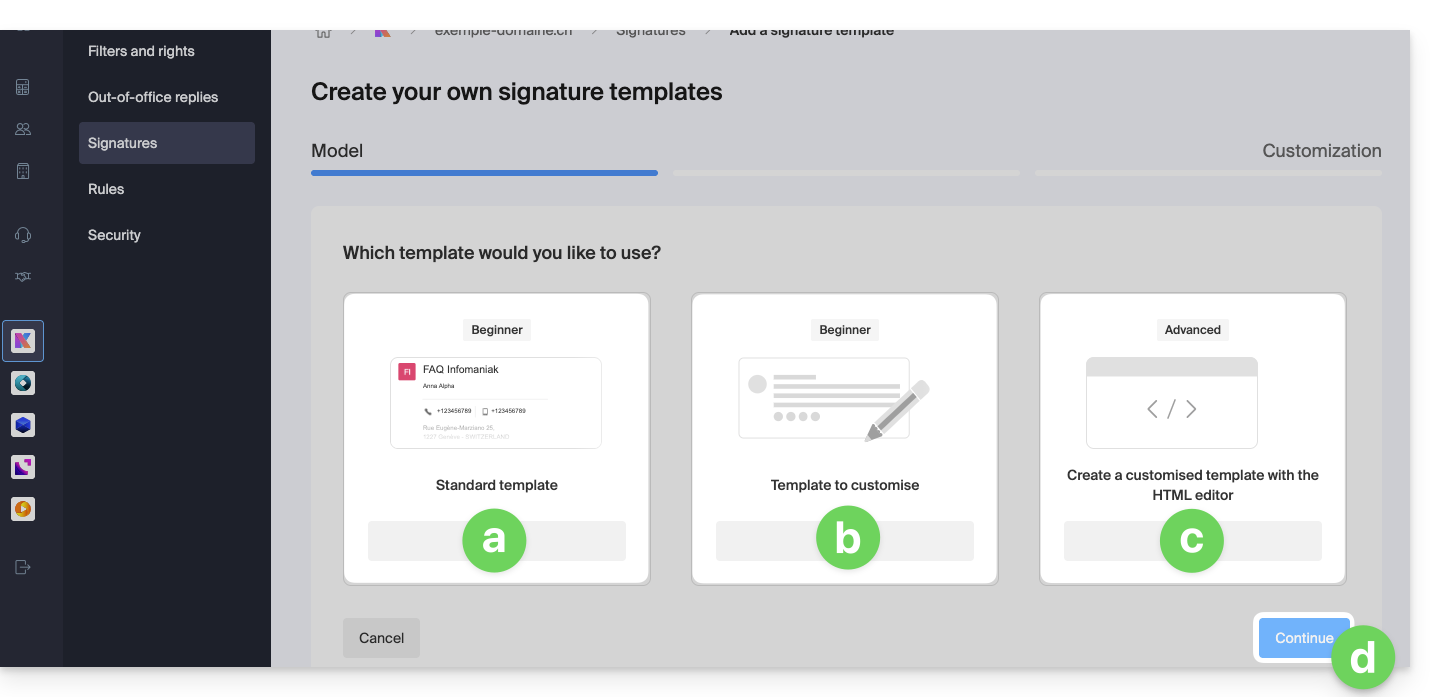
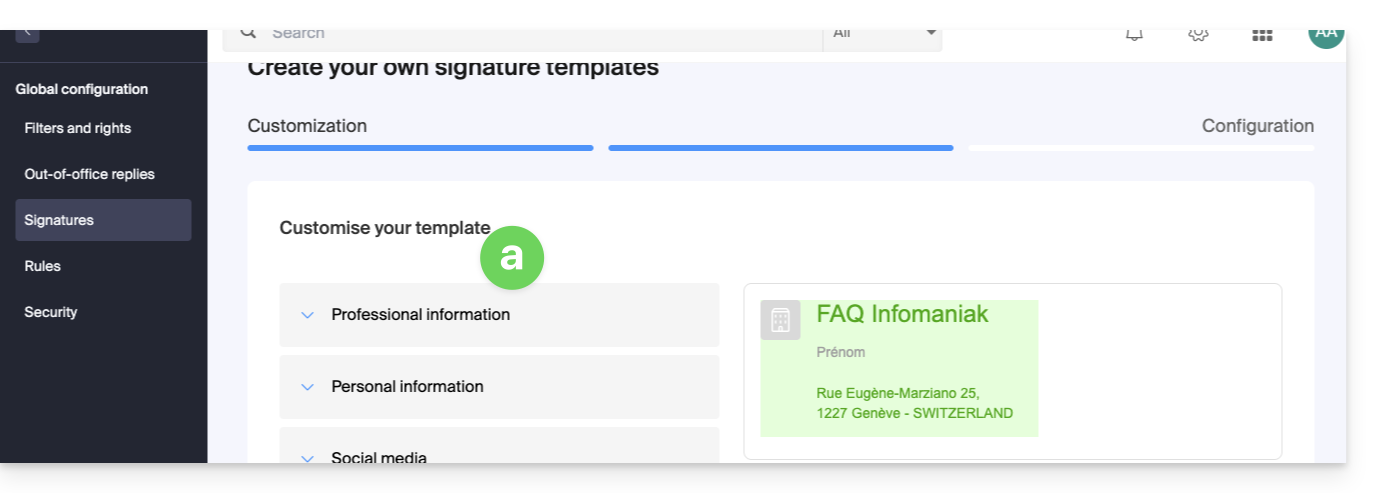
- Allows you to configure the signature block with the usual information; the elements are detailed further down in this guide:
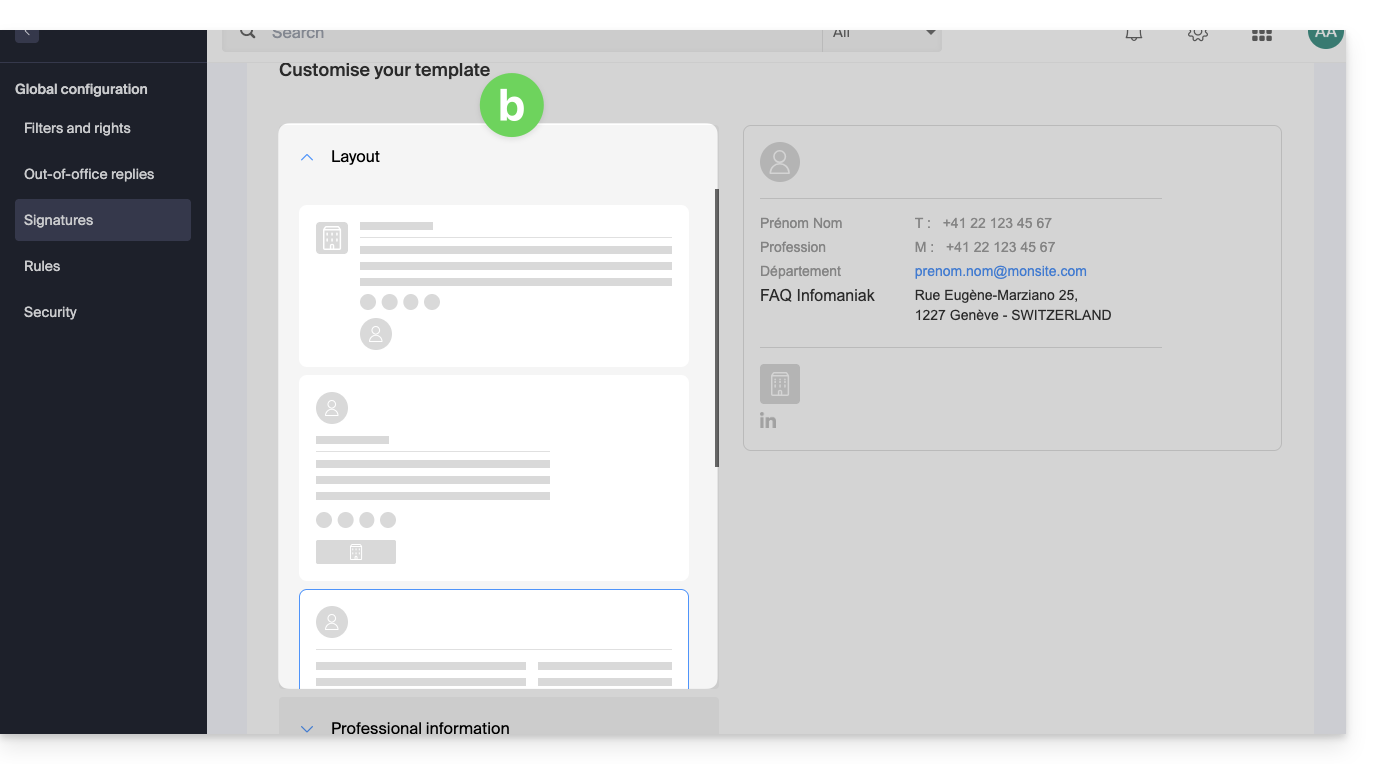
- Allows you to configure the signature block with the usual information and the layout of the elements can be modified using predefined settings; the elements are detailed further down in this guide:
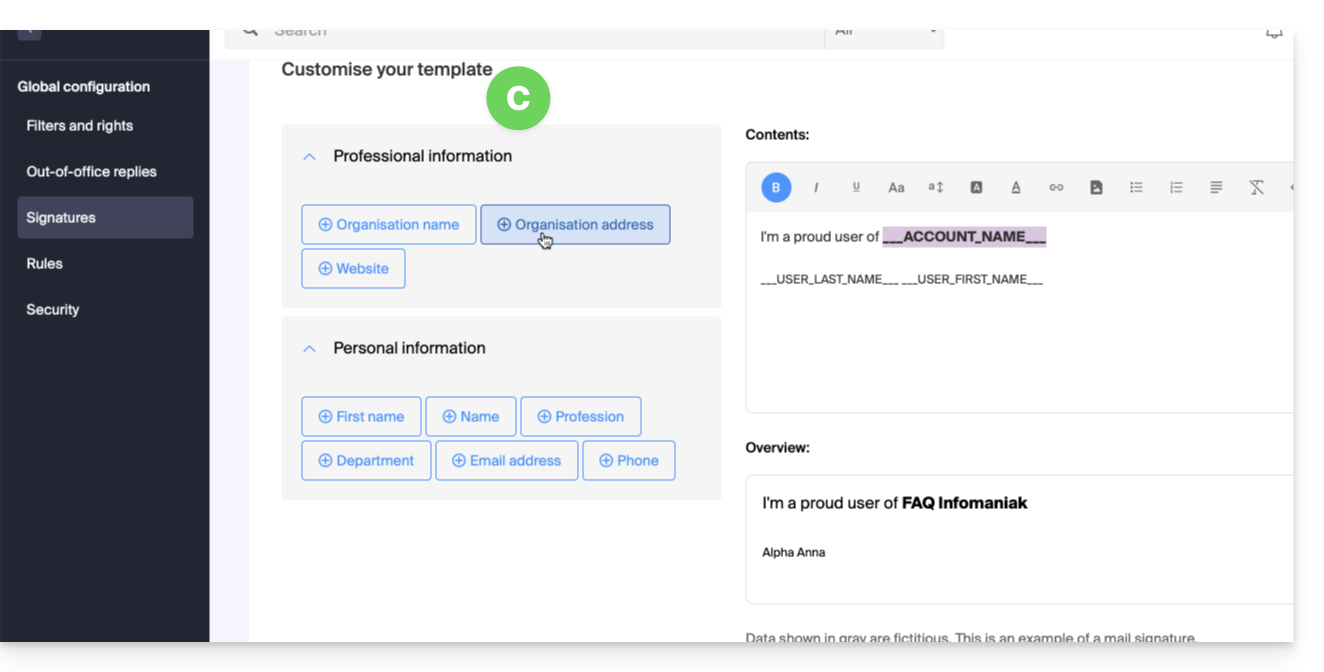
- Allows you to configure the signature block starting from a blank block, and the information can be inserted as variables:
- In this mode, it is also possible to work directly with the HTML code:
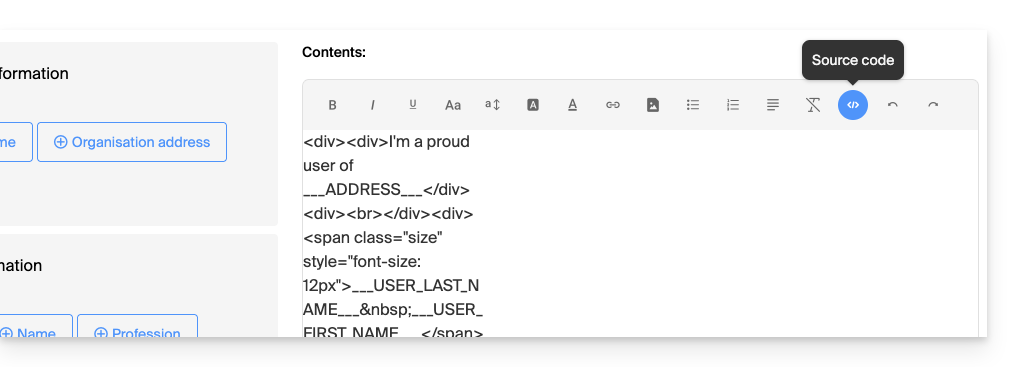
- In this mode, it is also possible to work directly with the HTML code:
- Allows you to configure the signature block with the usual information; the elements are detailed further down in this guide:
Configure the signature base
Depending on the selected template:
- Define the fields to keep and insert using the checkboxes.
- Configure the display preferences for certain information, such as the order
First Name - Last Name. - Some fields can be:
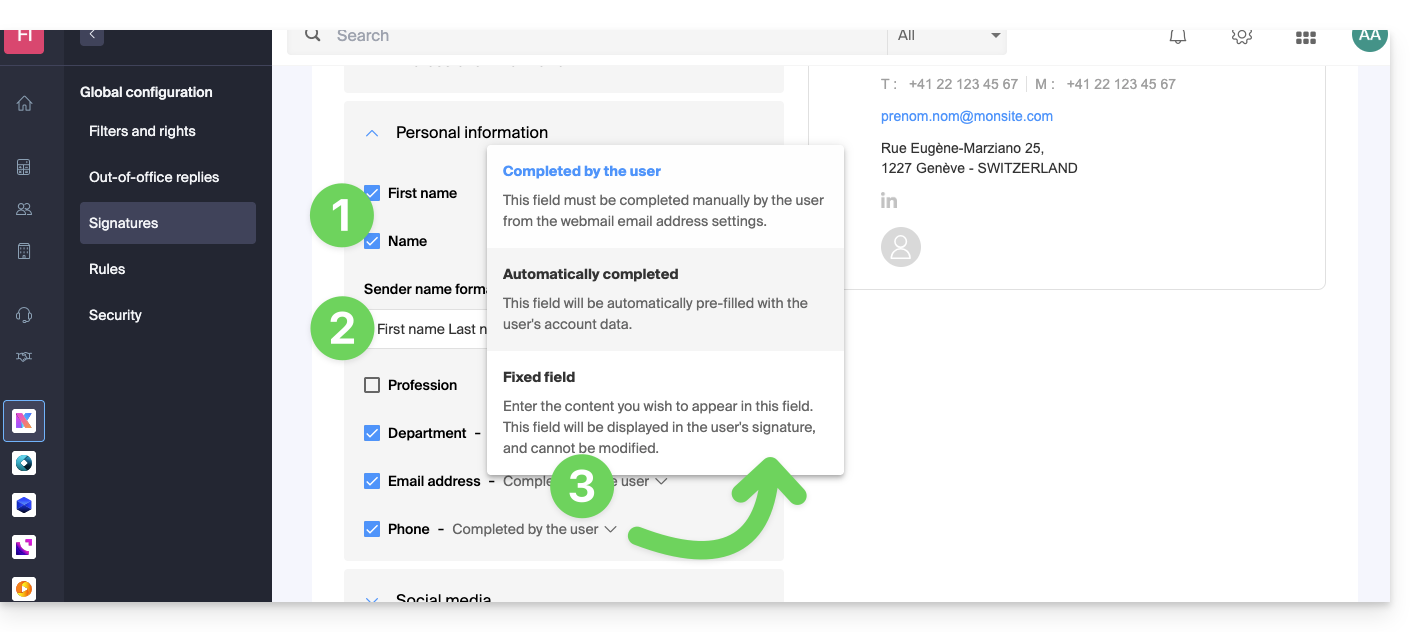
- completed by the user in their Mail app settings,
- automatically completed based on the information in their Infomaniak account,
- defined here and will therefore be fixed and common to all users.
- Click on the Continue button at the bottom of the page.
- Give the template a name.
- Decide whether this template should be accessible and applied to users of existing addresses on the Mail Service.
- Click the blue Finish button or save as a draft:
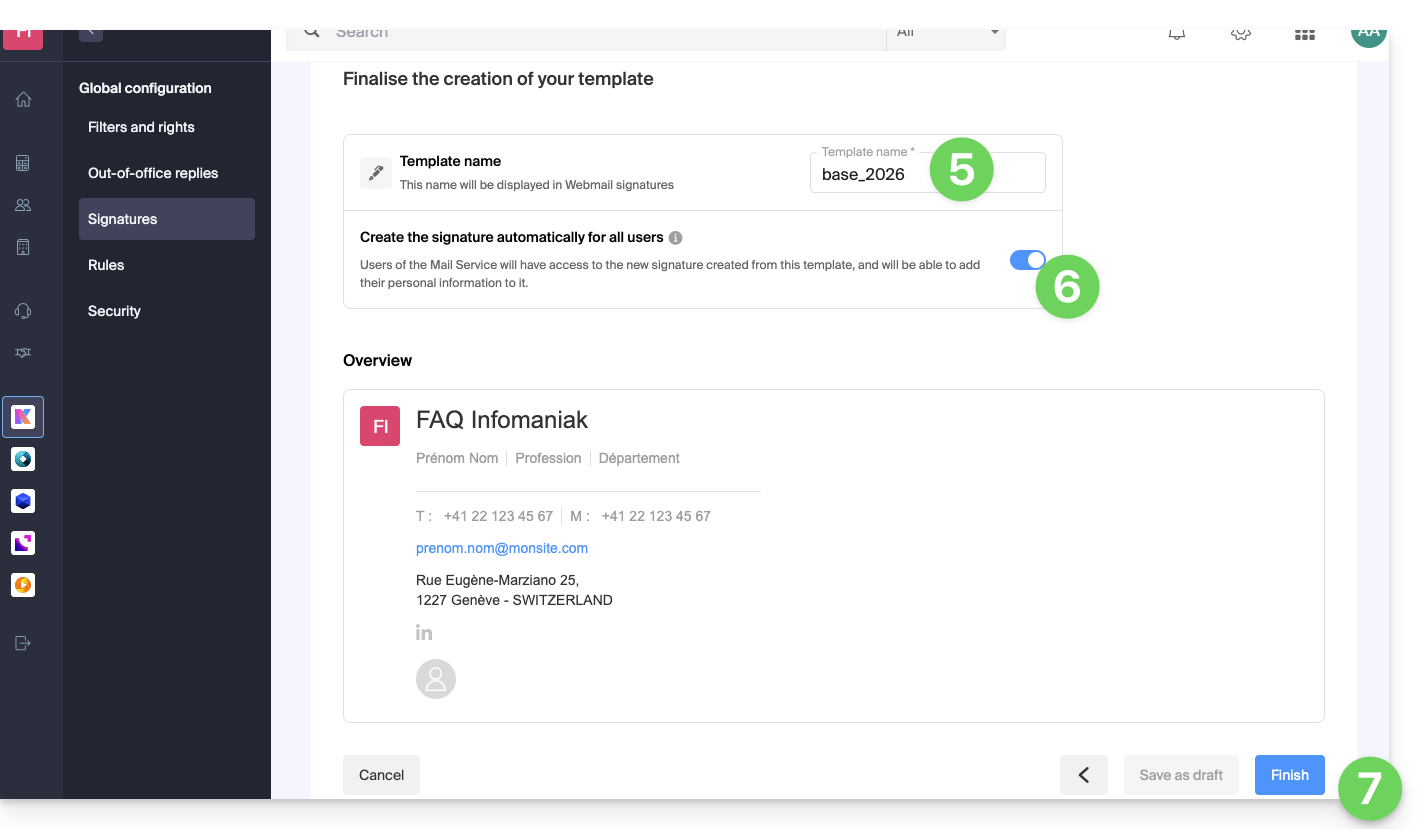
An email is sent to users affected by the creation of this template, inviting them to go to the signature management section to complete the information if necessary.
- When editing a signature template, you can decide whether or not to notify users of the changes that have been made:
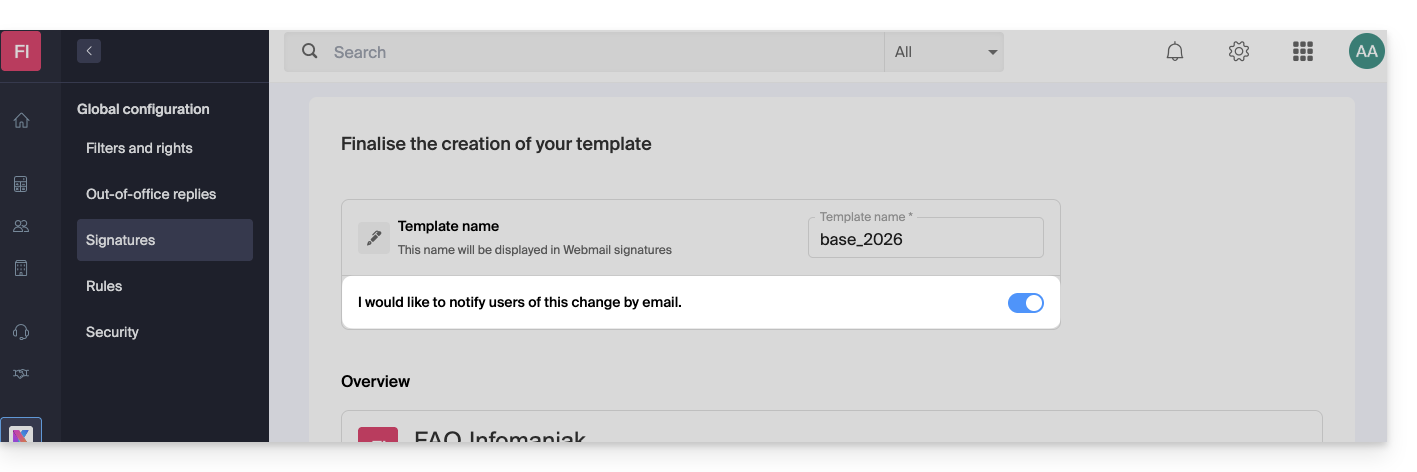
Complete the information used in the signature
Depending on the template used, the end-user can add their personal information in the Mail app to ensure the signature is displayed completely: 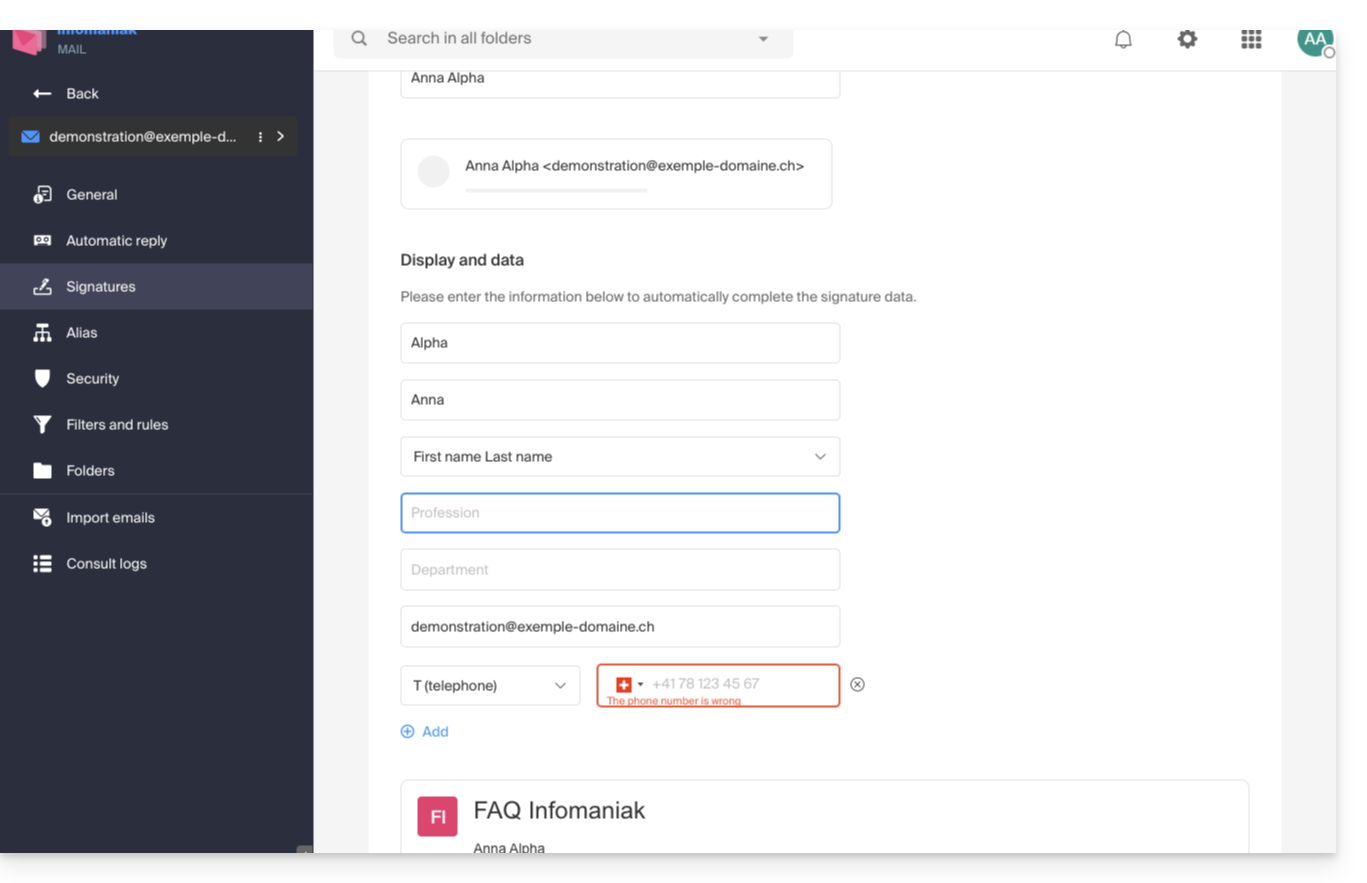
Apply signatures to users from this template
From the Signatures section of the Global Configuration, click on the action menu ⋮ located to the right of the signature template: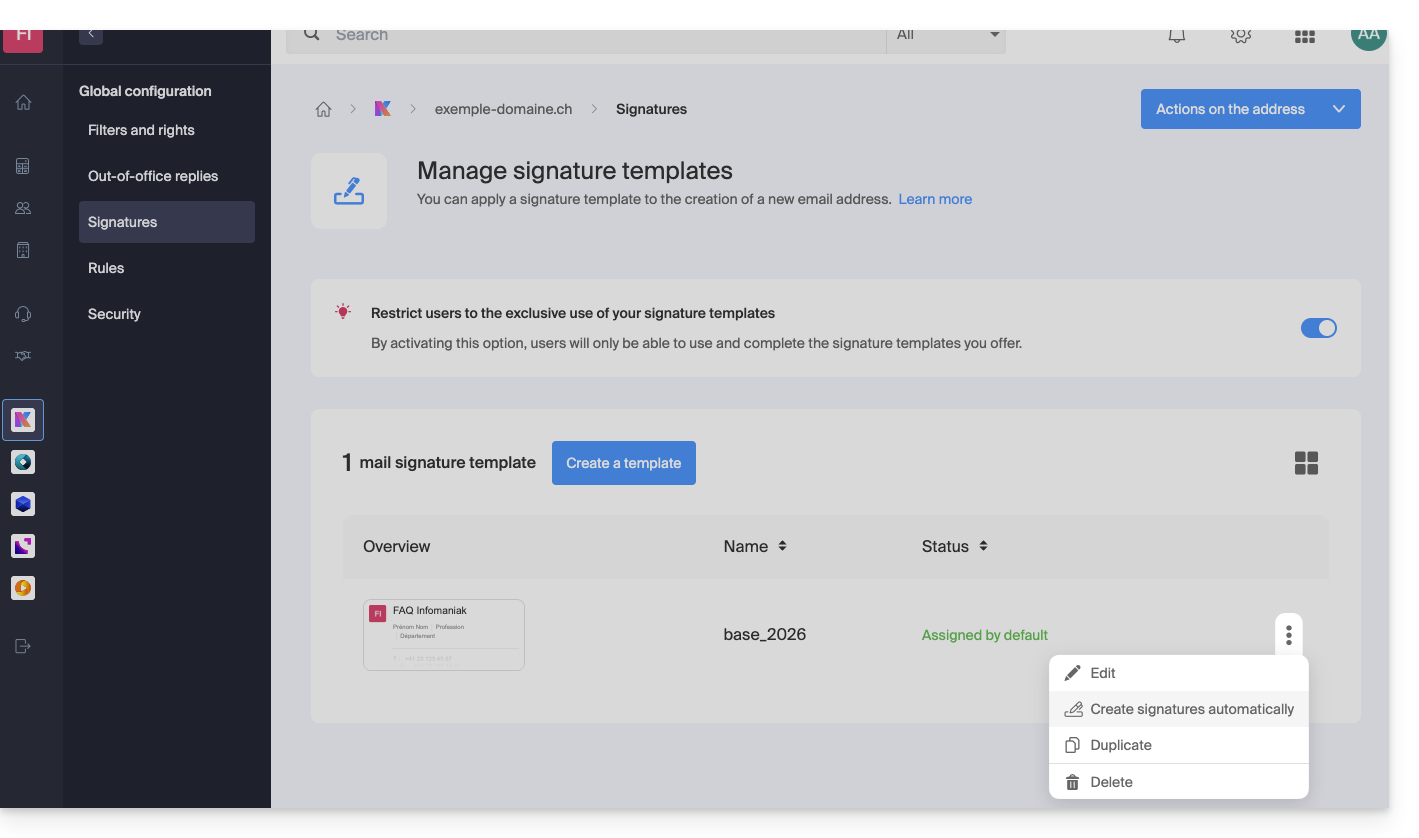
You can edit the signature, duplicate it to create a different signature for certain people based on this template, and delete it.
Another option allows you to create signatures for the different users using the email addresses of the domain:
- They will be notified by email that a new signature is available.
- For shared email addresses, if you want a generic signature that uses this template, without it being associated with a specific user, you must configure it yourself from the Infomaniak Web Mail app or the Mail Service.
Mail service users will then be able to…
- … use the new signature created from this template
- … add their personal information
Enforce this template for new signatures
In the Signatures section of the Global Configuration, activate the toggle switch to prevent users of the Mail Service from creating a custom signature: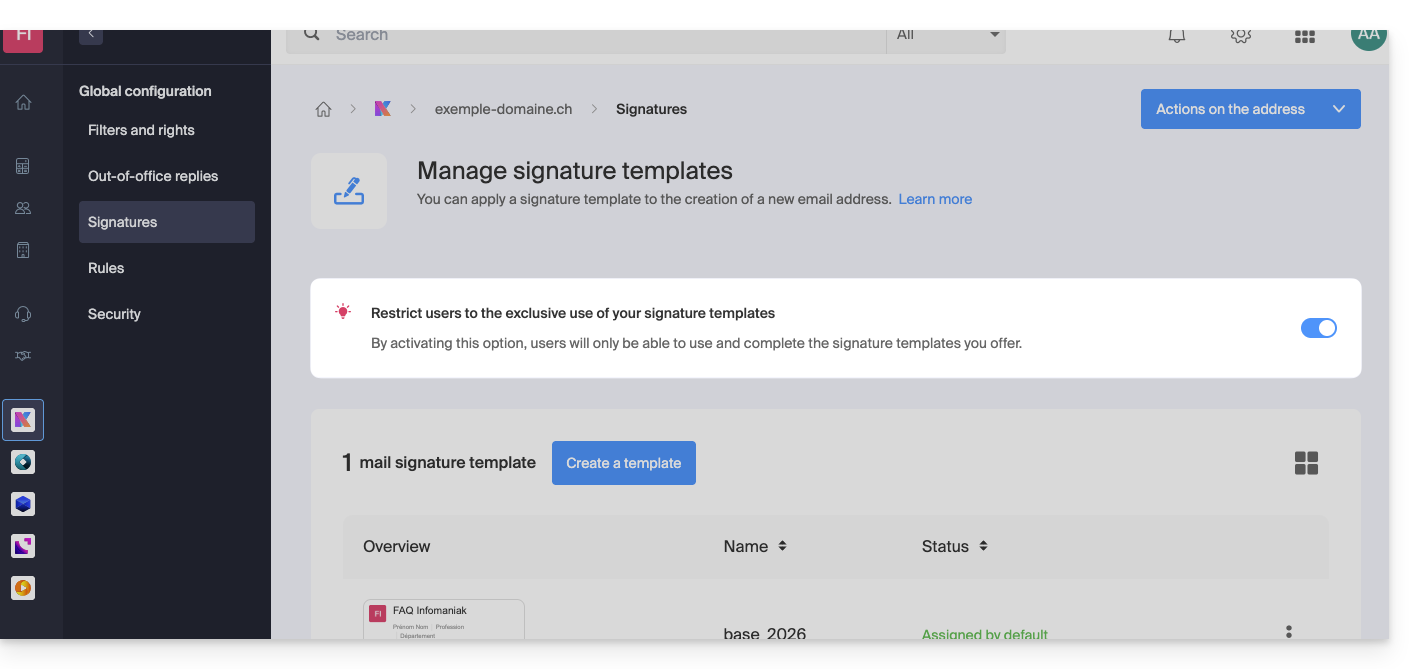
- The template created previously will then serve as the basis for any new signature created by the user:
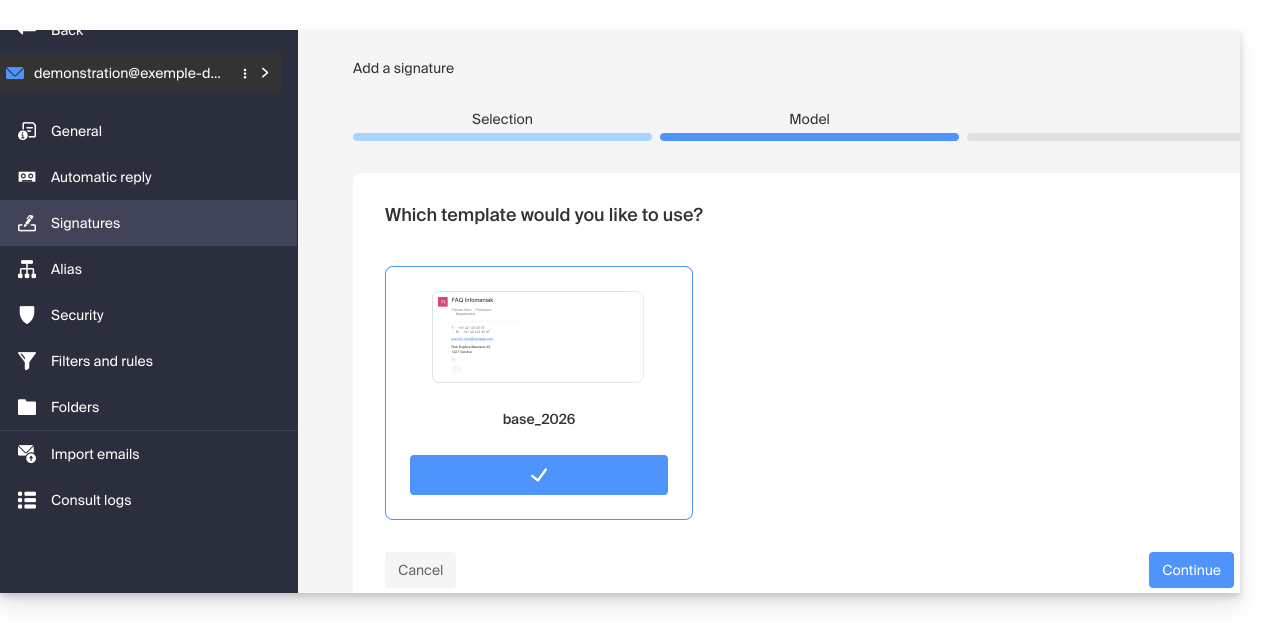
- If the option is disabled, the choice is left to the user:
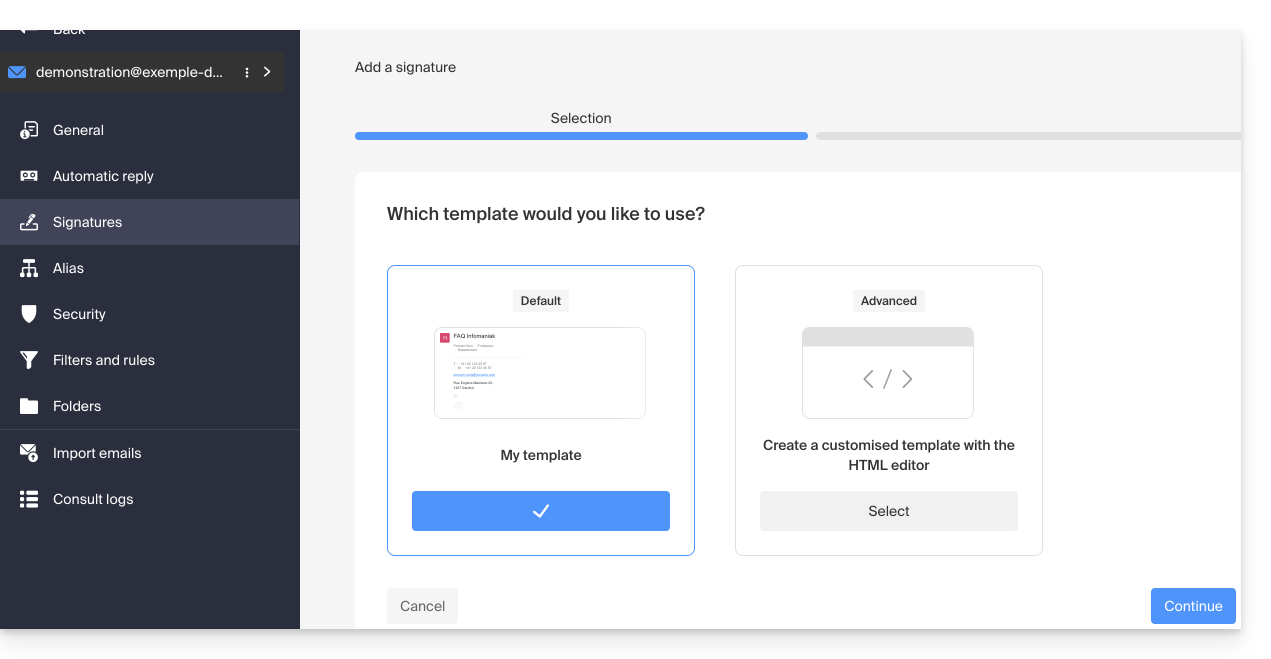
Enable a template on an existing email address
You need an existing template to activate it for one or more email addresses. This can be useful when the template is created after the addresses already exist:
- Click here to access the management of your product on the Infomaniak Manager (need help?).
- Click directly on the name assigned to the product in question.
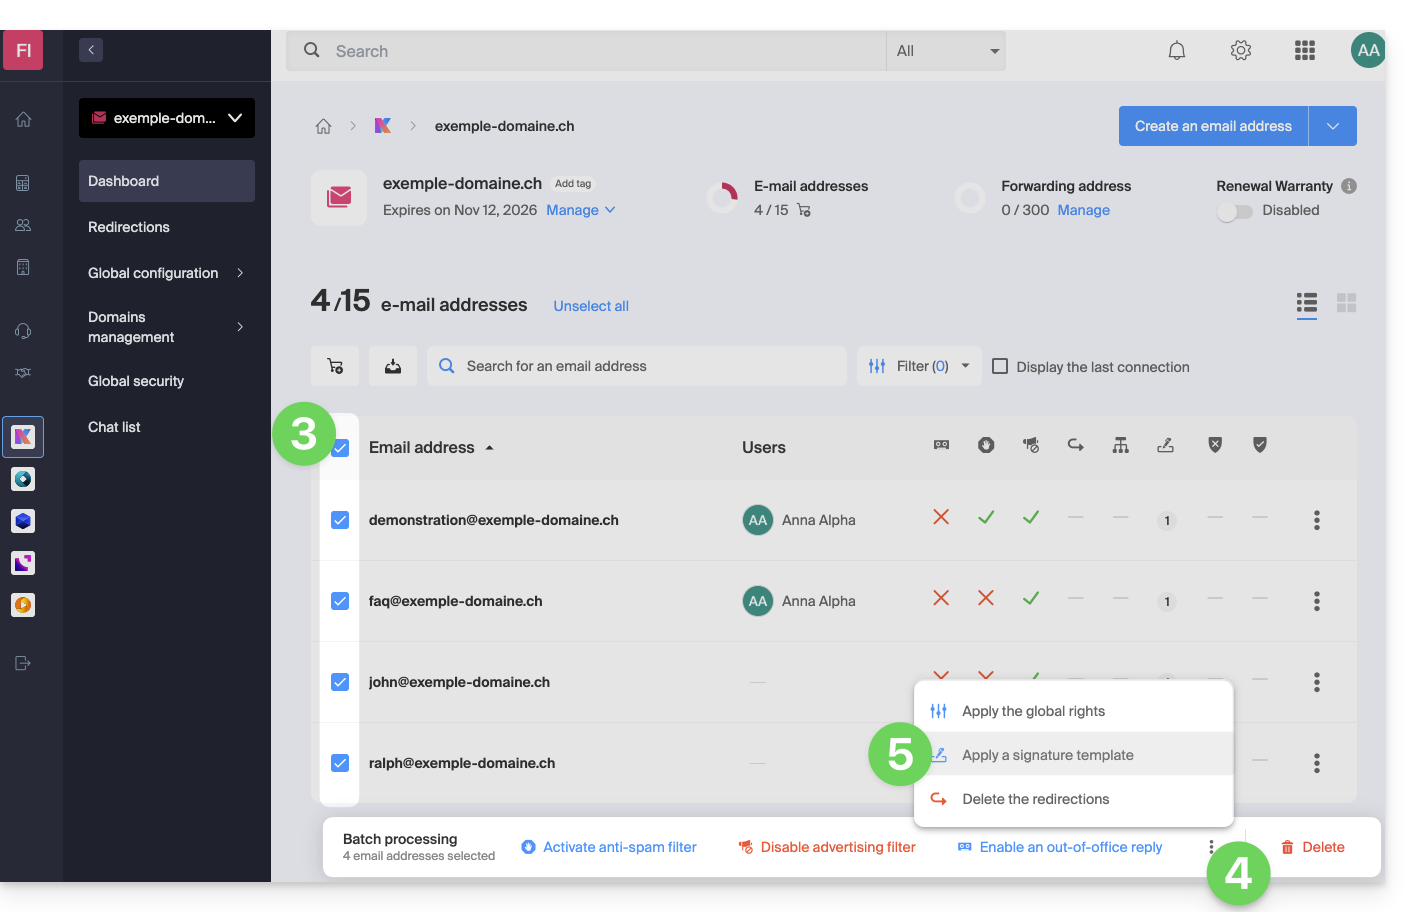
- Click on the boxes to select one or more email addresses in the table that appears.
- Click on the action menu ⋮ at the bottom of the page.
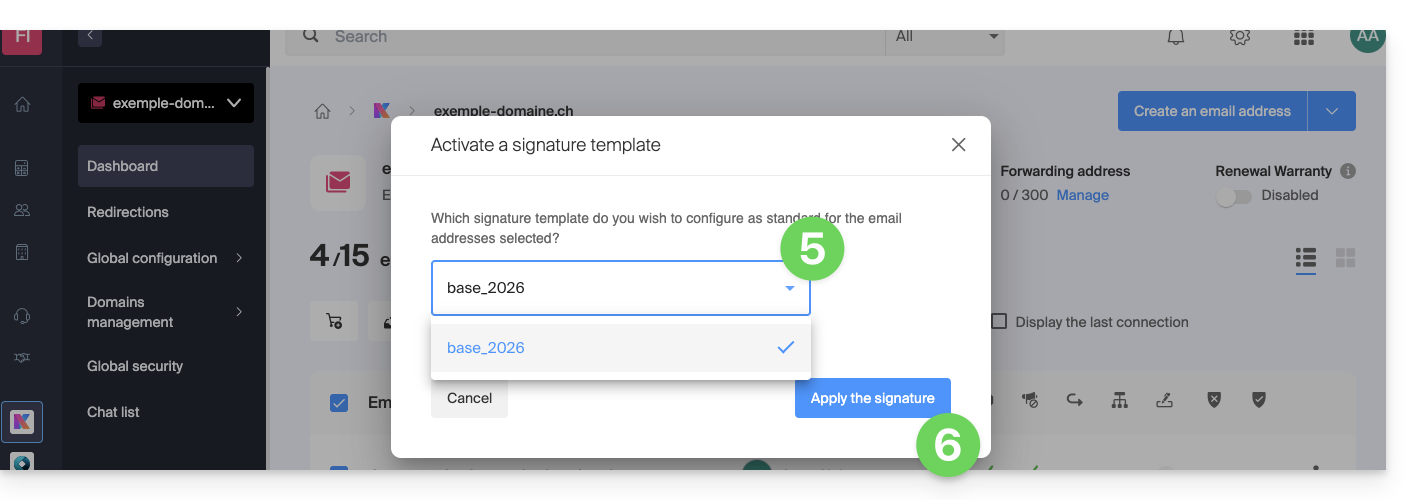
- Click on Apply a signature template:
- Select the template of your choice.
- Click on the Activate button:
Link to this FAQ: https://faq.infomaniak.com/1189
Has this FAQ been helpful?