Knowledge base
1000 FAQs, 500 tutorials and instructional videos. Here, there are only solutions!
Allow Infomaniak to access your products / Complete a support request
This guide explains how to authorize Infomaniak Support to access your online products and more specifically their content, and provide useful details when requesting assistance.
Preamble
- Infomaniak Support may ask you to grant temporary access to part of your content.
- This access is strictly limited to the analysis context and is used solely to identify the source of the problem encountered.
- It saves time in diagnosing by avoiding unnecessary back and forth.
- In accordance with Infomaniak's privacy policy, your data will never be used for other purposes.
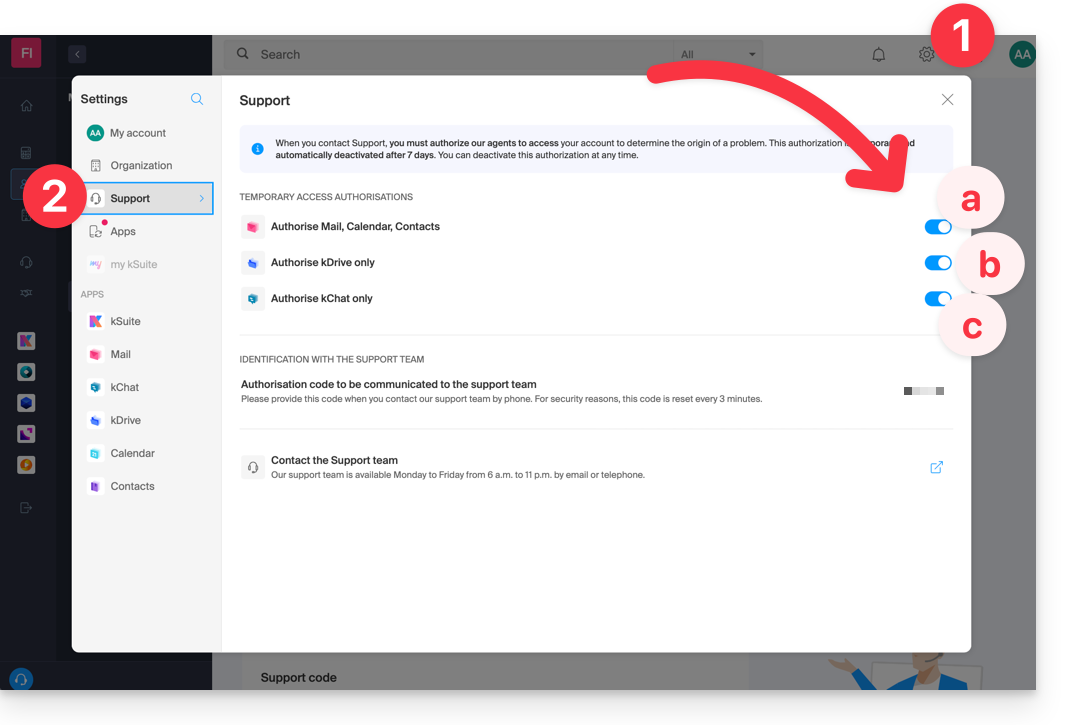
Authorize Support to access a type of content
To authorize Infomaniak to access a specific part of your services (authorizing access to content never opens access to others; each authorization is specific and independent):
- Click here to access the management of accesses on the Infomaniak Manager.
- Click on the toggle switch to authorize access to the content of…
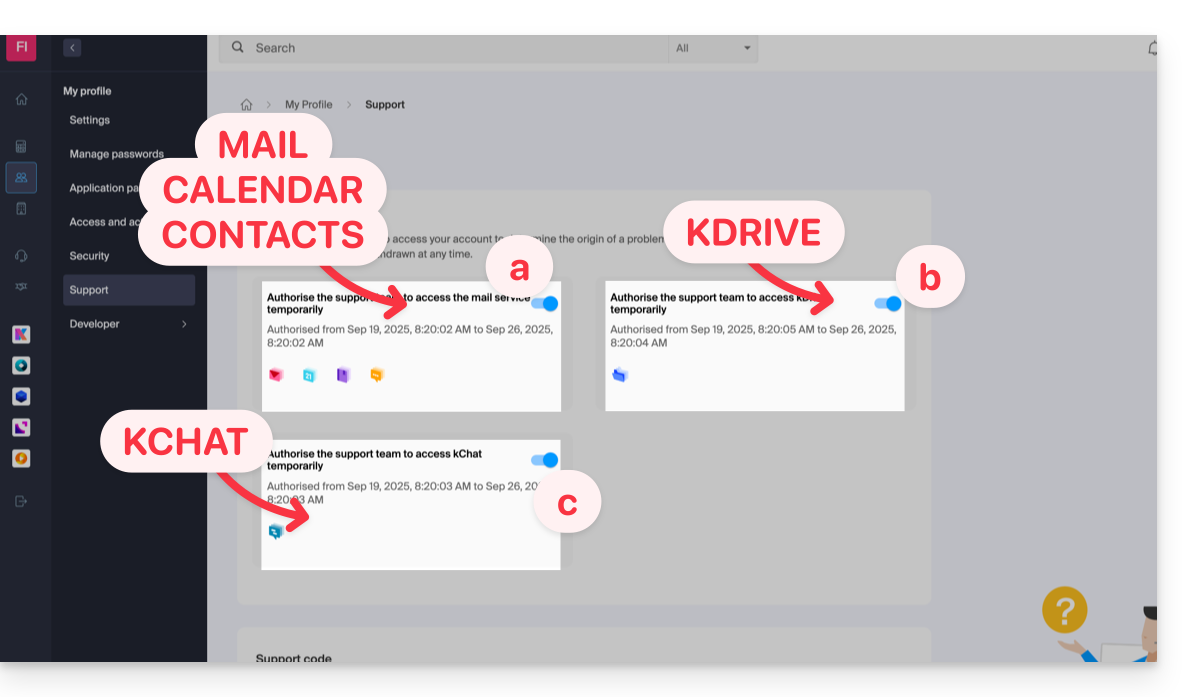
- … email addresses linked to the Web Mail app Infomaniak (online service ksuite.infomaniak.com/mail).
- … folders among the kDrive(s) existing in the Organizations of which the current user is a part.
- … discussions among the kChat product(s) existing in the Organizations of which the current user is a part.
With my kSuite+, you can also do this by clicking here or proceed as follows to get there:
- Click on the Settings icon at the top right of your my kSuite+ window.
- Click on Support in the left sidebar:
Who can access it?
- Only Infomaniak employees handling your support request directly.
- Access is only from Infomaniak's controlled facilities.
Duration and control of access
- You can revoke this access at any time.
- Otherwise, it expires automatically after 7 days.
You can also share a single specific email very easily.
Taking screenshots…
… on Windows
Microsoft provides a software pre-installed for screenshots. But to do it manually:
- Display what you want/need to send on the screen.
- Press the PRINTSCREEN key on your keyboard (or
PRTSCR,IMPR. ECRAN, etc.) once. - In Microsoft Word (or similar), do "Edit" -> "Paste" to place your image on the page.
- Save your file.
- Repeat the operation from step 1 to step 5 as many times as the number of desired screenshots.
… on macOS
- Press the keys "
CMD" + "shift" (the hollow arrow up — shift) + the key "3". - Each press on these keys creates an image file on your computer's desktop.
… on iOS (iPhone, iPad...)
- Press the buttons "
Power" + "Home" (the only two physical buttons) simultaneously. - Retrieve the screenshots in the "Photos" app on your device.
… on Android (e.g., Samsung, LG, or Huawei)
- Press the "Volume Down" key (on the side) and the lock key simultaneously.
- The captured image is automatically saved in a Screenshots folder in the gallery.
Windows Popup
To copy-paste an error message present in a Windows popup as text, simply press the CTRL + C key on your keyboard to copy the message to the clipboard. You can then paste it (CTRL + V) into the body of the message you send us.
Browser Javascript console…
… on Windows
Chrome, Firefox and Safari: enter the key combination CTRL + SHIFT + i
Internet Explorer and Edge: press the F12 key
… on macOS
Chrome: enter the key combination ⌘ + ⌥ + J
Safari: enter the key combination ⌘ + ⌥ + C
- Then, click on the crossed-out circle icon or similar to reset the log.
- Display the page of your site affected by the issue.
- The console tab displays JavaScript errors and missing online resources.
Link to this FAQ:
Has this FAQ been helpful?