Knowledge base
1000 FAQs, 500 tutorials and instructional videos. Here, there are only solutions!
Manage my kSuite passwords
This guide details how to use a my kSuite account, and it is important to distinguish between the Infomaniak account password and the passwords for the my kSuite address (ik.me, etik.com, ikmail.com).
1. Registration: creating the login and password
When you registered for my kSuite, you chose an email address, which is also your login, in the format xxx@ik.me or xxx@ikmail.com, etc., as well as a login password: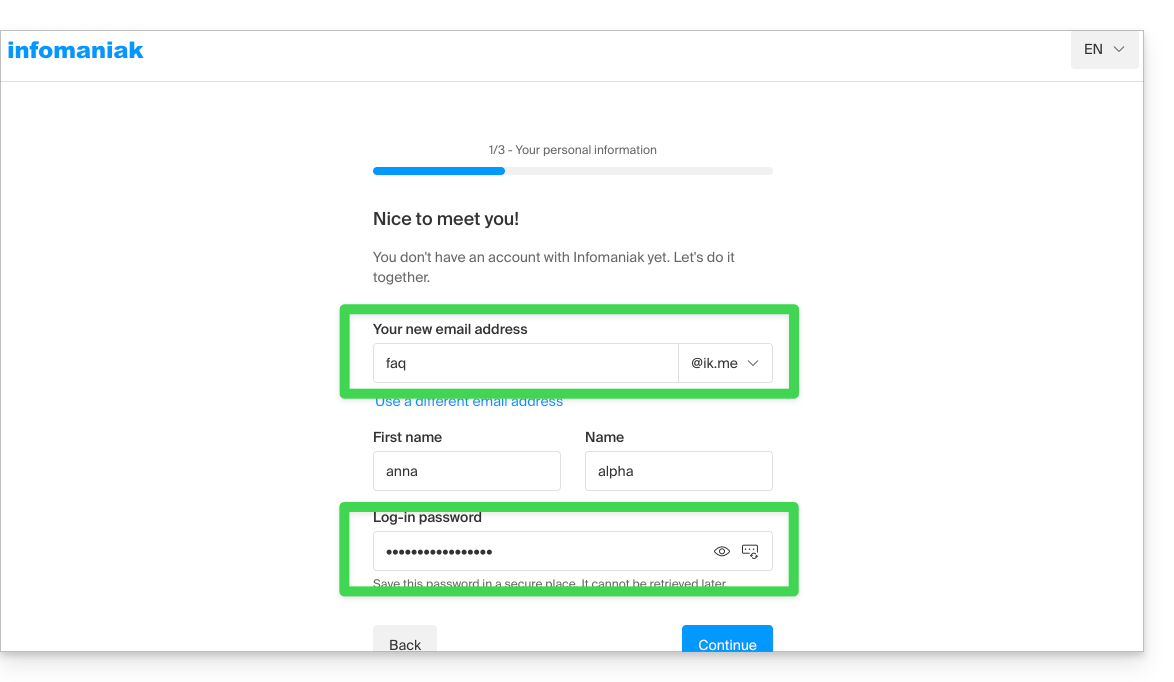
Once registered, you can go to ksuite.infomaniak.com/mail and use the email service: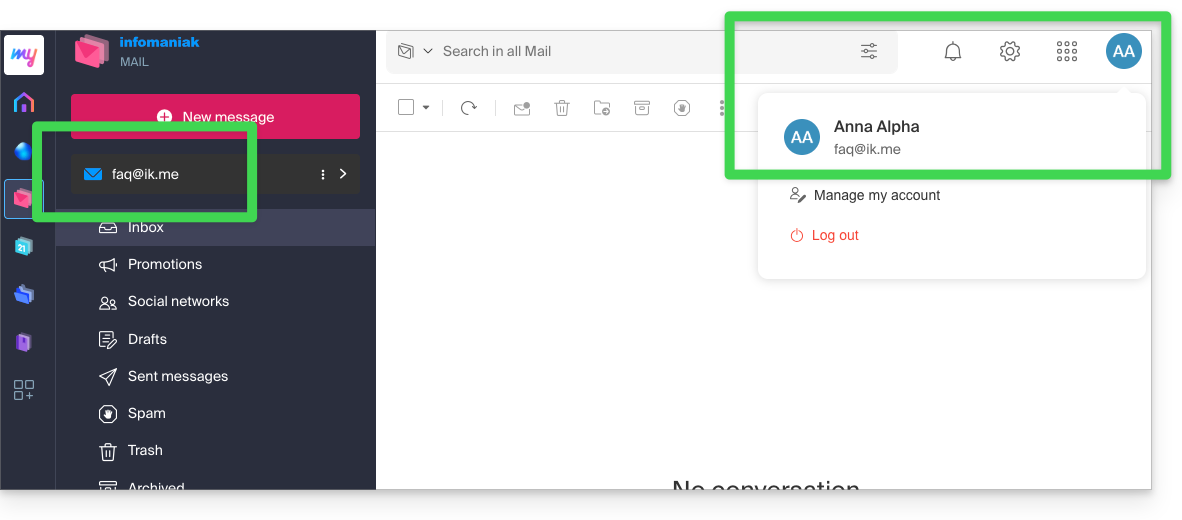
2. Reconnecting: using the login and password
On another computer or after reopening the browser, simply go back to ksuite.infomaniak.com/mail (or ik.me) and reconnect using the information you created and obtained (see point 1 above):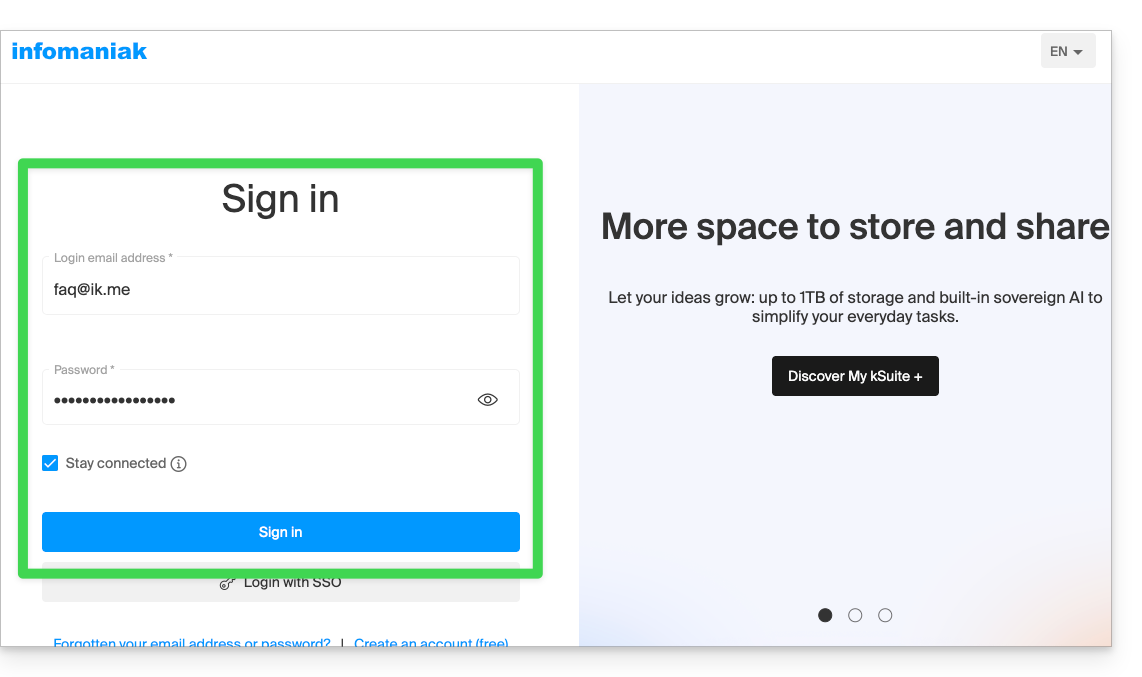
You will then access your email within the my kSuite Infomaniak interface: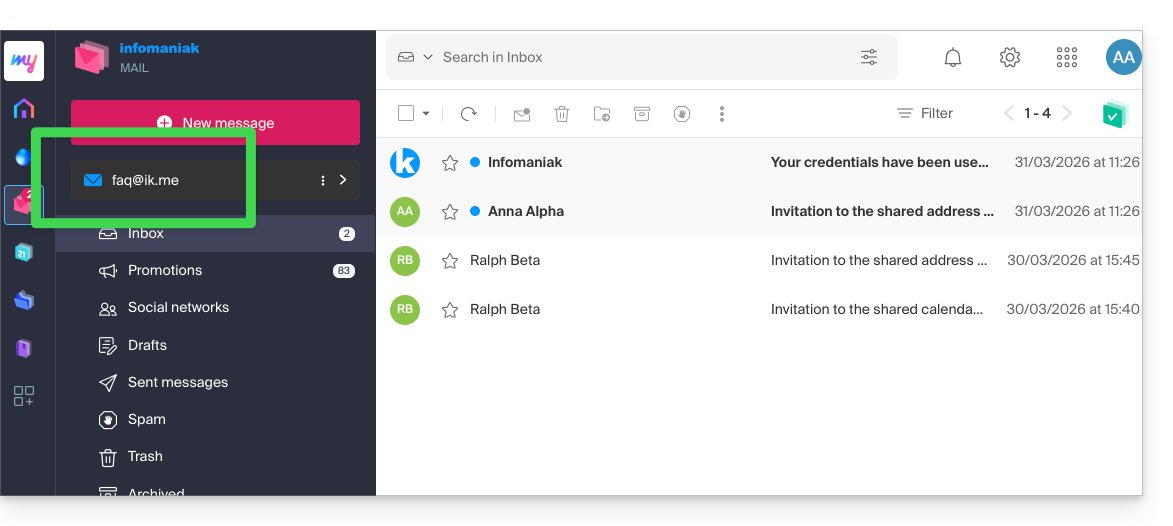
3. Using the email address outside of Infomaniak
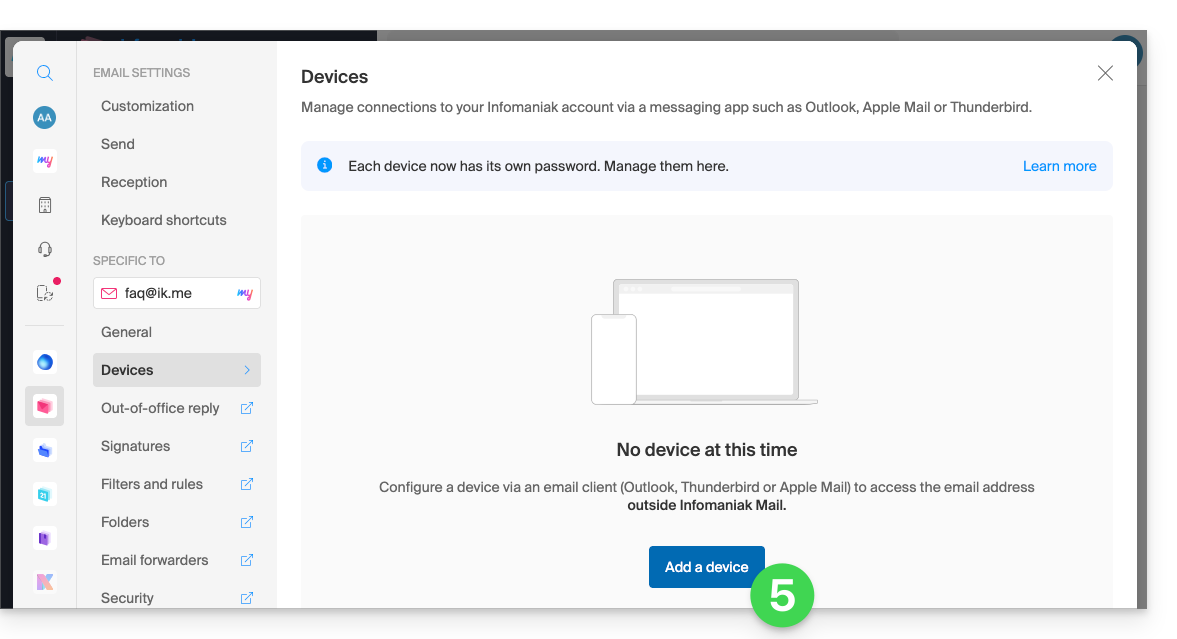
To synchronise your email address with a software/email client such as Outlook or Thunderbird, or even on an iPhone or Apple Mail on macOS, you need to create an additional password (= “a device”) because the password for your Infomaniak account (points 1 & 2 above) will not allow you to configure the address outside of Infomaniak.
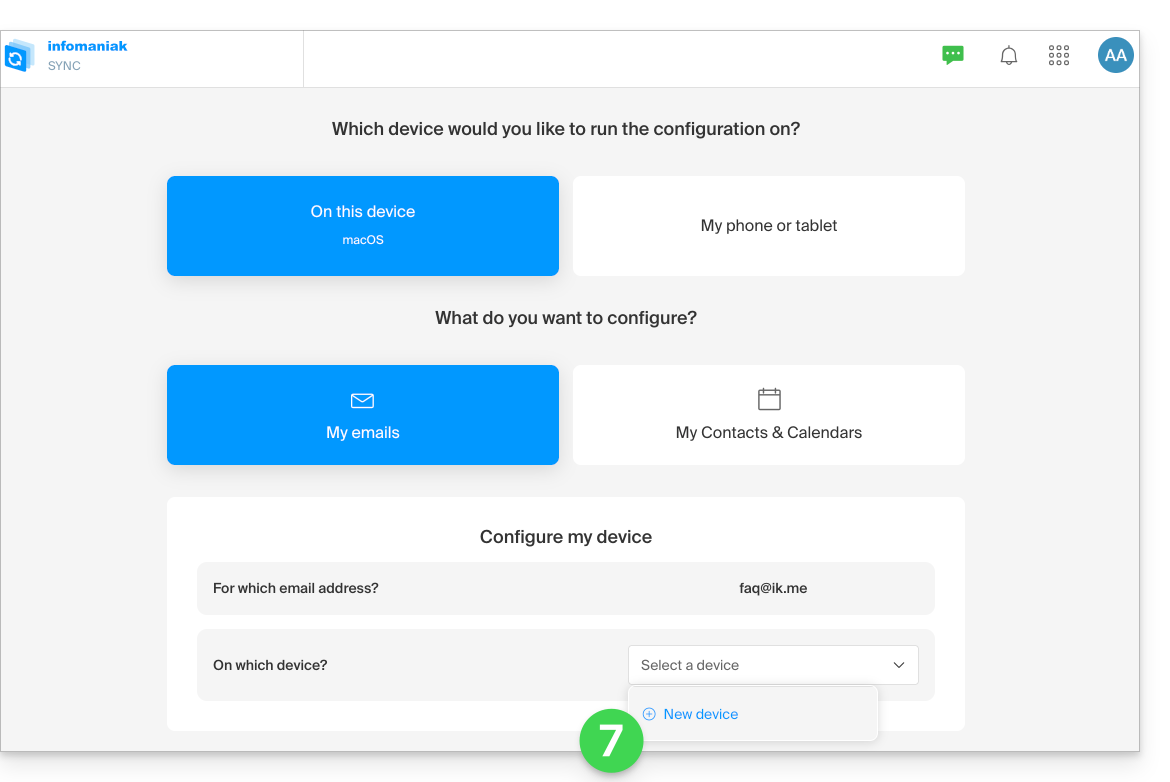
To add a device (= “create an additional password”):
- Log in to your my kSuite account as in point 2 above.
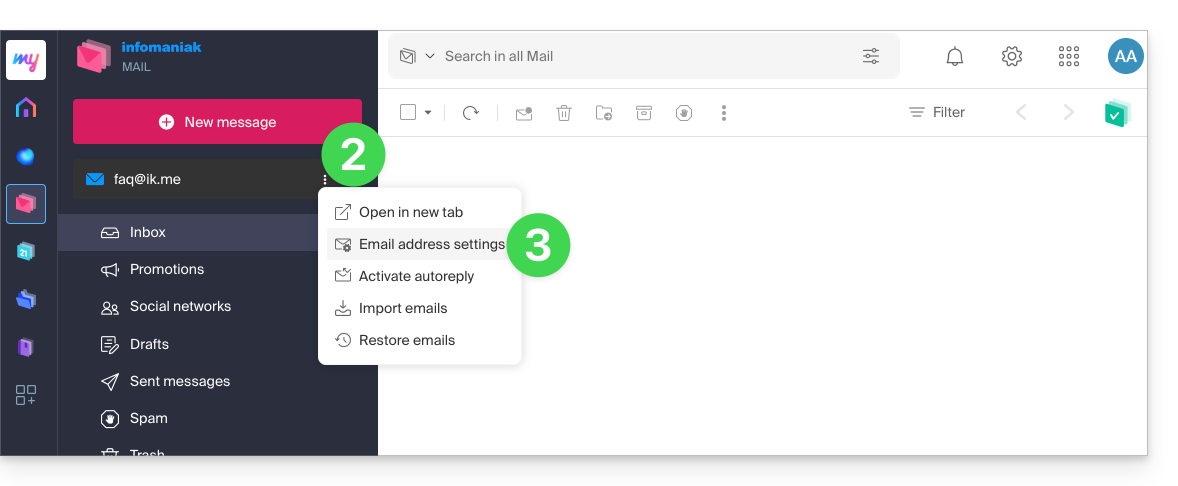
- Click on the action button ⋮ to the right of your my kSuite address.
- Click on the settings for the email address:
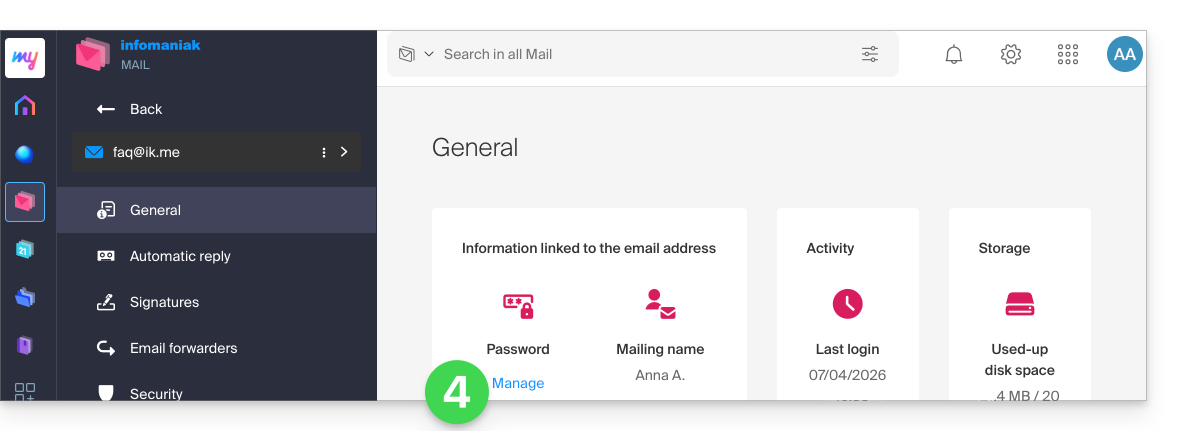
- Click on Manage password:
- Click on Add a device:
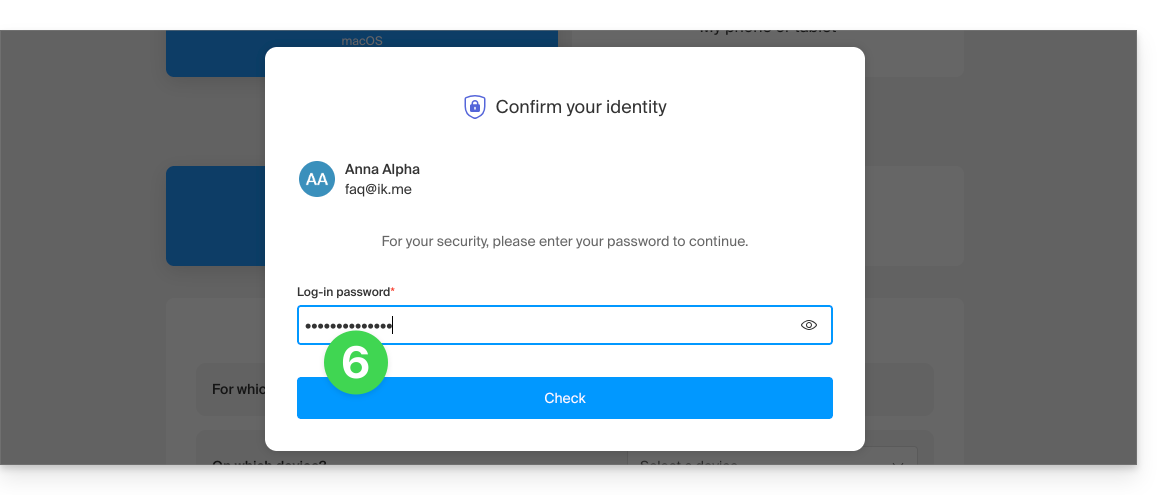
- Enter the login password if requested for security reasons:
- Follow the wizard according to your needs, until a new device is created:
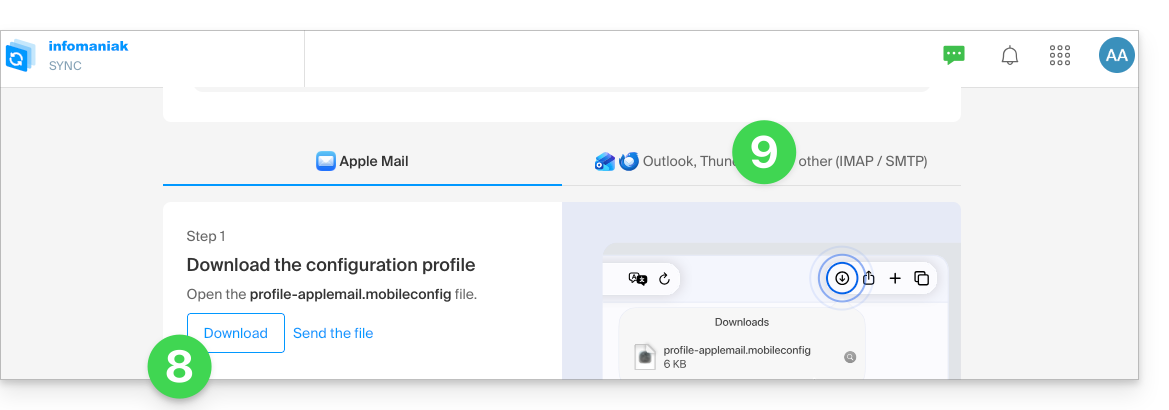
- Depending on your device, the assistant will offer you the option to download an Apple profile (refer to this guide for macOS or this one for iOS), and then it will create a new, secure password to enable synchronization via the profile.
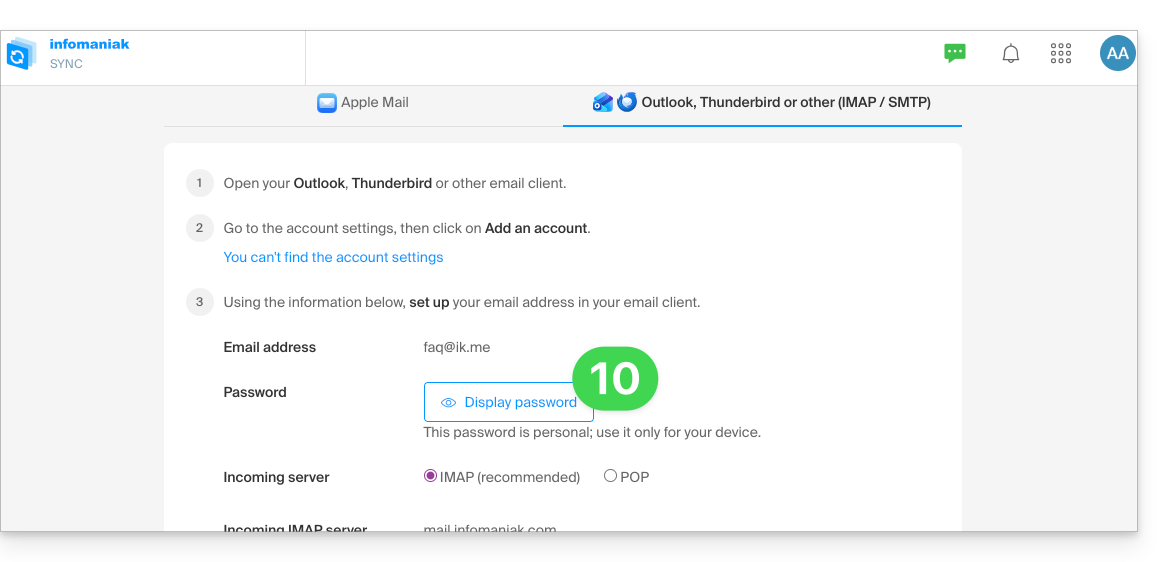
- To simply create a new password and configure the tool of your choice (refer to the configuration guides), click on the IMAP / SMTP tab:
- This will allow you to generate a new, secure password to use in your configuration:
Link to this FAQ: https://faq.infomaniak.com/2904
Has this FAQ been helpful?