Knowledge base
1000 FAQs, 500 tutorials and instructional videos. Here, there are only solutions!
Manage the ad filter
This guide explains how to enable or disable the Infomaniak ad filter that automatically sorts emails detected as Newsletters or activity notifications into specific folders.
Preamble
- The filter…
- … is automatically enabled when creating an email address within an Infomaniak Mail Service or when subscribing to a my kSuite / my kSuite+ offer.
- … allows you to focus on relevant and important emails, which improves your productivity by reducing distractions from ads and spam.
- … helps keep your inbox cleaner and better organized by separating advertising emails, which facilitates the management of important emails.
Enable the option from the Infomaniak Web Mail app
Prerequisites
- Have permission to manage filters: it is possible that the Mail Service manager has removed this right from their admin account.
To access your Infomaniak mailbox settings:
- Click here to access the Infomaniak Web Mail app (online service ksuite.infomaniak.com/mail).
- Click on the Settings icon in the top right corner.
- Check or select the email address concerned in the dropdown menu of the left sidebar.
- Click on Filters and rules:
- Enable the ad filter option, the effect is immediate:
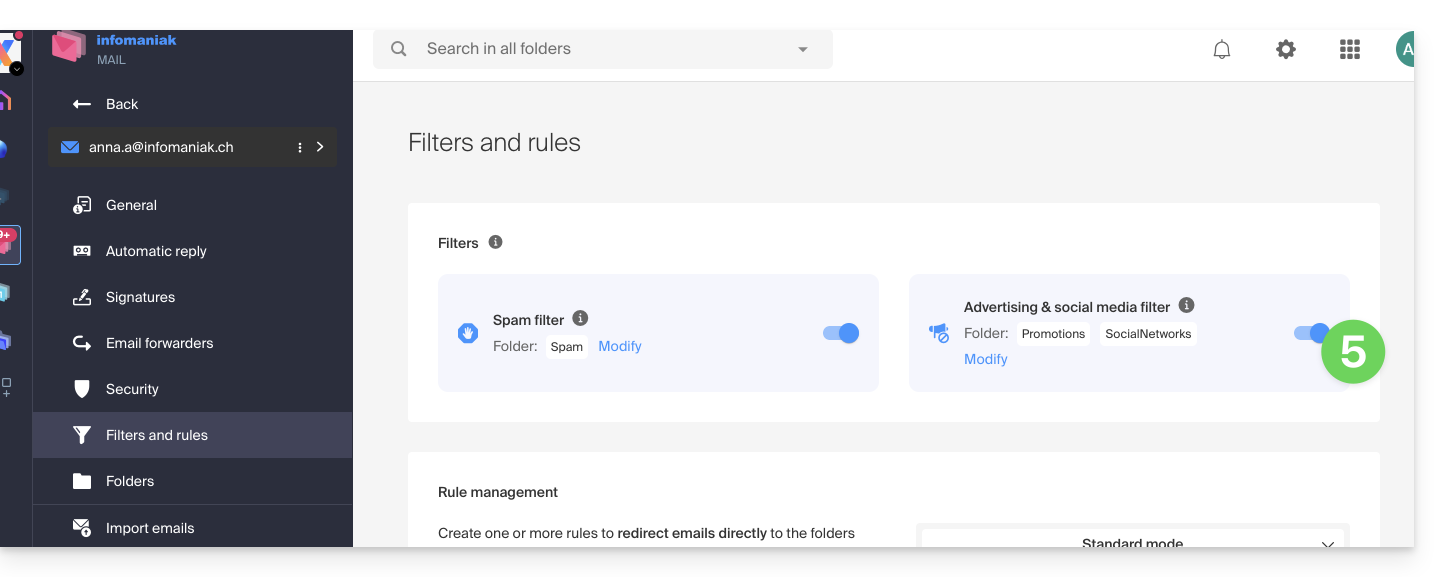
- To disable the filter, simply click the toggle switch again; in this case, all future received messages will go to the inbox.
Enable the option from a Mail Service
To access your Infomaniak mailbox settings:
- Click here to access the management of your product on the Infomaniak Manager (need help?).
- Click directly on the name assigned to the product concerned.
- Click on the email address concerned in the table that appears
- Click on Filters and rules in the left sidebar menu
- Enable the ad filter option, the effect is immediate:
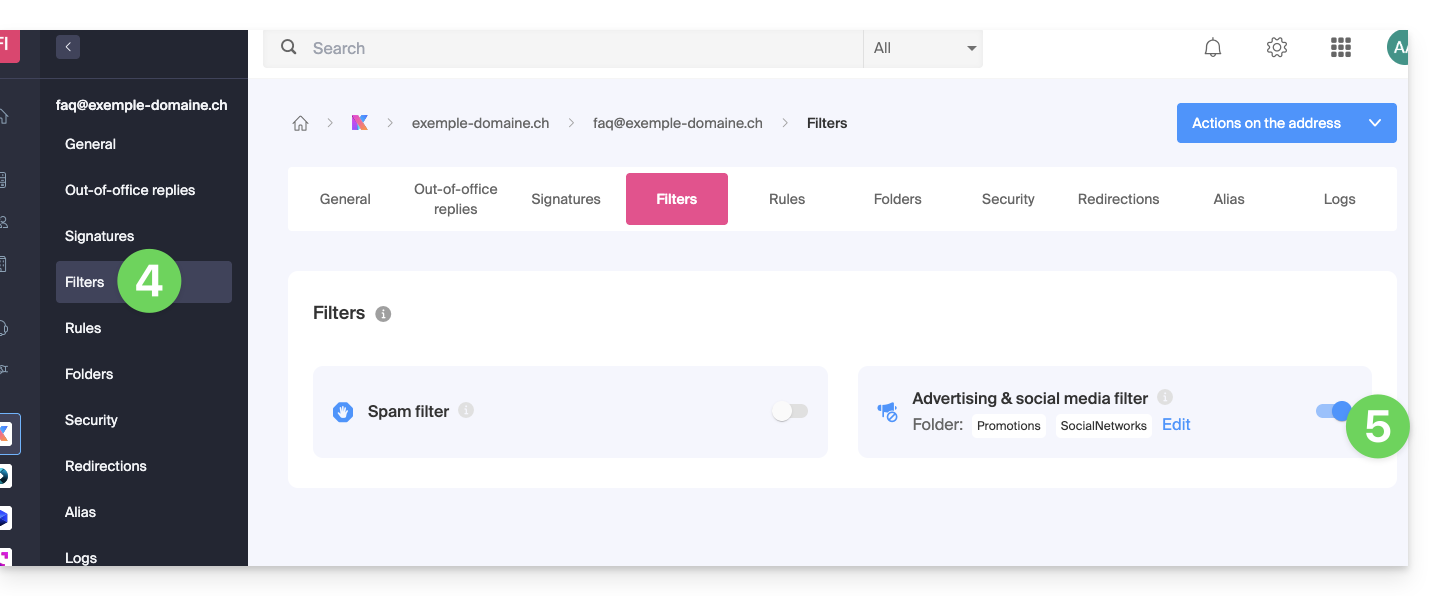
- To disable the filter, simply click the toggle switch again; in this case, all future received messages will go to the inbox.
Note that you can activate it in bulk on multiple addresses at the same time.
Customize the advertising filter
Email location
In the same place (point 5 in the images above), by clicking on Modify, you can choose the default location of the 2 folders in which the messages will be automatically placed (similar to the special IMAP folders).
Link to this FAQ: https://faq.infomaniak.com/2839
Has this FAQ been helpful?