Knowledge base
1000 FAQs, 500 tutorials and instructional videos. Here, there are only solutions!
Manage ad filter
Update 10/12/2026
This guide explains how to enable or disable the Infomaniak ad filter, which automatically sorts emails detected as newsletters or activity notifications into specific folders.
Introduction
- The filter is, in principle, automatically activated (❓: help) when creating a mail address within an Infomaniak Mail Service or when subscribing to a my kSuite / my kSuite+ offer.
- It allows you to focus on relevant and important emails, which improves your productivity by reducing distractions related to advertisements and spam.
- It helps maintain a cleaner and better-organized inbox by separating promotional emails, which simplifies the management of important emails.
Enable the option from the Infomaniak Web Mail app
Prerequisites
- You must have permission to manage filters: it is possible that the Mail Service administrator has removed this right from your account via their admin account (❓: help).
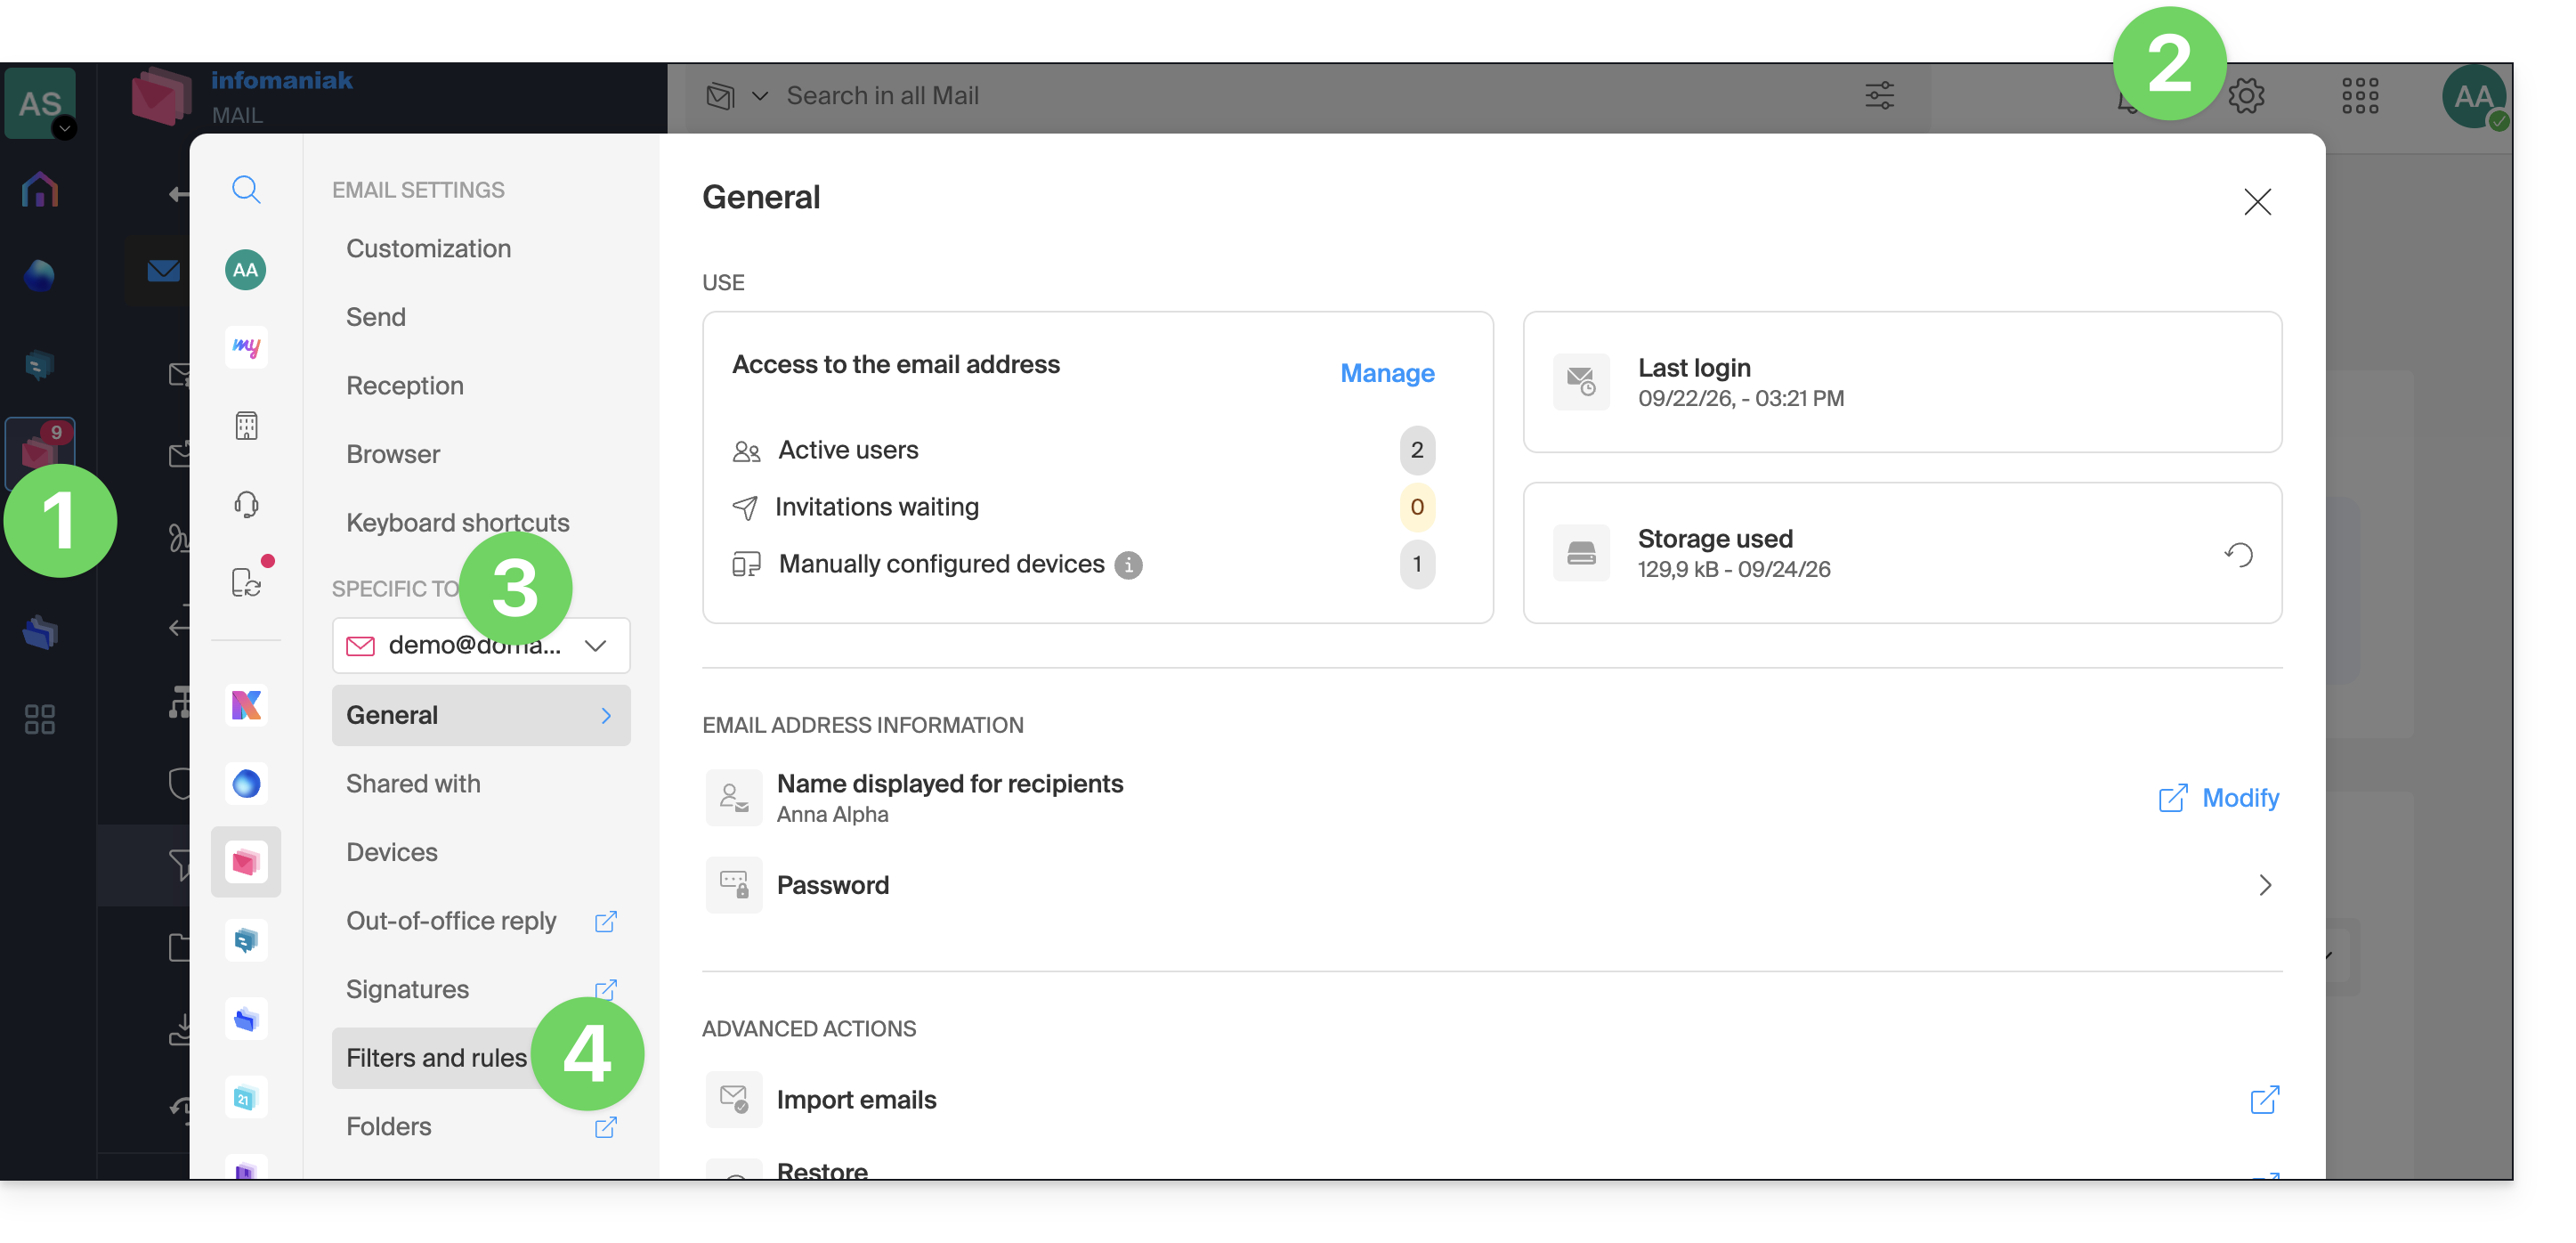
To access your Infomaniak email settings:
- Click here to access your emails in your Infomaniak kSuite (❓: help).
- Click on Settings in the top right corner.
- Check or select the relevant email address from the dropdown menu in the left-hand menu.
- Click on Filters and rules:
- Enable the ad filter option; the effect is immediate:
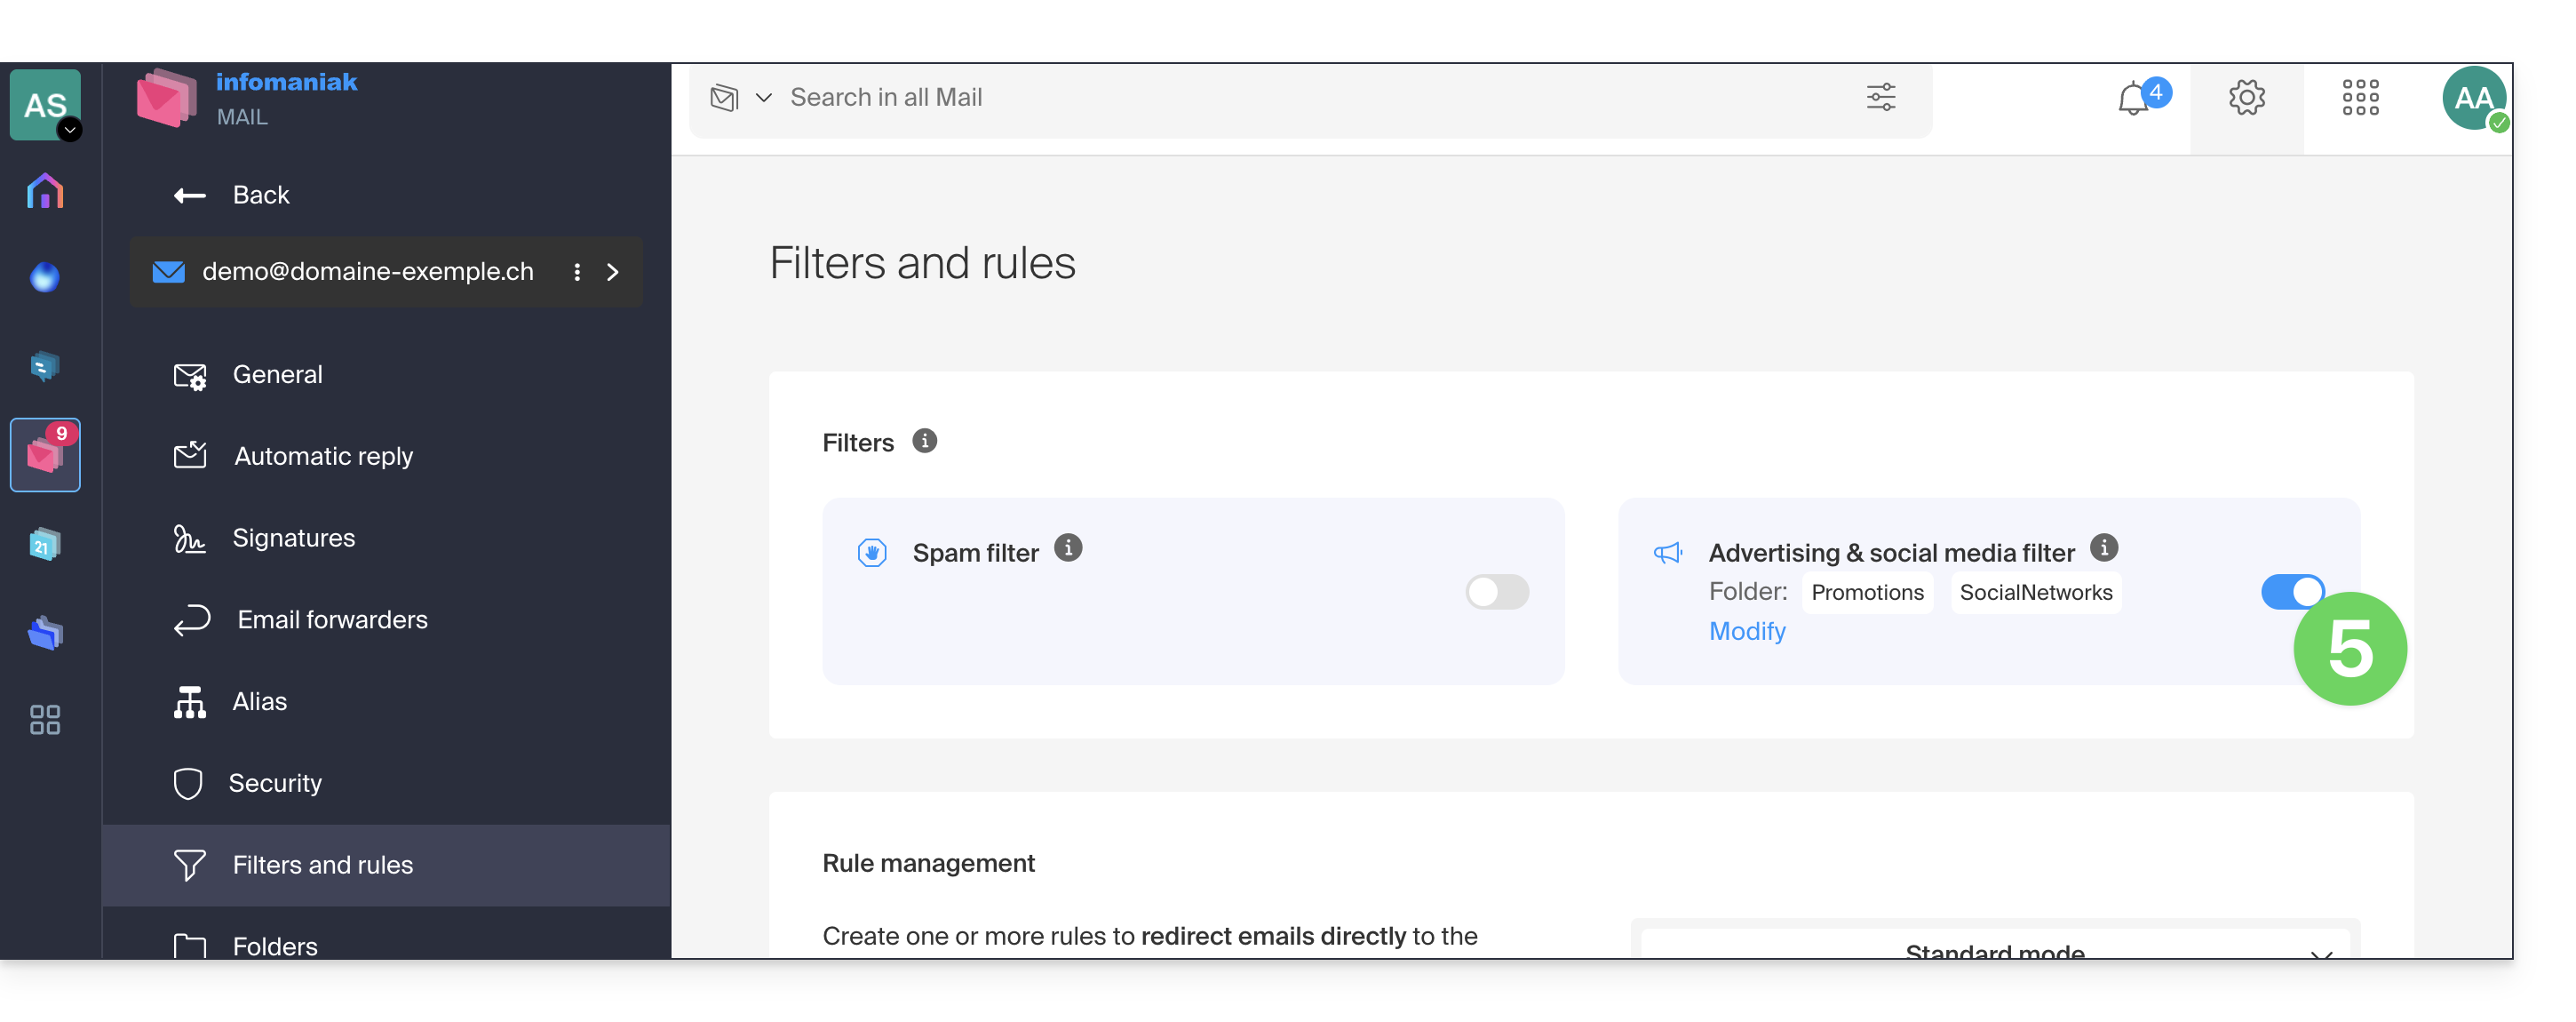
- To disable the filter, simply click the toggle switch again; in this case, all future incoming messages will go to the inbox.
Enable the option from a Mail Service
To access your Infomaniak email settings:
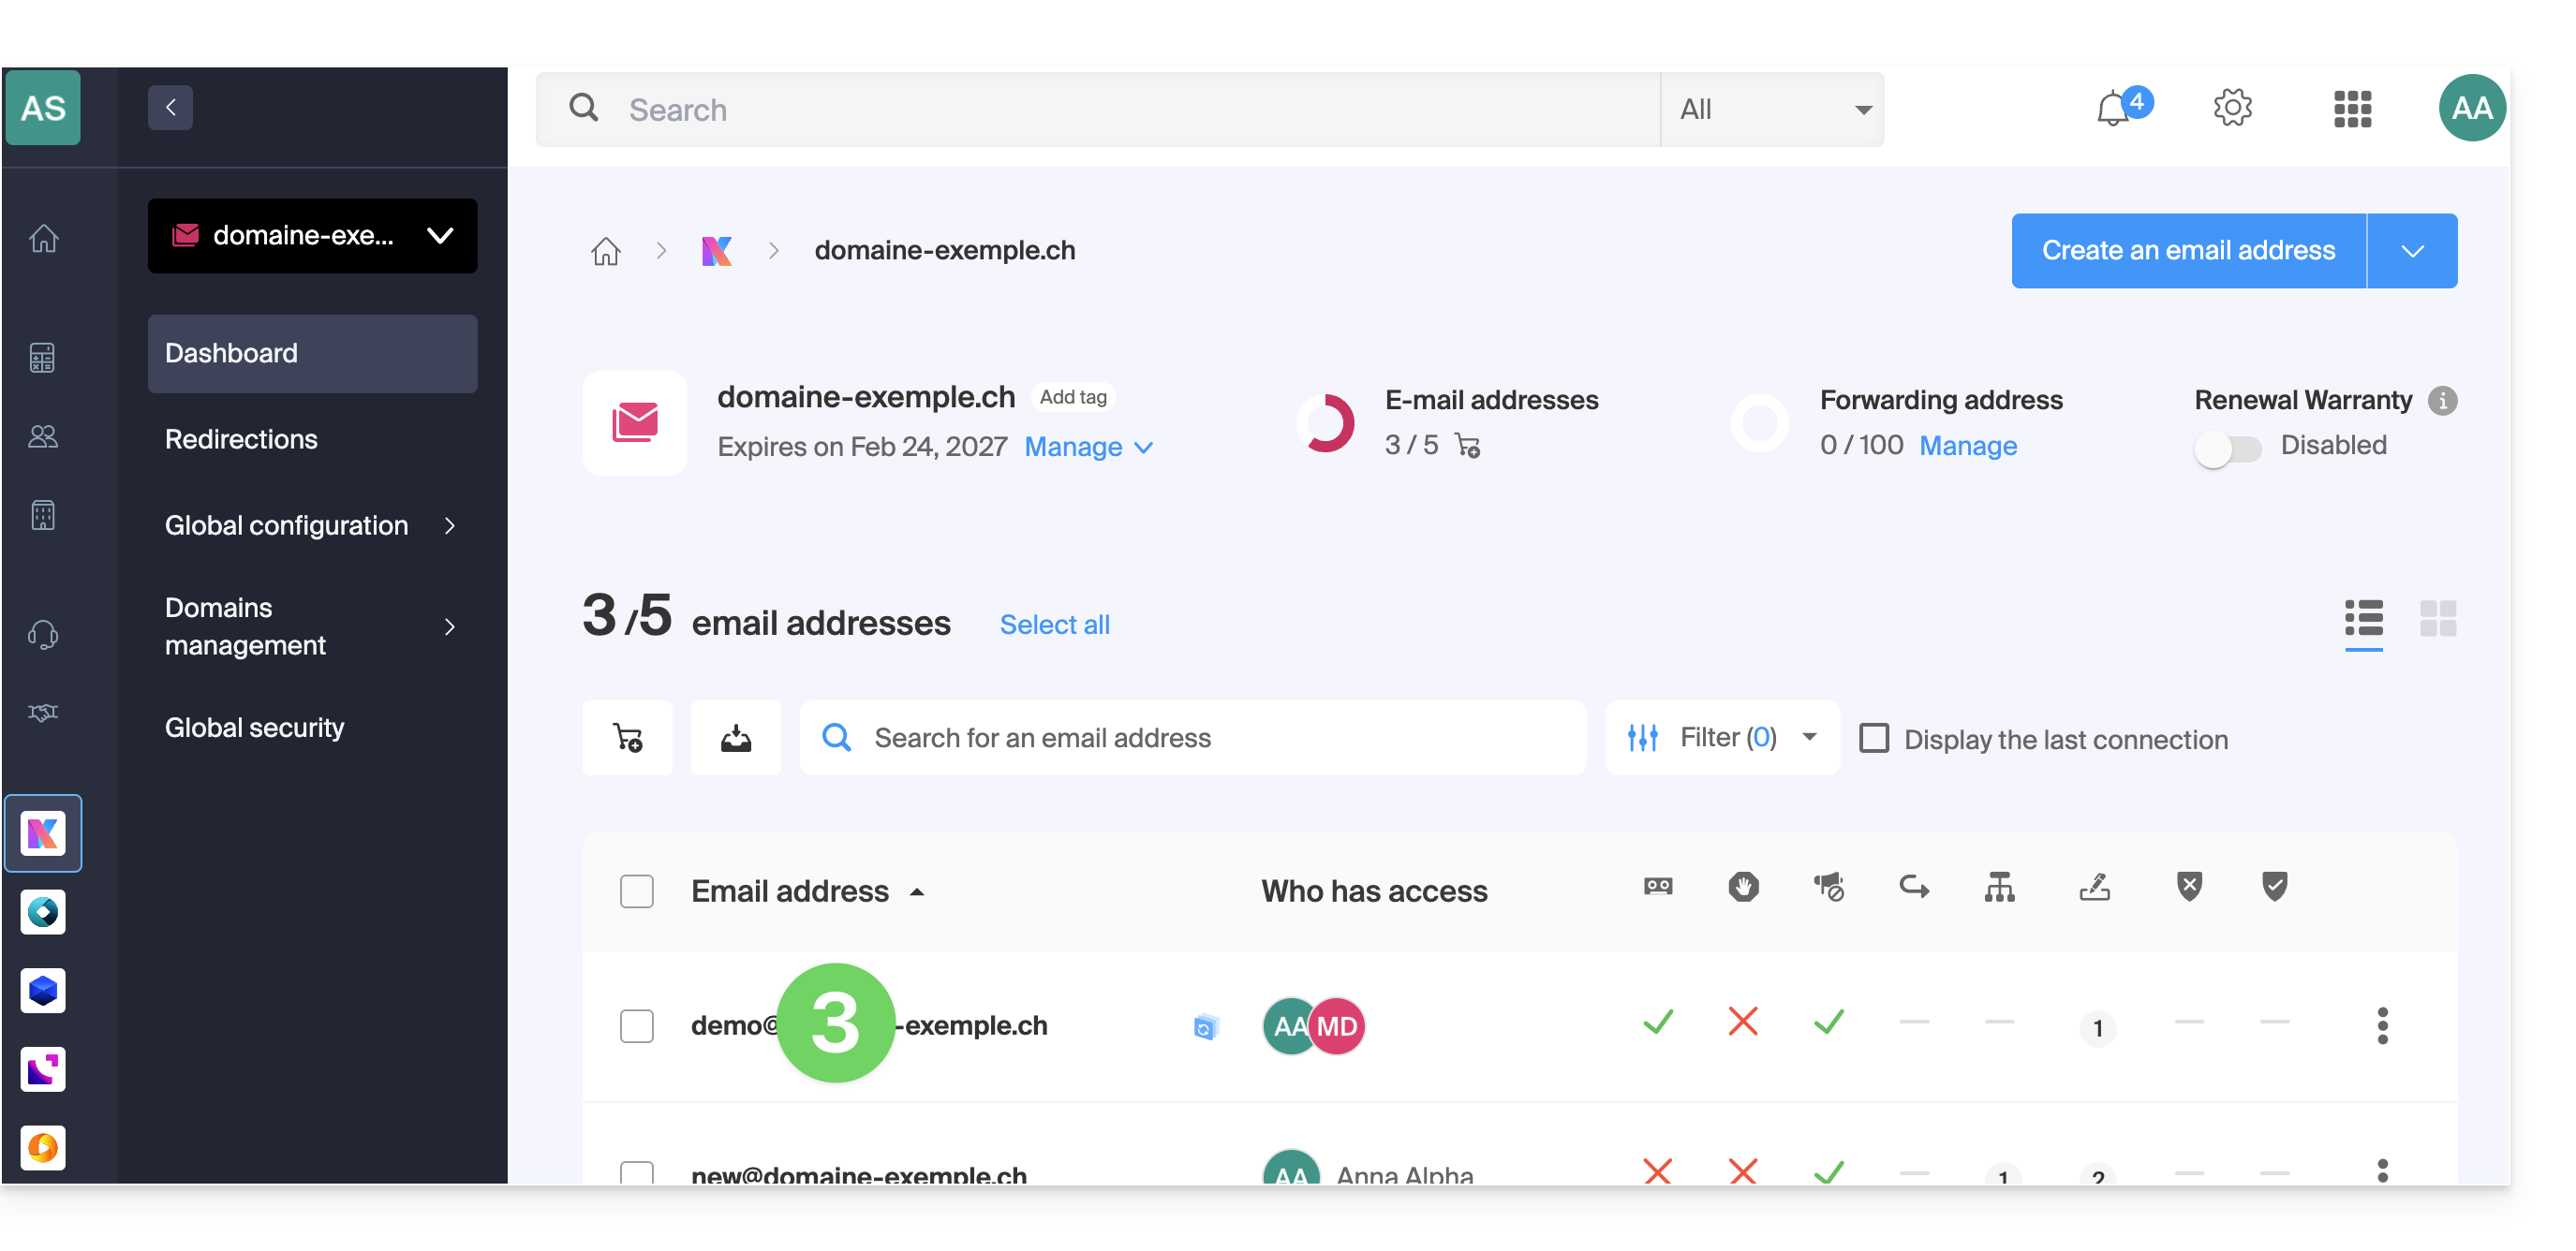
- Click here to access the Mail Service management in your Infomaniak Manager (❓: help).
- Click on the name of the Mail Service in question.
- Click on the email address in question in the table that appears:
- Click on Filters and rules in the left-hand menu.
- Enable the ad filter option; the effect is immediate:
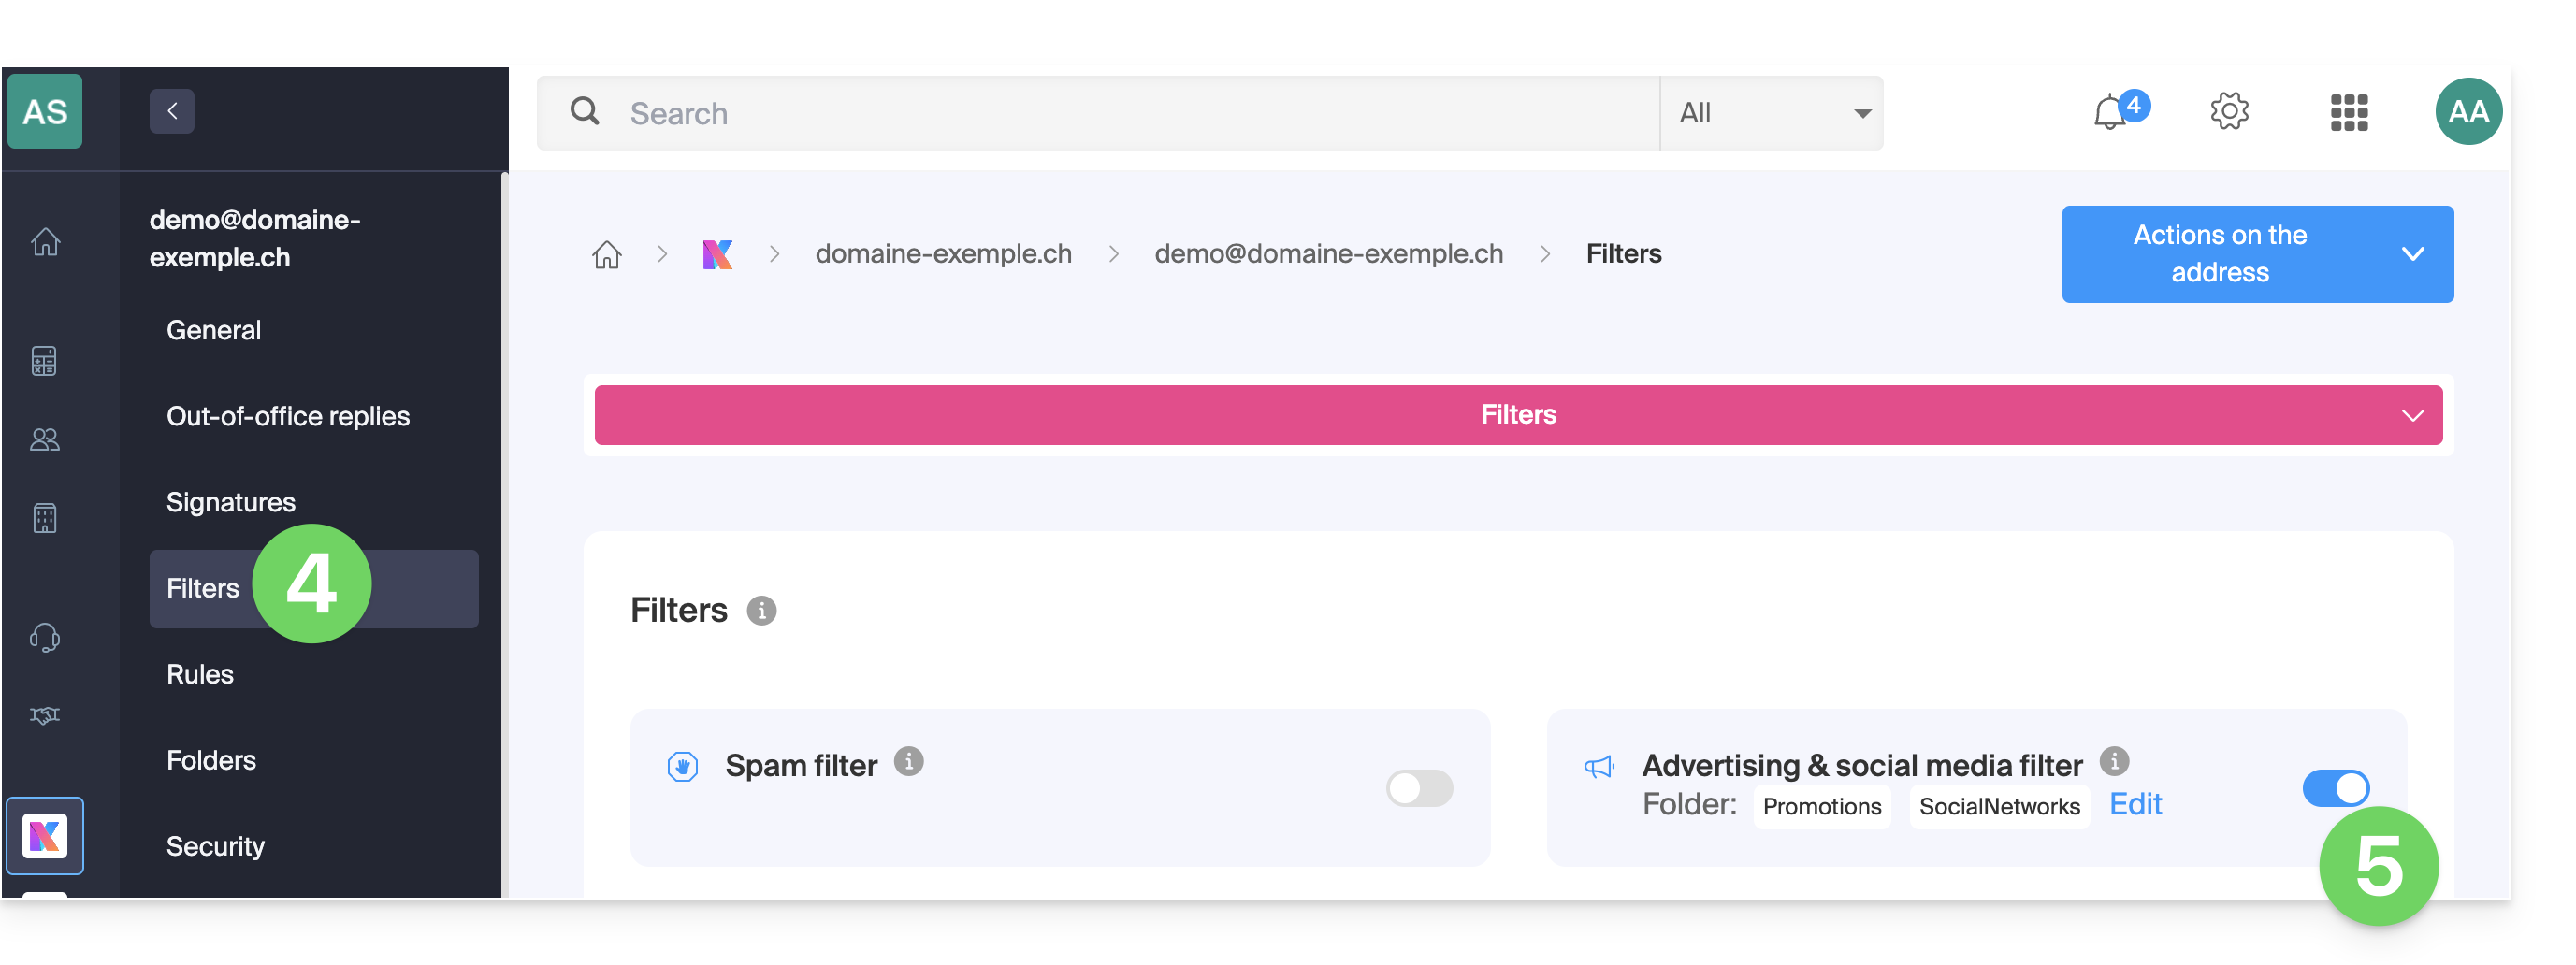
- To disable the filter, simply click the toggle switch again; in this case, all future incoming messages will go to the inbox.
Note that you can enable it in bulk for multiple addresses at once (❓: help).
Customize the ad filter
Email location
In the same place (point 5 in the images above), by clicking on Edit, you can choose the default location for the 2 folders where messages will be automatically placed, similar to special IMAP folders (❓: help).
Link to this FAQ: https://faq.infomaniak.com/2839
Has this FAQ been helpful?