Knowledge base
1000 FAQs, 500 tutorials and instructional videos. Here, there are only solutions!
Create a blog with Site Creator
This guide explains how to add and configure a blog module on your site created with Site Creator Infomaniak.
Preamble
- There is no feature that allows the management of multiple users in the Blog section (or in Site Creator).
- Several users of the same Organization with access to Site Creator (via their web hosting access authorization) will be able to publish on the blog, but the author's identity will remain the same for all.
- It is possible to get help from the Euria artificial intelligence as is the case on the rest of the Site Creator pages.
- Be aware of this other guide regarding the model used by the writing assistant and the responsibilities of each.
Starting a blog on Site Creator
Prerequisites
- Access Site Creator:
- Click here to access the management of your product on the Infomaniak Manager (need help?).
- Click directly on the name assigned to the concerned Site Creator.
- Click on the button Edit my site to start the editor:

Once in Site Creator, on the page where you want to insert your future blog articles:
- Click on the button + located below an already inserted block:
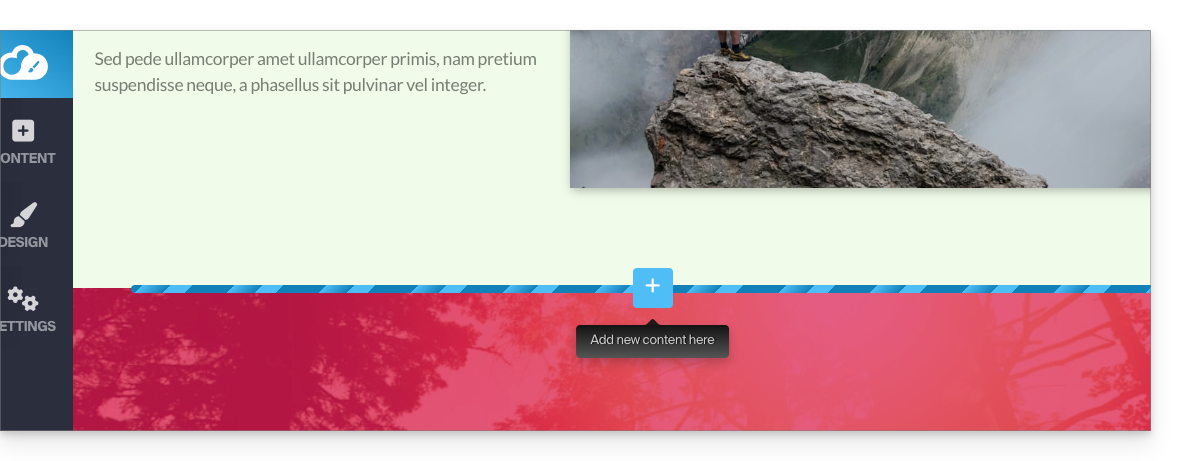
- Click on Applications (on the Content tab that opened when you clicked to add the visual block).
- Click on the Blog module:
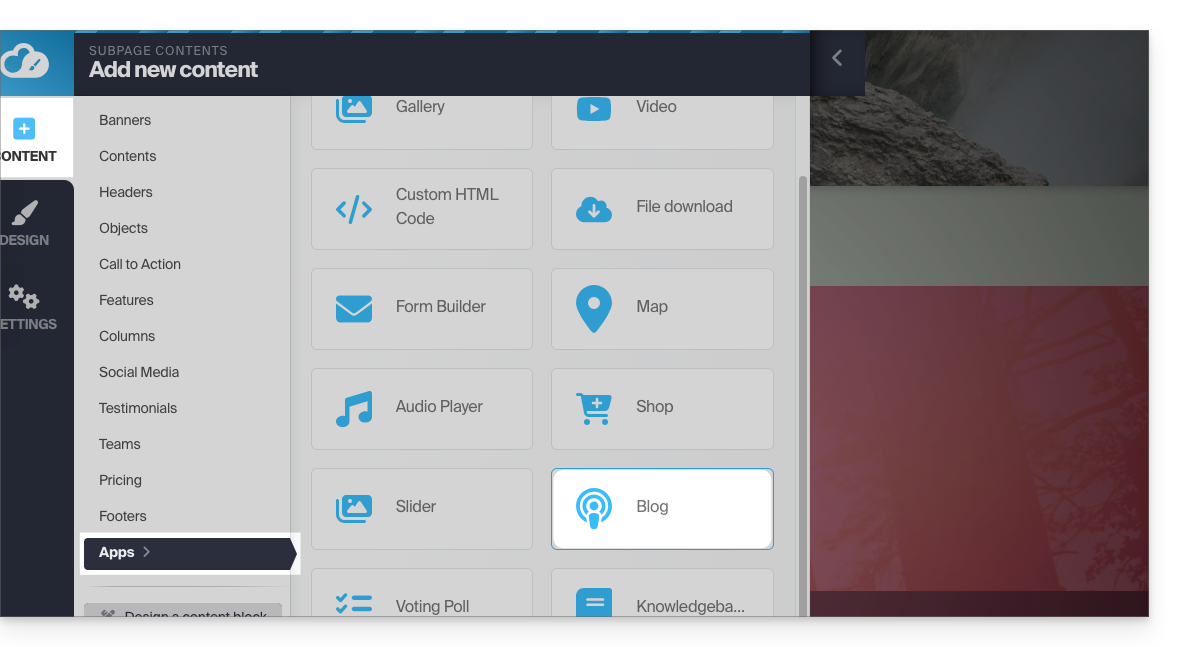
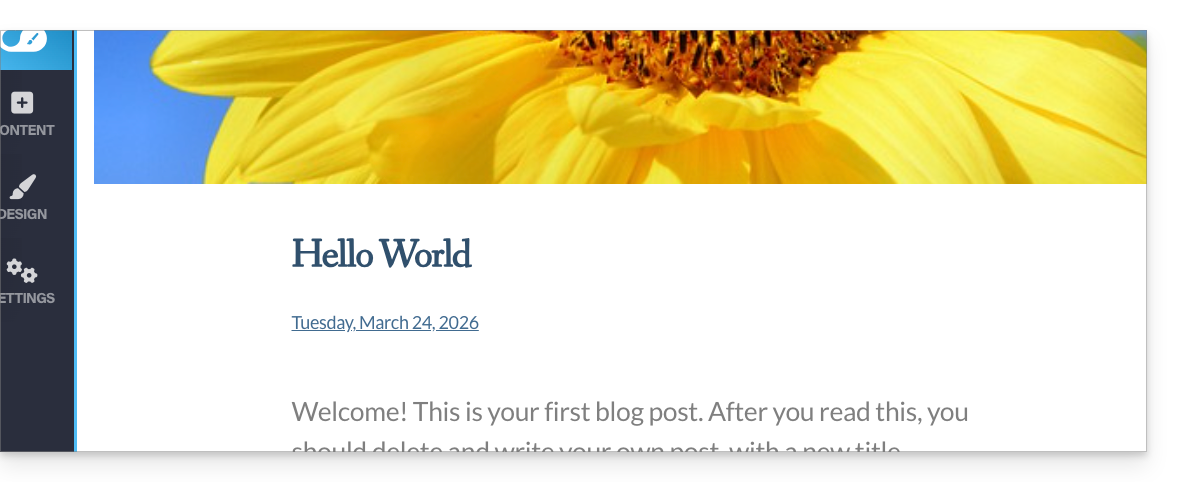
- If this is the first insertion of this module, then you get the following visual block with an example of the first published article (skip to point 4 below):
- If you have already tested the Blog module before and removed it from your pages, you get this:
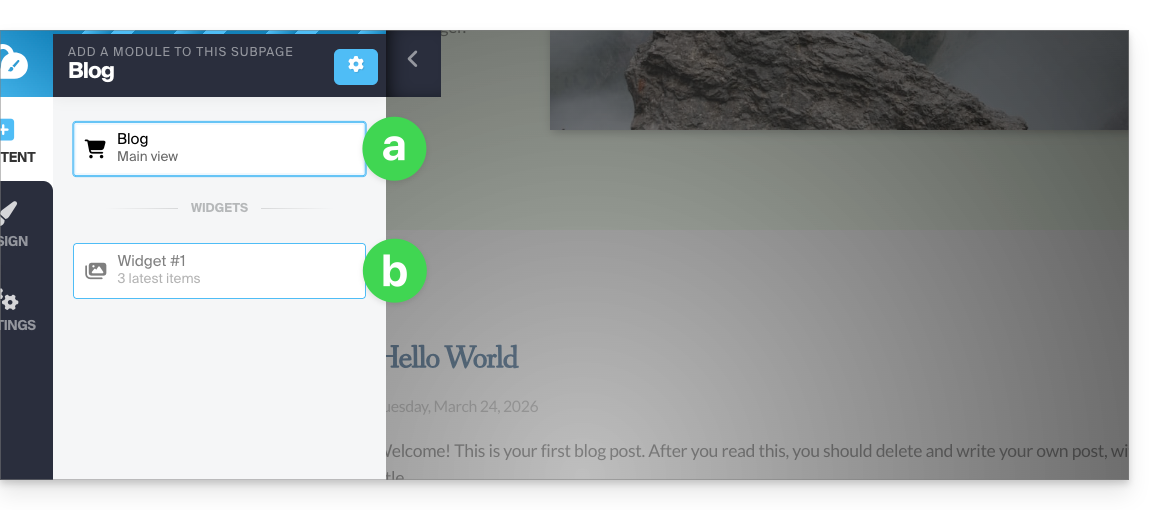
- Press the top choice to insert the main block.
- Press the second choice to display a block with the 3 last published articles only if you already have a main block inserted elsewhere on the site.
- If this is the first insertion of this module, then you get the following visual block with an example of the first published article (skip to point 4 below):
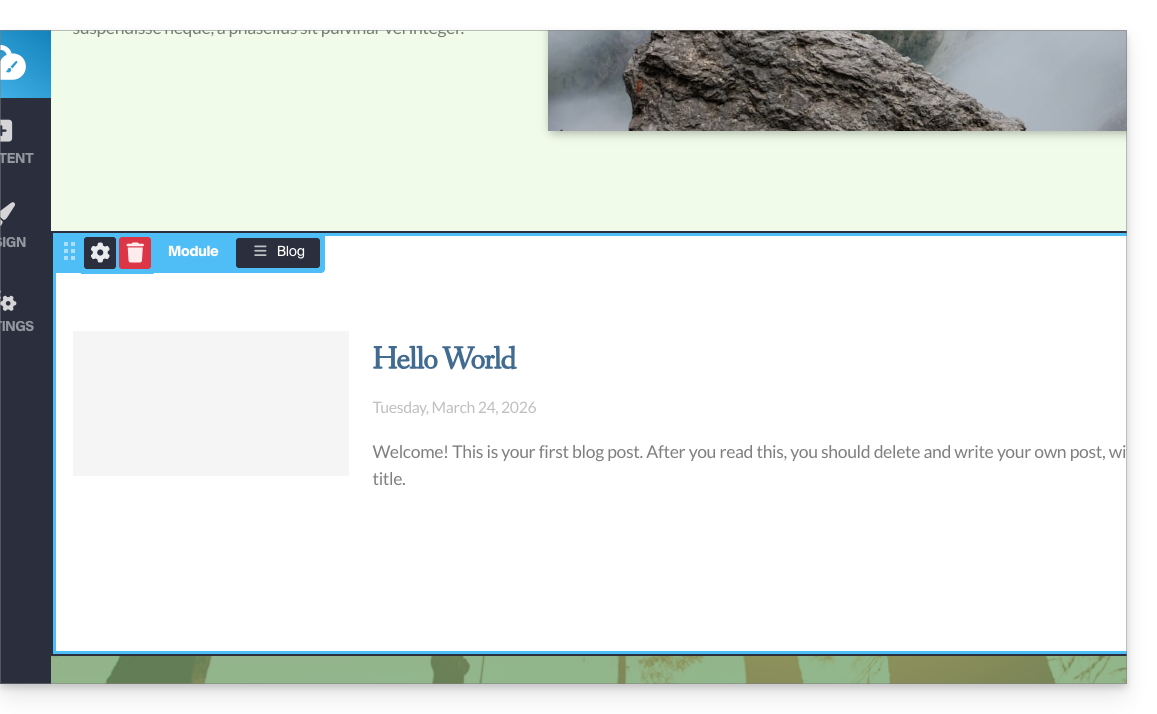
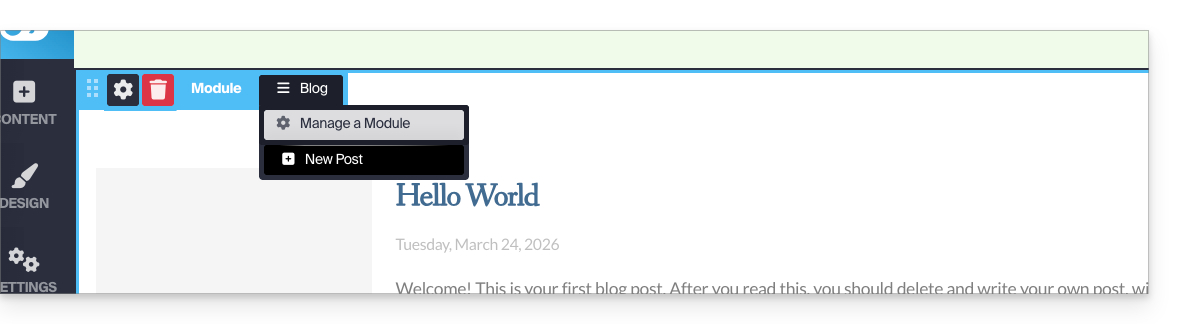
- Once the Blog module is inserted, hover over the block and click on the three-line horizontal menu button ☰ Blog then on New article to insert a blank article:
Publishing content by leveraging artificial intelligence
To write content and, if necessary, improve your writing:
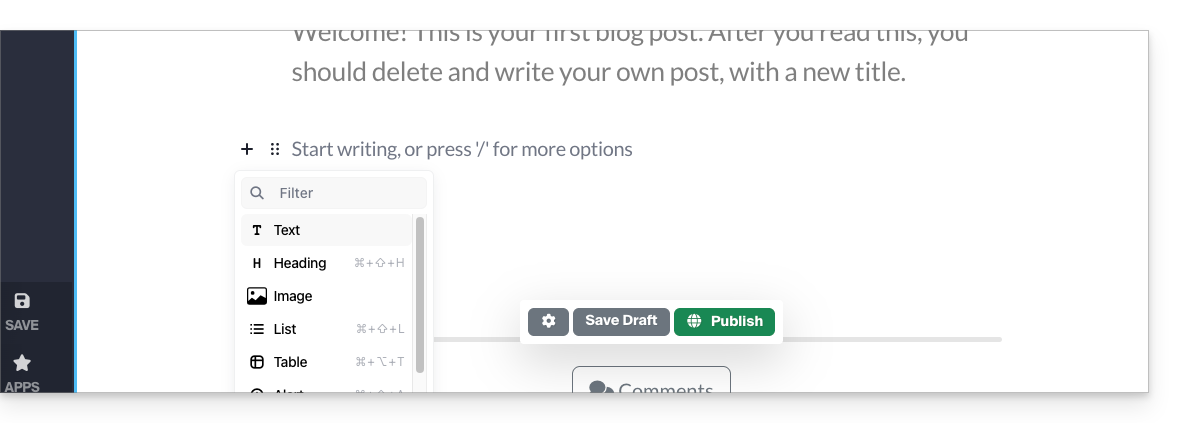
- Choose an image for the banner, enter a title, optional subtitle, body of the article with different formatting:
- Press the + sign in the article text or the tab key on your keyboard:
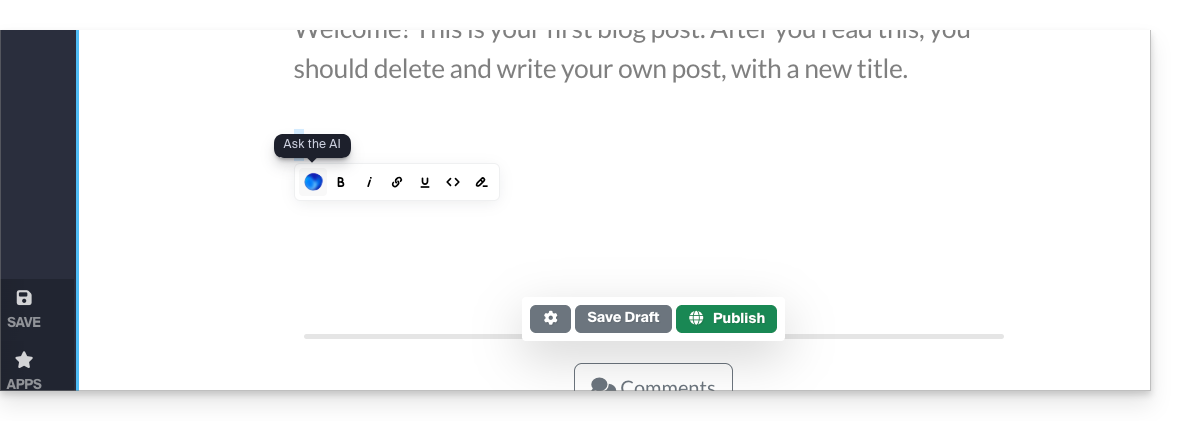
- Select the content and then click on it to display a text formatting toolbar.
- From this toolbar, access the possibilities offered by AI (translation, rephrasing, correction, etc.):
- Publish by clicking the Publish button (or save the draft for later).
Edit the blog
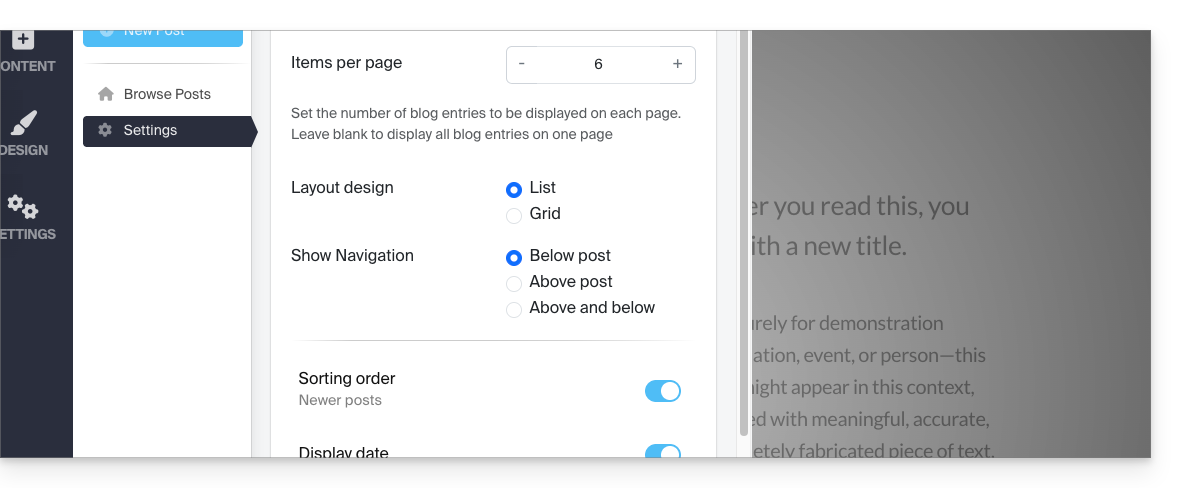
To enable comments, email notifications, list layout, and sorting of these, etc.:
- Click on Applications in the left sidebar menu.
- Click on Blog.
- Click on Settings and adjust your preferences without forgetting to save at the bottom of the page:
Edit blog articles
Wherever you are when editing your site, simply go to the Applications menu at the bottom left, then click on Blog: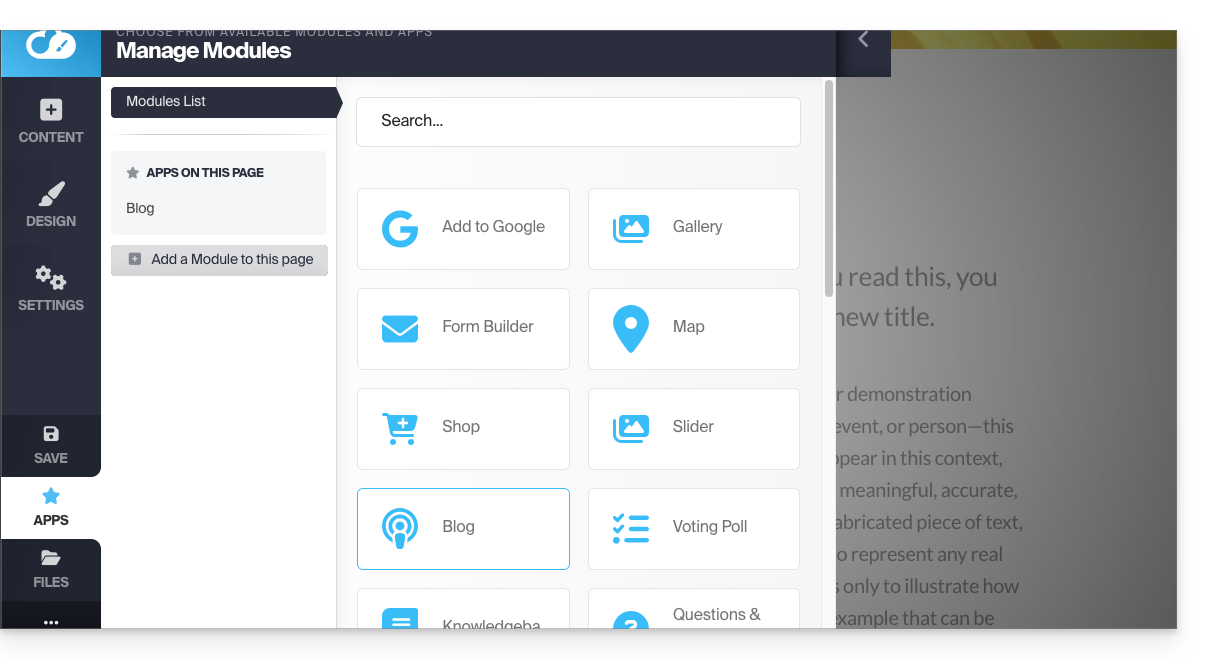
To edit the content of your article, click on Browse articles in the left sidebar menu, hover over and click on the pencil icon ✎: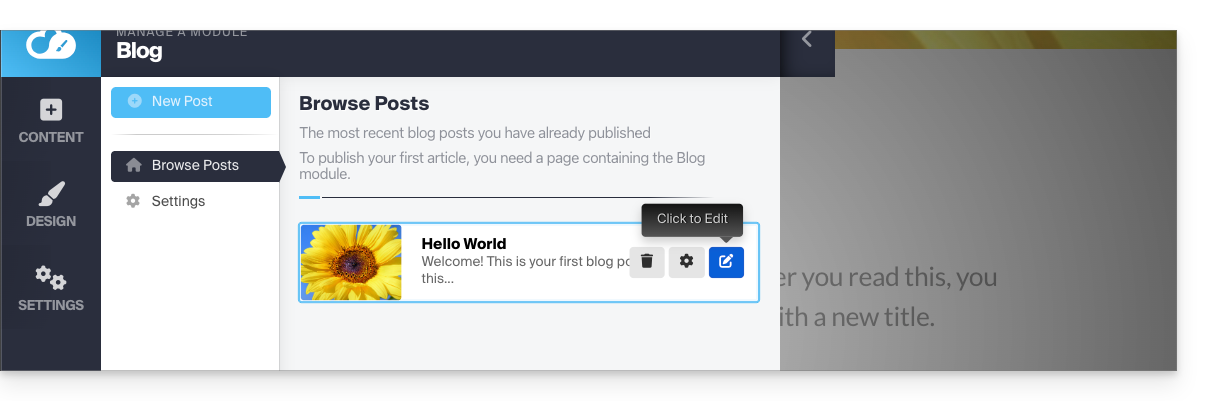
To configure (see below) one of the articles, hover over and click on the gear icon: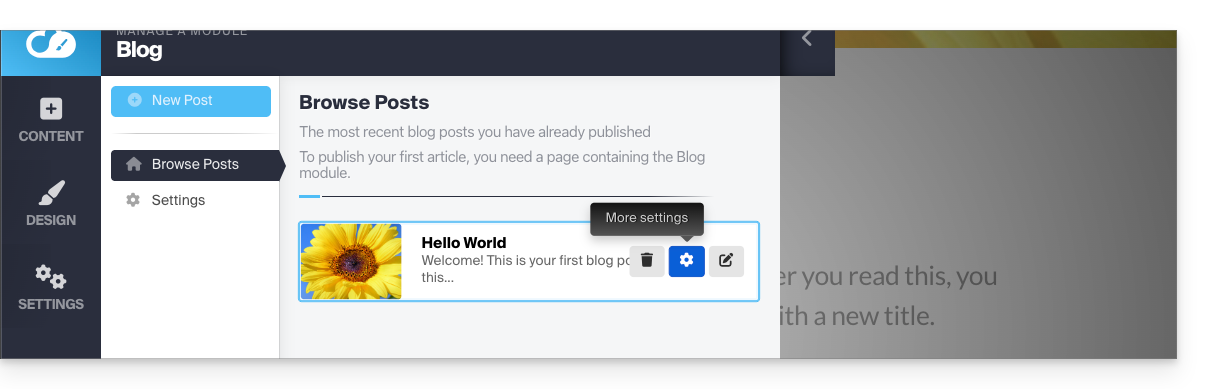
Tag, archive, or expire an article
A blog article can disappear from your list of articles, either by giving it an expiration date or by archiving it immediately. It is also possible to add a tag (label) that will be clickable for the visitor and thus facilitate navigation within the posts:
Do not forget to save the changes at the bottom of the page.
Article dates
By default, new blog articles will be added with the date "today" but it is possible to modify it:
- Hover over and click on the date link (directly on the article):

- Choose a new date.
Link to this FAQ:
Has this FAQ been helpful?