Knowledge base
1000 FAQs, 500 tutorials and instructional videos. Here, there are only solutions!
Manage media in Site Creator (images, videos, documents, etc.)
This guide concerns Site Creator, Infomaniak's website creation tool, which offers a library for your media (images, videos, documents, etc.).
Prerequisites
- Access Site Creator:
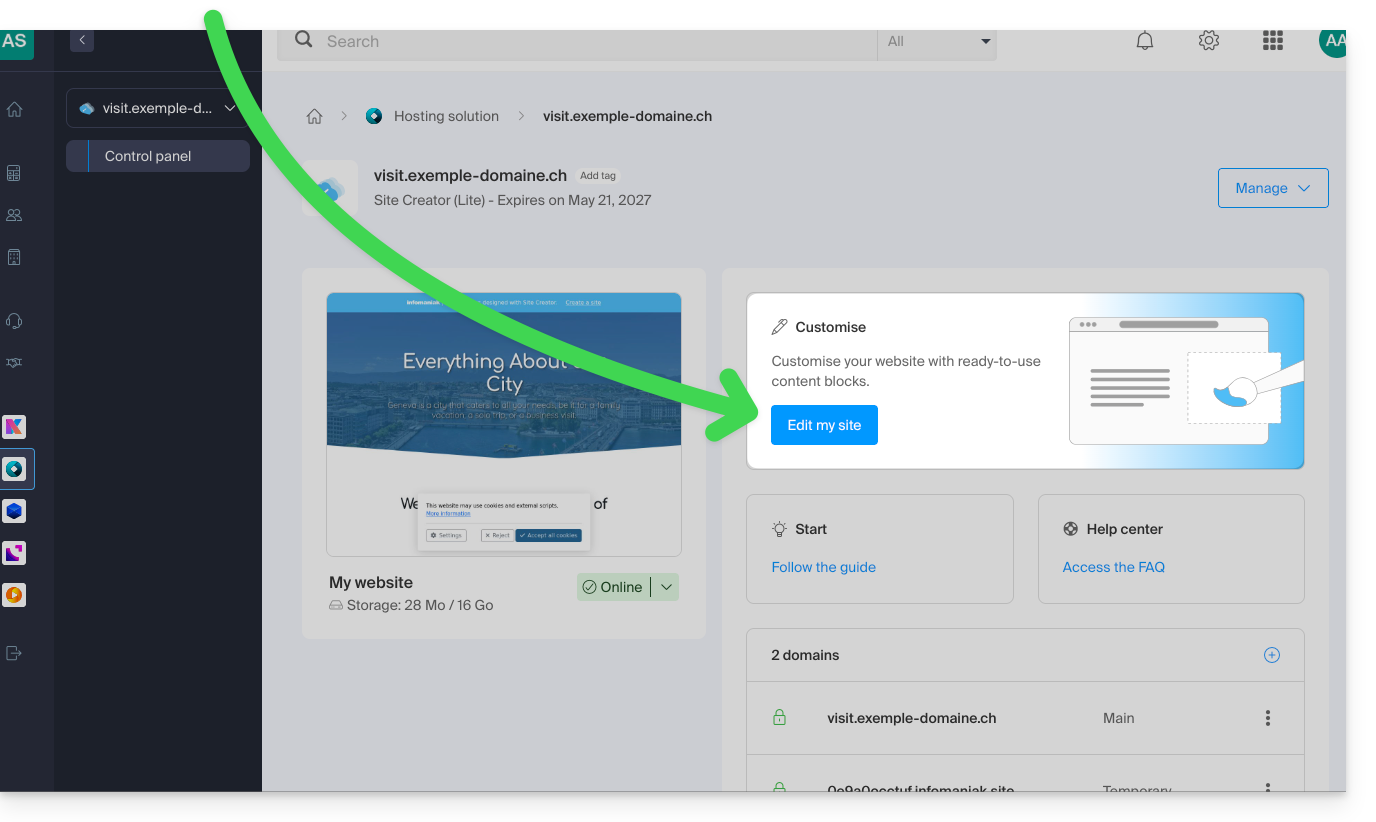
- Click here to access the management of your product on the Infomaniak Manager (need help?).
- Click directly on the name assigned to the Site Creator in question.
- Click on the Edit my site button to start the editor:
Accessing files
The library is accessible from the bottom of the left-hand side menu, under Files: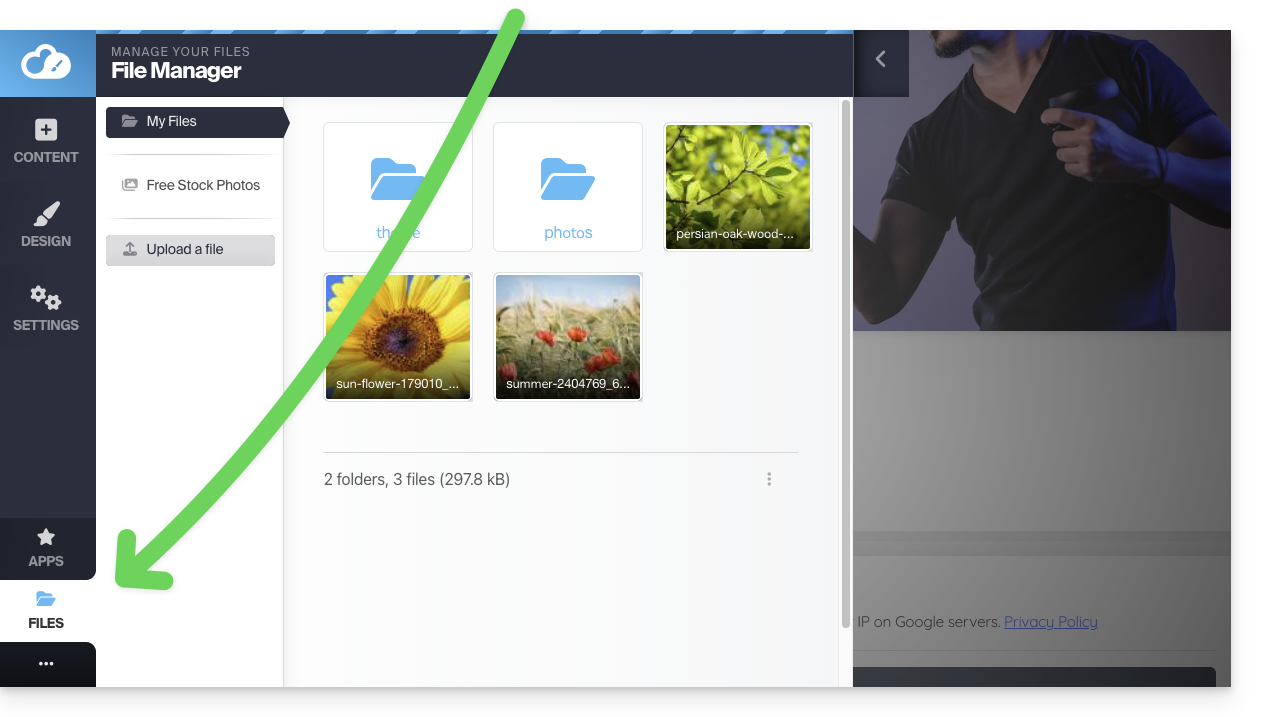
These media will be available to you when you edit your pages and want to insert content.
Organize your files, folders, and subfolders
Please note that you cannot:
- move files/folders
- rename files/folders
- delete a folder if it is not completely empty
Therefore, think about the organization of your media and their structure, if possible, before creating the site.
Create a new folder
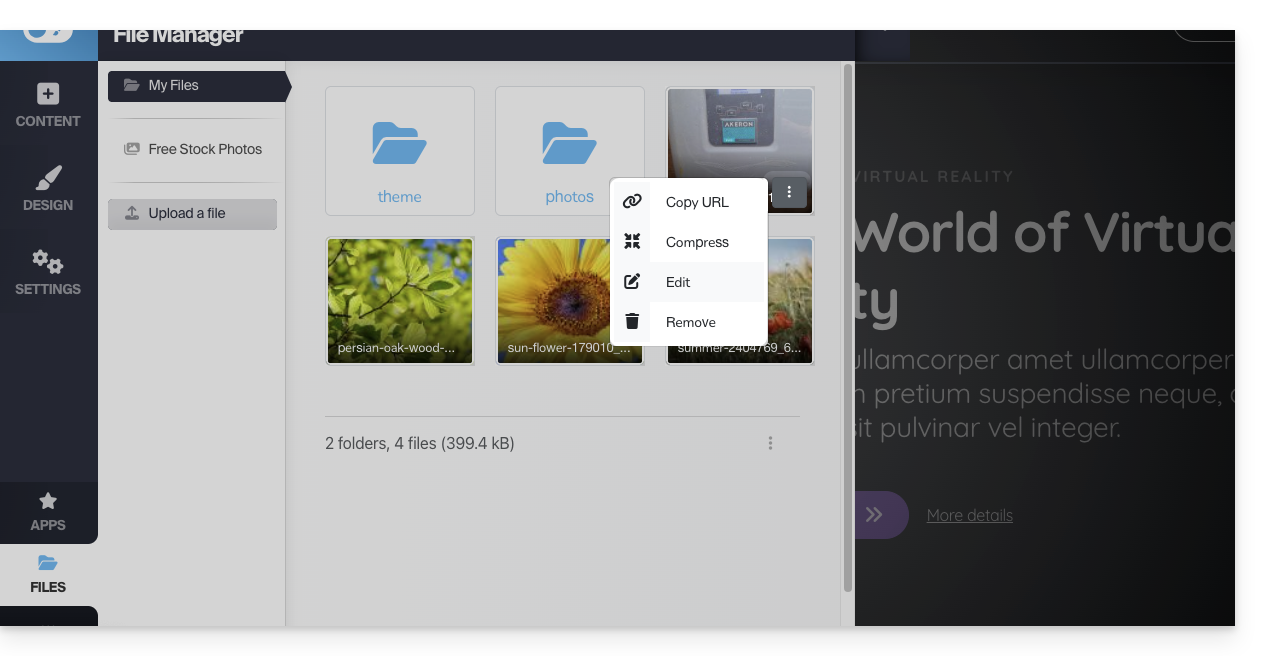
Use the action menu ⋮ at the bottom right of the window: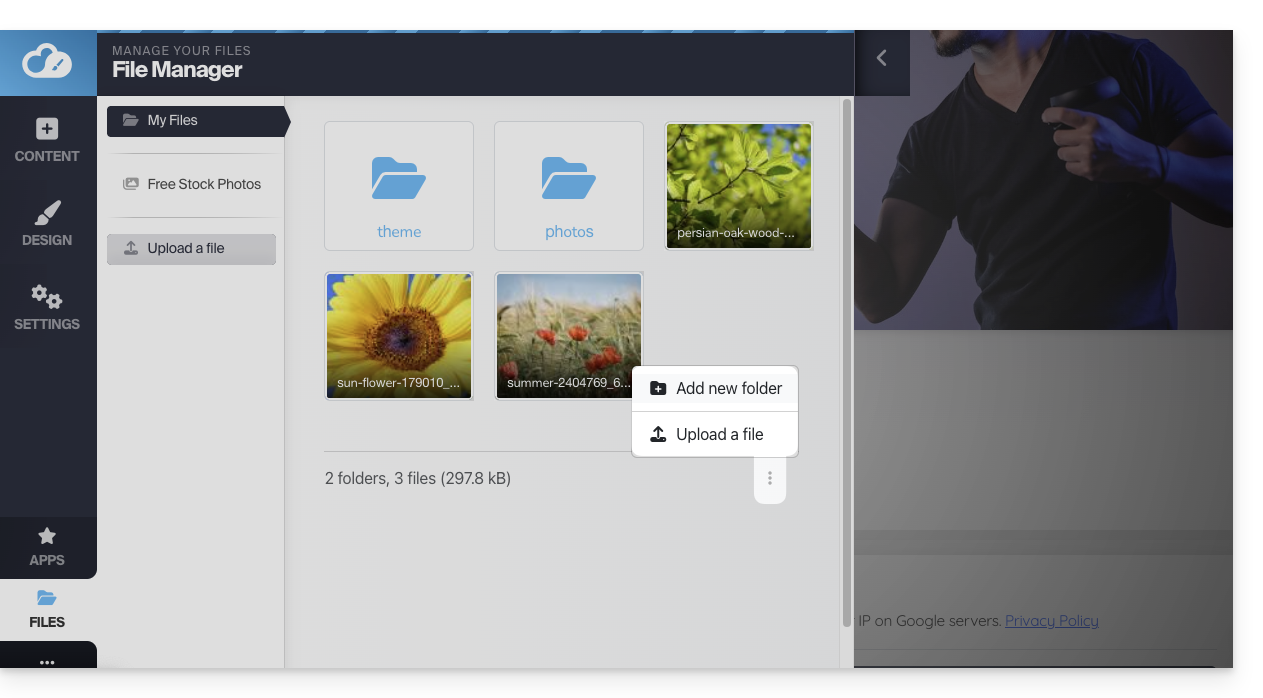
Upload a new file to the library
Click on Upload a file to browse your hard drive and upload the desired files: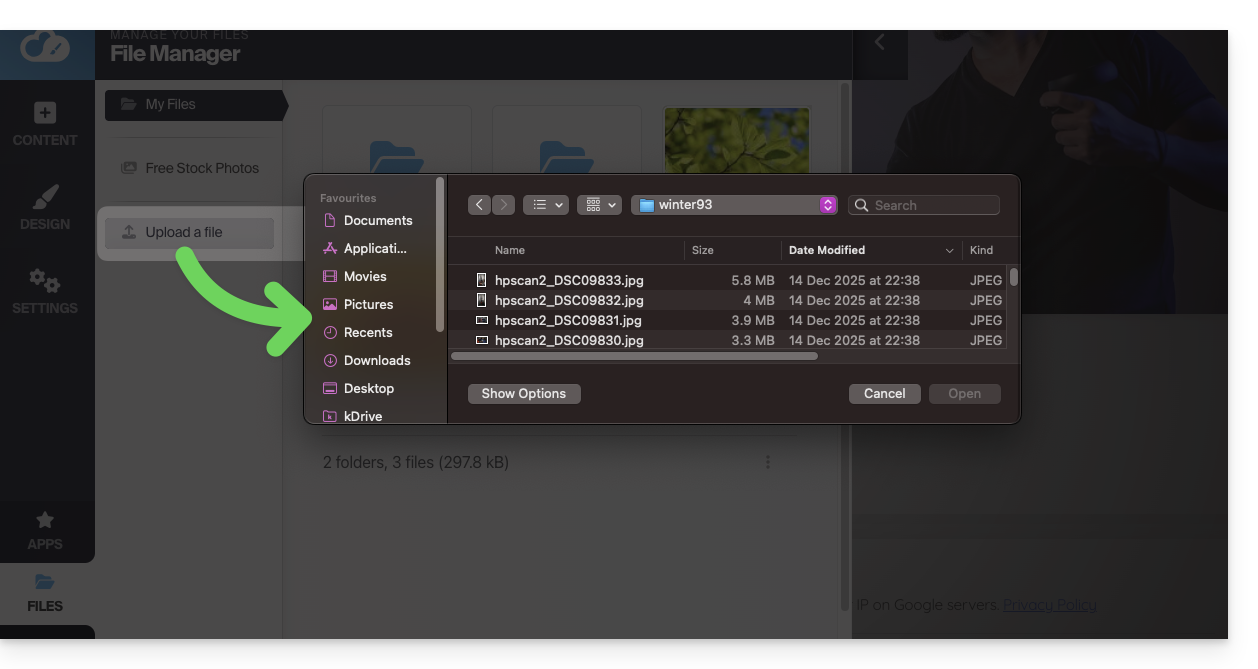
Common image formats are supported (webp, jpg, jpeg, png, gif, svg, etc.), with the webp format being recommended (it offers the best quality/compression ratio for ultra-fast web display).
The same applies to videos (mp4, mov, etc.), and you can also upload files (zip, pdf, etc.) to make them available to visitors via the File Download module.
Compress an image
Large images are automatically resized by default when imported: images larger than 1200 px are automatically reduced to 1200 px, but you can manage this in the general settings: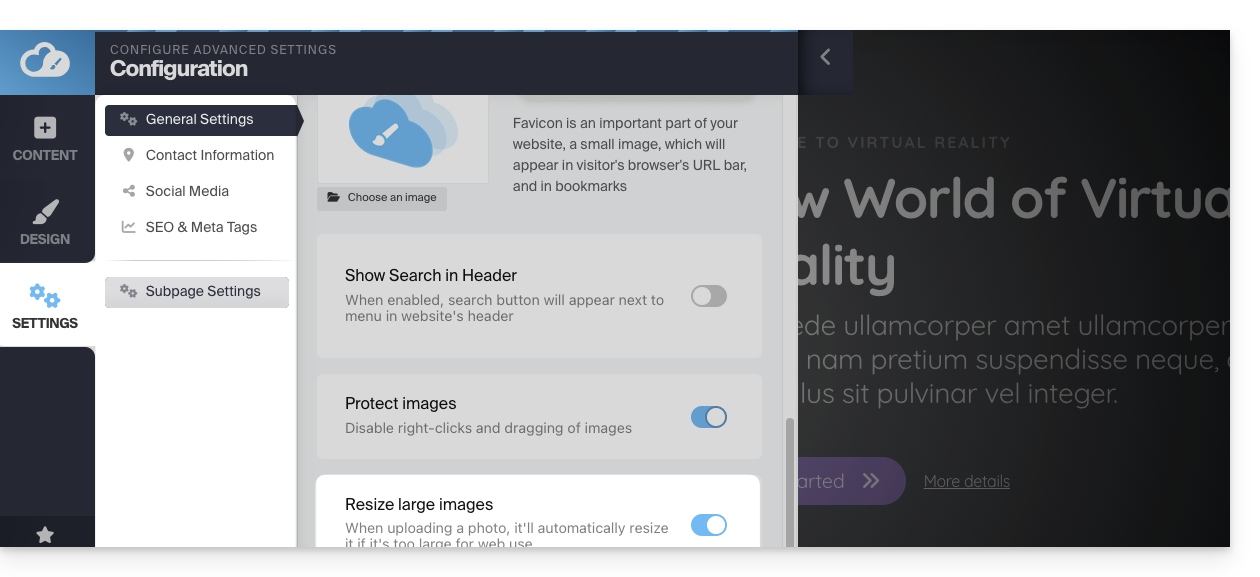
You can also compress the image itself using the Compress an image option from the library, to improve the display speed of your site: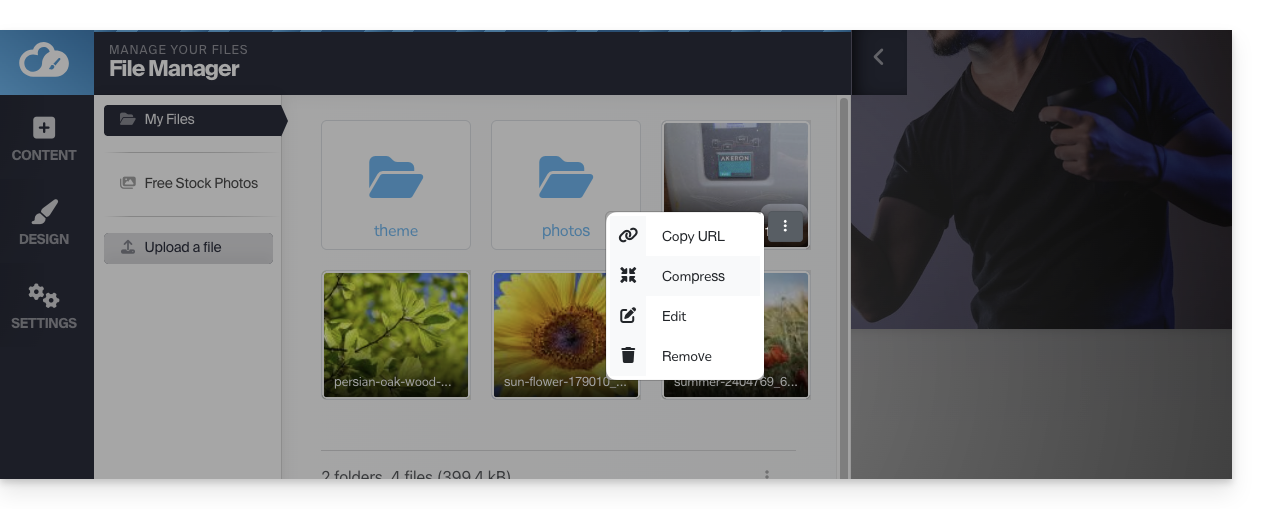
⚠ The Compress Image option is generating the TinyPNG API key error (TinyPNG API key is not set)…
To avoid this, obtain a TinyPNG API key from their website and enter it under Applications > TinyPNG in SiteCreator: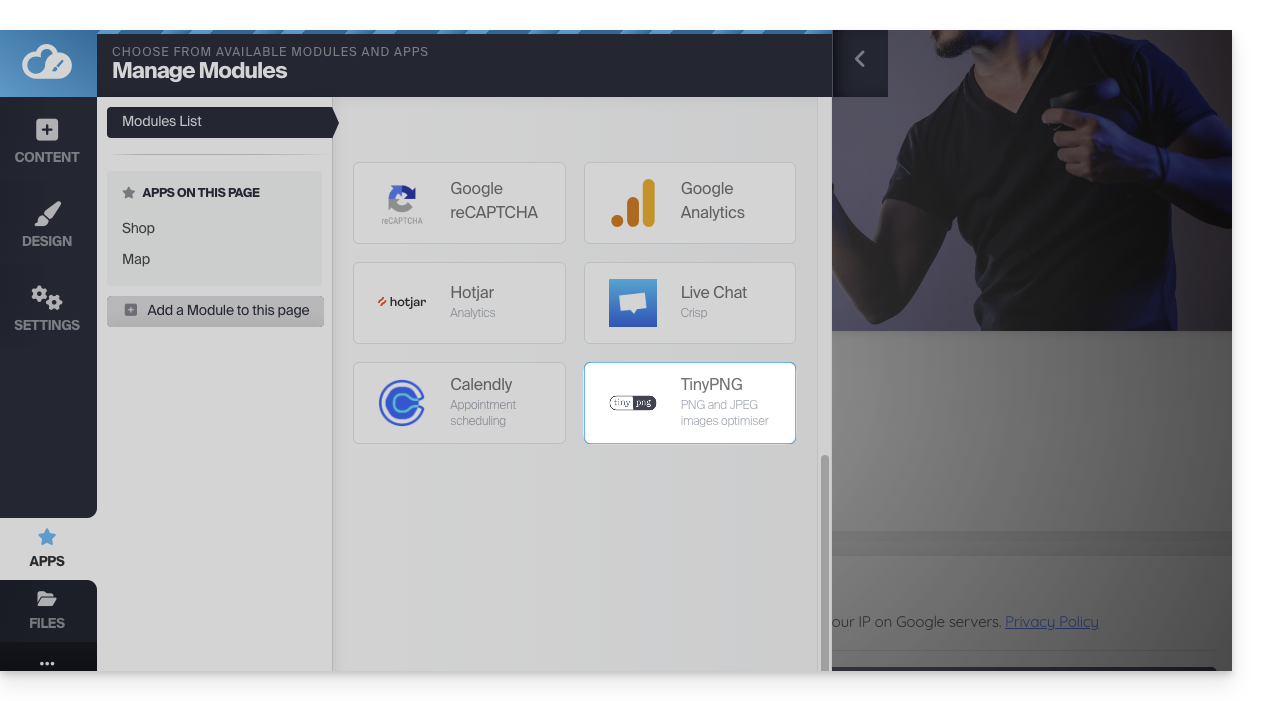
Open the Image Editor
Hover over an image in the library and click the ⋮ action menu to access the image editor:
When you save your changes, the image will be saved as a copy in your library: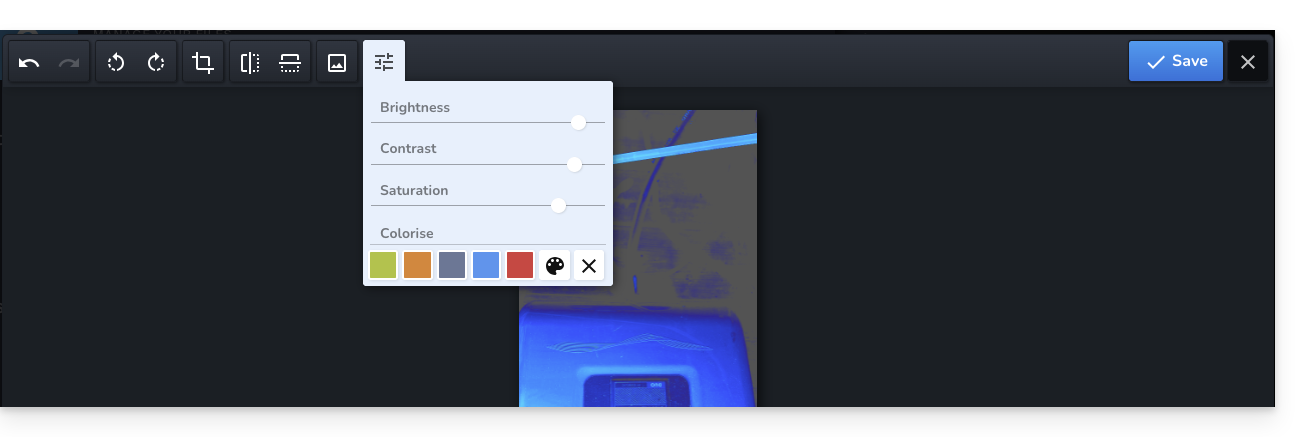
Optimize SEO and Accessibility
Once your images have been imported from the library to your web pages, remember to fill in their Alt Text (Alt tag) in the image block settings. This text description is essential: it allows search engines (like Google) to understand the content of your visuals, while also making your site accessible to visually impaired people who use screen readers.
And since it is not possible to rename files once they are online, make it a habit to name them correctly on your computer before uploading them. Avoid generic names (e.g., IMG_1234.jpg) and use descriptive names with hyphens (e.g., swiss-home-repair.jpg) to improve your search engine ranking.
Search for and Use Royalty-Free Images
In the left sidebar of the library, you will find a menu item that leads to a stock image library (image bank) containing royalty-free images that you can insert into your library to enhance your website: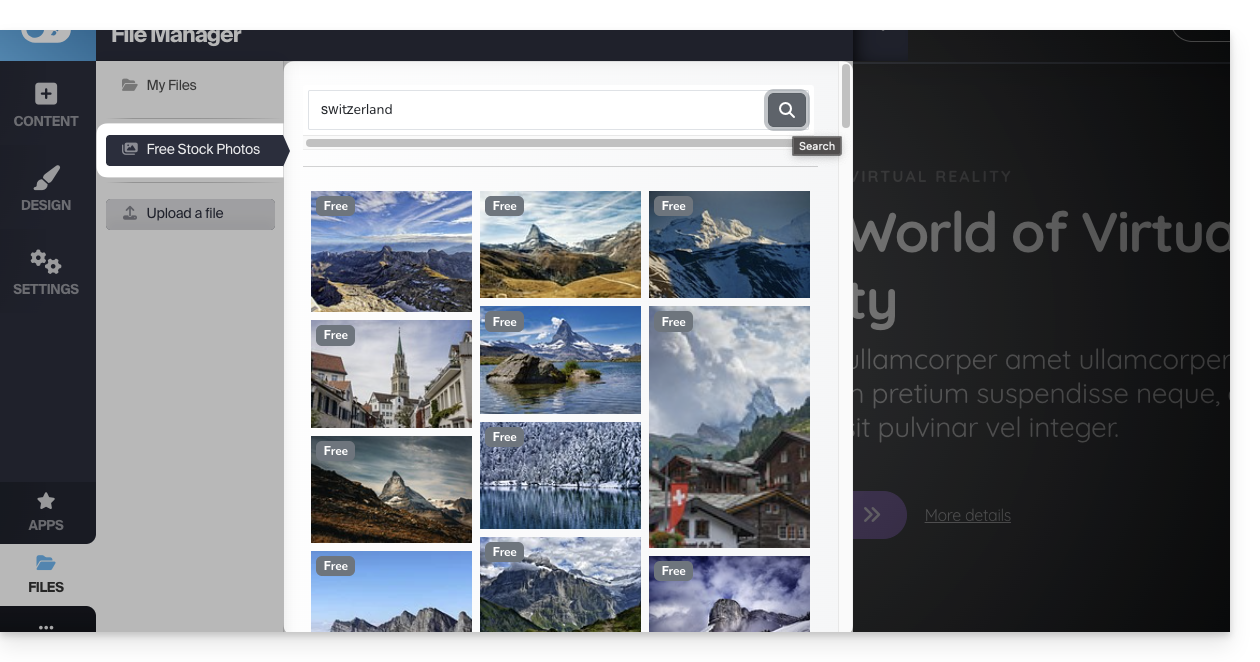
Protect your content: disable right-click
Click on Settings in the left sidebar, then on General Settings. At the bottom, you will find an option that, when enabled, disables the right-click function for visitors on your site: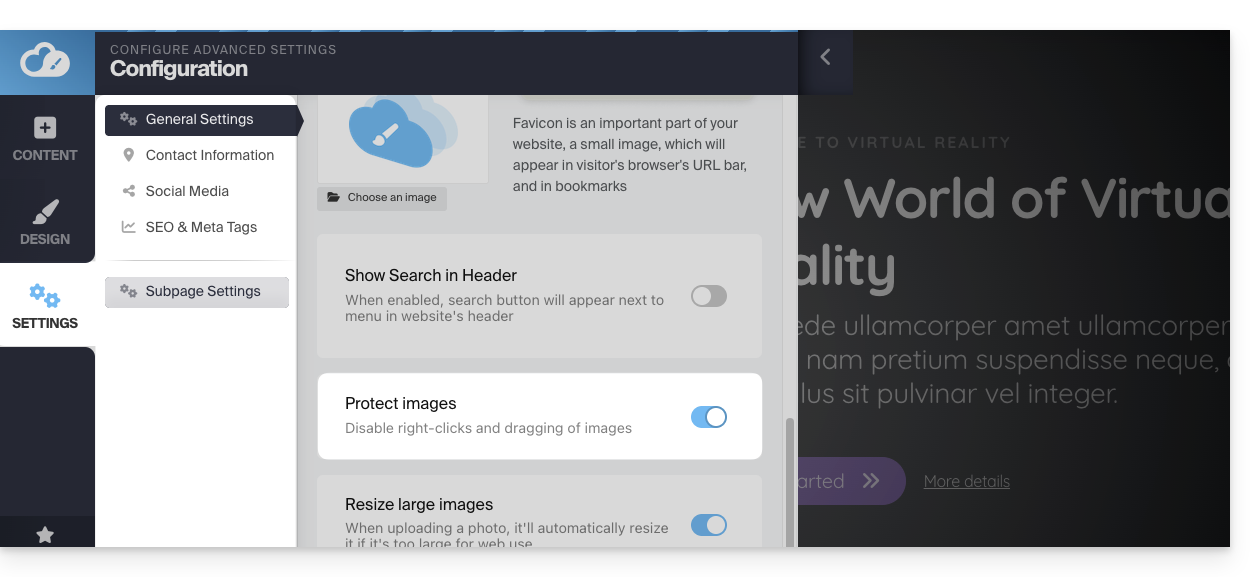
Troubleshooting media upload issues
Try uploading WEBP, JPG, or PNG files that are as lightweight as possible (ideally under 500 KB). It is not necessary to upload images with a width greater than 1000-2000 pixels to the server.
Also, make sure that your image files are saved with the RGB color profile, which is the standard for display on screens. Avoid the CMYK profile, which is very heavy and exclusively reserved for paper printing, as it can cause display errors or block the import.
If you are trying to upload files directly from your camera or smartphone, try resizing them before uploading. For example, from your iPhone, the image may be in HEIF/HEIC format, which is not natively supported by web browsers – try converting it to JPG first.
Link to this FAQ: https://faq.infomaniak.com/2705
Has this FAQ been helpful?