Knowledge base
1000 FAQs, 500 tutorials and instructional videos. Here, there are only solutions!
Block / allow email senders
This guide explains how to block email addresses or entire domains to stop receiving unwanted messages, or conversely allow addresses to bypass your Infomaniak email's anti-spam filter, thus always receiving their messages.
Preamble
- In addition to the Infomaniak anti-spam filter which eliminates the majority of unwanted emails as it evolves, Infomaniak offers two distinct lists that you can fill out as you wish:
- blocked senders:
- blocked emails and domains (blacklist) are then directly treated as spam…
- allowed senders:
- allowed senders and domains (whitelist) will no longer be filtered by the anti-spam filter…
- the list of allowed senders is only active on the original recipient of each message; if the message is addressed to abc@domain.xyz and then redirected to def@domain.xyz, the anti-spam filter and the list of allowed senders must be configured for the address abc.
- blocked senders:
- These lists are specific to the email address on which the operation is performed, but a Mail Service administrator can also apply these lists to the entire Mail Service via the Global Configuration of a Mail Service.
- These lists are also automatically filled based on your actions on emails at the anti-spam filter level.
Formats that can be used
Replace the example domain (the-spam-domain.xyz) with the one that is bothering you and that you want to send directly to the Spam folder:
Block a specific email address
john.example@the-spam-domain.xyz
Block all email addresses from a specific domain
*@the-spam-domain.xyz
Block certain email addresses from a specific domain
*example@the-spam-domain.xyz or john*@the-spam-domain.xyz
Block all incoming emails
*
Manage blocks or authorizations from the Infomaniak Web Mail app
Prerequisites
- Avoir la permission de gérer la sécurité: if you had been invited to the Infomaniak Web Mail app (online service ksuite.infomaniak.com/mail) to manage your address, it is possible that the Mail Service manager has removed this right from their admin account.
To block or allow senders:
- Click here to access the Infomaniak Web Mail app (online service ksuite.infomaniak.com/mail).
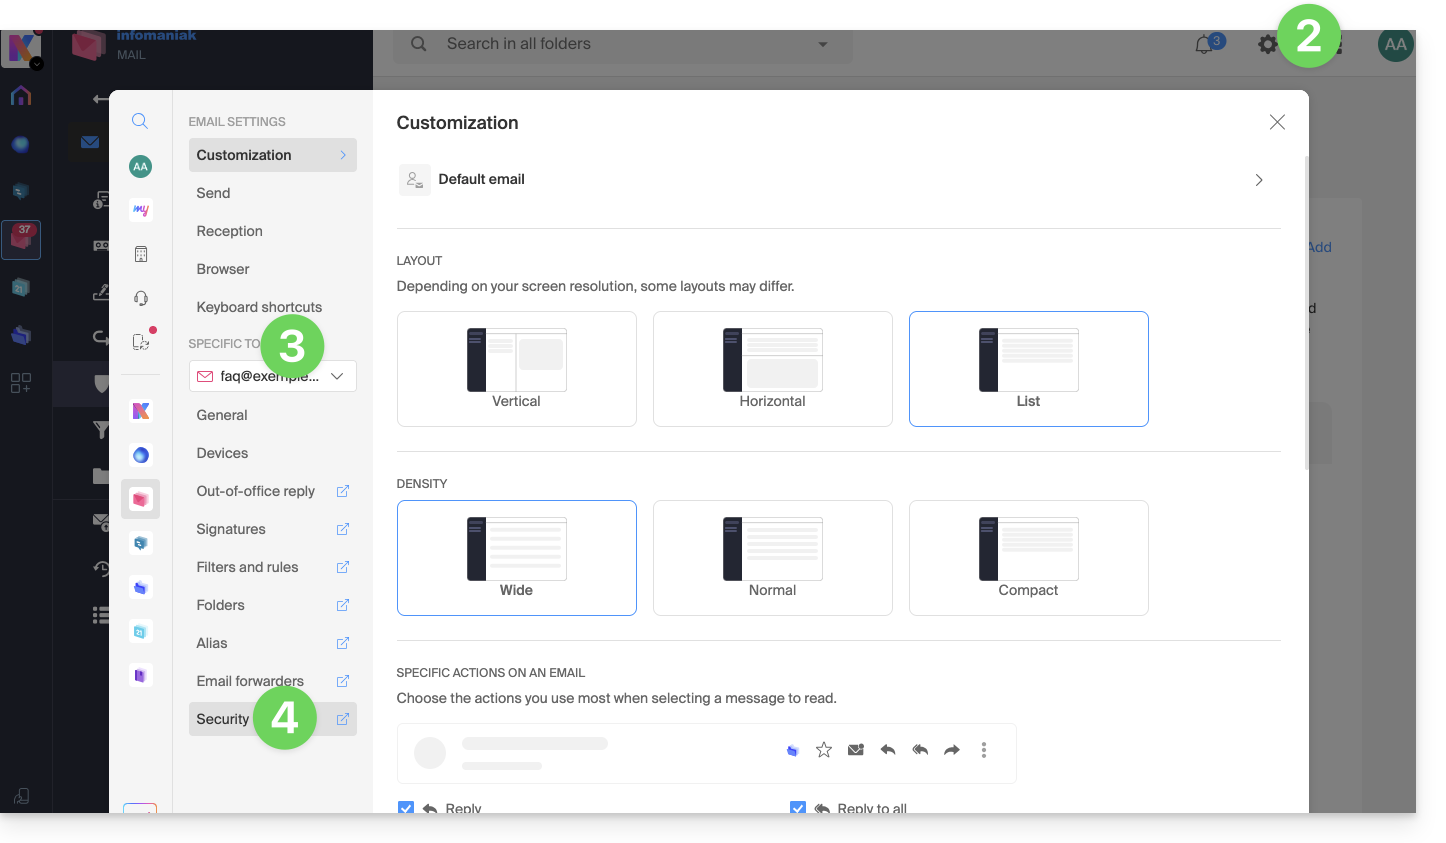
- Click on the Settings icon in the top right corner.
- Check or select the email address concerned in the dropdown menu of the left sidebar.
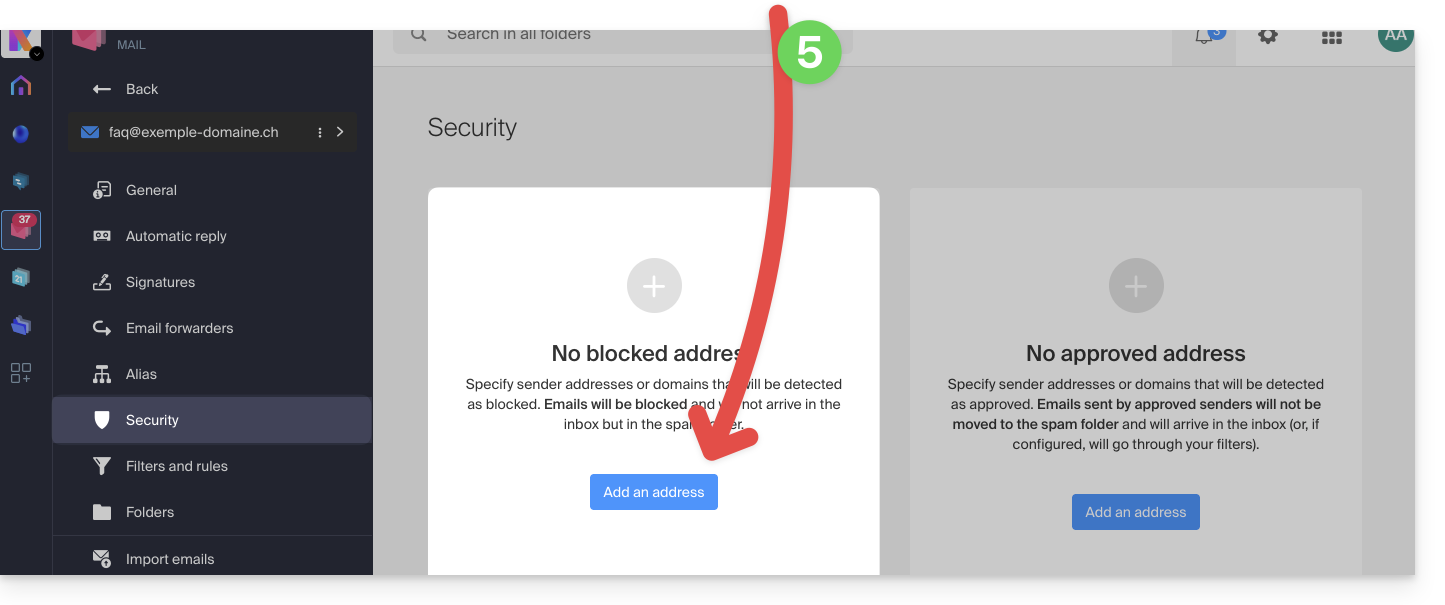
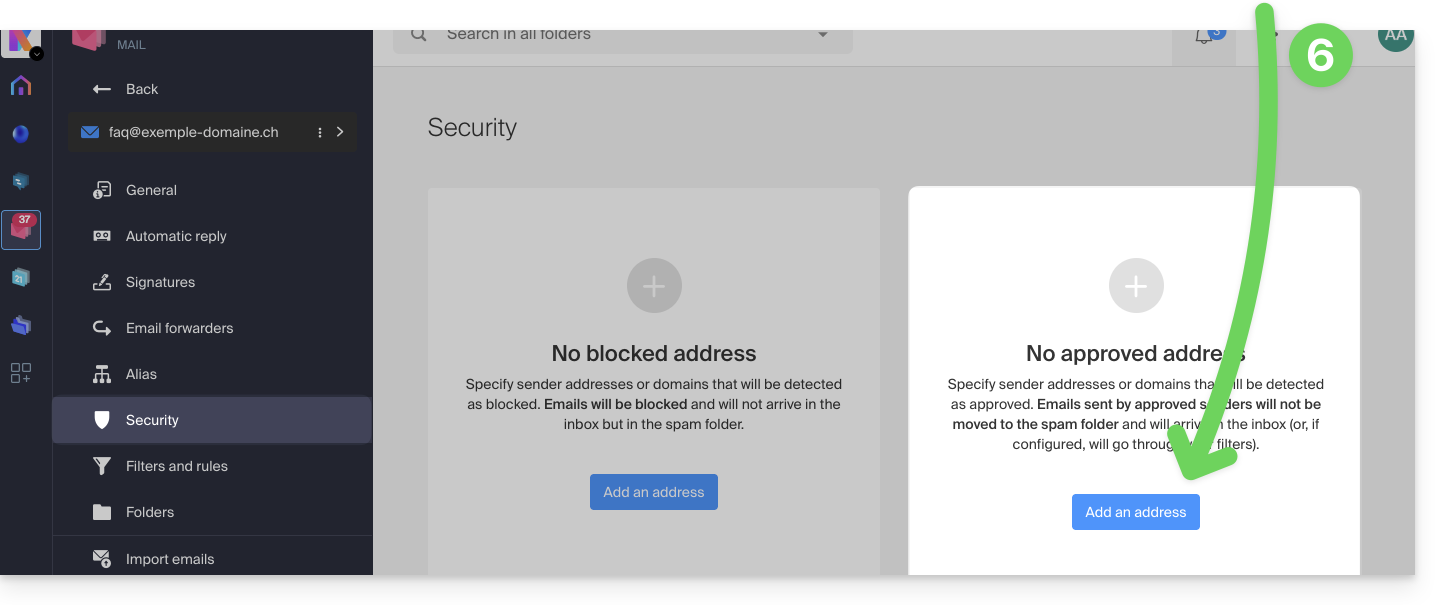
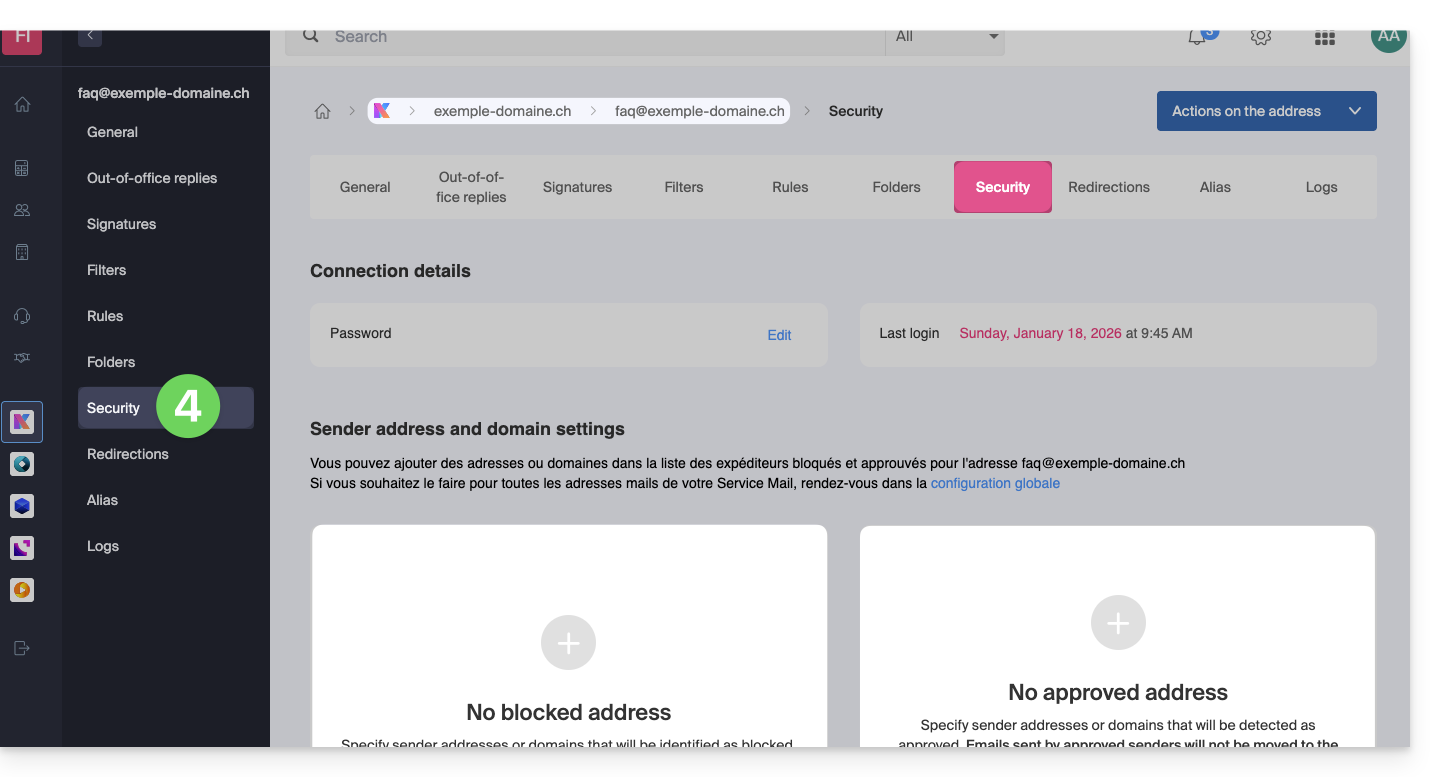
- Click on Security:
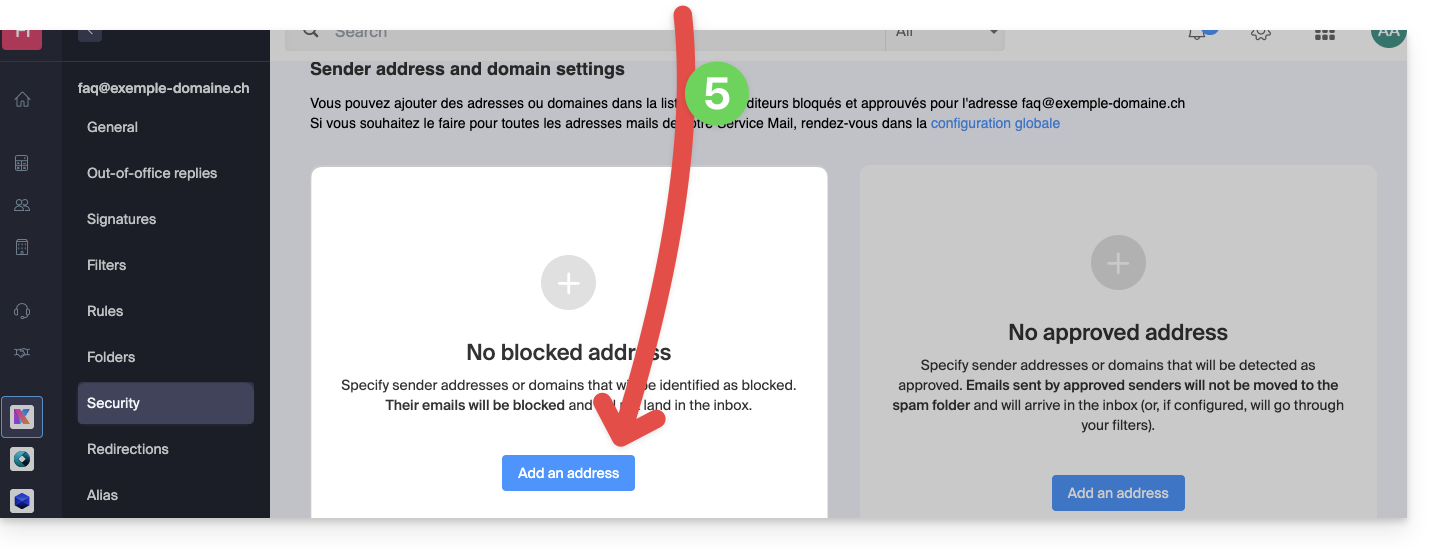
- To add a blocked sender (blacklisted), click on the Add an address button in the Blocked address box:
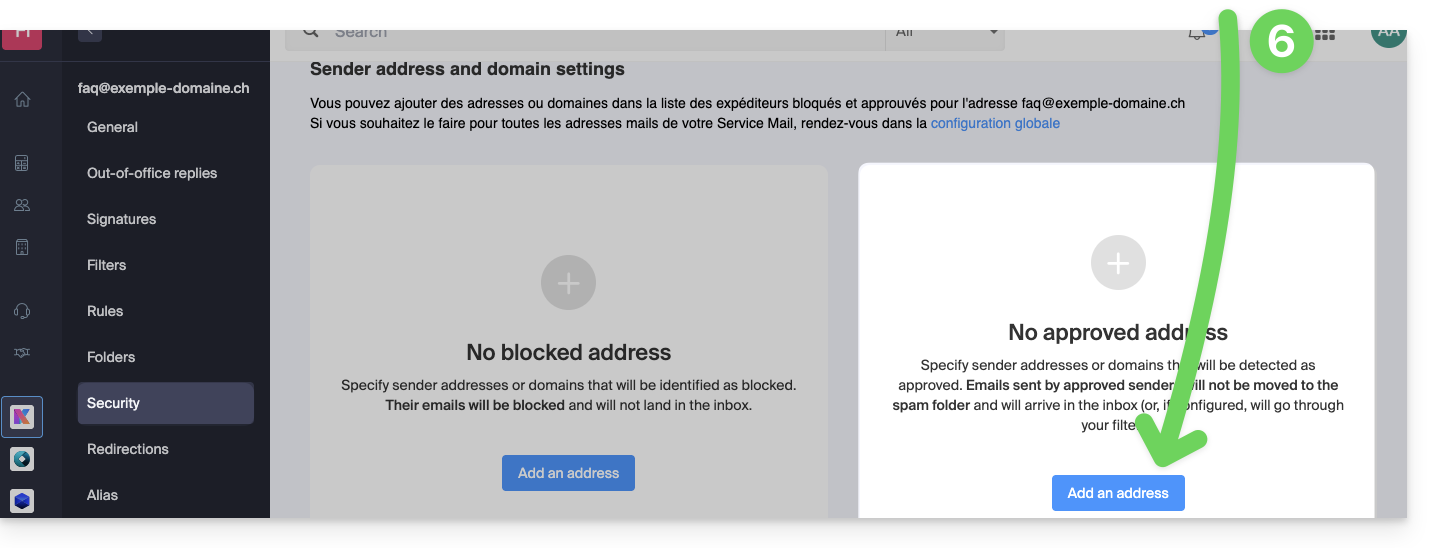
- To add an authorized sender (whitelisted), click on the Add an address button in the Approved address box:
- Fill in the fields as desired and/or according to the formats indicated above.
You can also block a sender directly from the received e-mail:
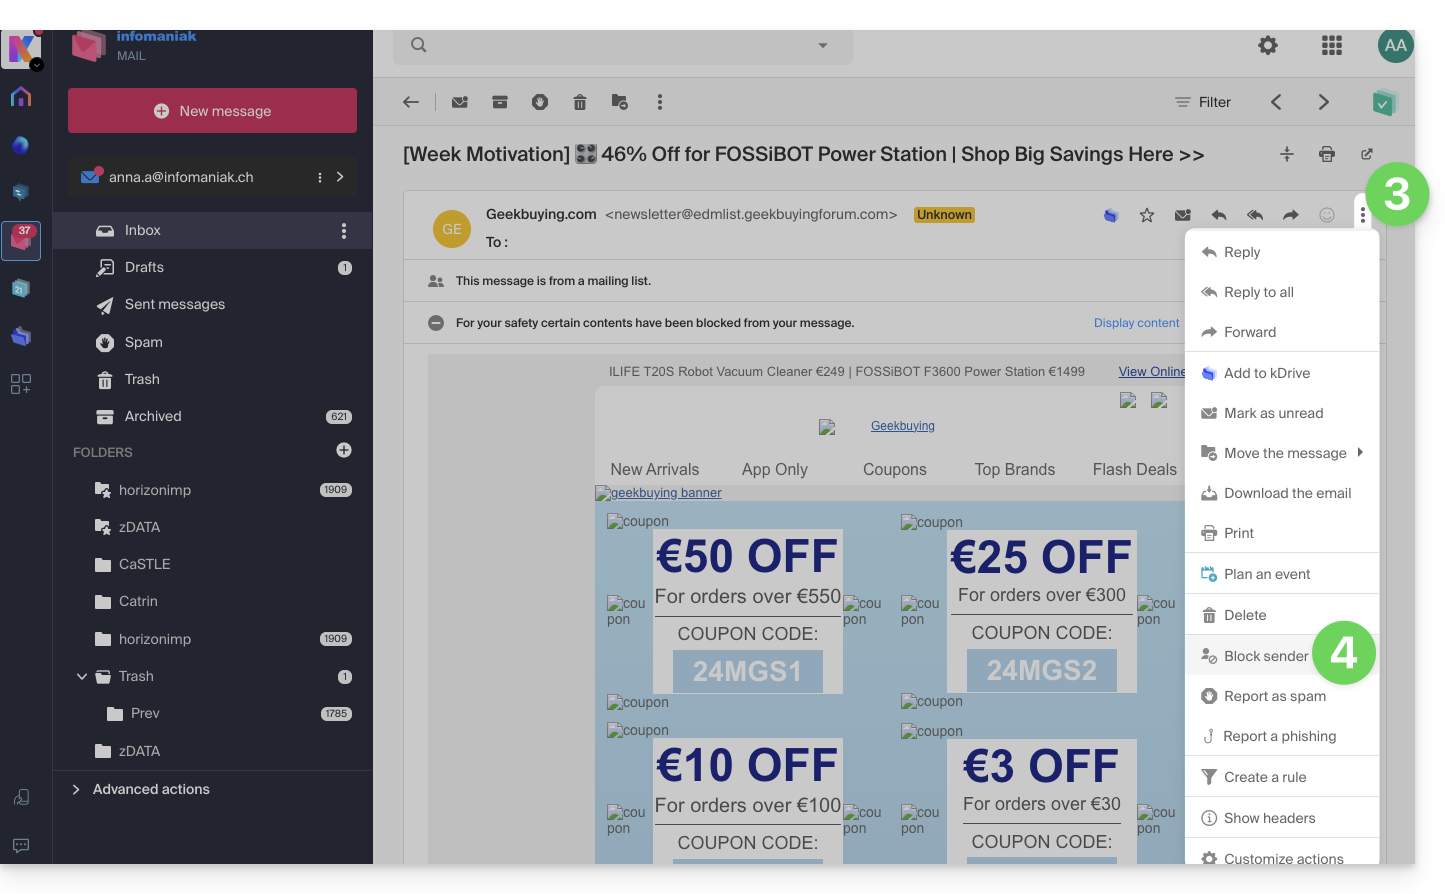
- Click here to access the Infomaniak Mail Web app (online service ksuite.infomaniak.com/mail).
- Open the message from the unwanted sender.
- Click on the ⋮ icon at the top right of the open message.
- Choose Block the sender to add it directly to the list of blocked addresses:
If necessary, remove the address by returning to the Security tab.
Manage blocks or authorizations from a Mail Service
To block or authorize senders from a Mail Service:
- Click here to access the management of your product on the Infomaniak Manager (need help?).
- Click directly on the name assigned to the product concerned.
- Click on the email address concerned.
- Click on the Security tab or from the left sidebar on Security:
- To add a blocked sender, click on the Add an address button in the Blocked address box:
- To add an authorized sender, click on the Add an address button in the Approved address box:
- Fill in the fields as desired and/or according to the formats indicated above.
Alternative
To act on your incoming emails, you can also use mail filters. It is also possible to disable mail usage for an entire domain (messages will continue to arrive).
Link to this FAQ: https://faq.infomaniak.com/2618
Has this FAQ been helpful?