Knowledge base
1000 FAQs, 500 tutorials and instructional videos. Here, there are only solutions!
Import data to kDrive
This guide explains how to import external data (files, folders, etc.) to your kDrive using the WebDAV protocol provided by your Cloud host.
Preamble
- Refer to this other guide if you are looking for information on how to copy specific data from one kDrive to another when your user has access to both kDrives concerned.
Import external data via WebDAV
Prerequisites
- Have a kDrive or kSuite offer
- Have sufficient permissions within kDrive or kSuite.
- Do not change your passwords until the import is complete!
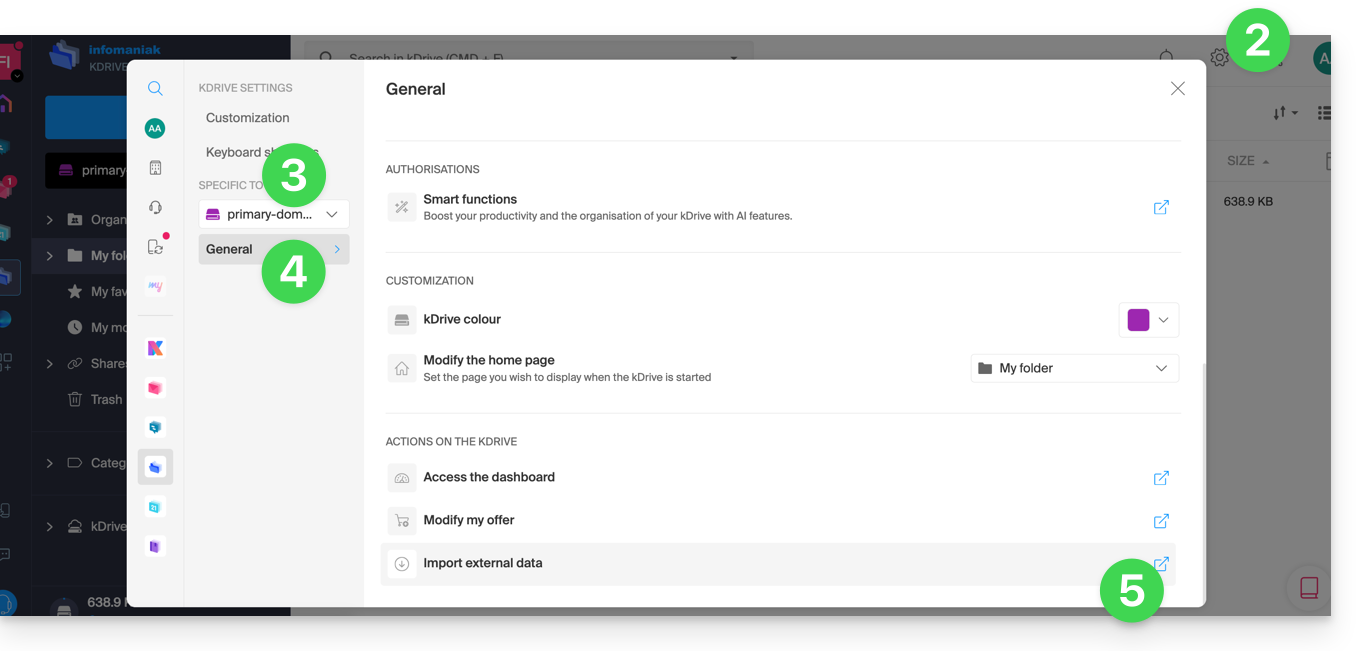
To access the import tool, where the data needs to be imported:
- Click here to access the Infomaniak kDrive Web app (online service ksuite.infomaniak.com/kdrive).
- Click on the Settings icon in the top right corner.
- Check or select the kDrive concerned in the dropdown menu of the left sidebar.
- Click on General in the left sidebar.
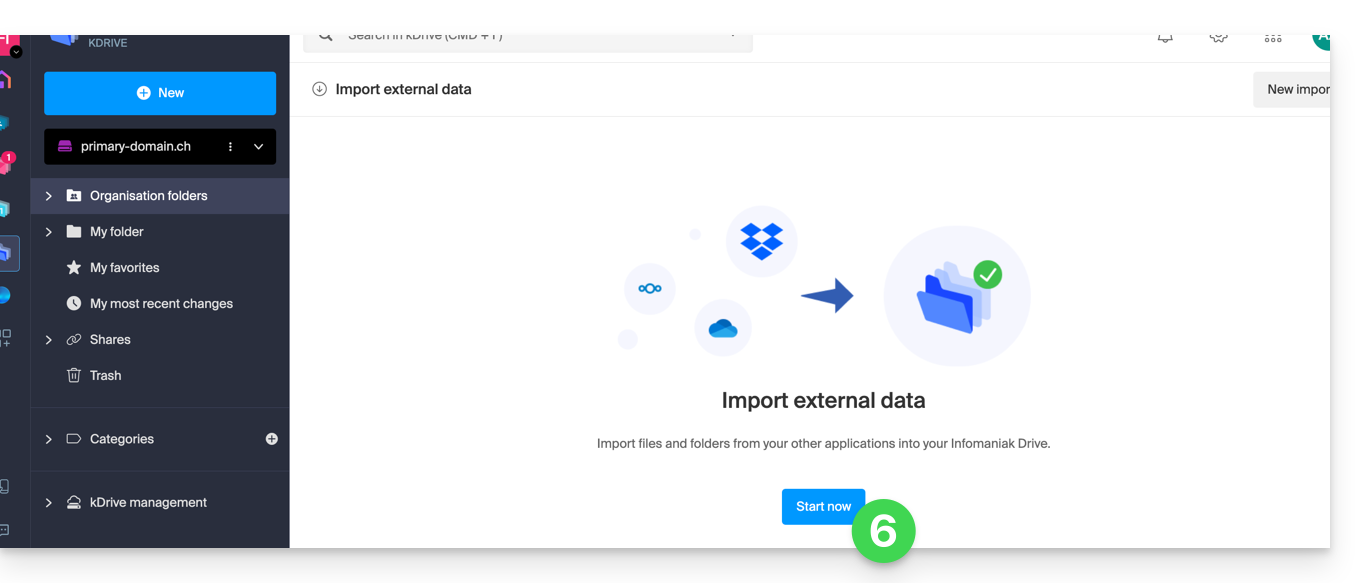
- Click on Import external data:
- Click the blue Start button:
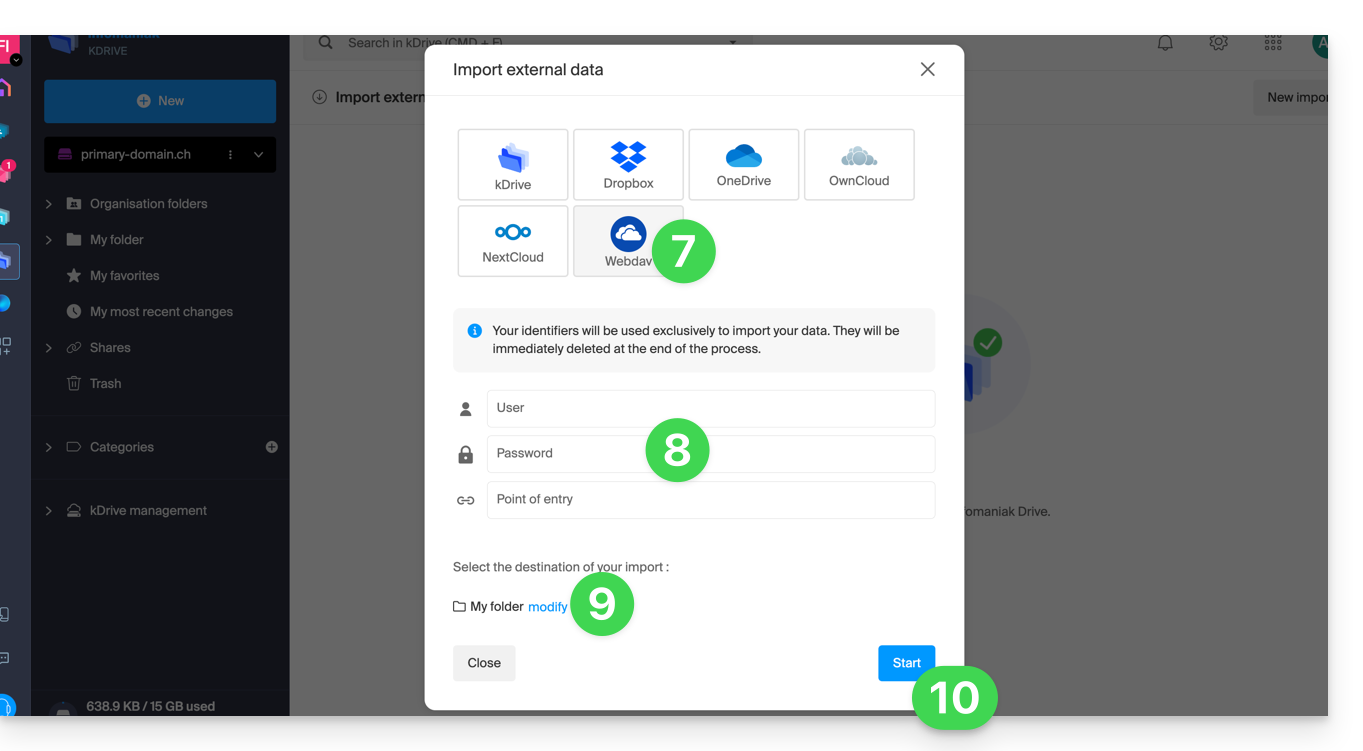
- Click on WebDAV.
- Complete the requested information based on the source (including the WebDAV address you have - obtained from the source).
- Choose the destination kDrive and the desired location to host the imported data.
- Click on Start:
Link to this FAQ: https://faq.infomaniak.com/2557
Has this FAQ been helpful?