Knowledge base
1000 FAQs, 500 tutorials and instructional videos. Here, there are only solutions!
Change the configuration of a Node.js site
This guide explains how to adjust the configuration of a Node.js site hosted on Infomaniak's infrastructure. You will learn how to adapt the behavior of your application according to its evolution, its dependencies, or your technical preferences.
Prerequisites
- Install a Node.js site on your hosting.
- Test your modifications locally before applying them to production.
- Check that your scripts (
start,build) are well defined in yourpackage.jsonfile. - If you modify the structure of your project, remember to adjust the execution folder and the associated commands.
- Important: The listening port defined in the Manager must imperatively match the one used in the application's code.
Access the configuration
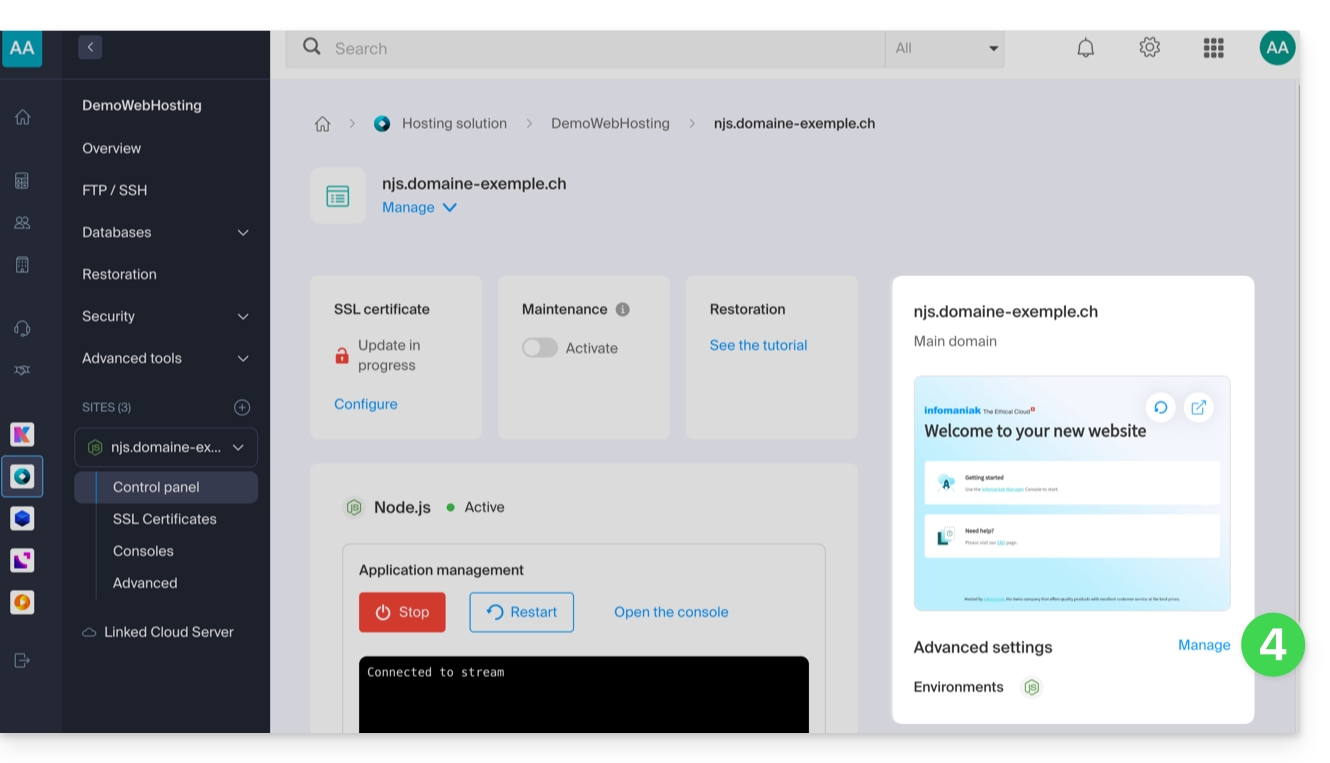
Each site has a dedicated dashboard to control the application (start, stop, restart), view the execution logs, manage Node.js versions, and activate SSL certificates:
- Click here to access the management of your site on the Infomaniak Manager (need help?).
- Click directly on the name assigned to the site in question.
- Click on Manage under Advanced settings:
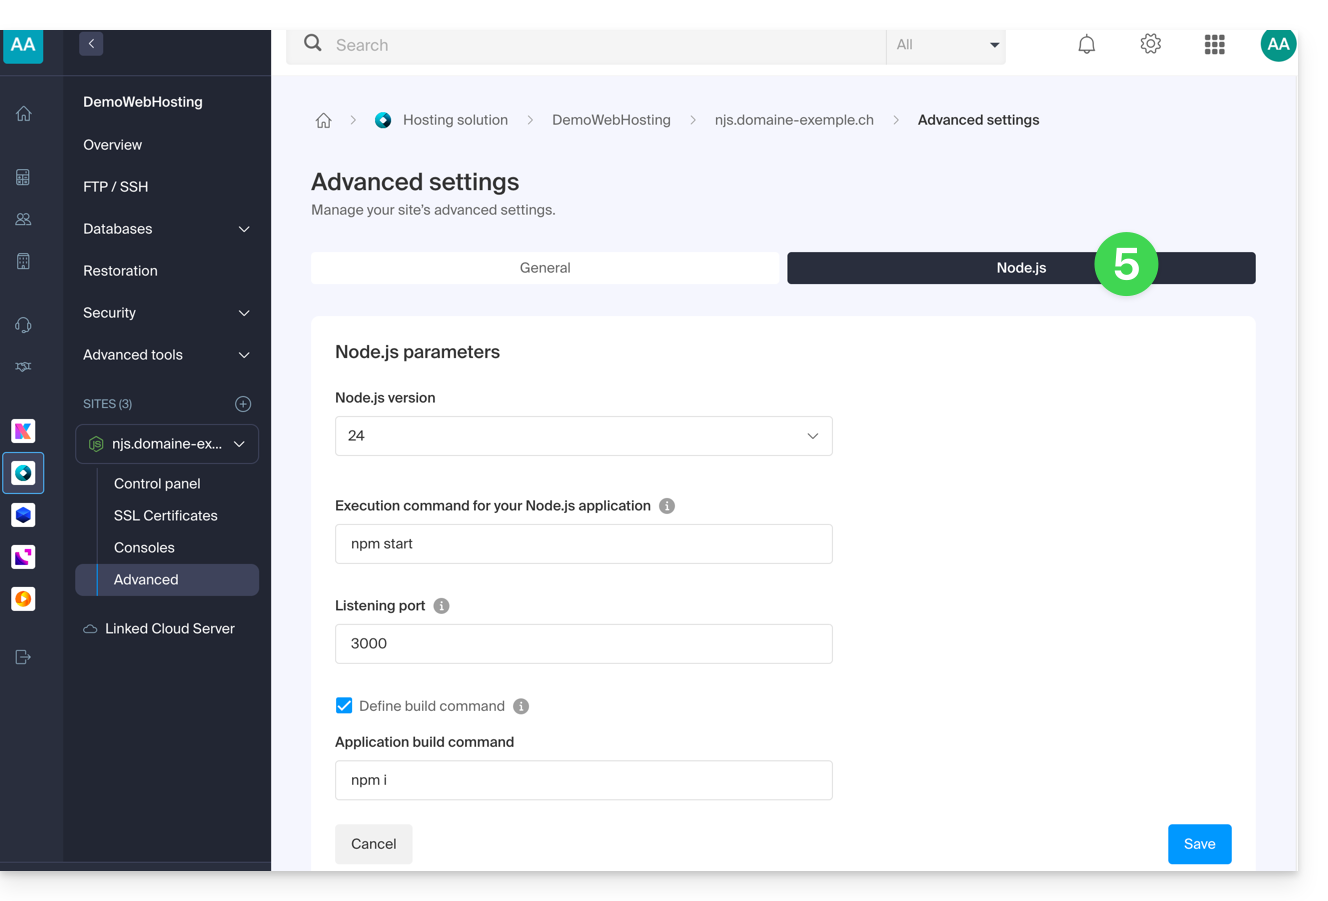
- Click on the Node.js tab to access the settings:
Commands and automation
Execution folder
The execution folder indicates the location on the server where the build and launch commands will be executed. It must point to the root directory of your application, where your package.json file is located.
./          // Root directory
./app       // Subfolder named app
./backend   // Subfolder named backend
Build command
If your application requires a preparation step (installing dependencies, compiling TypeScript, minification), specify the command to execute here. This is the recommended method for deploying your updates.
Unlike a manual execution via SSH, this interface uses an environment with boosted performance to ensure fast building without impacting the resources of your production site. You can chain multiple tasks (such as a git pull followed by a build) and monitor the progress and logs of the process in real-time directly from the Manager.
# Example: install dependencies and build
npm install && npm run build

# Example: update code and build with yarn
git pull && yarn install && yarn build
Note: If your project is already compiled or does not require any intermediate steps, this field can be left empty.
Start command
This instruction starts your server. It must be identical to the one used in your local development environment to launch the application's entry point.
# Option 1: Direct file launch
node index.js

# Option 2: Using npm script
npm start

# Option 3: Using yarn script
yarn start
Listening port
Your application must listen on the dynamic port assigned by the Manager. This port is passed to your code via the PORT environment variable.
// Use the port provided by the environment
const port = process.env.PORT || 8080;

app.listen(port, () => {
  console.log(`Application started on port ${port}`);
});
Node.js version
You can select the desired Node.js version in the settings. It is recommended to prioritize a stable version (LTS) to ensure the security and longevity of your project.
Apply and validate changes
Once your modifications are saved in the Manager, you must restart your application from the dashboard for the new parameters (new Node version, new port, or new build command) to be taken into account.
If you encounter startup issues, you can check the execution console or refer to this other guide for troubleshooting.
Link to this FAQ:
Has this FAQ been helpful?