Knowledge base
1000 FAQs, 500 tutorials and instructional videos. Here, there are only solutions!
Share your screen on kMeet
This guide explains how to use the screen sharing feature (screen sharing) of kMeet, the ethical free video conferencing solution by Infomaniak.
Prerequisites
- Have the desktop app kMeet (desktop application for macOS / Windows) or the mobile kMeet app (application for Android smartphone or tablet).
- The Web kMeet app (online service kmeet.infomaniak.com) is also compatible.
- Screen sharing is not yet possible with the mobile iOS app.
- If this is your first use or first screen share, the permissions requested by the operating system (macOS, Windows...) or the browser (Chrome, Firefox...) may require a restart of the application and consequently an interruption of the meeting.
It is better to prepare the technical aspects in advance to avoid being in a delicate situation during the broadcast; refer to this other guide on this subject.
Start screen sharing
To start sharing your screen:
- Start kMeet via kmeet.infomaniak.com or from one of the applications for computers or mobile devices.
- Create or join a meeting room.
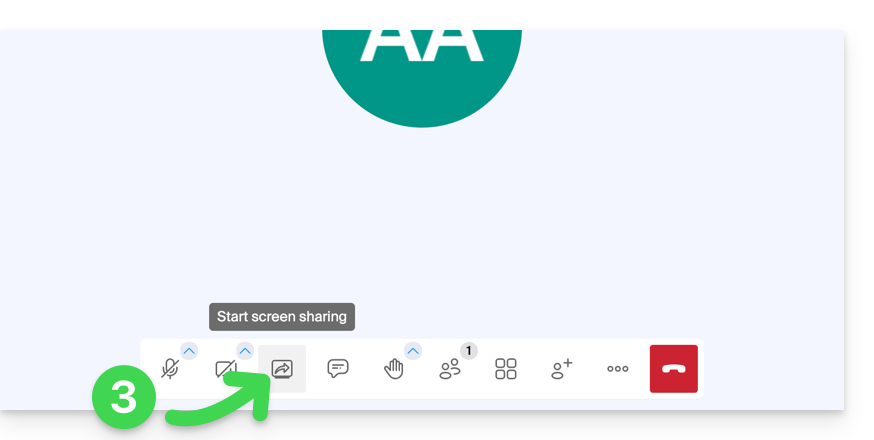
- Click on the screen icon with an arrow to Share your screen:
- Read the warning that may be displayed by your device and validate the authorization to access the screen content.
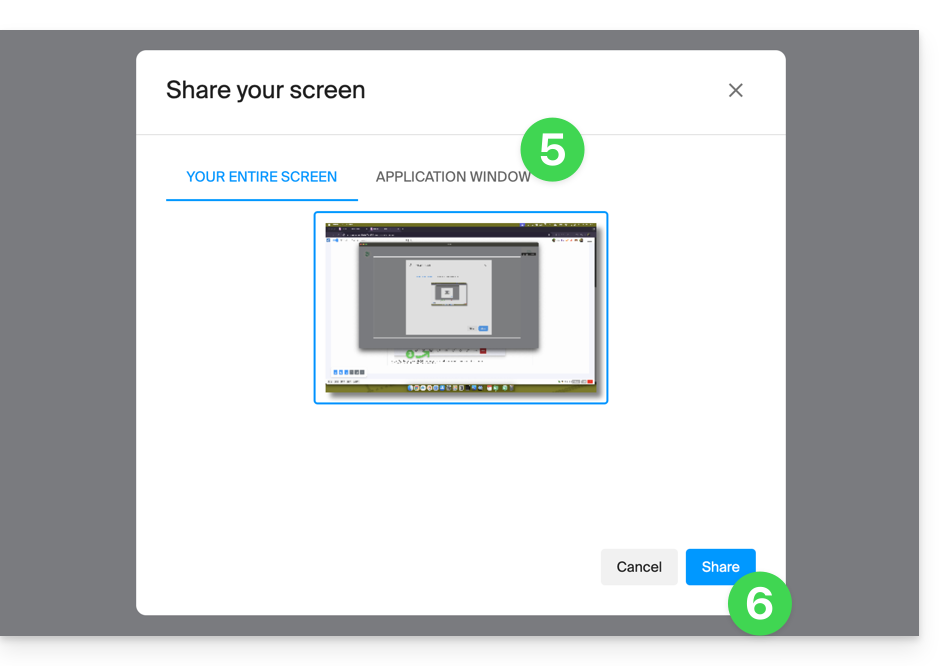
- By default, it is the entire screen that will be shared in the next step, but you can also choose a specific window, that of an application for example, in order to restrict the participants' view to a specific activity of the device.
- Be careful, if the purpose of the sharing is to then allow participants to interact by drawing, you must choose to share the full screen.
- Click on the button to start the sharing:
- To stop the broadcast, click again on the toolbar icon.
Link to this FAQ: https://faq.infomaniak.com/2477
Has this FAQ been helpful?