Knowledge base
1000 FAQs, 500 tutorials and instructional videos. Here, there are only solutions!
Back up Jelastic Cloud to Swiss Backup (Swift)
This guide details how to back up the data from your folders and nodes on Jelastic Cloud using the OpenStack Swift protocol on Swiss Backup, the backup solution in an independent Swiss cloud.
Introduction
- To back up the data, an extension for Virtuozzo (Jelastic Cloud) is available in the node's add-ons.
- Learn more about the extension (add-on) on Github.
Configure the Swiss Backup extension on Jelastic Cloud
Prerequisites
- Use Jelastic Cloud (at least one Jelastic environment must be active with the extension installed for your backups to be visible).
- Have an Swiss Backup Infomaniak account with an available device quota (minimum 1) for a Cloud backup.
- Add 1 device of type Cloud to obtain the OpenStack Swift parameters.
To add the extension useful for Swiss Backup on Jelastic Cloud:
- Log in to the Jelastic Cloud Dashboard of your server.
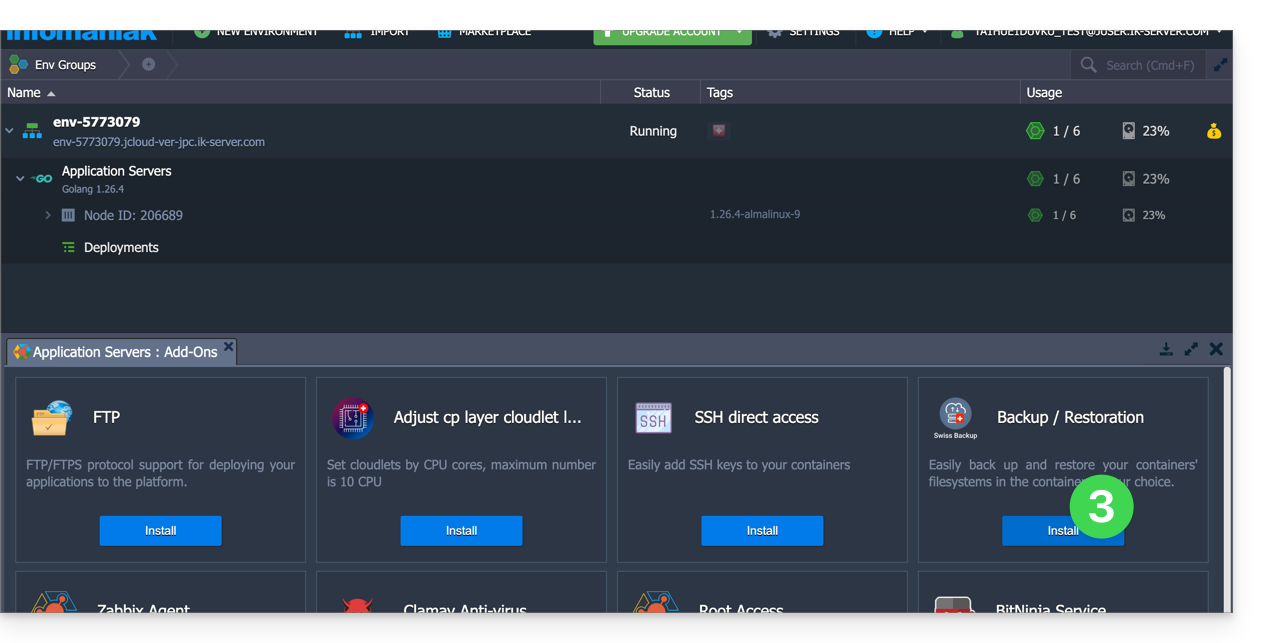
- Go to the node's add-ons section:

- Search for and install the Backup / Restoration extension:
Two types of backup are then possible and detailed below:
- Back up specific folders.
- Create a snapshot of an entire node.
Back up specific folders
To back up specific directories:
- Enter the username and password according to the information specific to your device.
- Check Backup your data.
- Check Backup specific folders
- Enter the absolute path of the folders to be backed up in the Folders to backup field; it is possible to specify several folders by separating each path with a comma, for example:
/root/admin/, /home/user1/, /jelastic/containers/(in this example, 3 folders have been specified)…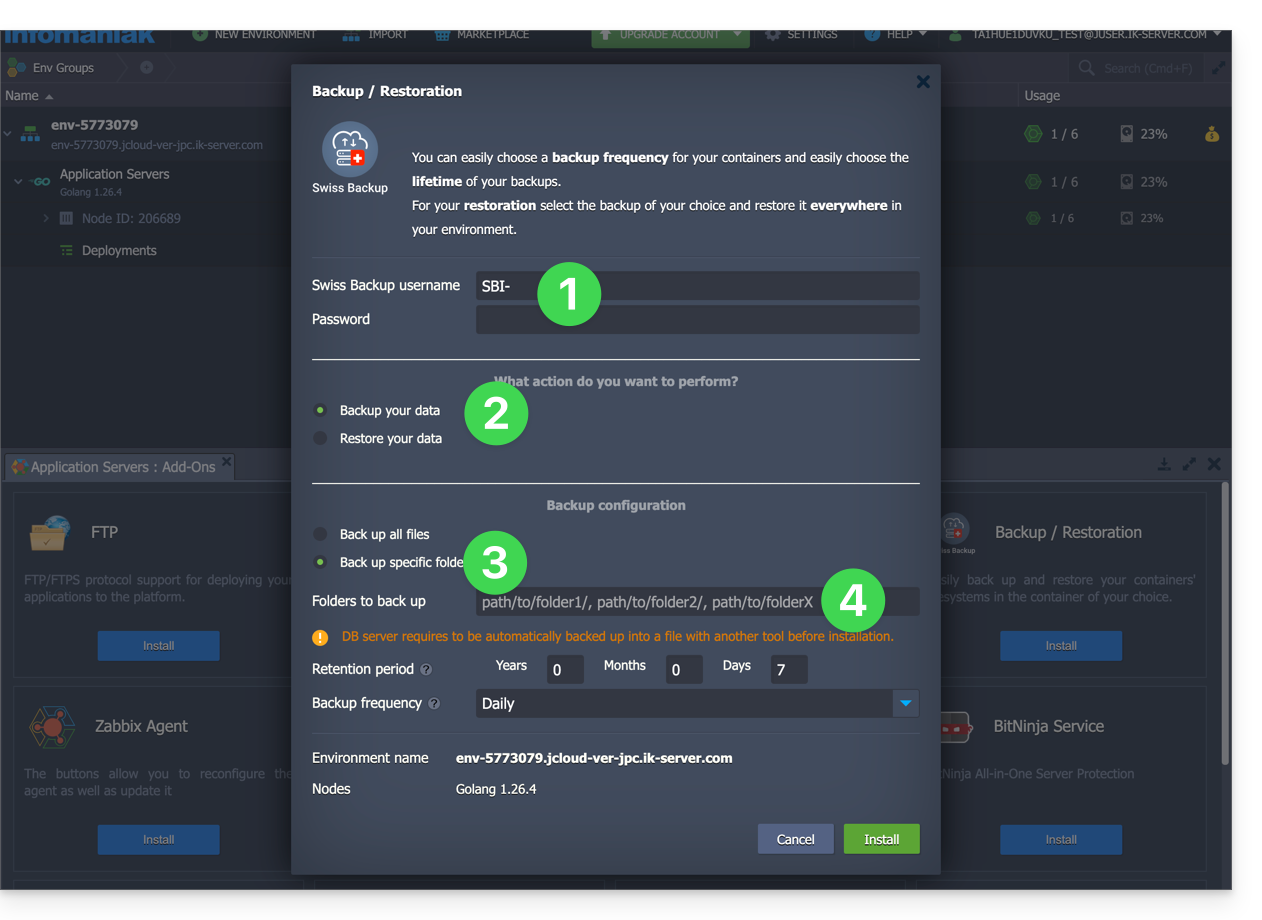
Next, you need to define the frequency of the backups (see below).
Back up an entire node
To back up an entire node:
- Enter the username and password for your Swift device on Swiss Backup.
- Check Backup your data.
- Check Backup all files to back up the entire file system of a node; some files are automatically excluded:
- the
/dev,/proc,/sys,/rundirectories - file systems that are not mounted as part of the root partition, including virtual file systems
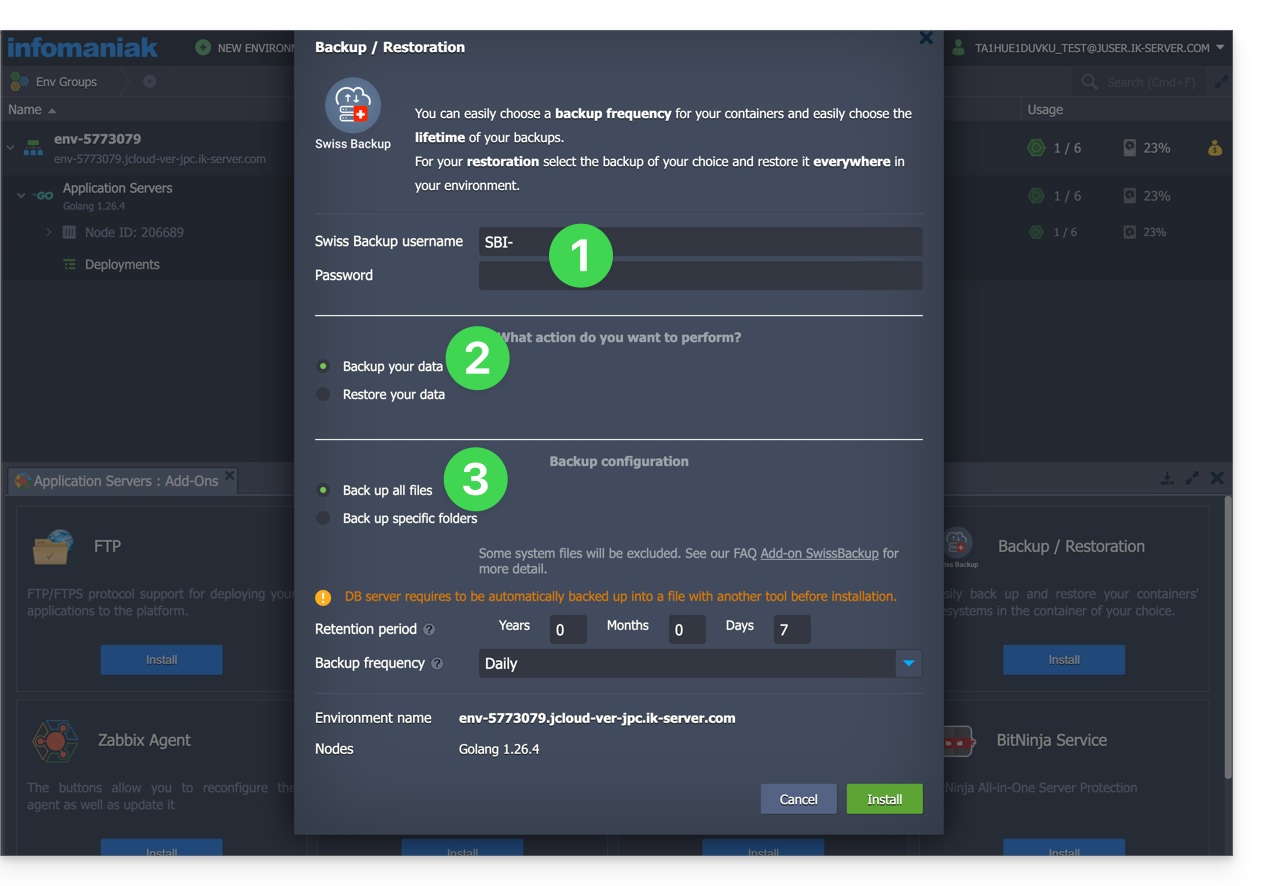
- the
Next, you need to define the frequency of the backups.
Define the frequency and retention policy for backups
Two options are available for performing the backup:
- daily (at 8 PM UTC)
- every hour (at the beginning of the hour, for example at 1 PM, 2 PM, etc.)
You can define the retention period for your backups in years, months, days, and hours. To keep your backups indefinitely, simply set the parameters to 0.
For example, if you perform backups every hour and set a retention policy of 1 year, 2 months, 4 days, 2 hours, this means that each backup will be available for a period of 1 year, 2 months, 4 days, 2 hours (=10322 backups). Note that backups are deleted every Sunday at 10:30 PM (UTC).
Warning: Do not set all parameters to 0, as permanent backups can lead to backup failures.
Recommended limits:
- Year: 1
- Month: 12
- Days: 99
For an hourly backup (every hour), a maximum retention of one month is recommended. Beyond this value, some backups may fail.
Restore backups
Restore data from a node
- Log in to the Jelastic Dashboard of your server.
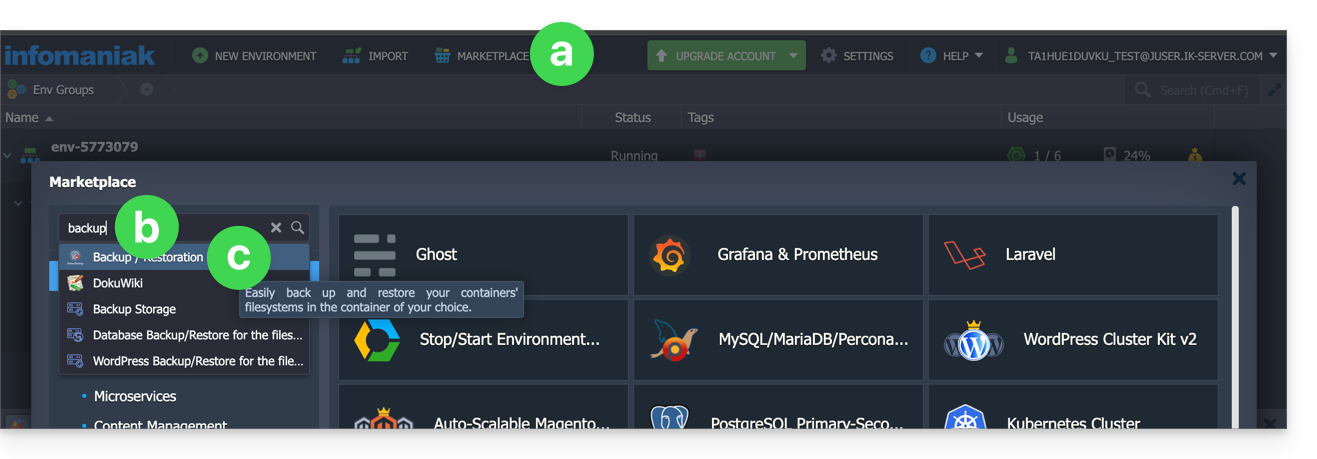
- You will probably need to re-install (restart) the add-on from the Marketplace:
- Click on Marketplace.
- Search for “backup”…
- Click on the "Backup / Restoration" add-on:
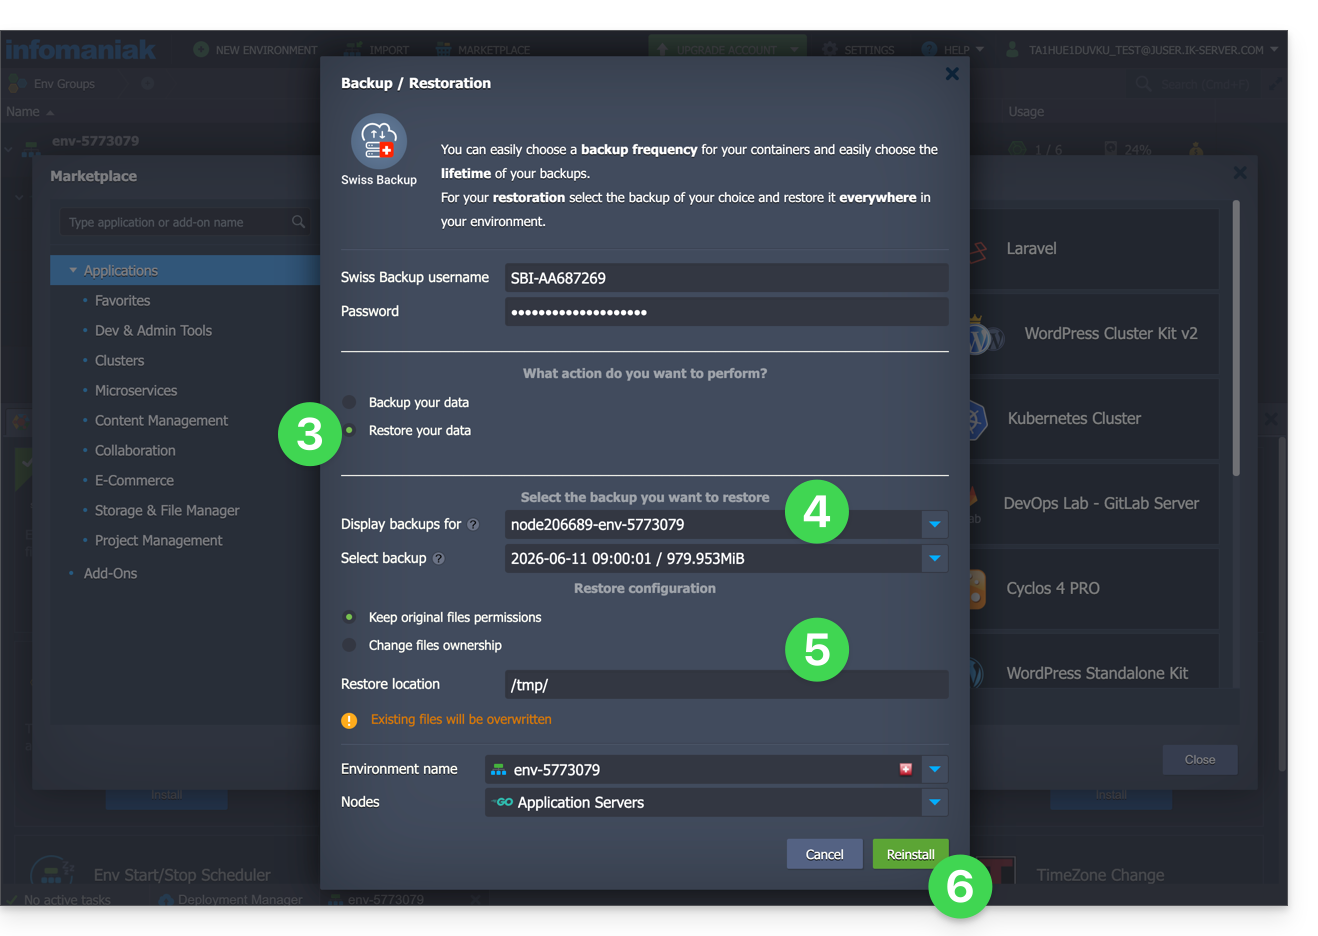
- Once the extension has been added and the username and password for your Swift device on Swiss Backup have been entered, check Restore your data.
- Select the node that contains the backup to be restored.
- Select the backup to be restored and the folder for restoration.
- Click on the Restore button:
Restore specific folders from a snapshot (CLI)
Each backup corresponds to a unique ID. You can include and exclude folders from your snapshots during a restore. To view your snapshots:
. /home/.config/swissbackup/openrc.shrestic snapshots
- Use
--excludeand--includeto restrict the restore to a subset of files in the snapshot; for example, to restore a single file:restore 79766175 --target /tmp/restore-work --include /work/foo
There are case-insensitive variants of --exclude and --include called --iexclude and --iinclude. These options behave the same way but ignore the case of the paths.
Modify the backup configuration
To do this:
- Log in to the Jelastic Dashboard of your server.
- Once the extension has been added and the username and password for your Swift device on Swiss Backup have been entered, modify the configuration as desired.
The backup schedule is defined by a cron job, and backups are performed using the restic tool.
To manually modify the backup schedule (CLI), as the root user, run the crontab -l command to display the current schedules:
- The line containing
retention-all.shcorresponds to the backup task. - The line containing
purge.shcorresponds to the backup retention task.
Example:

Modify the schedule using the crontab -e command.
You can modify the line containing the retention-all.sh or retention.sh script; these scripts launch your backups. Note: the cron jobs are designed to avoid causing problems between backups and multiple deletions. Pay attention to the time required for backups and deletions…
- Learn more about cron jobs: crontab.guru
- Learn more about restic: restic.net
Manually Delete Backups (CLI)
To do this:
- Source the configuration file:
. /home/.config/swissbackup/openrc.sh - Display the available backups:
restic snapshots - Delete the desired backup:
restic forget IdBackup --prune - Delete all backups of a file except one:
restic forget --tag folders --keep-last 1 --prune

Remove the Backup Schedule
This button allows you to delete the schedule for your backup: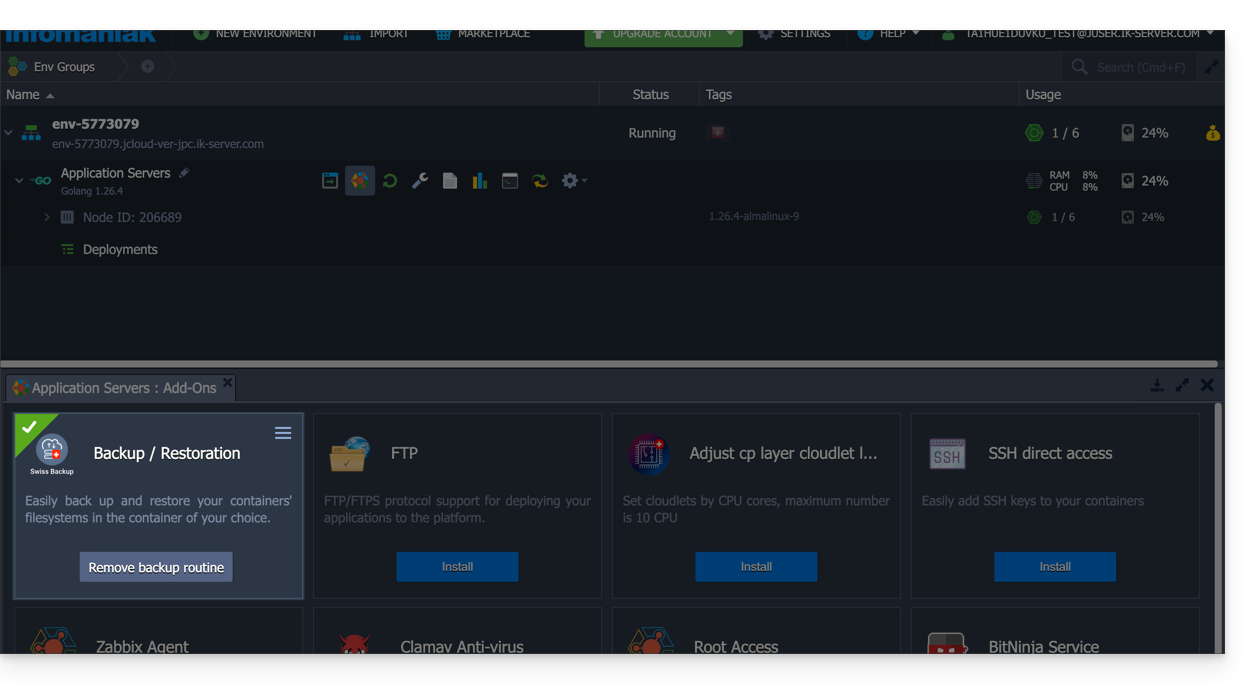
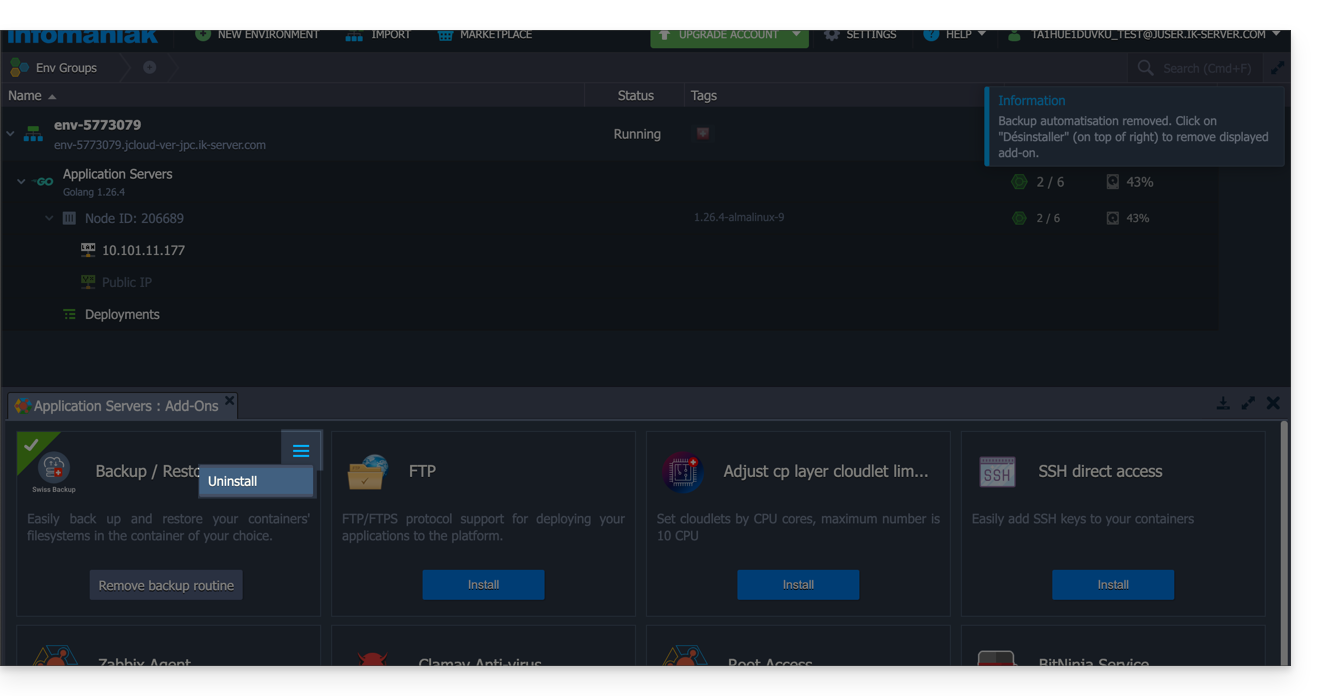
Uninstall the Swiss Backup extension
You must delete the backup schedule (see above) before you can delete the Swiss Backup extension:
Link to this FAQ: https://faq.infomaniak.com/2420
Has this FAQ been helpful?