Knowledge base
1000 FAQs, 500 tutorials and instructional videos. Here, there are only solutions!
Manage kDrive drop boxes
This guide explains how to create a (or multiple, depending on the kDrive offer you have) drop box with kDrive to invite contacts to deposit content (files or folders) there. The content uploaded by your contacts is thus directly sent and sorted to the right place on your kDrive.
Create a drop box
To access kDrive and create a drop box:
- Click here to access the Infomaniak kDrive Web app (online service ksuite.infomaniak.com/kdrive).
- Navigate through the kDrive directory that appears in the left sidebar and go to the folder that will host the data collected in the drop box:
- Stay in the personal folder (My Folder) if the data is private and specific to your user.
- Go to the shared folder (Organization Folders) if you want other users of your kDrive to be able to directly view the data from the drop box.
- Click the blue New button when you are in the directory of your choice (the one that will host the data collected using the drop box).
- Click on Drop box:
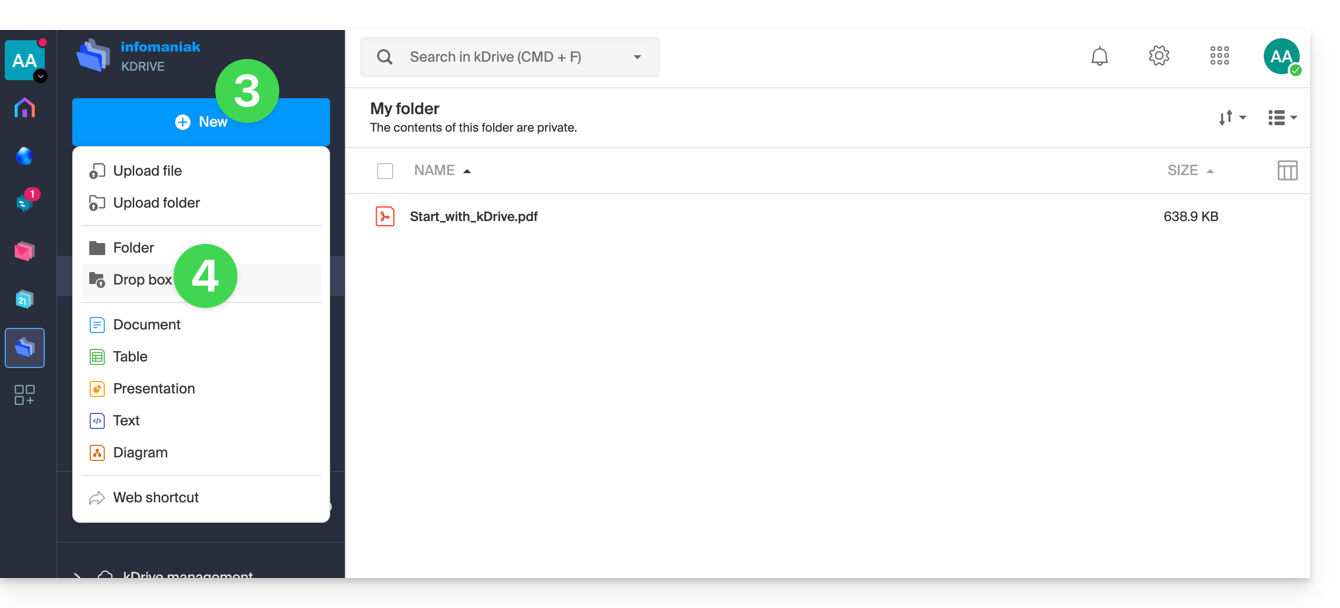
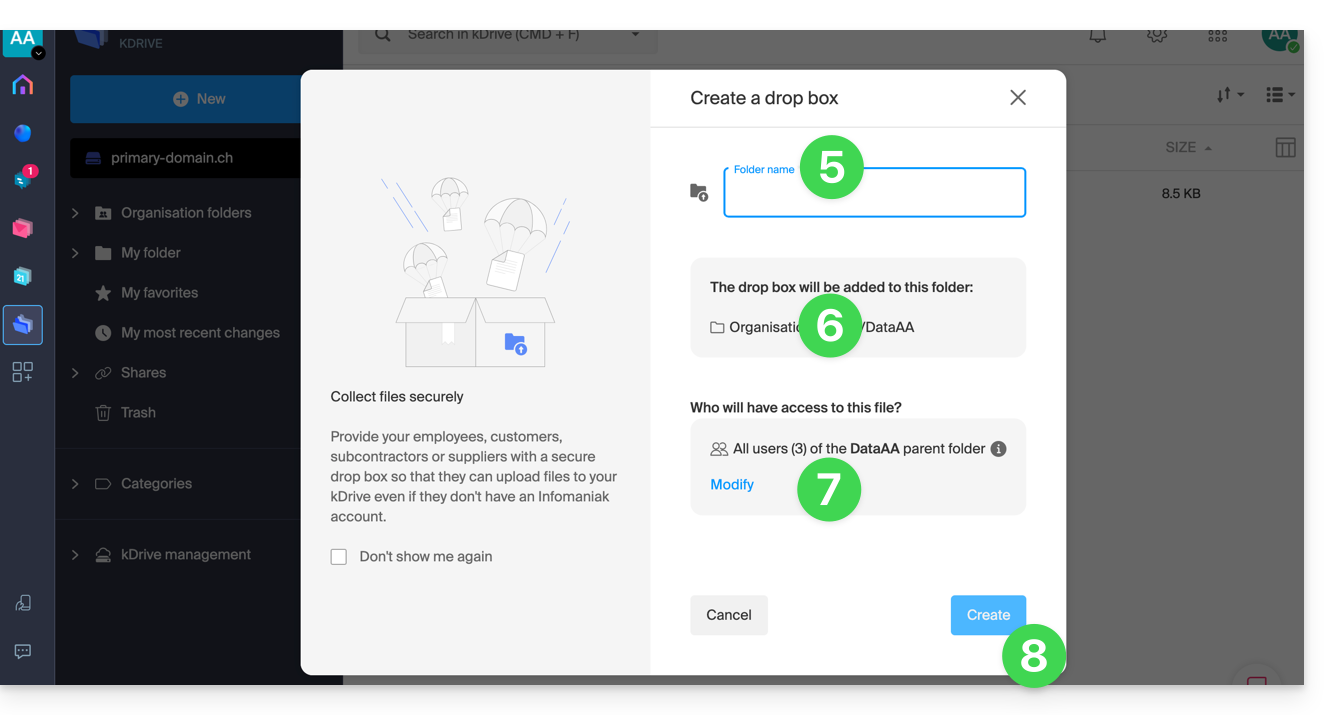
- Enter the name of the drop box.
- The full path (internal to your kDrive) to the location of this drop box is specified for your information.
- Depending on the kDrive offer and the choice in point 2 above, you can still decide whether, despite a location in an Organization Folder (shared folder), you want to restrict access to your user only.
- Click the blue Create button:
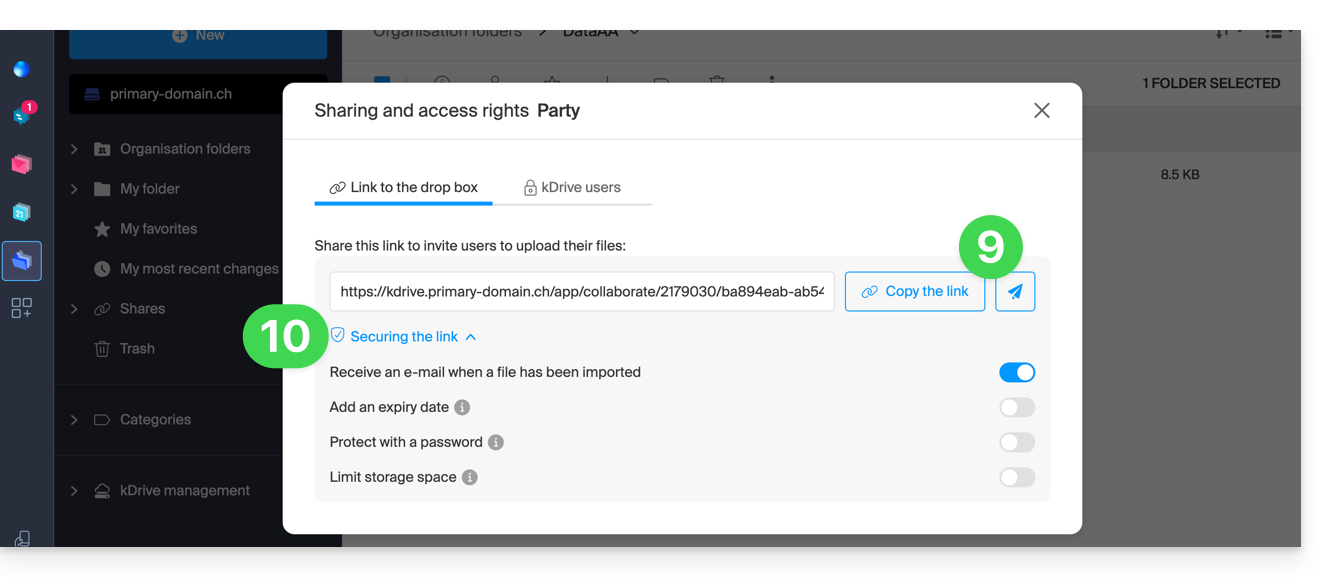
- Share the link to the drop box or click on Send by email to share it with your contacts.
- Advanced options allow you to receive an email notification when a file is deposited, protect the folder with a password, add an expiration date, and limit the storage space of the drop box:
- You can also customize the appearance.
⚠ Number of authorized drop boxes:
| my kSuite | free | 1 |
| Standard | 10 | |
| Business | 100 | |
| Enterprise | 1000 | |
| my kSuite | 1 | |
| my kSuite+ | unlimited | |
| kDrive | Solo | 100 |
| Team | 1000 | |
| Pro | 1000 |
The file size limits are those of kDrive.
Disable or modify a drop box
To access the drop boxes:
- Click here to access the Infomaniak kDrive Web app (online service ksuite.infomaniak.com/kdrive).
- Click on Shares in the left sidebar.
- Click on Drop boxes.
- Right-click or click on the action menu ⋮ to the right of the object concerned in the table that appears.
- Click on Disable to cancel the share link without deleting the already shared data (the box will become a simple folder).
or on Settings higher up in the dropdown menu to modify the advanced options (point 10 above):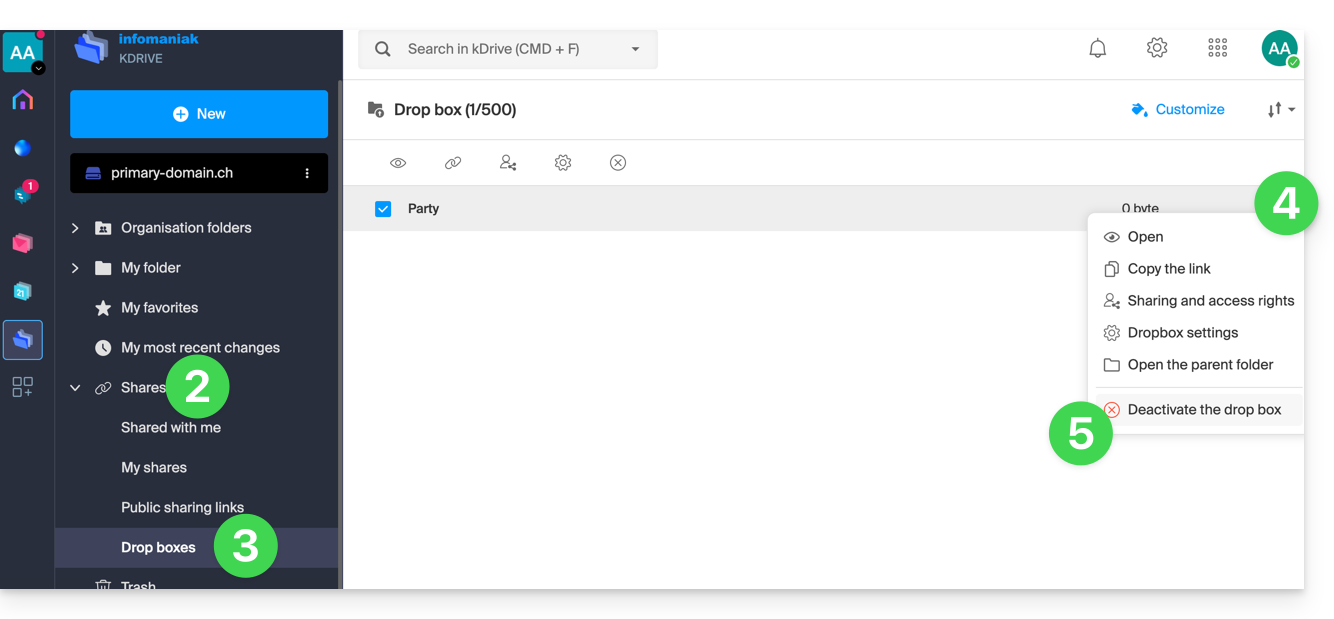
Link to this FAQ: https://faq.infomaniak.com/2386
Has this FAQ been helpful?