Knowledge base
1000 FAQs, 500 tutorials and instructional videos. Here, there are only solutions!
Manage kDrive users
This guide explains how to add, block, replace, or remove a user from a kDrive. To learn more about managing user rights, please refer to this other guide.
Prerequisites
- The user must create (or have) an Infomaniak account to accept the invitation and join the kDrive.
- You must have a kDrive plan with a sufficient number of available user slots (need help?).
Adding a user
To do this:
- Click here to access the Infomaniak kDrive web app (online service ksuite.infomaniak.com/kdrive).
- Check or select the relevant kDrive in the drop-down menu on the left-hand side.
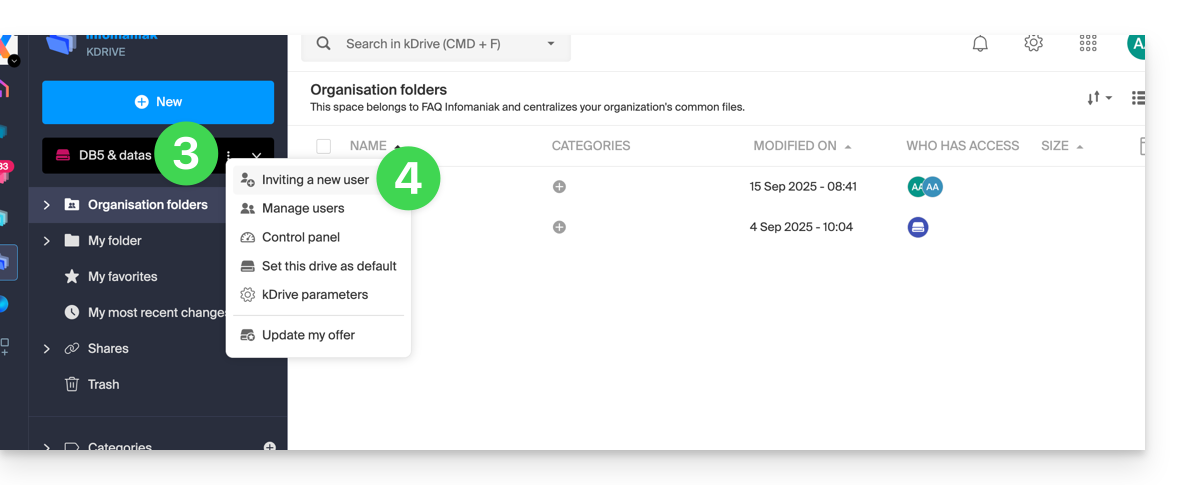
- Click on the action menu ⋮ located to the right of the item in question.
- Click on Invite a new user:
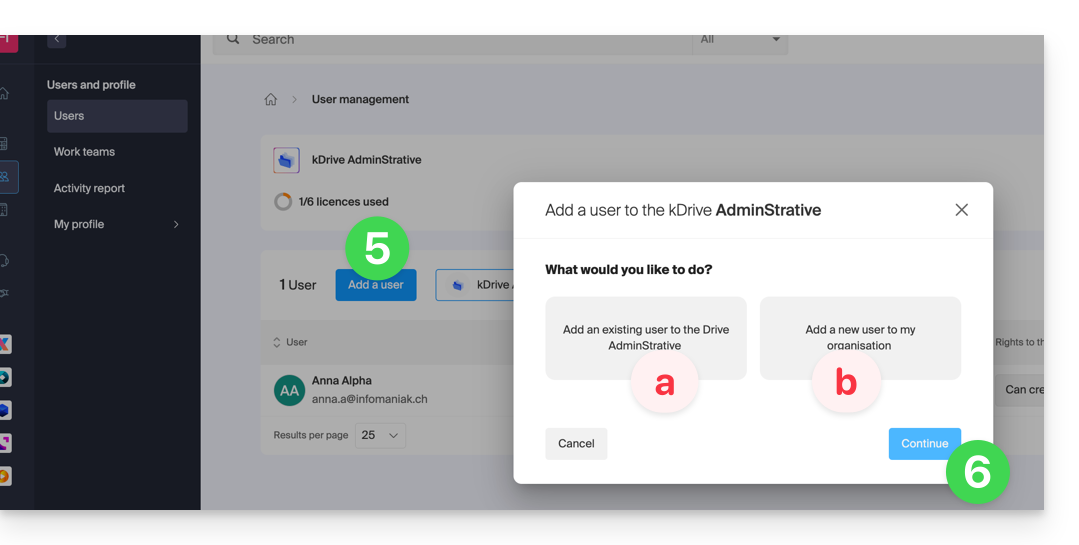
If necessary, click the button again to invite a new user, then click on:
- Add a user to Drive to choose a user already present in your Organization,
- Add a user to my Organization to invite an external user.
With kSuite, it's essentially the same:- Create a (new) kSuite user,
- Invite an existing user to kSuite.
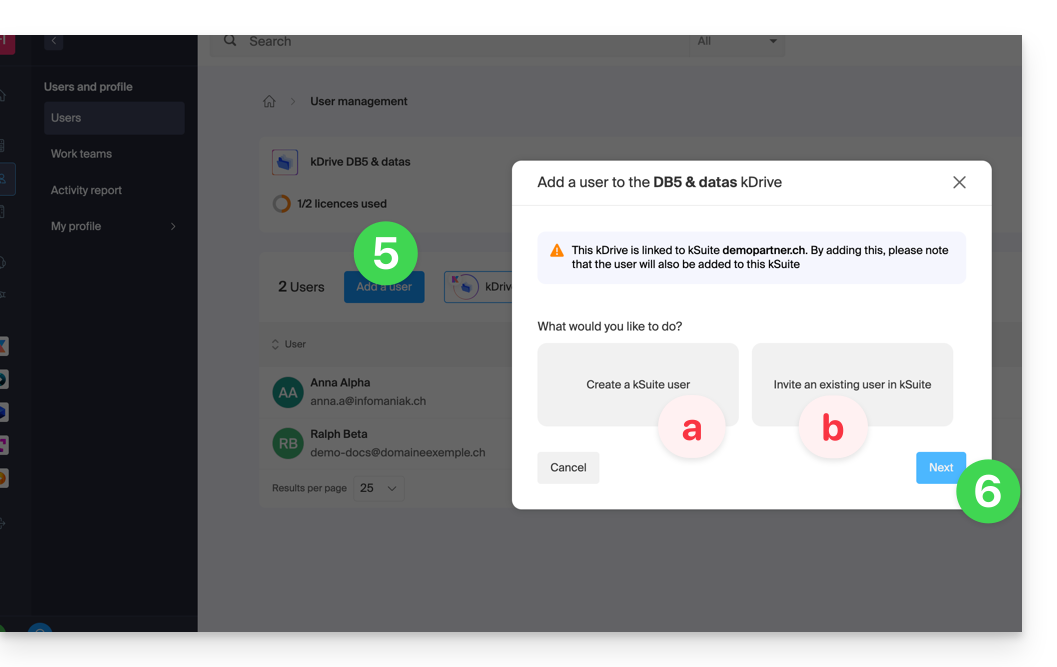
- Press the button to continue.
- Depending on your choice, enter the contact details or simply the email address of the user to invite and specify their rights.
- Click on Invite.
The user will then receive an email that will allow them to accept the invitation (valid for 1 month). They will be indicated as an invited user awaiting confirmation in the kDrive user management section.
Block a user
This feature allows you to prevent a user from accessing files from the kDrive web interface and from the application on a device:
- Click here to access the Infomaniak kDrive web app (online service ksuite.infomaniak.com/kdrive).
- Check or select the kDrive in question from the drop-down menu in the left-hand menu.
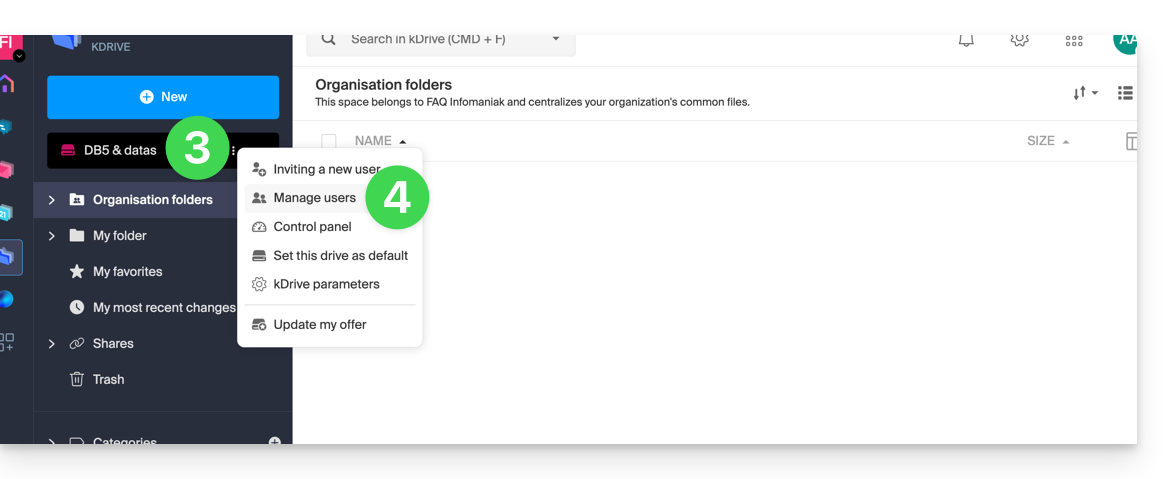
- Click on the action menu ⋮ located to the right of the item in question.
- Click on Manage Users:
- Click on the action menu ⋮ to the right of the user in question in the table that appears.
- Click on Block User and confirm the action:
To unblock a user, simply follow the same procedure.
How to delete a user
If a user leaves your company or team, several options are available to you as an administrator. You can choose to…
- … block the user for a certain period of time (see above).
- … completely delete the user and their files.
- … delete the user and keep their files for 6 months.
- … delete the user and transfer their files to another user.
To delete a user:
- Click here to access the Infomaniak kDrive web app (online service ksuite.infomaniak.com/kdrive).
- Check or select the relevant kDrive in the drop-down menu in the left-hand menu.
- Click on the action menu ⋮ to the right of the item in question.
- Click on Manage Users:
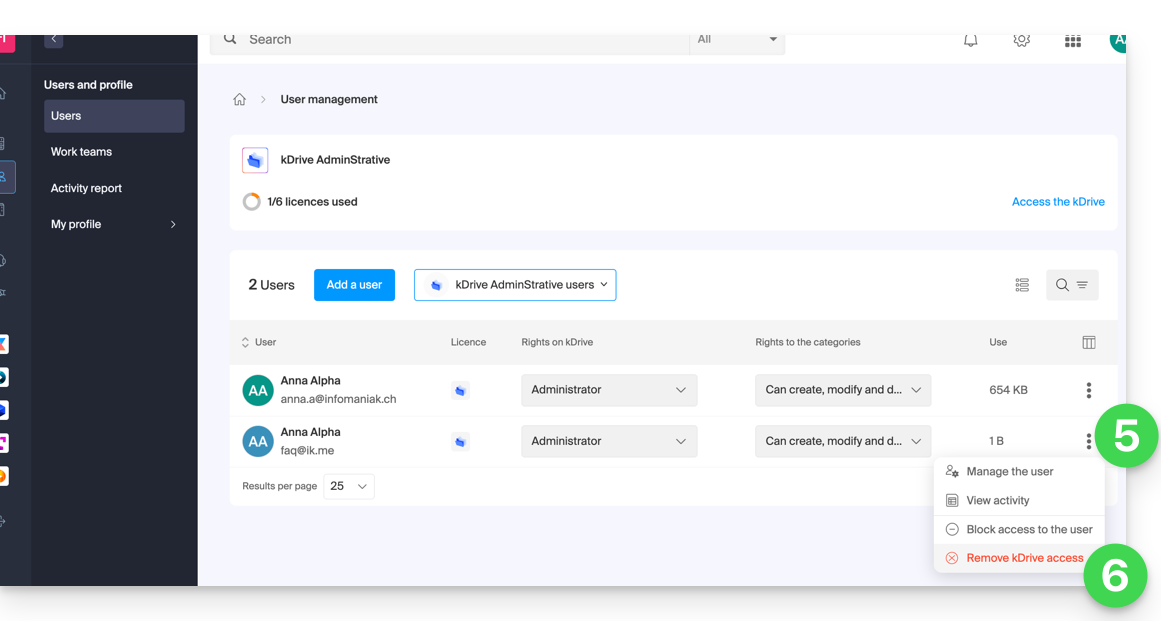
- Click on the action menu ⋮ to the right of the user in question in the table that appears.
- Click on Remove User.
- Choose whether or not to keep the user's data:
- Keep the user's files for 6 months or transfer them to another user.
- Delete the user's files immediately and permanently.
- Click on Remove access rights.
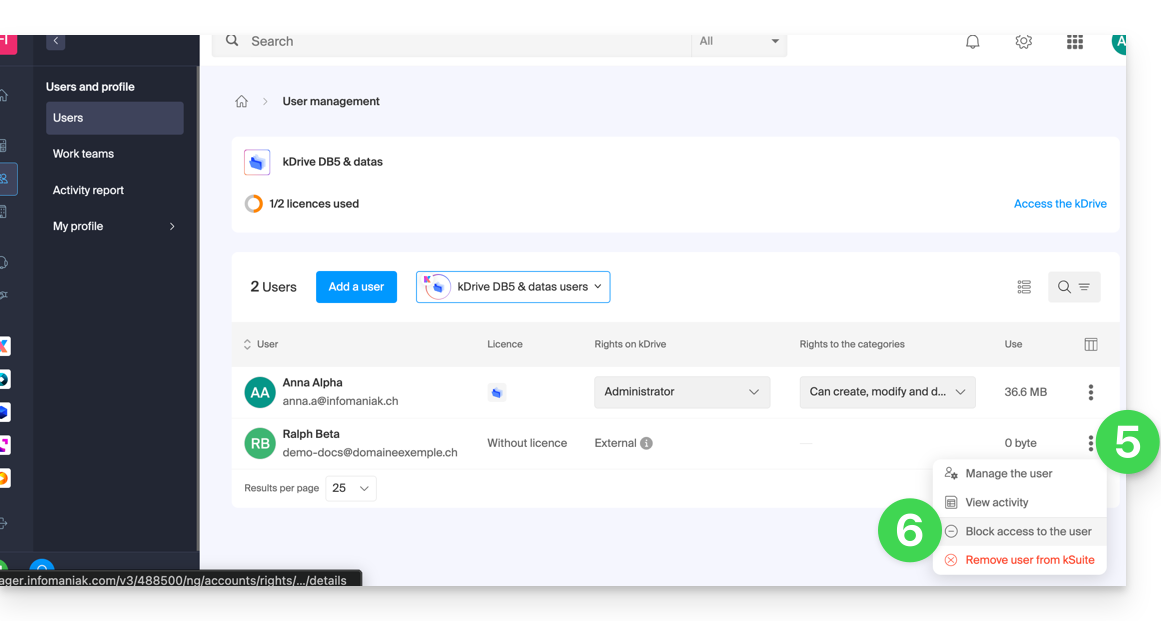
Remove an external user from kDrive
External users are those with whom you have only shared one or more files/folders without giving them access to the entire kDrive:
To remove an external user:
- Click here to access the Infomaniak kDrive web app (online service ksuite.infomaniak.com/kdrive).
- Check or select the relevant kDrive in the dropdown menu on the left-hand menu.
- Click on the action menu ⋮ located to the right of the item in question.
- Click on Manage users.
- Click on the action menu ⋮ to the right of the external user in question in the table that appears.
- Click on Remove access to kDrive:
You can also go to the location of the shared file and click on the sharing column to remove access for the user in question: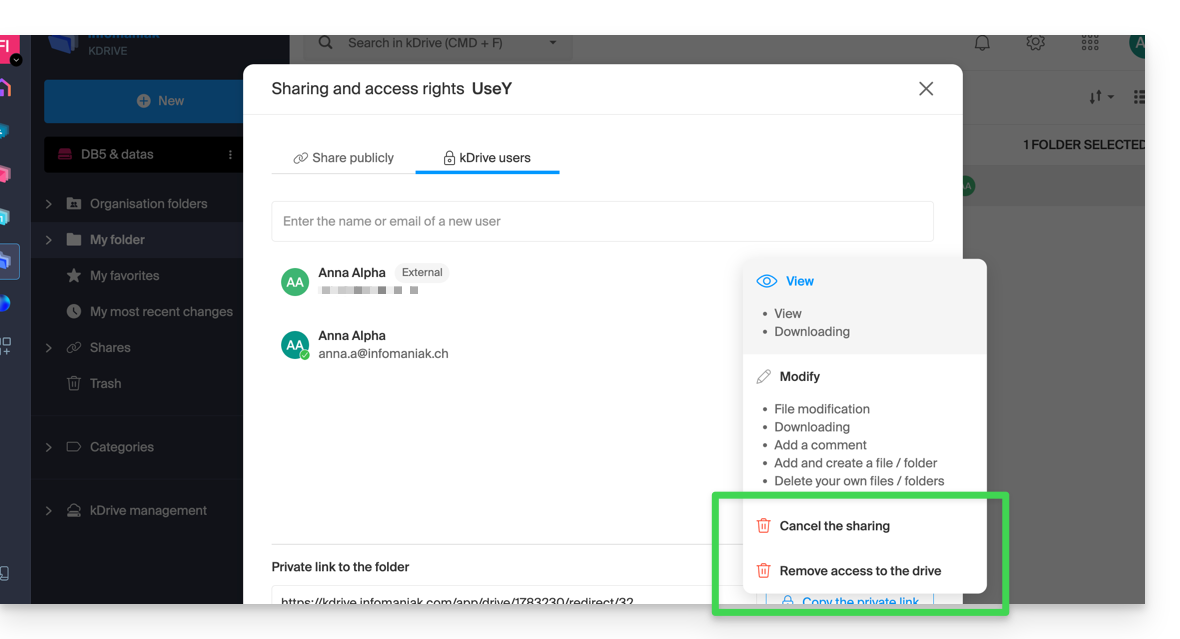
You can:
- stop sharing the file with them (they will continue to see the other files if you have shared others)
- remove their access to all the files you have shared with them from this kDrive
Please note that the external user can also, from their limited kDrive, remove themselves by cutting off access to the shared file if they no longer wish to access that file: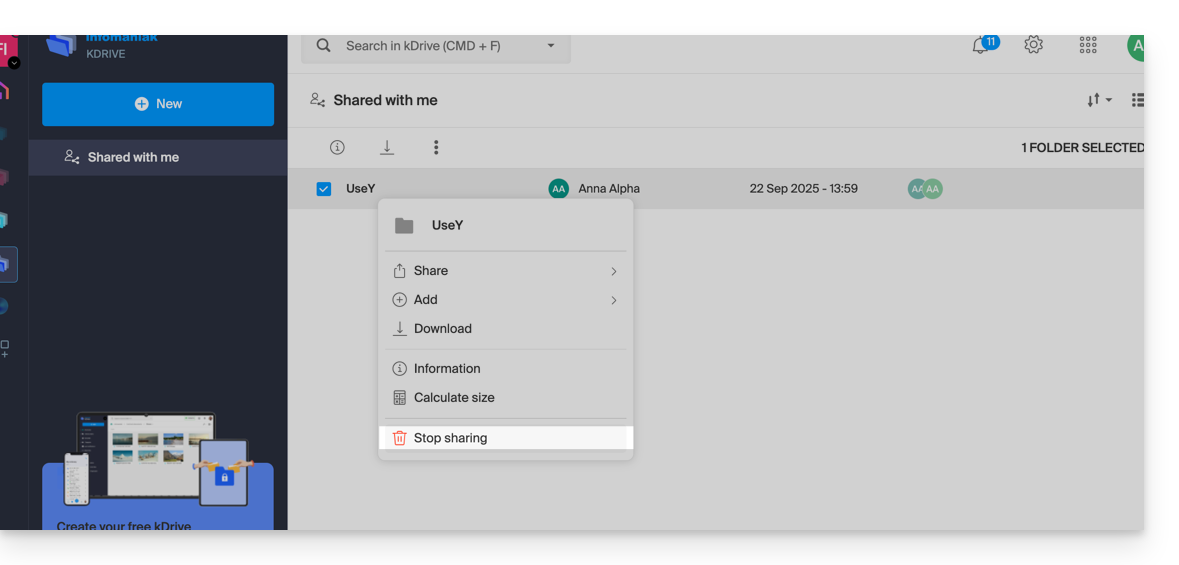
They will no longer appear in the list of external users.
Replace a kDrive user
✘ UNAVAILABLE with
kSuite
my kSuite / my kSuite+ (ik.me, etik.com, ikmail.com)
In the case where a kDrive administrator wishes to remove themselves (only this type of account can do so) and assign the kDrive usage rights to a third-party user (who is already among the users of the Organization on which the kDrive in question is located):
- Click here to access the Infomaniak kDrive web app (online service ksuite.infomaniak.com/kdrive).
- Check or select the kDrive in question from the drop-down menu in the left-hand menu.
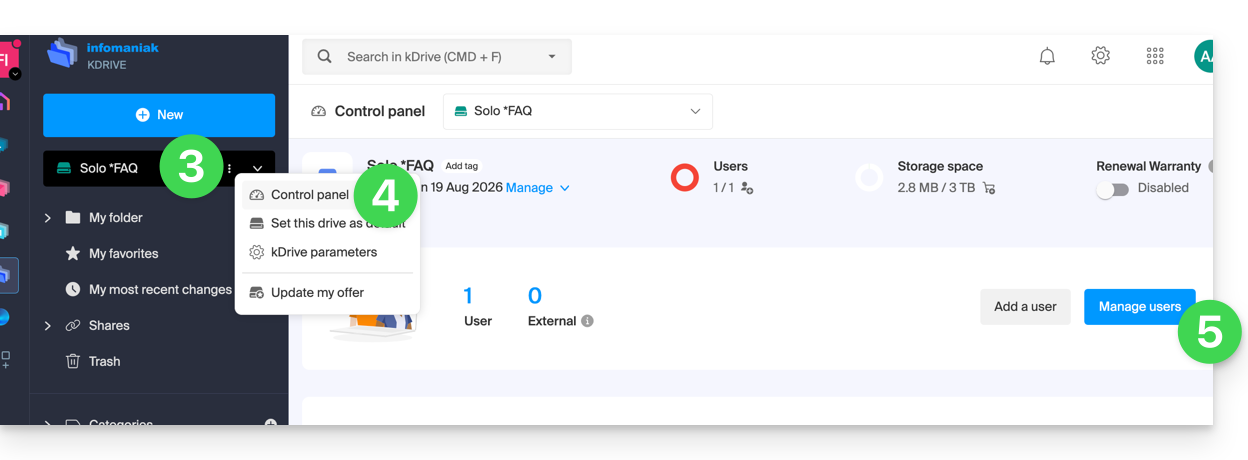
- Click on the action menu ⋮ located to the right of the item in question.
- Click on Dashboard.
- Click on Manage users:
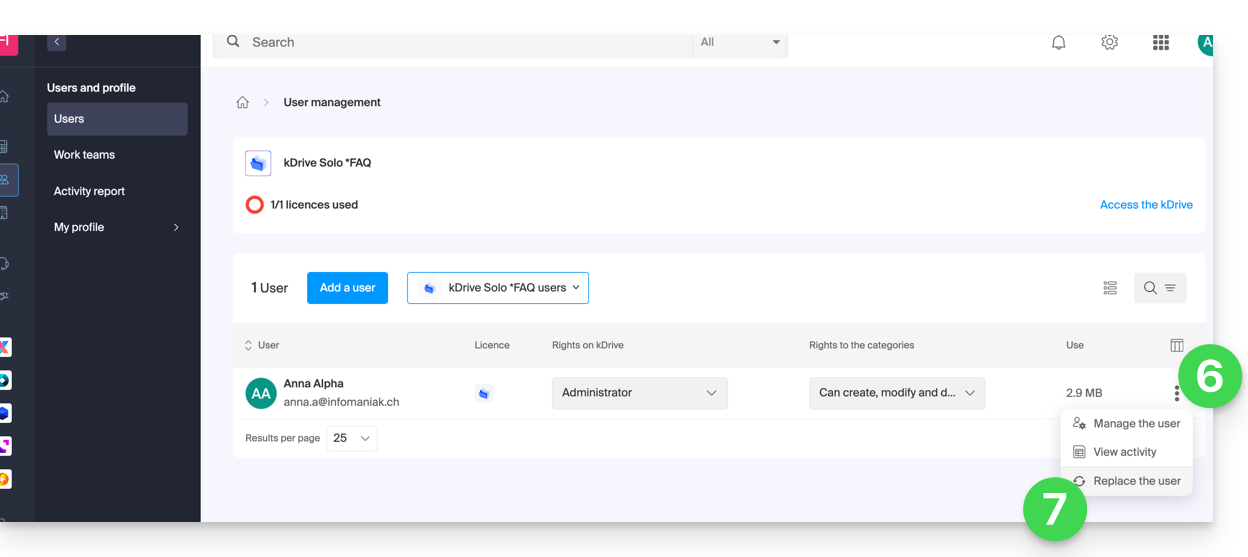
- Click on the action menu ⋮ located to the right of the current user.
- Click on Replace User:
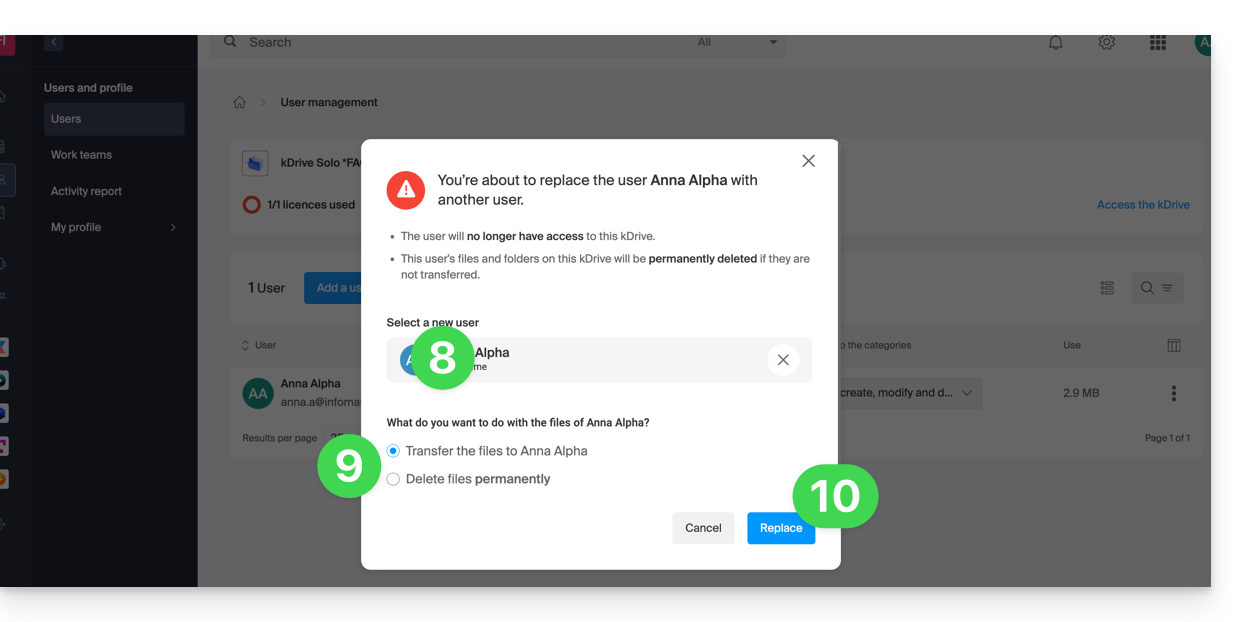
- Enter the user (from those already associated with the Organization) who should be the main user of the kDrive, replacing the current administrator.
- Choose whether the existing data on kDrive should be kept and transferred to the user, or whether it should be deleted completely and permanently.
- Click on the Replace button:
Video: What does a newly added user have access to?
Imagine a kDrive Pro within a kSuite, with only 1 user out of 3, data in the shared folder "Organization Folders" and in the personal folder "My Folder".
If a new user without an Infomaniak account is invited to kSuite as a collaborator, what will they be able to access by default in the Manager and on kDrive?
The new user is invited to the Organization as a collaborator, therefore by default they will have no management rights over the products in the Manager:
The invitee opens the link in a browser and creates their Infomaniak account:
and at the end of the registration process, they access the Manager, which, as expected, is completely empty in terms of product management…
However, they are prompted to use the kDrive web app (online service ksuite.infomaniak.com/kdrive), accessible via the icon in the top right corner, under Applications:
and they can access the organization's folders, which are already populated by other users!
Link to this FAQ: https://faq.infomaniak.com/2364
Has this FAQ been helpful?