Knowledge base
1000 FAQs, 500 tutorials and instructional videos. Here, there are only solutions!
Create email addresses in bulk
This guide explains how to create email addresses in bulk instead of adding them one by one within an Infomaniak Mail Service.
Preamble
- To ensure responsible use of the services, a limit of up to 50 email addresses per 24-hour period has been set.
- Contact Infomaniak support to lift this restriction.
Create new email addresses in bulk
Prerequisites
- Have a tool to manage CSV files (format
.csv). - Have a Mail Service on your Infomaniak Manager.
- Have a quota of available addresses or adjust it in advance if necessary.
Obtain the example CSV file
Importing is done using a CSV file (format .csv) which, once filled out, can be imported to add the addresses to your Mail Service in one go.
To download the CSV file to configure the creation of addresses:
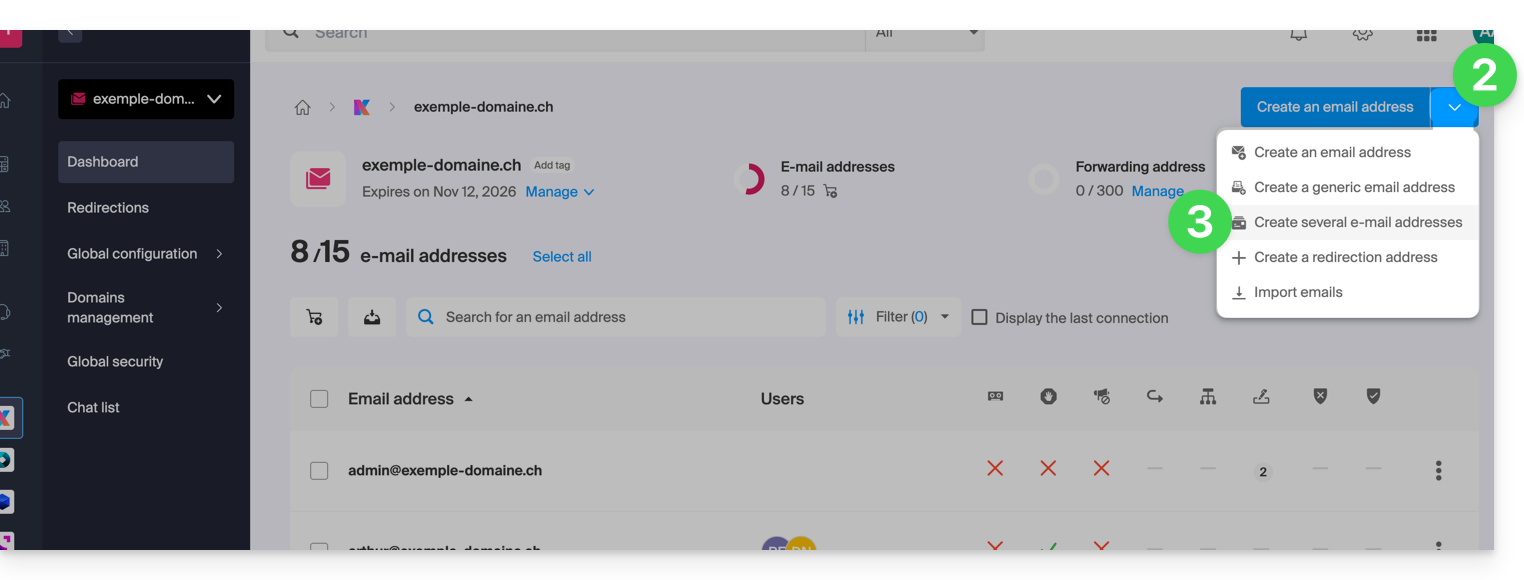
- Click here to access the management of your product on the Infomaniak Manager (need help?).
- Click on the chevron to the right of the blue address creation button.
- Click on Create multiple email addresses
- Download the proposed template (CSV file in
.csvformat):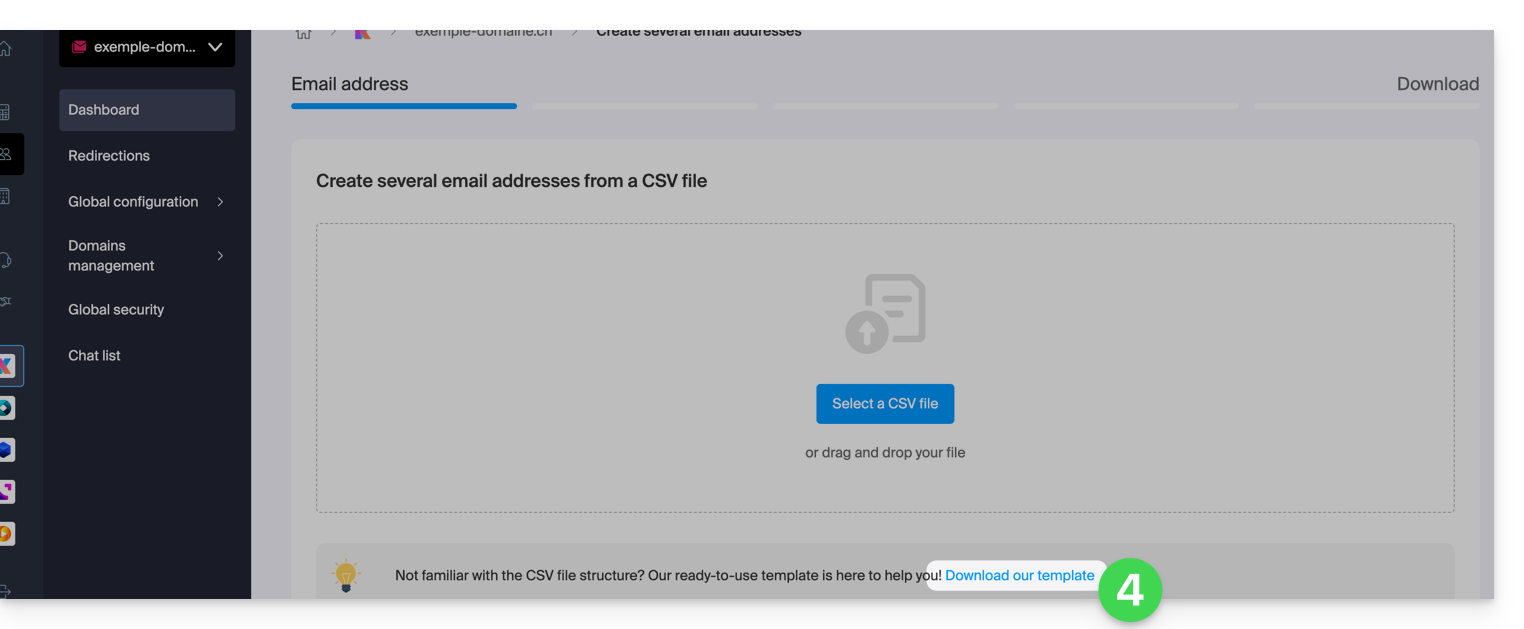
Complete the CSV file
- Open the example CSV file; do not touch the first line, then from the second line on:
- 1st column, specify the address to create (without the domain)… example:
john. - 2nd column, specify if necessary a complete email address to which to redirect emails.
- 3rd column, specify whether to delete (1) messages after redirection.
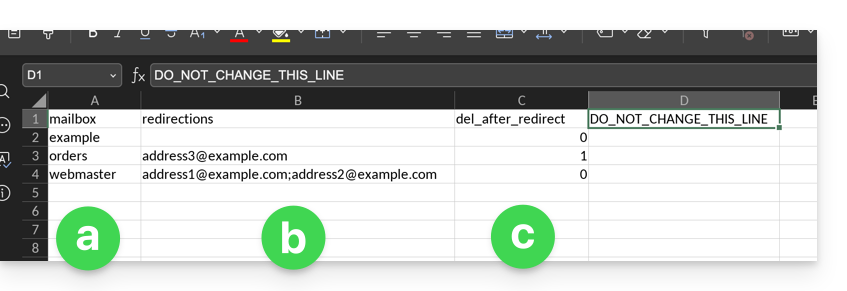
- 1st column, specify the address to create (without the domain)… example:
- The second and third columns are optional (you can leave them completely empty).
Import the CSV file
Once the .csv file is completed, save it in the same format as the proposed model and then:
- Click on the chevron to the right of the blue address creation button.
- Click on Create multiple email addresses.
- Click on Select a CSV file:
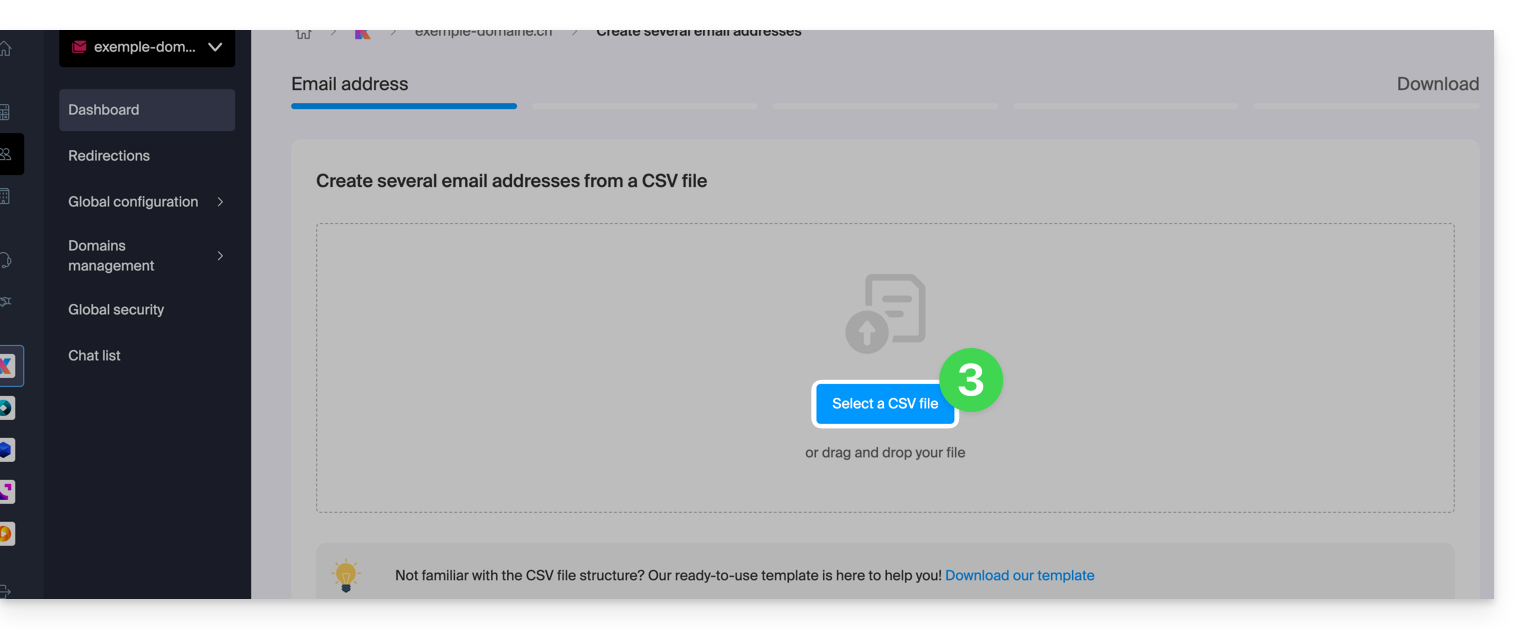
- Browse your device and select your CSV file.
- Click on Continue; after a few minutes, the email addresses will be added (without any password being assigned to them yet), according to the instructions in the imported file.
Link to this FAQ: https://faq.infomaniak.com/224
Has this FAQ been helpful?