Knowledge base
1000 FAQs, 500 tutorials and instructional videos. Here, there are only solutions!
Manage MX records
This guide explains how to add or modify an MX record in the DNS zone of a domain name managed from the Infomaniak Manager.
Introduction
- An MX record indicates to mail servers which server/provider to forward messages addressed to your domain name to.
- Changes made in the Infomaniak Manager are only taken into account if the domain name uses the corresponding DNS zone.
- Any DNS addition/modification may take up to 48 hours to propagate; during this period, some messages may still be routed according to the old configuration.
MX for Infomaniak Mail
Infomaniak automatically configures the necessary MX record when the domain name and Mail Service are created in the same Organization in the Infomaniak Manager.
If your configuration requires manually adding the MX record to route incoming messages to Infomaniak, enter the following values:
- Host / Source: leave this field blank to apply the record to the main domain
- Target:
mta-gw.infomaniak.ch - Priority:
5
The target must be entered as a hostname, without https://, without an email address, and without any additional path.
Variant specific to certain DNS interfaces
Some interfaces, including Gandi's, require a period at the end of the target to indicate that it is a fully qualified hostname. In this case, enter:
mta-gw.infomaniak.ch.
If another MX record is used or if multiple MX records are configured, Infomaniak cannot guarantee that messages will be received correctly.
Modify the DNS zone
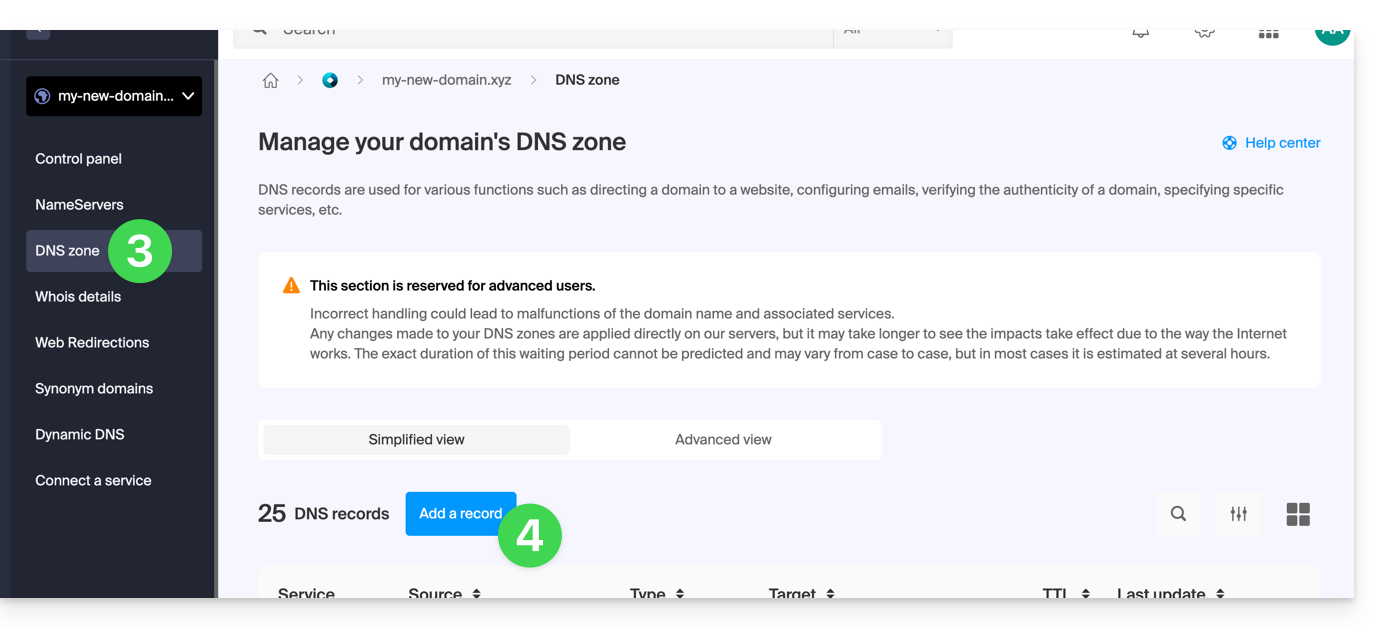
To add an MX record to the DNS zone:
- Click here to access the domain management section in the Infomaniak Manager (need help?).
- Click directly on the name assigned to the domain in question.
- Click on DNS Zone in the left-hand menu.
- Click on the button to add a record:
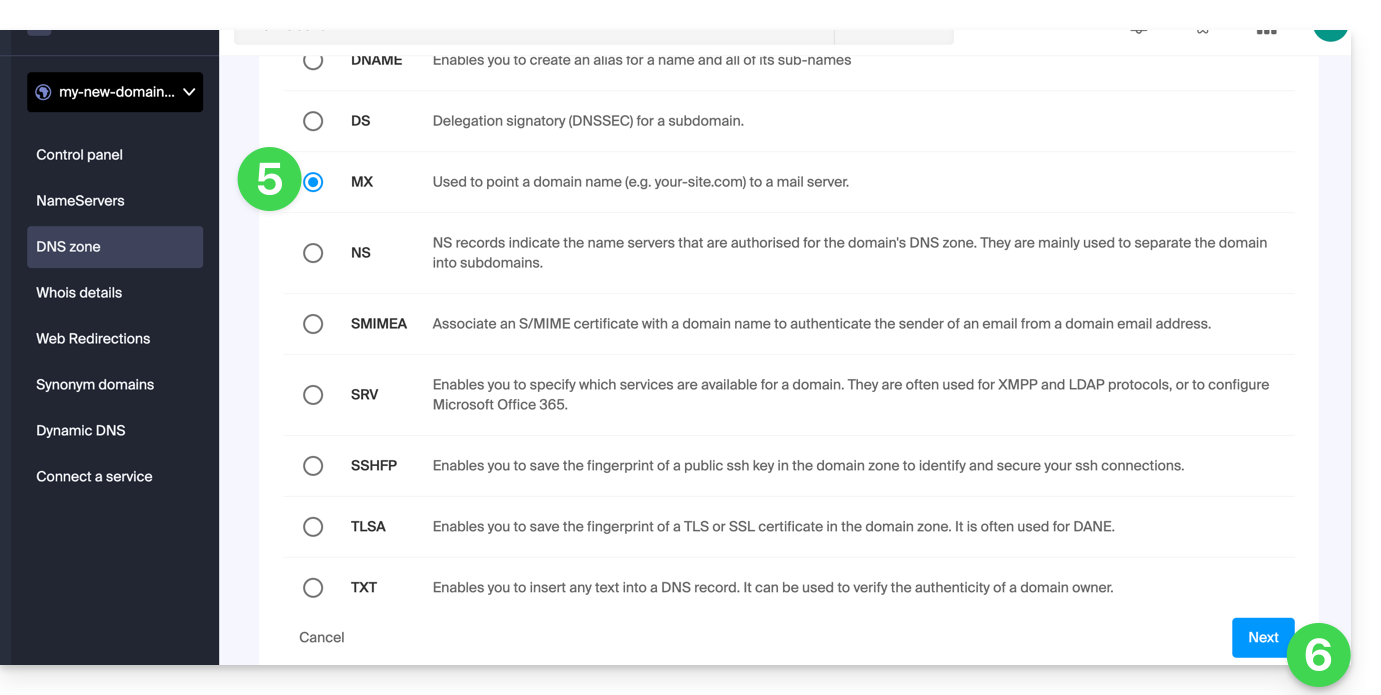
- Select the MX record type.
- Click on the Next button:
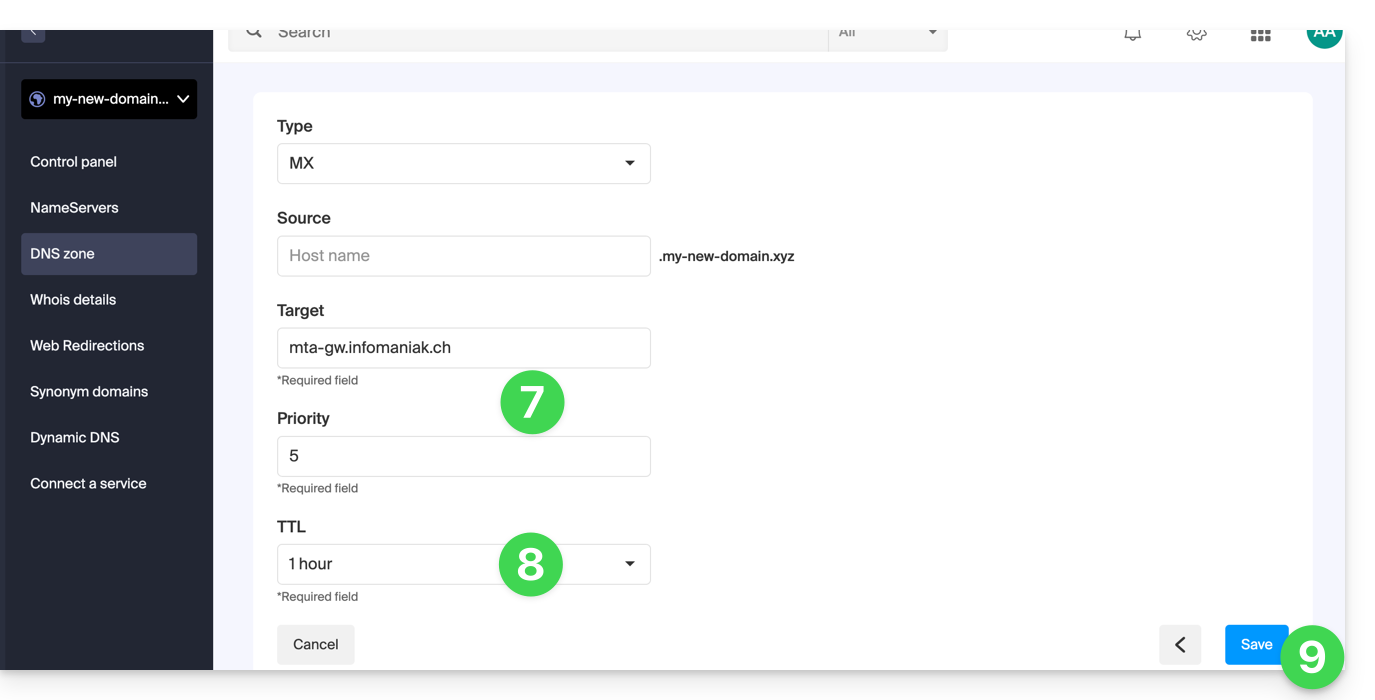
- Enter the required values:
- for the main domain's email, leave the Host or Source field blank
- enter the email server name provided by the provider in the Target field
- enter the priority indicated by the provider
- Keep the default value for TTL, unless otherwise specified by your email provider.
- Click on the Save button:
Once registered, the MX record will appear in the DNS zone table: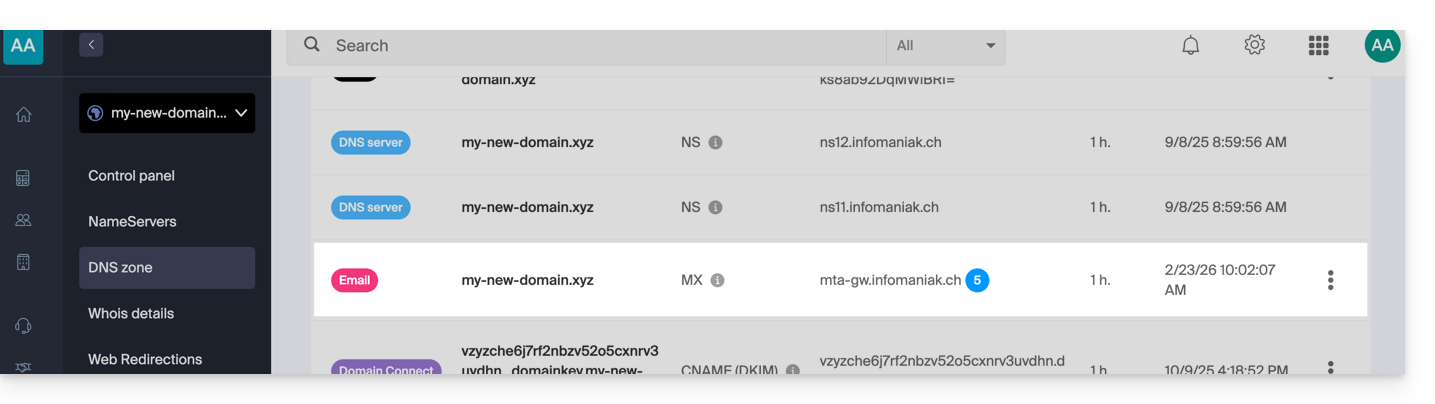
To send messages using Infomaniak's email service, the domain name must also have a correctly configured SPF record.
Learn more
Link to this FAQ: https://faq.infomaniak.com/2110
Has this FAQ been helpful?