Knowledge base
1000 FAQs, 500 tutorials and instructional videos. Here, there are only solutions!
Change the domain name of a Mail Service
This guide explains how to replace the main domain name associated with a Mail Service in case you want to modify the spelling of everything that comes after the at sign @ of your email address (= the domain name). If your Mail Service is part of a my kSuite, then you will need to act on the my kSuite domain directly.
Preamble
- You can also follow this procedure if the goal is to have completely new email addresses while keeping the history of your emails in Mail (since the email address will continue to exist, for example info@first-domain.xyz will become info@new-domain.xyz without modifying its content).
- Indeed, it is not possible to simply modify the spelling of the domain name concerned; it is therefore necessary to replace the current domain name associated with your email addresses with another domain name.
- To simply add an additional domain name, refer to this other guide.
- To rather modify the part of your email address that comes before the at sign
@, refer to this other guide. - Also note that you can rename your product (example) on the Infomaniak Manager but changing the name of a Mail Service has strictly no impact on its addresses; you need to act on the domain name.
If your Mail Service is part of a my kSuite, then you will need to act on the my kSuite domain directly.
Modify the domain name of the Mail Service
Prerequisites
- Own the new domain name (if necessary, create it in advance).
- Refer to the instructions of this other guide by applying the instructions corresponding to your situation (this is so that the domain name works when it is linked to your Mail Service).
Once the new domain name is ready to be used in place of the old one, you need to add it to the Mail Service and then perform a reversal:
- Click here to access the management of your product on the Infomaniak Manager (need help?).
- Click directly on the name assigned to the product in question.
- Click on Domain Management in the left sidebar
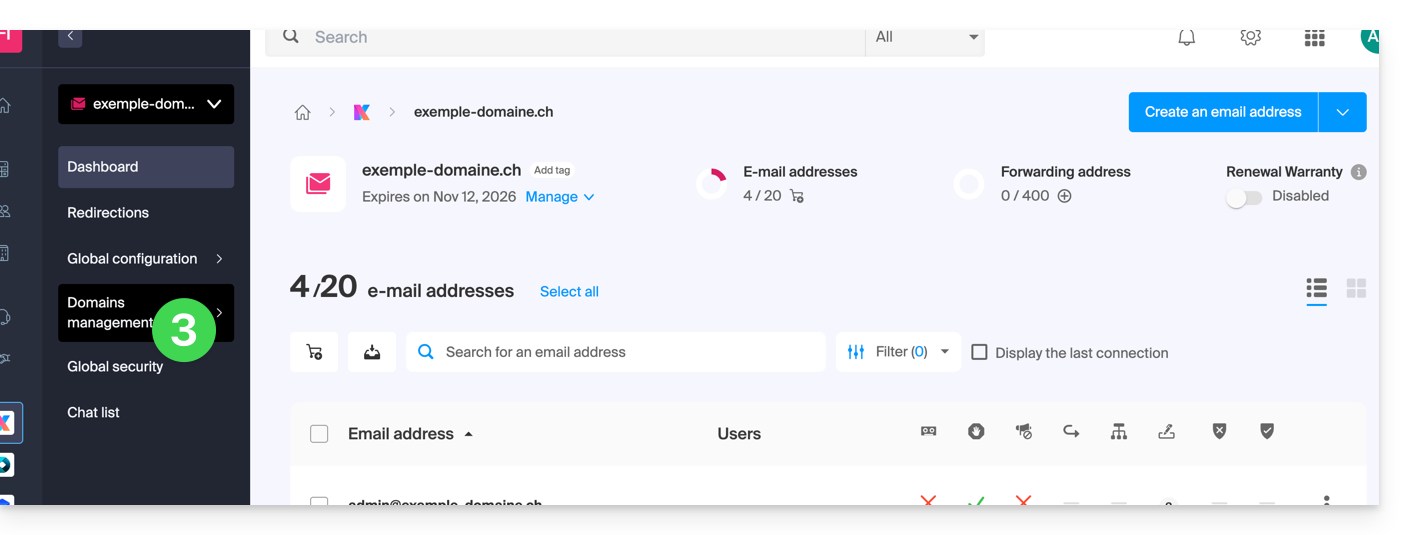
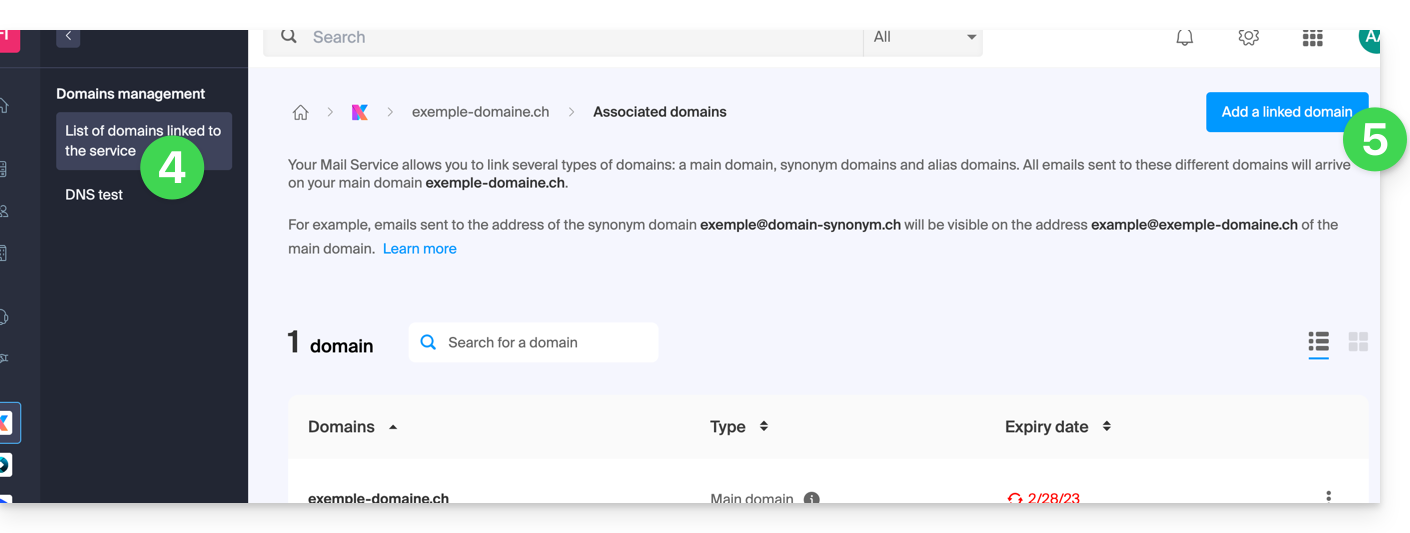
- Click on Service-related domains in the left sidebar.
- Click the blue button Add a linked domain:
- You can:
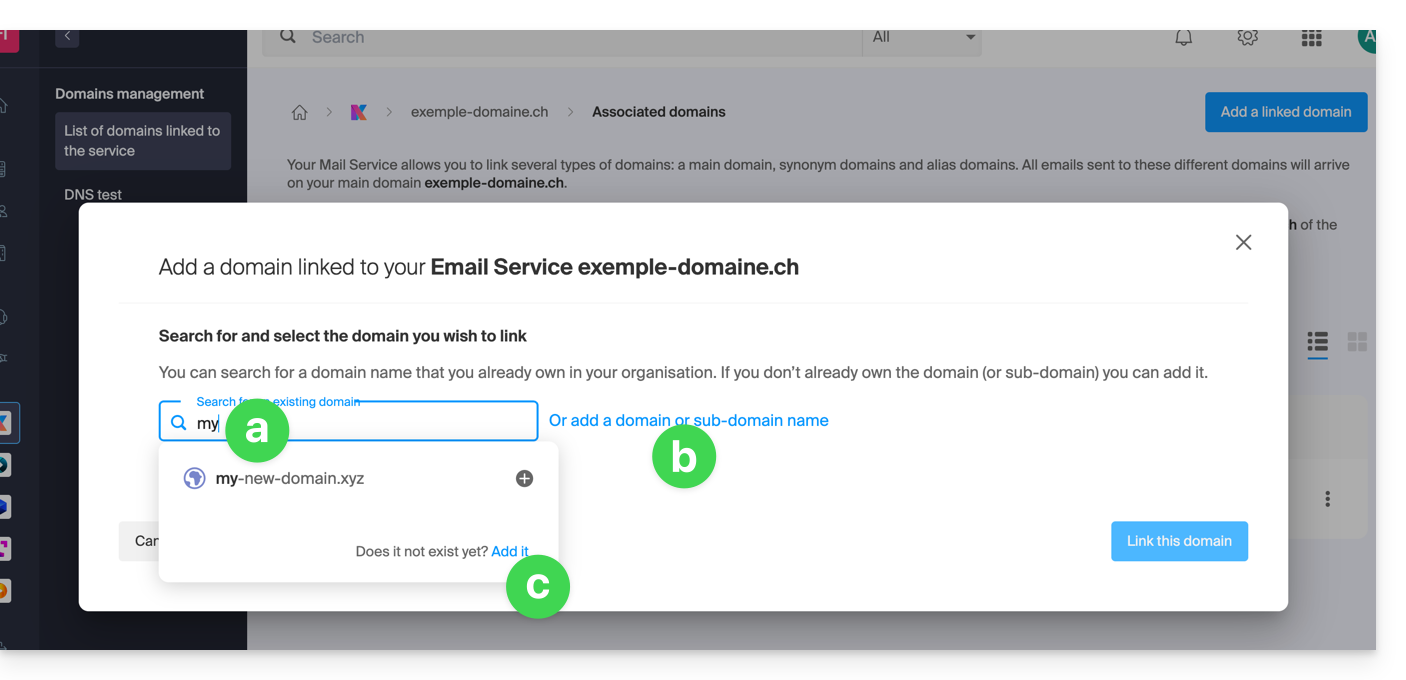
- Search for an existing domain within the Organization you are connected to; this will link and automatically update the DNS zone of the added domain.
- Add a domain name or subdomain to manually specify the domain name or subdomain to use (ideal if the domain name is hosted elsewhere).
- Buy a new domain name (see prerequisites above).
a: The domain exists within the Organization
Before proceeding, make sure to dissociate the domain name if it had been set as an alias domain previously.
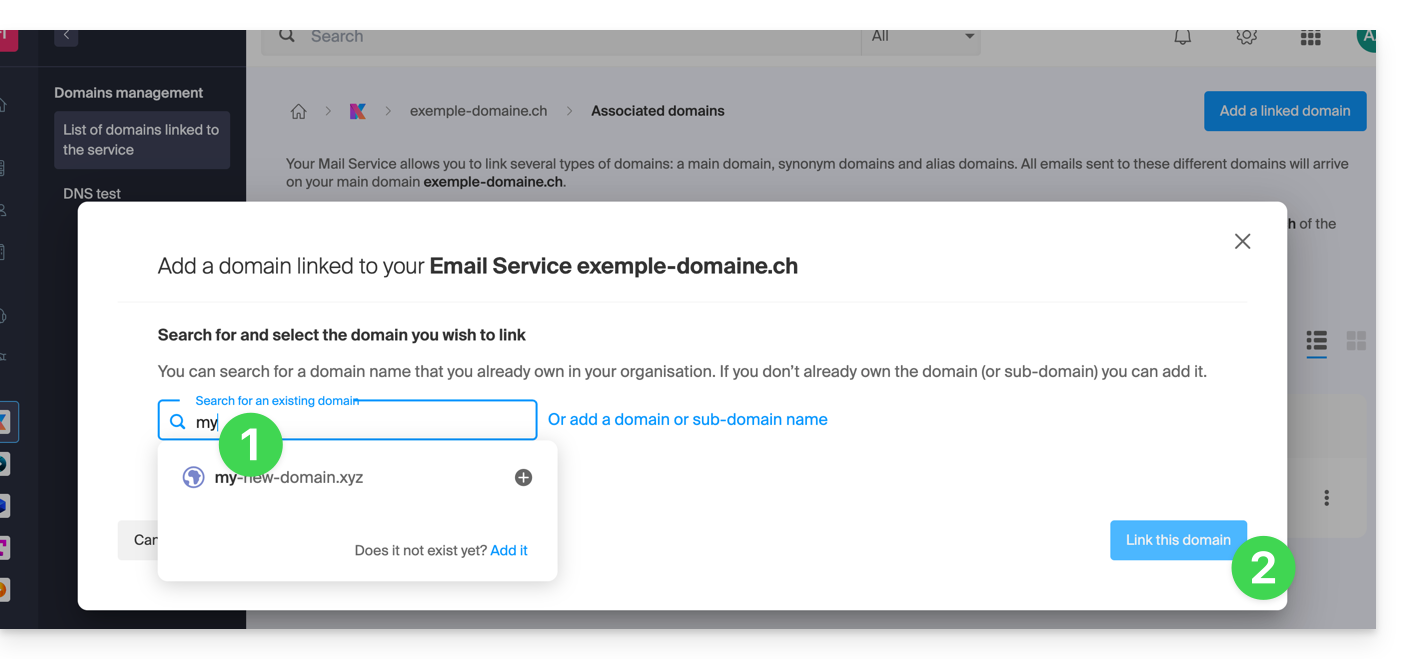
- Click on the proposed domain name.
- Click the blue button Link this domain:
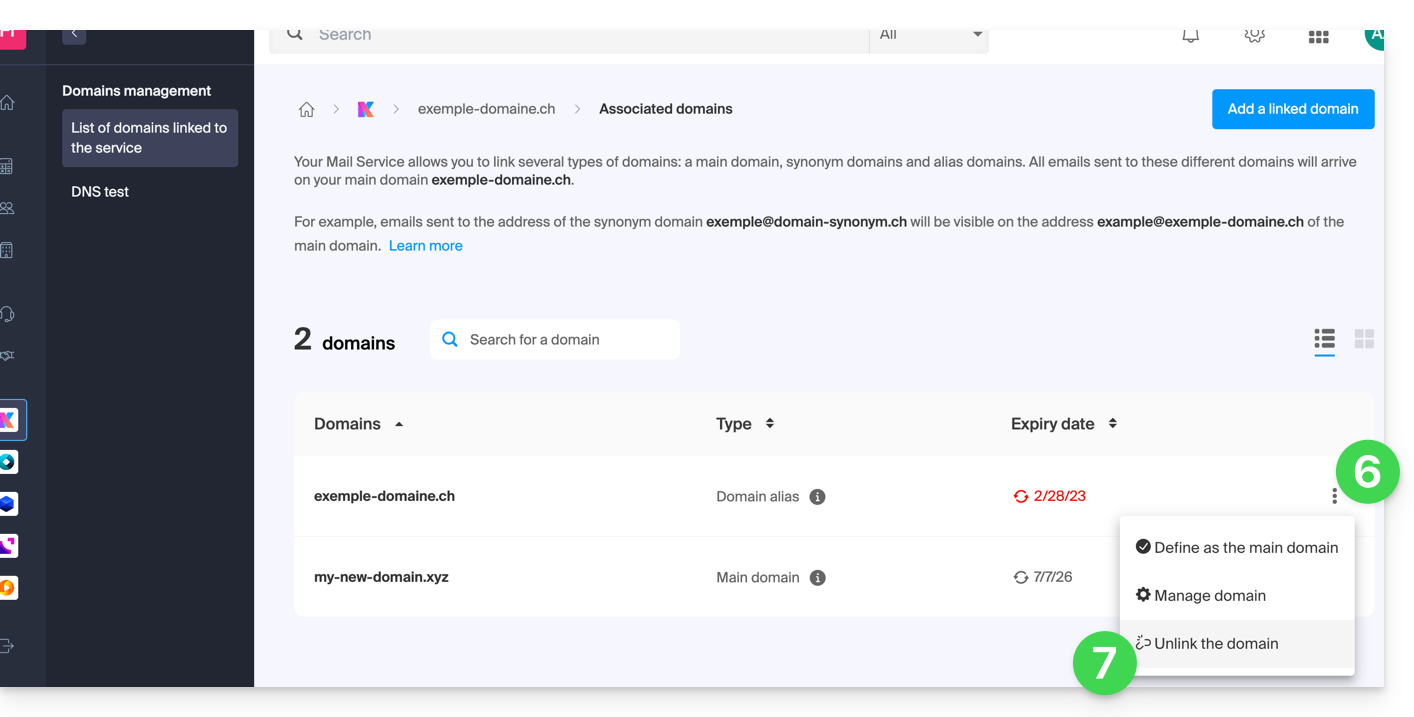
- Click on the icon ⋮ to the right of the newly added domain name.
- Click on Set as primary domain (you must have dissociated the alias domain name from the primary domain name if there was a previous association):

- Confirm the reversal and then wait for the operation to complete.
- Click on the icon ⋮ to the right of the old domain name.
- Click on Unlink the domain:
- Confirm the detachment by verifying if you want to delete the associated DNS records during the detachment operation.
That's it, the Mail Service now responds to a new domain name.
b: The domain exists but elsewhere
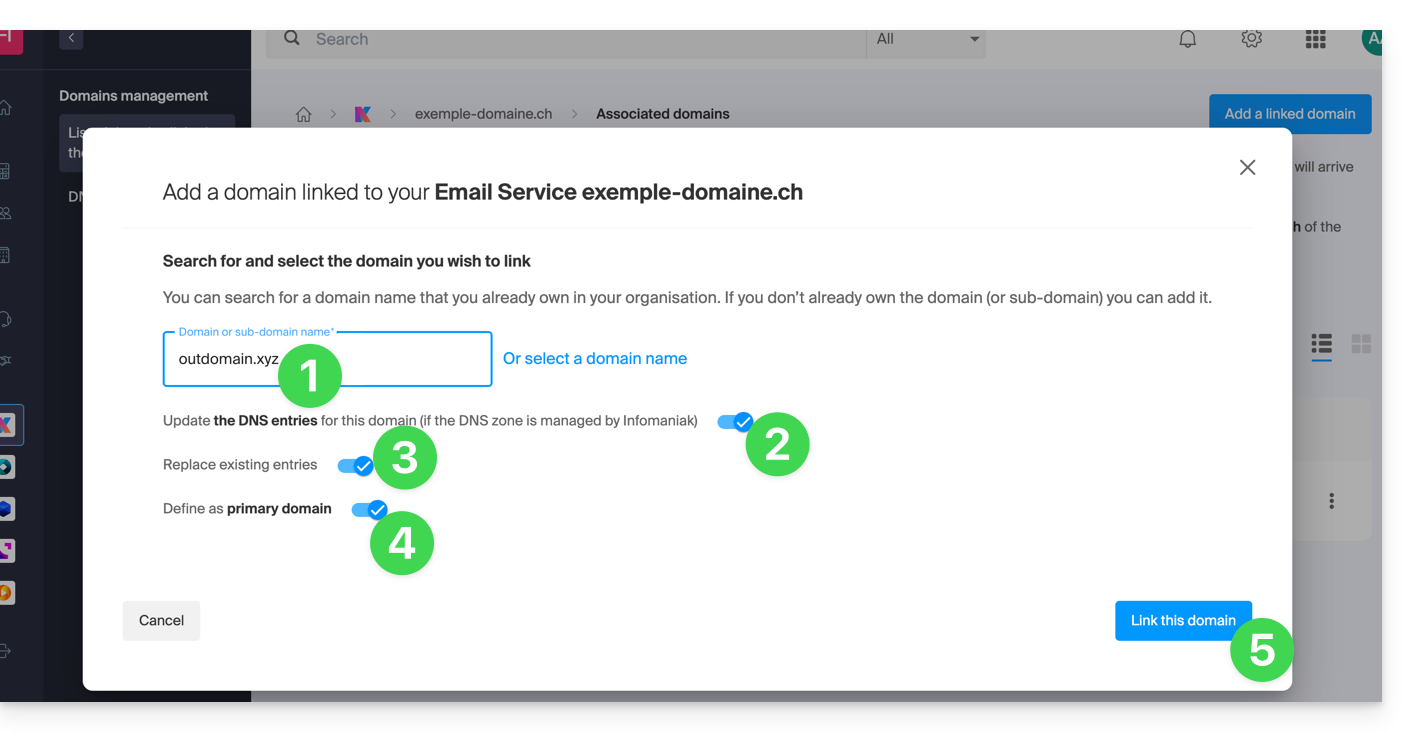
- After clicking on Add a domain or subdomain, enter the domain name that will replace the current name.
- Enable DNS entry updates (if the domain name situation allows it, the DNS zone of the domain name will be automatically updated).
- If the point above is active, then enable the replacement of any existing entries.
- Enable reversal of the domain name (to avoid additional steps as in point "a" above).
- Click the blue button Link this domain:
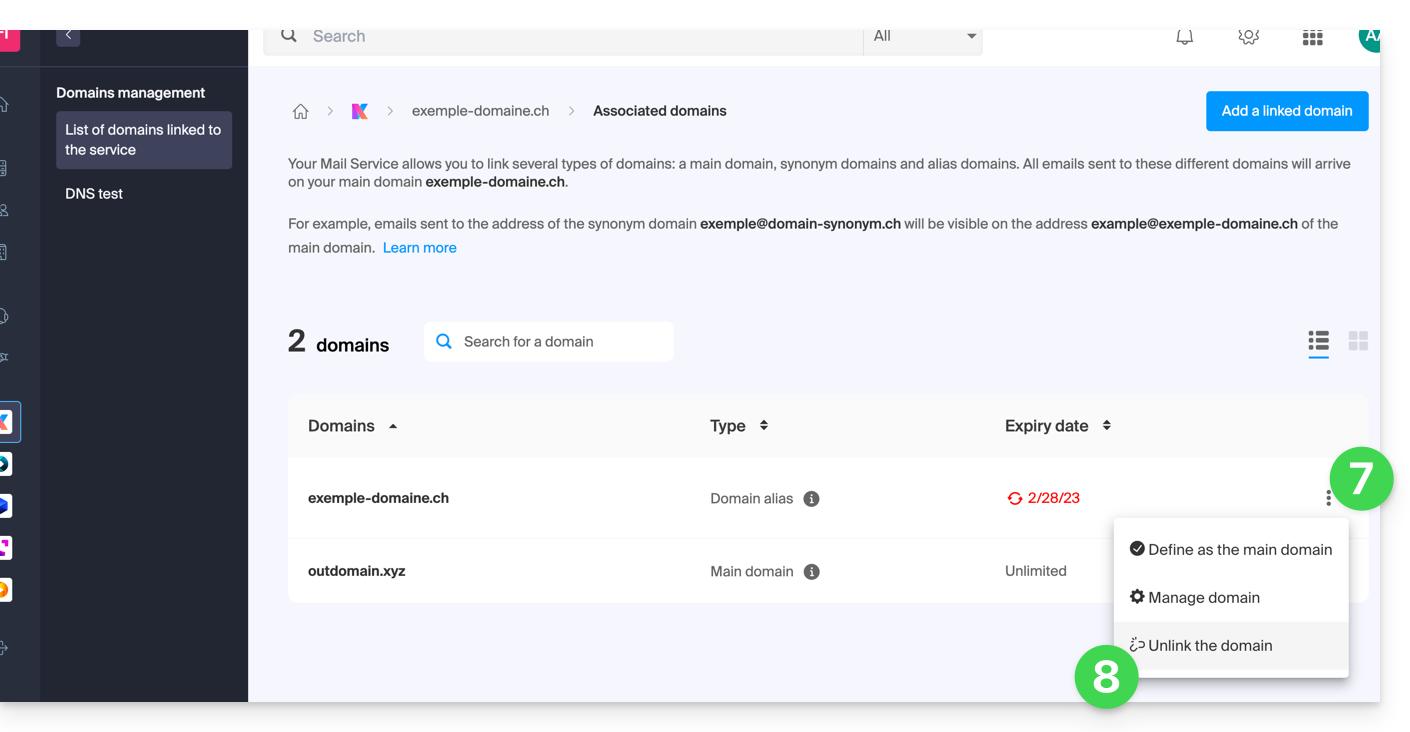
- Wait for the operation to complete.
- Click on the icon ⋮ to the right of the old domain name.
- Click on Unlink the domain:
Link to this FAQ: https://faq.infomaniak.com/1934
Has this FAQ been helpful?