Knowledge base
1000 FAQs, 500 tutorials and instructional videos. Here, there are only solutions!
Synchronize Joplin notes via WebDAV with kDrive
Update 03/03/2026
This guide explains how to store the database of Joplin on your kDrive Infomaniak and connect your various devices via the WebDAV protocol. You thus keep your notes safe in a storage medium located in Switzerland.
✘ UNAVAILABLE with
kSuite free / kSuite Standard
my kSuite / my kSuite+ (ik.me, etik.com, ikmail.com)
Preamble
- Joplin is a free and open-source note-taking tool that allows you to organize all your notes within folders and access them from any device (computer, mobile device, etc.)
- Joplin will store several of its configuration files, so to avoid cluttering your kDrive directories, it is recommended to create a dedicated folder in your personal directory on kDrive, with a simple folder name like "
joplin" for example, and then specify it at the end of the WebDAV link in point 7 below: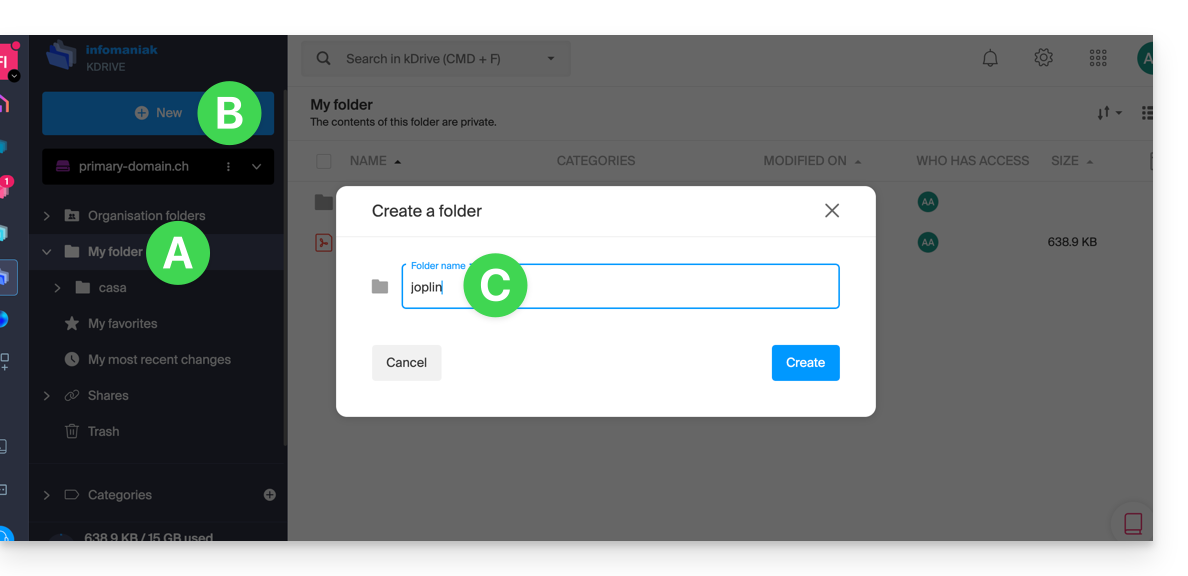
- The various services offered by Infomaniak are all compatible with the corresponding standard protocols (CalDAV/CardDAV for contacts & calendars for example), therefore if you encounter a problem with third-party software, contact its publisher or a Partner and consult the support policy as well as article 11.9 of the Infomaniak TOS.
Configure Joplin to use kDrive via WebDAV
Prerequisites
The example below is substantially identical with all versions of Joplin:
- Open the Joplin application.
- Press the menu at the top left:
- Press Settings:
- Press Synchronization.
- Press the menu to select a target.
- Choose the WebDAV mode:
- For the account parameters, use the following information:
- Server address:
https://IDkDrive.connect.kdrive.infomaniak.com/joplin(or /folder-name — read the preamble above) - Username: email address to log in to the Infomaniak user account
- Password: application password if two-factor authentication is enabled or the one of your Infomaniak user account if you have not enabled 2FA
- Server address:
- Press the synchronization test and wait for the connection confirmation below:
- Press the top left to return to the previous menu and press Synchronize to create the files on kDrive:
- Go back to the notes to start working.
Link to this FAQ:
Has this FAQ been helpful?