Knowledge base
1000 FAQs, 500 tutorials and instructional videos. Here, there are only solutions!
Manually synchronize Contacts & Calendar (iOS apps) using CardDAV/CalDAV
Update 07/03/2026
This guide explains how to connect the Contacts and Calendar iOS (iPhone, iPad…) apps with the contacts & calendars hosted by Infomaniak.
Introduction
- Rather than the manual configuration below, it is recommended to use the .mobileconfig configuration profiles offered by Apple.
- Infomaniak contacts & calendars are linked to your Infomaniak account; when you log in to ksuite.infomaniak.com/contacts or /calendar, you will likely need to perform two-factor authentication (2FA) during login.
- In this case, an application password is required to establish synchronization between your device and Infomaniak tools.
- But don't worry, creating such a password is offered as part of the configuration wizard.
Manual configuration (contacts & calendars)
Obtain your login information
To obtain the CardDAV/CalDAV synchronization username and password:
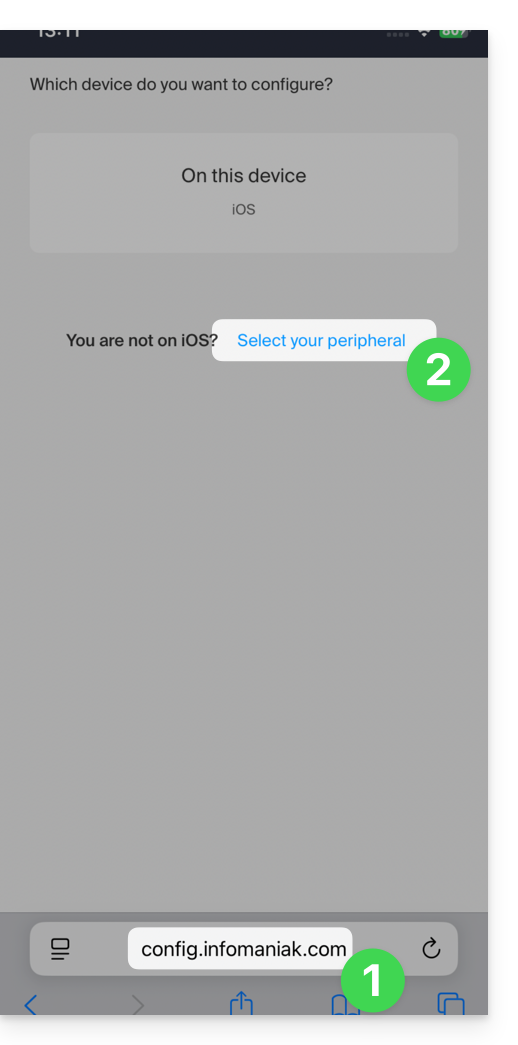
- Click here to access the Infomaniak configuration tool (online service https://config.infomaniak.com) — log in if necessary to your Infomaniak account for the Organization where your email address is managed.
- Select a device other than iOS (this is to obtain your username):
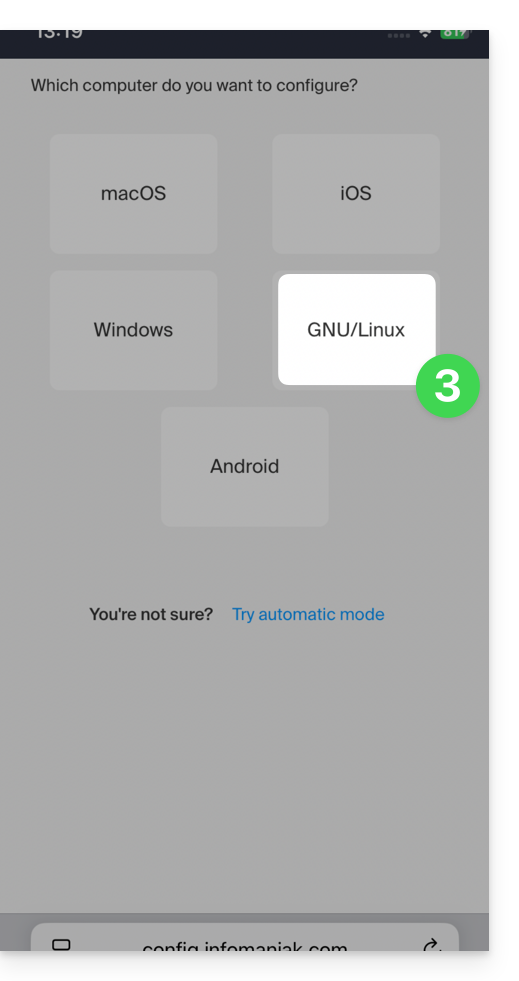
- Choose Linux:
- Choose Contacts or Calendars:
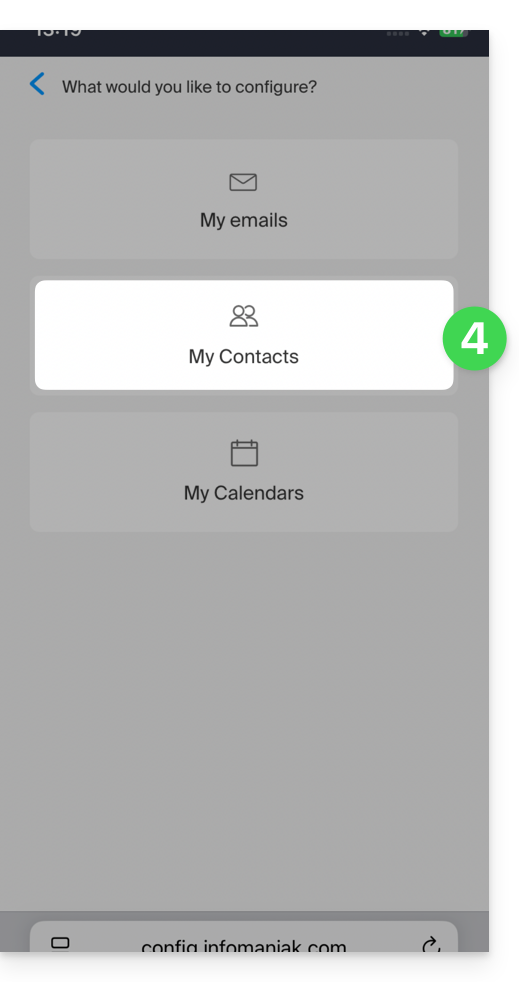
- Choose the specific service that needs to be synchronized.
- Tap the right arrow several times, then tap the title of the manual synchronization tab:
- The information displayed below allows you to obtain:
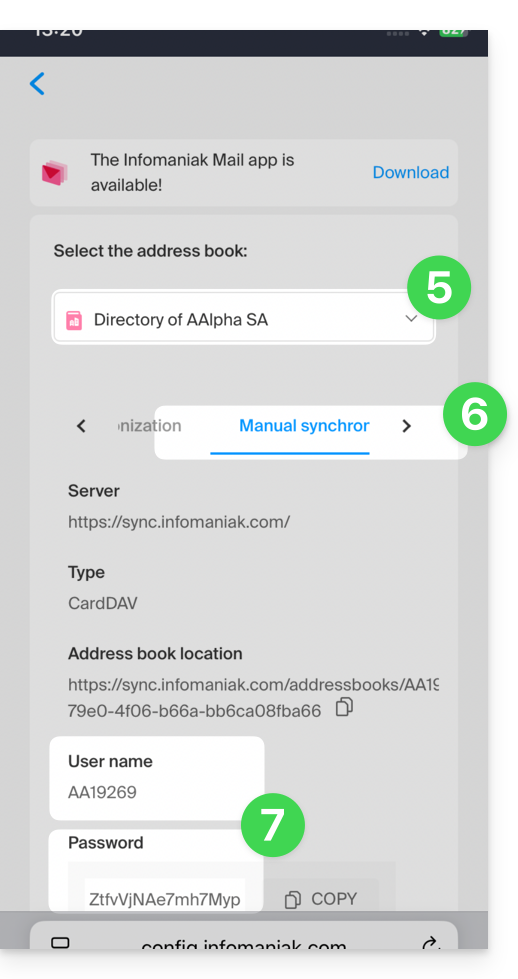
- your username (e.g.,
AB12345)… - application password if two-factor authentication is enabled or the password for your Infomaniak user account if you have not enabled 2FA.
- For the server address, use only
sync.infomaniak.com.
- your username (e.g.,
Using the login information
With this information, all you have to do is add your accounts according to Apple's instructions:
- Go to Settings > Contacts > Accounts > Add Account.
- Tap Other, then Add CardDAV Account and enter the account and server information.
Do the same for the Calendar app:
- Go to Settings > Calendar > Accounts > Add account.
- Tap Other, then Add CalDAV account and enter the account and server details.
Synchronization specifics
Refer to this other guide.
Link to this FAQ: https://faq.infomaniak.com/1544
Has this FAQ been helpful?