Knowledge base
1000 FAQs, 500 tutorials and instructional videos. Here, there are only solutions!
Add a device (create a mail password) from the Mail service
This guide explains how to create and manage the passwords for an email address from within the Mail service, so that you can access it using a third-party application, such as Outlook or Thunderbird.
Other access and management options are presented in the main guide. If you are a my kSuite user, please refer to this other guide.
Prerequisites
- Order a Mail Service from Infomaniak.
- Create one or more addresses on this Mail service.
- Have at least the right to manage the Mail service in question (or be Administrator / Legal Representative within the Organization).
Generate an email address password
To add a password to the example address demonstration@exemple-domaine.ch:
- Enter your Infomaniak account login ID and password on the page https://manager.infomaniak.com/:
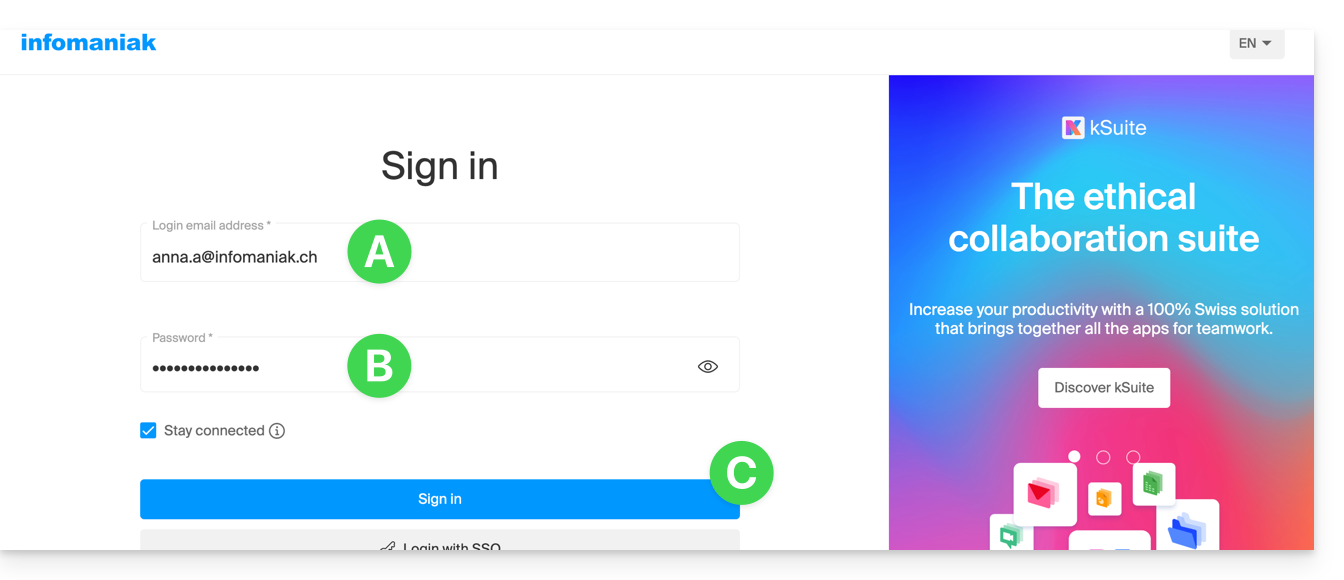
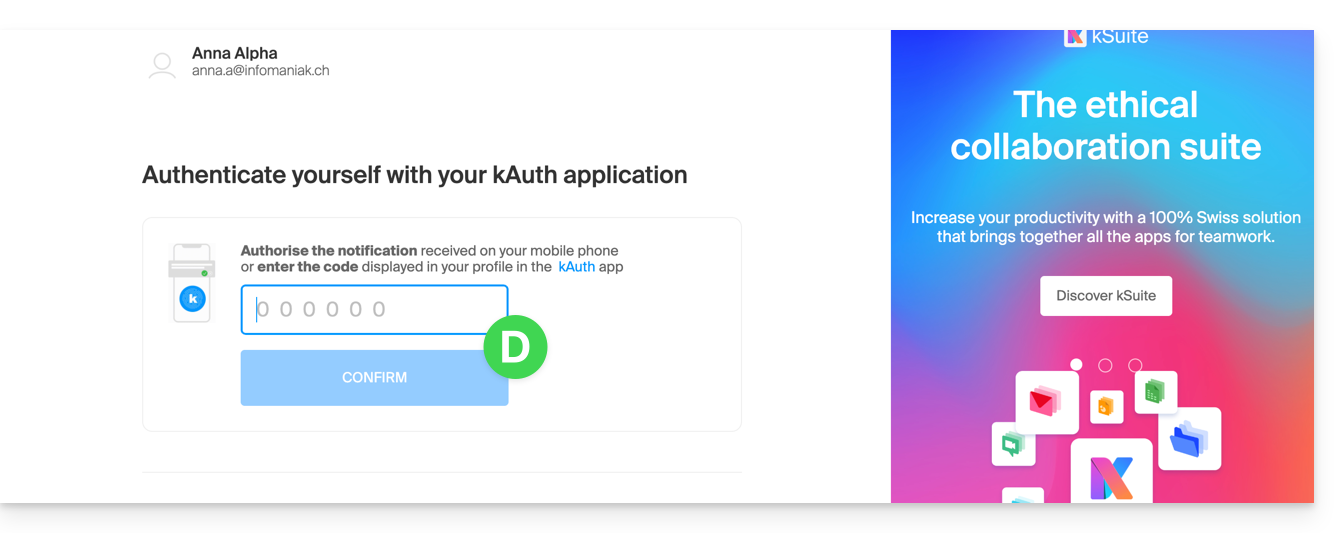
- Confirm the login on the Manager using the 2FA (two-factor authentication) method that you initially set up:
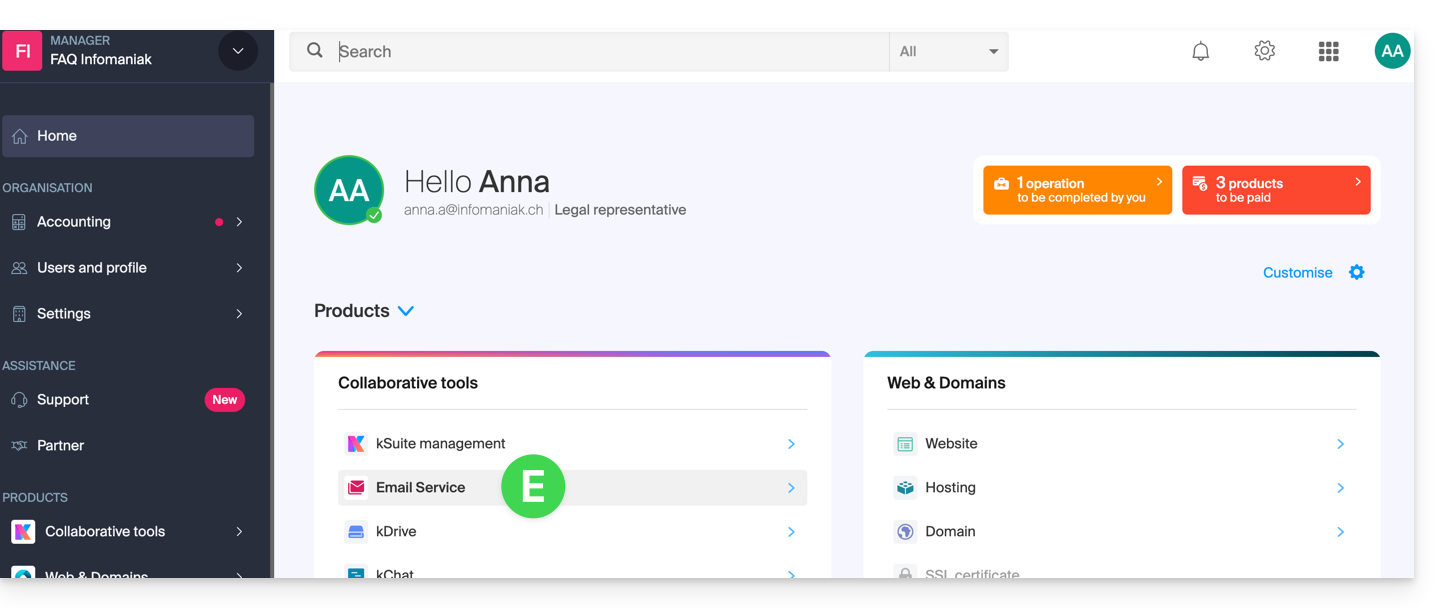
- Once on the dashboard, click on Mail Service:
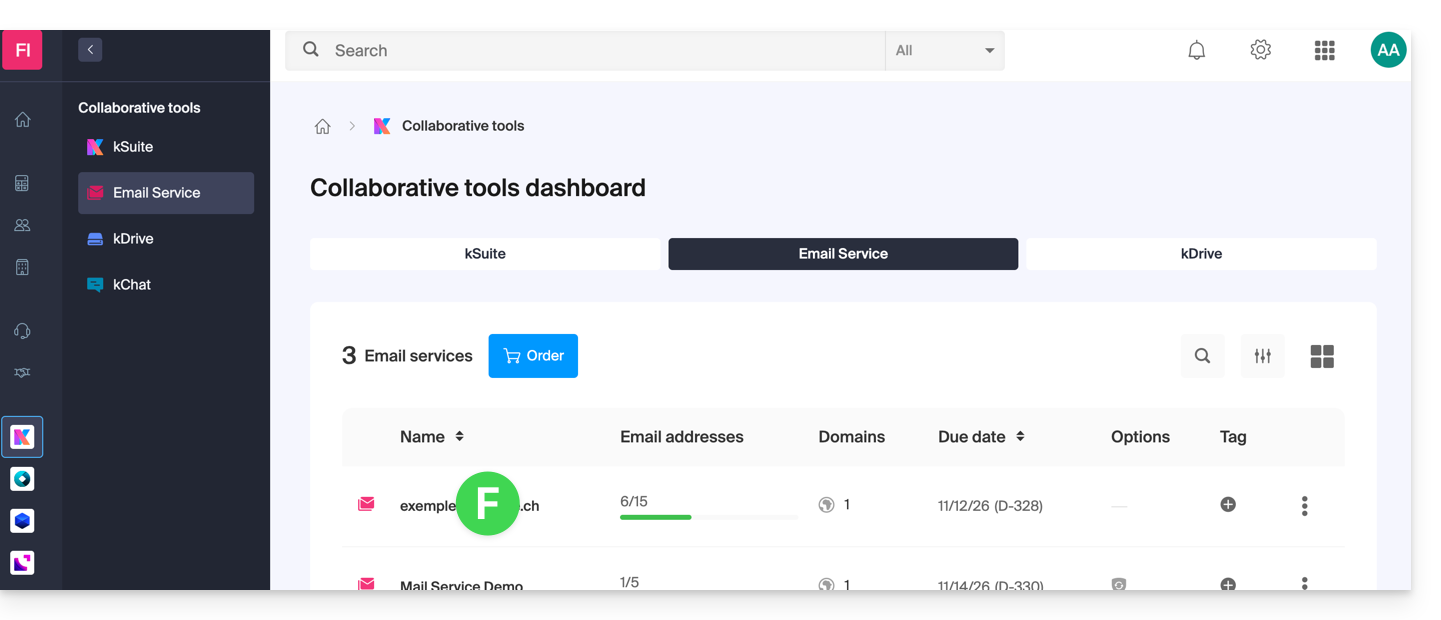
- Once on your Mail Services page, click on the name / domain name to which the email address in question belongs:
- Once you are on the Mail service to which the address belongs, click on the email address in question:
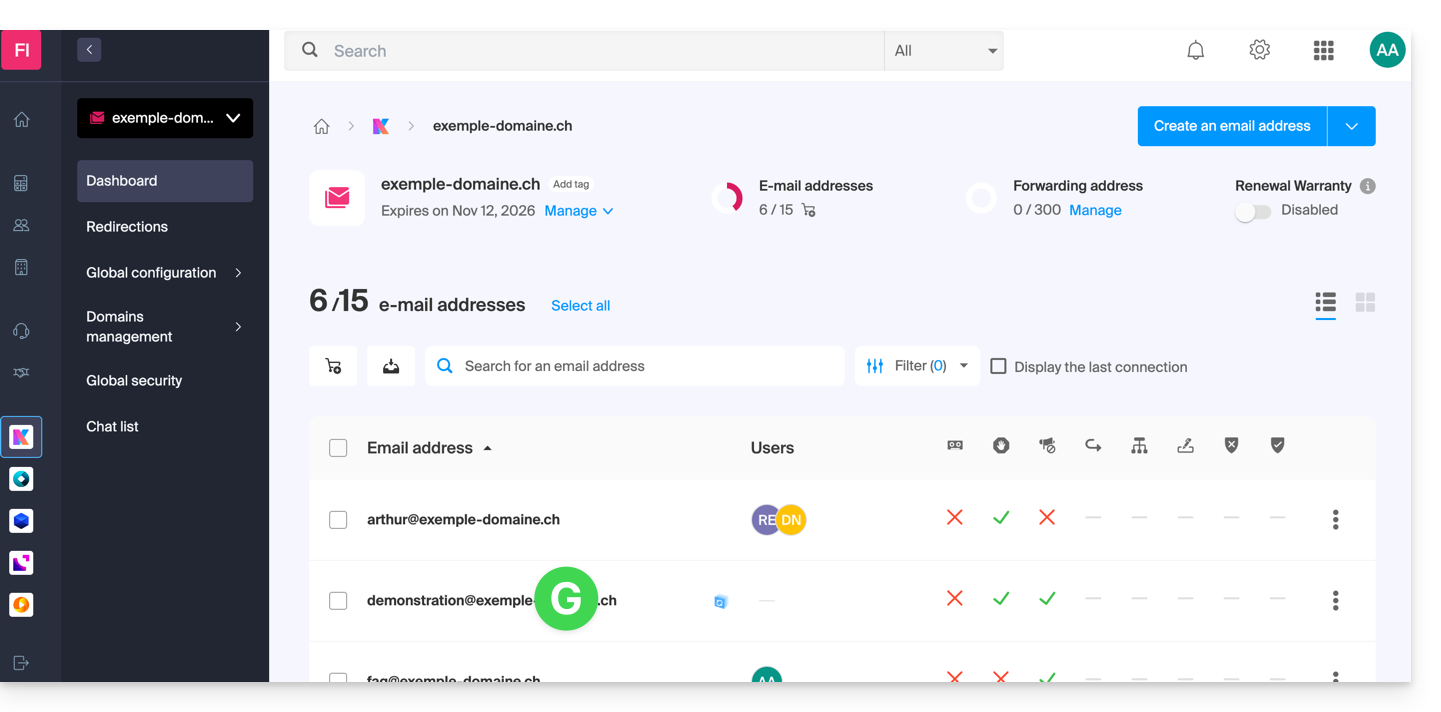
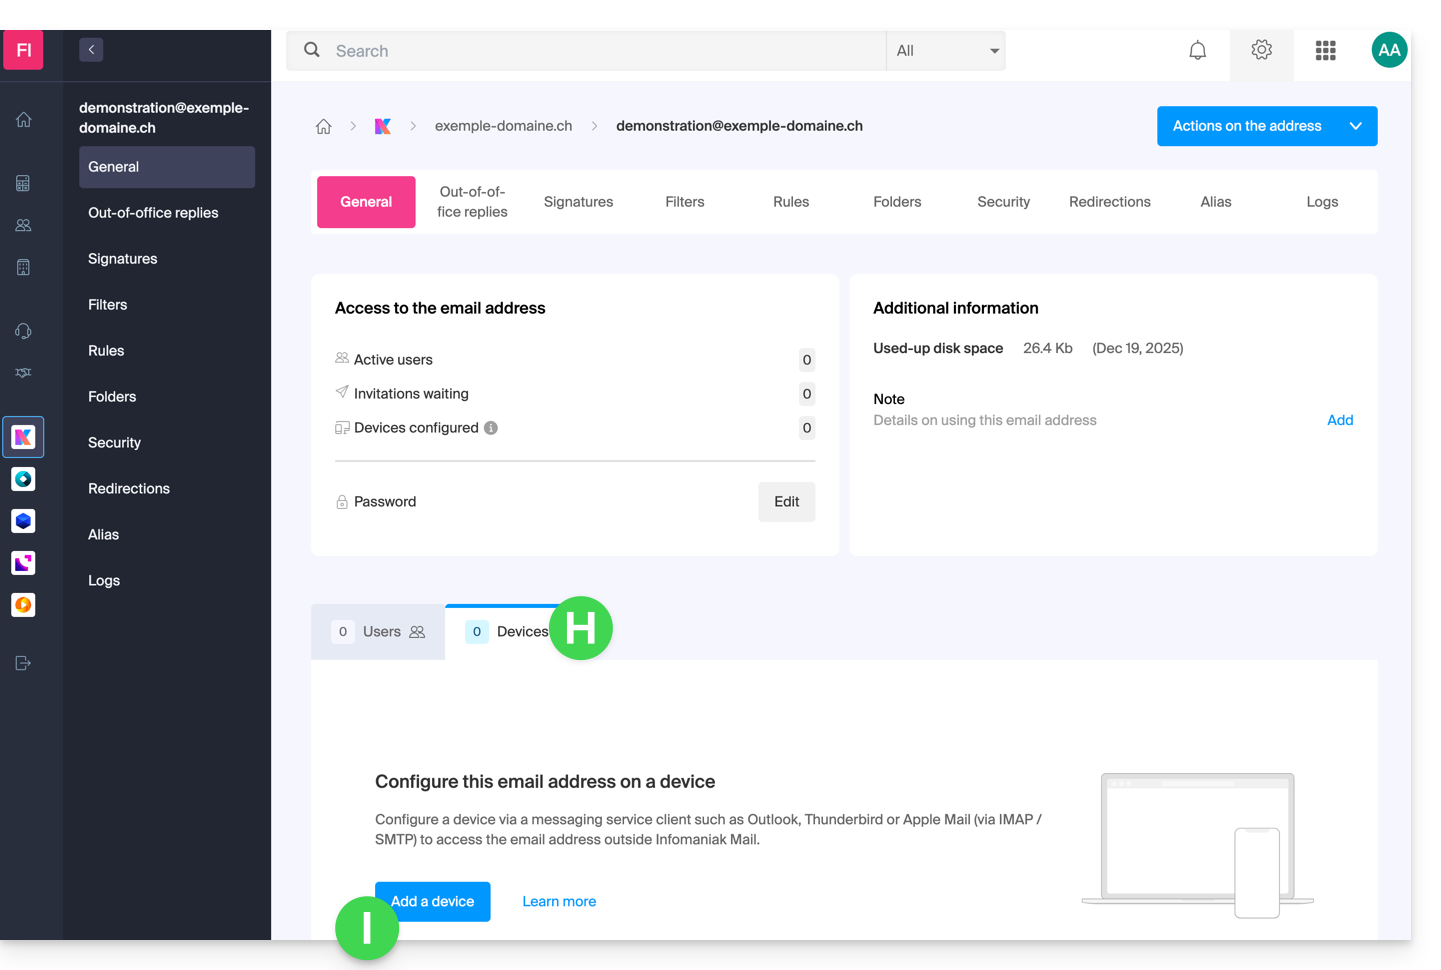
- Once you are on the email address in question, click on the Devices tab, then click on Add a device:
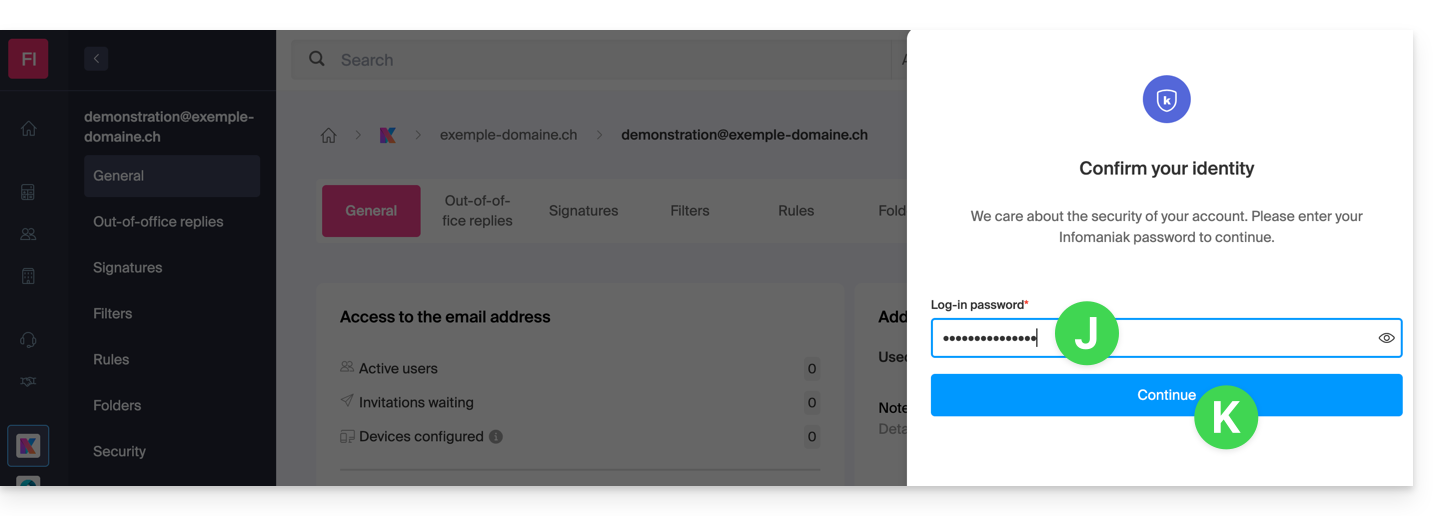
- At this stage, it may be necessary to re-enter the login password (the one from step B above):
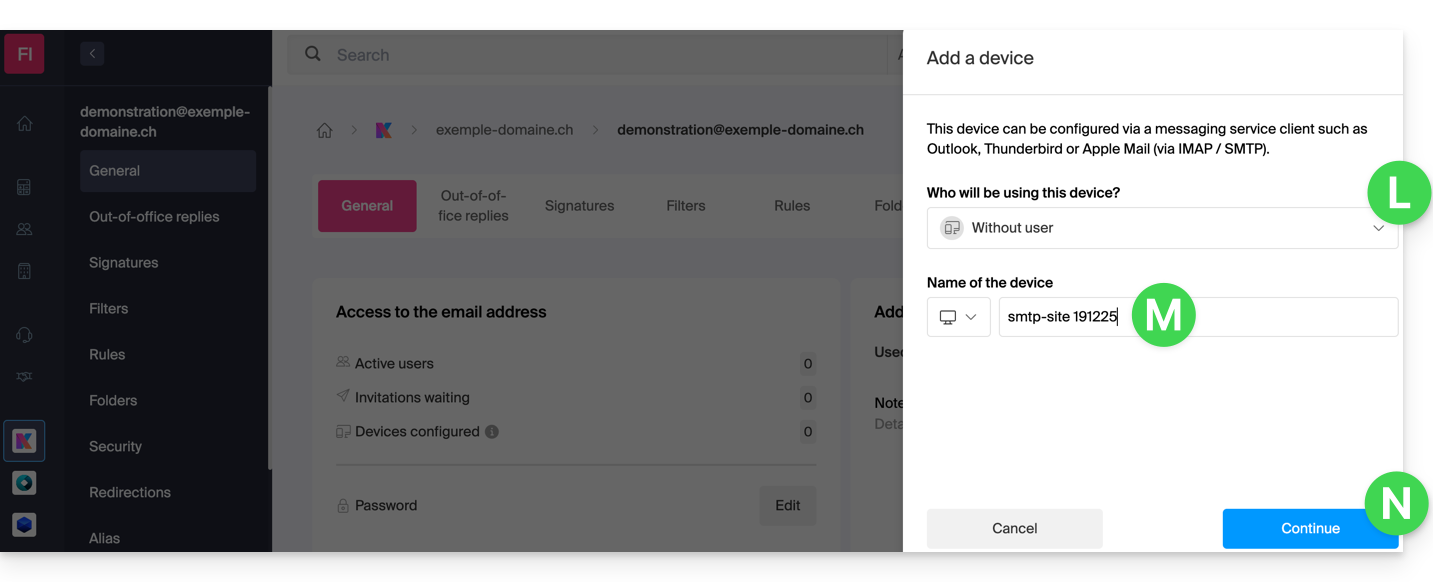
- Then, choose not to specify a particular user ("No user").
- Specifying a user, however, allows you to link any potential SMTP restriction for that user to their connected devices, in addition to simply removing their sending rights within the Infomaniak ecosystem.
- Enter a descriptive name that will help you identify the reason why you created this device(here, the user needs a password to be able to send emails from a website, and they add the current date as useful information):
- There you go: the new password is displayed, and you can change the characters (minimum 16) if necessary.Please note that it will not be possible to display it again later.).
- Save it at the bottom of the page to use it as you see fit:
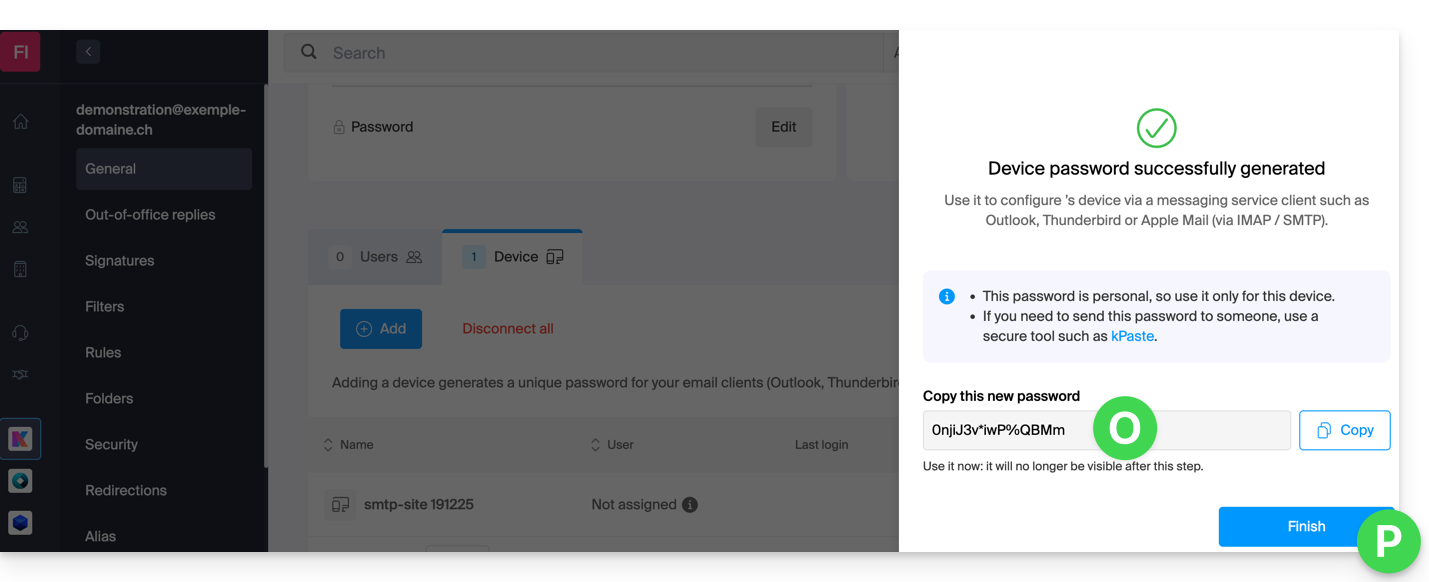
Did you click the “Finish” button (above, “P”) without noting the password? No problem, you can modify or regenerate a new one!
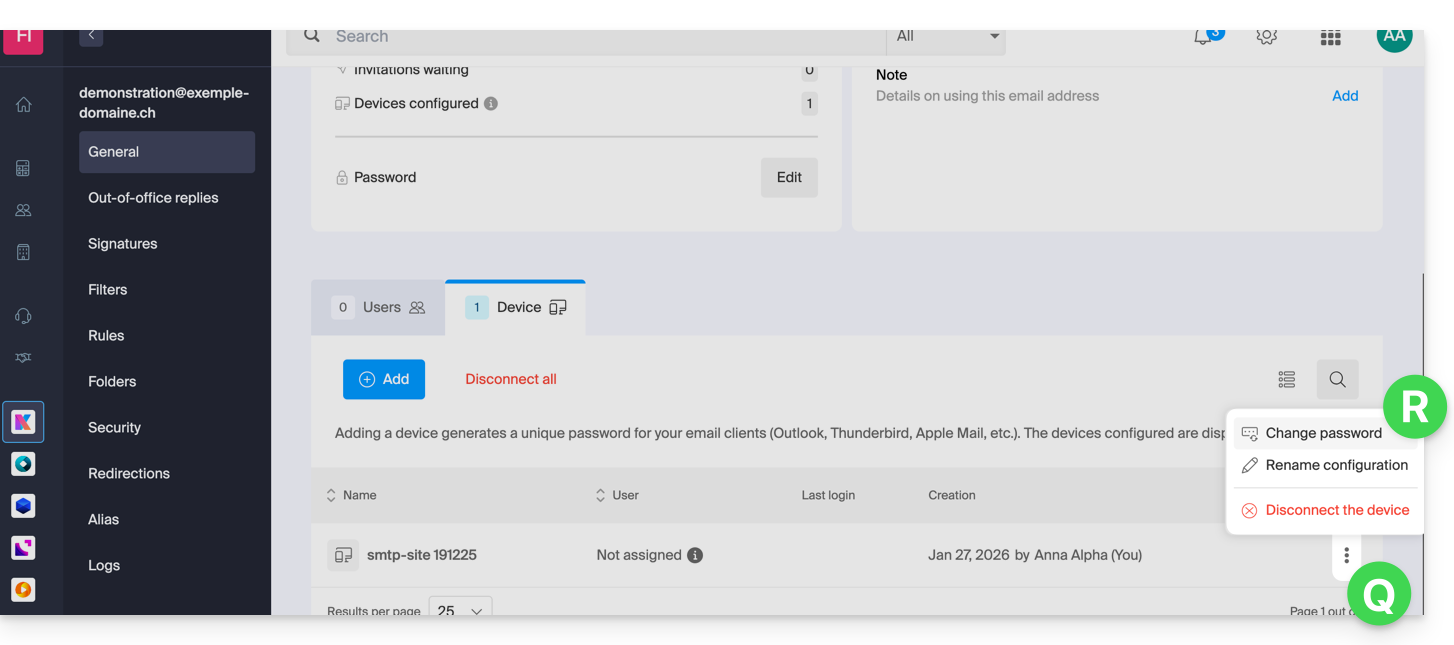
- Click on the action menu ⋮ located to the right of the device you just created and click on Change password:
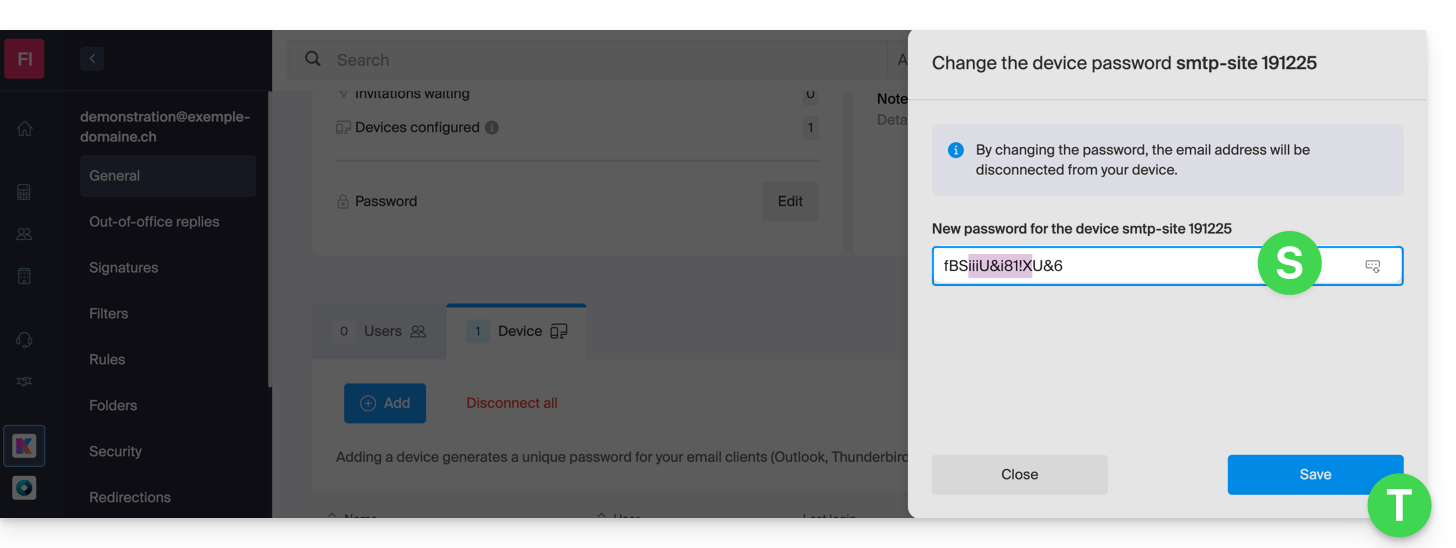
- Click the button on the far right of the field to generate a new random password and/or enter the secure characters you want to use (minimum 16) for the new password, then click the button to save the change:
- The new password, which replaces the old one, is now displayed permanently. You can enter it on your device(s) to replace the previous password (note that it will not be possible to display it again later).
Do you need a password for a secondary, temporary user? No problem, generate a second one!
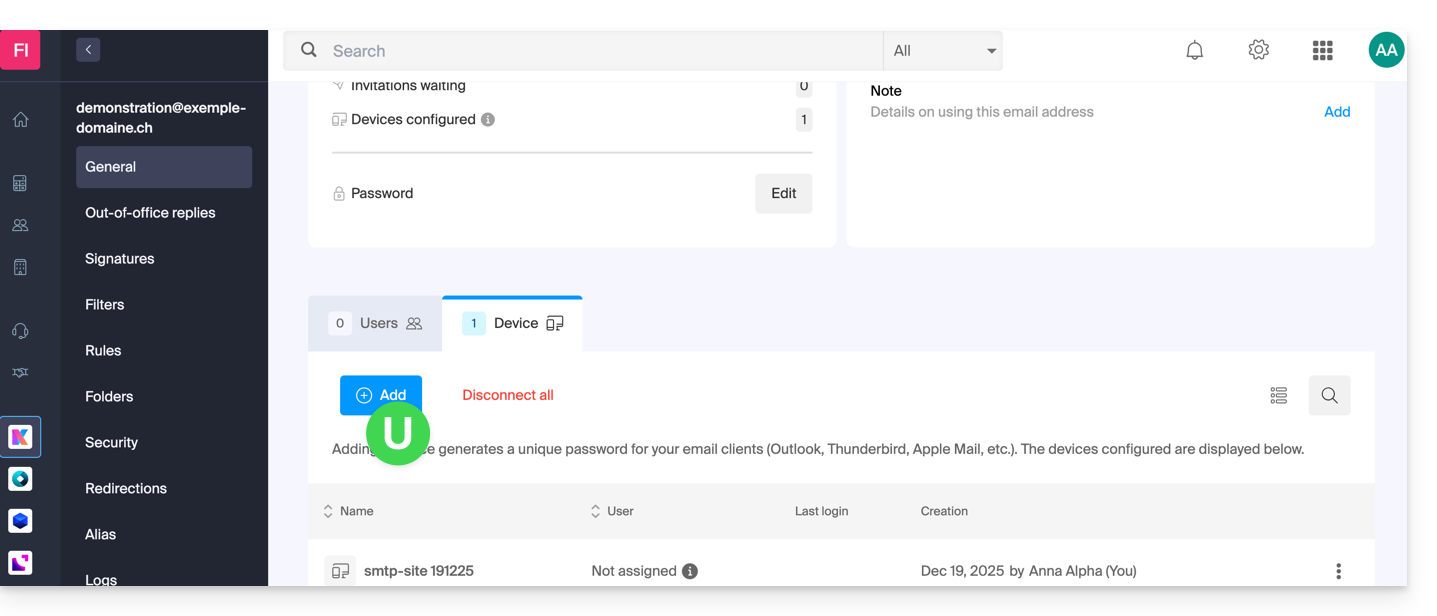
- Click the button to Add a new additional device:
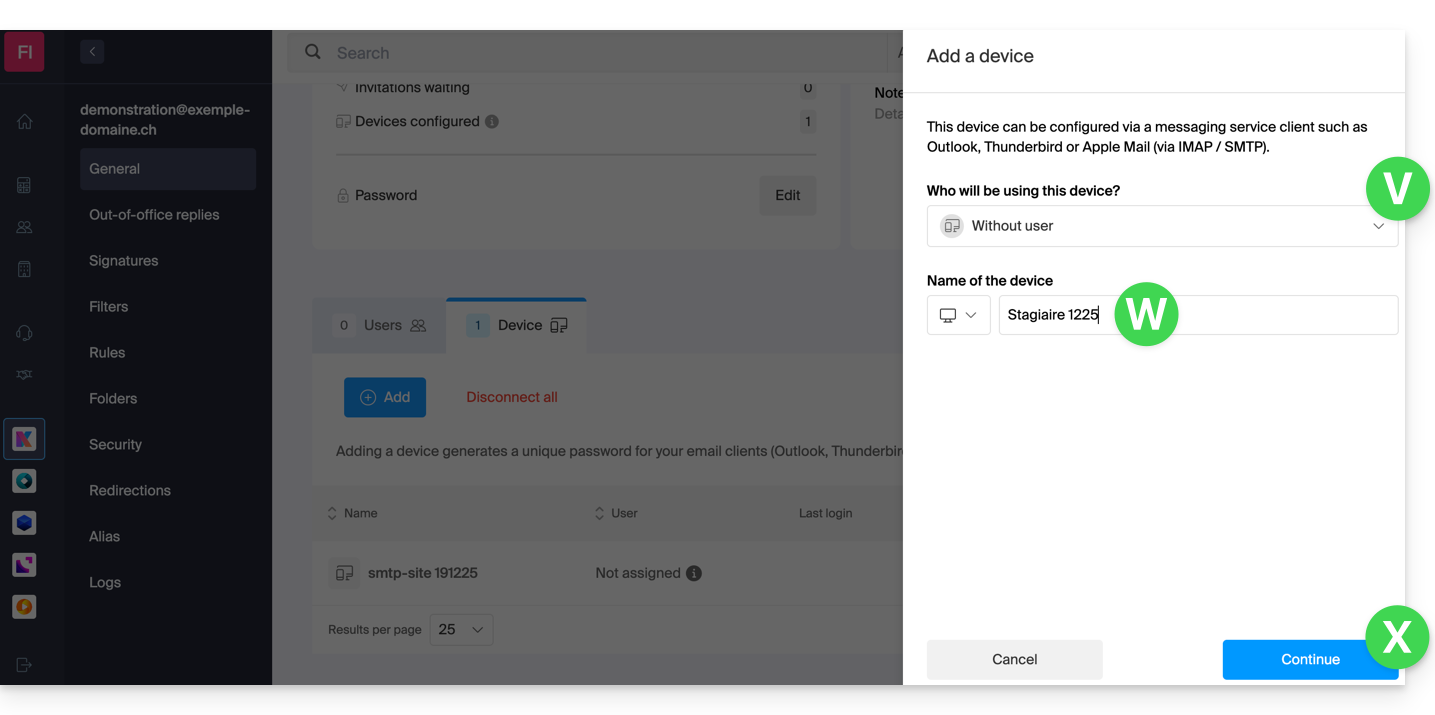
- Then, choose not to specify a particular user, and enter a name that will allow you to identify the reason why you created this device (here, the user needs a password for a one-week intern):
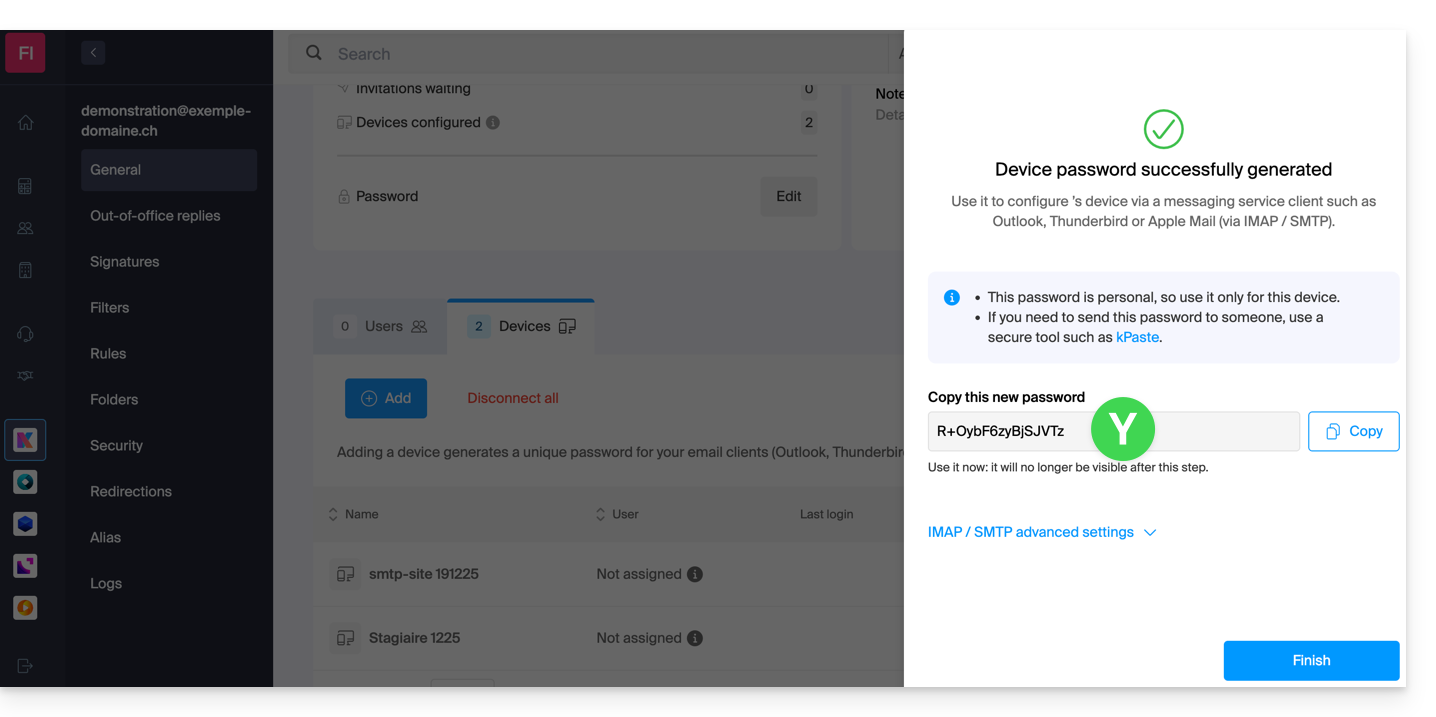
- The password is now displayed; you can use it for your intended purpose (please note that it will not be possible to display it again; however, as before, it will of course be possible to modify it or generate a new one):
Alternative: create a password for a user
Instead of creating a password yourself and then having to communicate it to the user, you can directly allow a user with fewer permissions than you to obtain the password for the device they need:
- Add the new user (whether they already exist in the Organization or not) as described in this other guide:
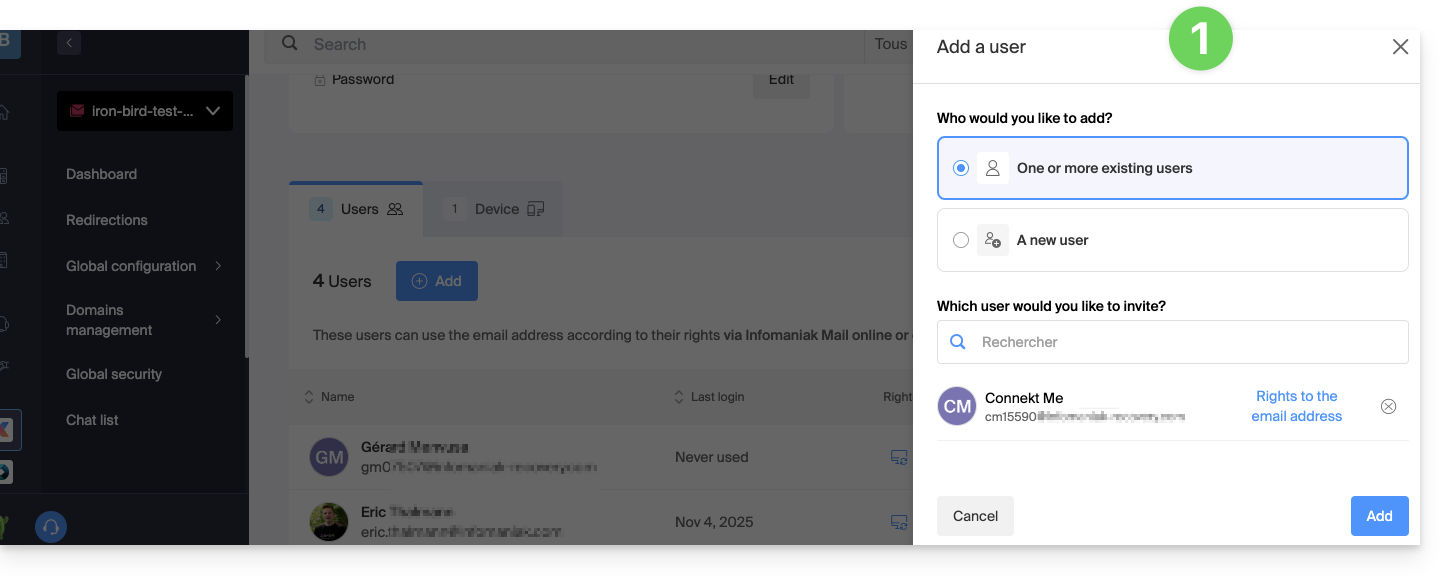
- Once the user has been added, switch to the devices tab to add a new device:
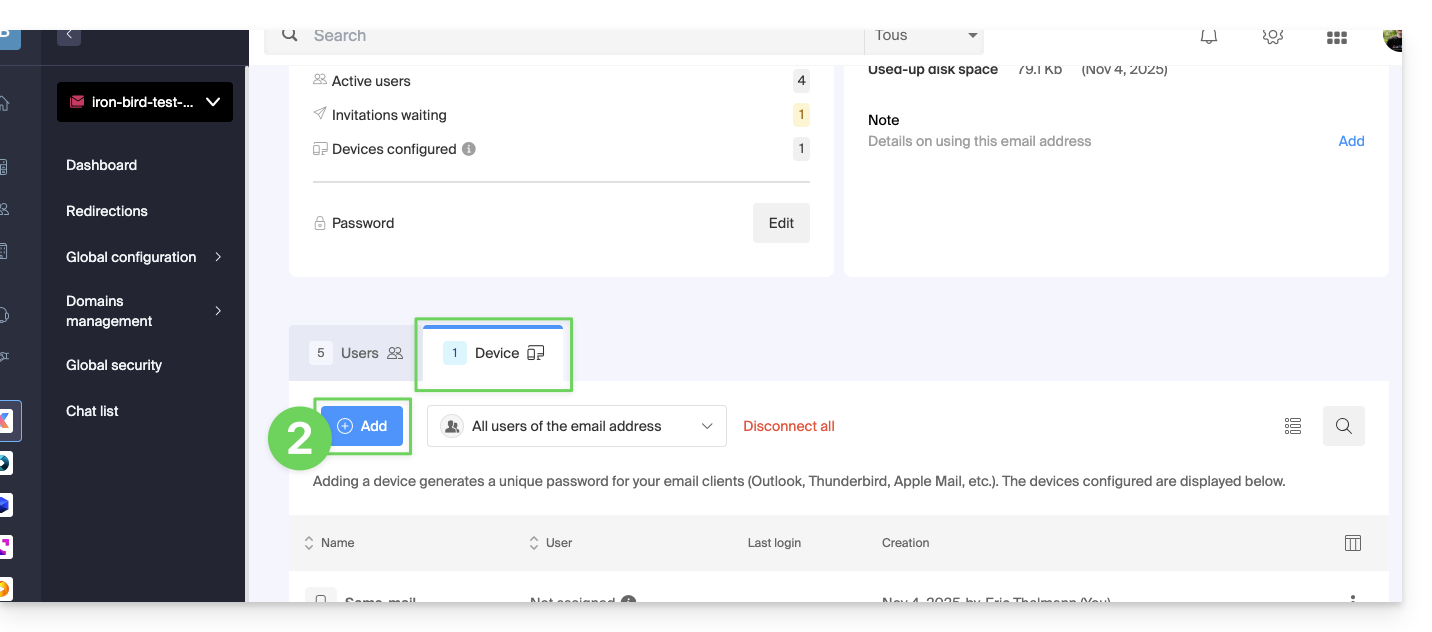
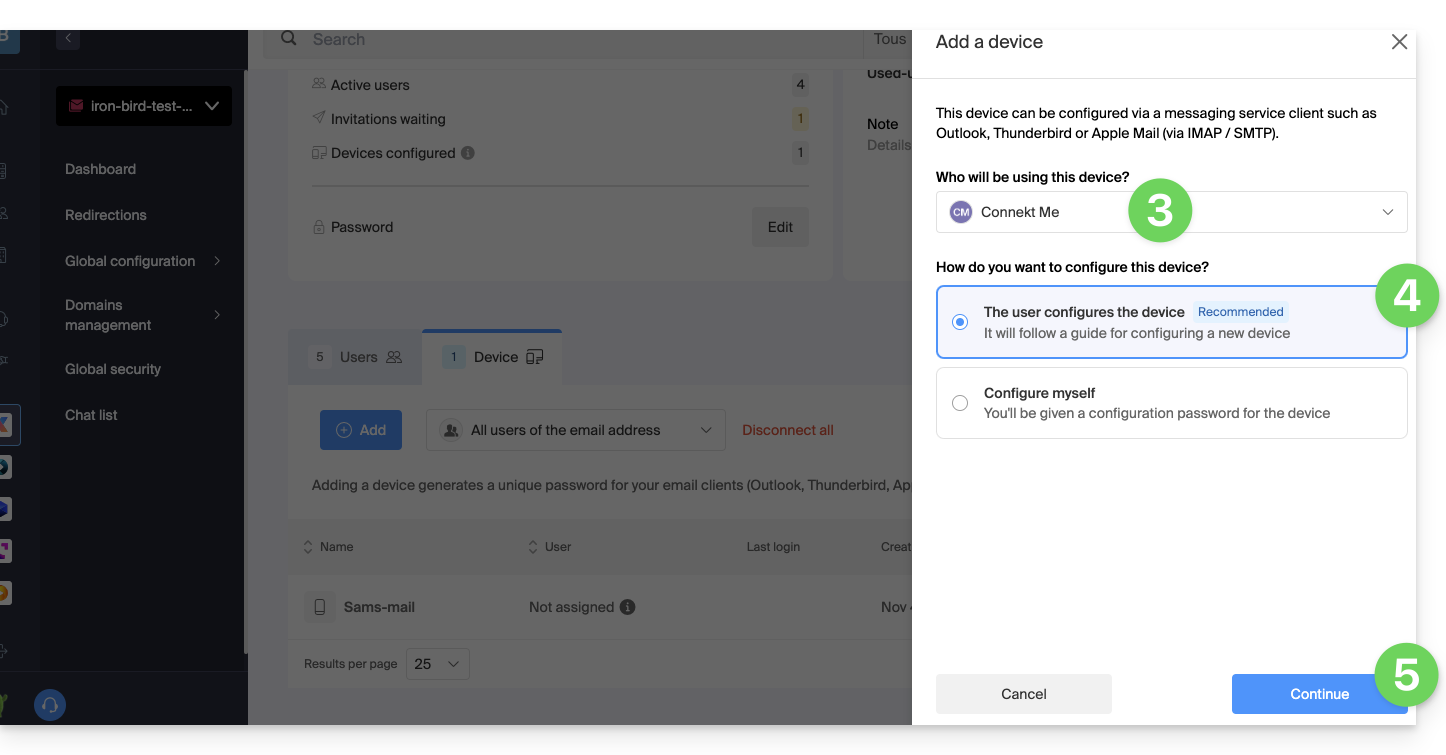
- If necessary, enter the password to log in to your Infomaniak account, then select the user created in step 1.
- Click on the first option to send a configuration assistant for the user's device.
- Click on the Continue button:
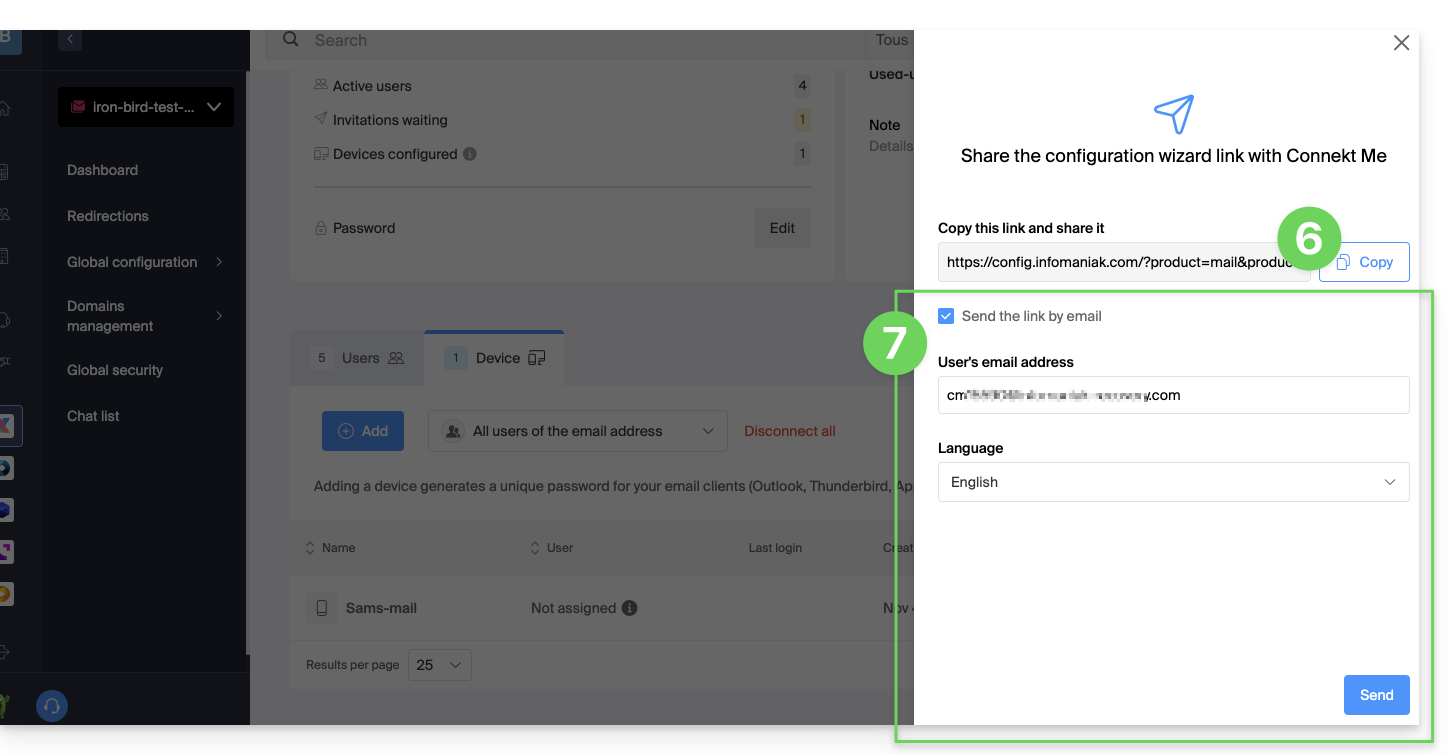
- Copy the invitation link, which is valid for 30 days, and send it to the user.
- If necessary, send the invitation to the user's email address:
In step 4 above, you can also choose to generate a password:
- The password you created will be displayed; you can modify it one last time, copy it, and store it securely (e.g., in a password manager); it will no longer be possible to display it afterward.
Modify or remove an existing password
When access is no longer needed, revoke only the password in question: other access to the email address will remain active.
Link to this FAQ: https://faq.infomaniak.com/1321
Has this FAQ been helpful?