Knowledge base
1000 FAQs, 500 tutorials and instructional videos. Here, there are only solutions!
Add a device (create an email password)
This guide explains how to quickly create/obtain a password from an Infomaniak Mail Service when you need to access an Infomaniak email address on third-party software, such as Outlook or Thunderbird.
Preamble
- When creating an email address, no password is defined:
- An email address can be accessed on Infomaniak Mail apps without a password other than the one that already allows you to access your Infomaniak account.
- You just need to authorize your account or invite a contact to be a user of the email address.
- You then simply create specific passwords for each device (Outlook, iPhone, CRM, etc.) as needed:
- You can create multiple passwords for the same email address without interrupting existing connections.
- Each password can be revoked individually, without affecting other users or devices linked to this address.
- A password is never displayed again after its creation; modify it or create a new one if necessary.
Generate an email password
Prerequisites
- Order a Mail Service from Infomaniak.
- Create one or more addresses on this Mail Service.
- Be Administrator or Legal Representative within the Organization.
If you cannot complete these steps because you receive different information on the screen, you probably lack the necessary permissions if you were not the original creator of the email address — refer to this other guide — an administrator can, for example, add the email address directly to your Web Mail app or send you a link allowing you to generate a password yourself.
To add a password to the example address demonstration@example-domain.ch:
- Enter your Infomaniak account login and password on the page https://manager.infomaniak.com/:
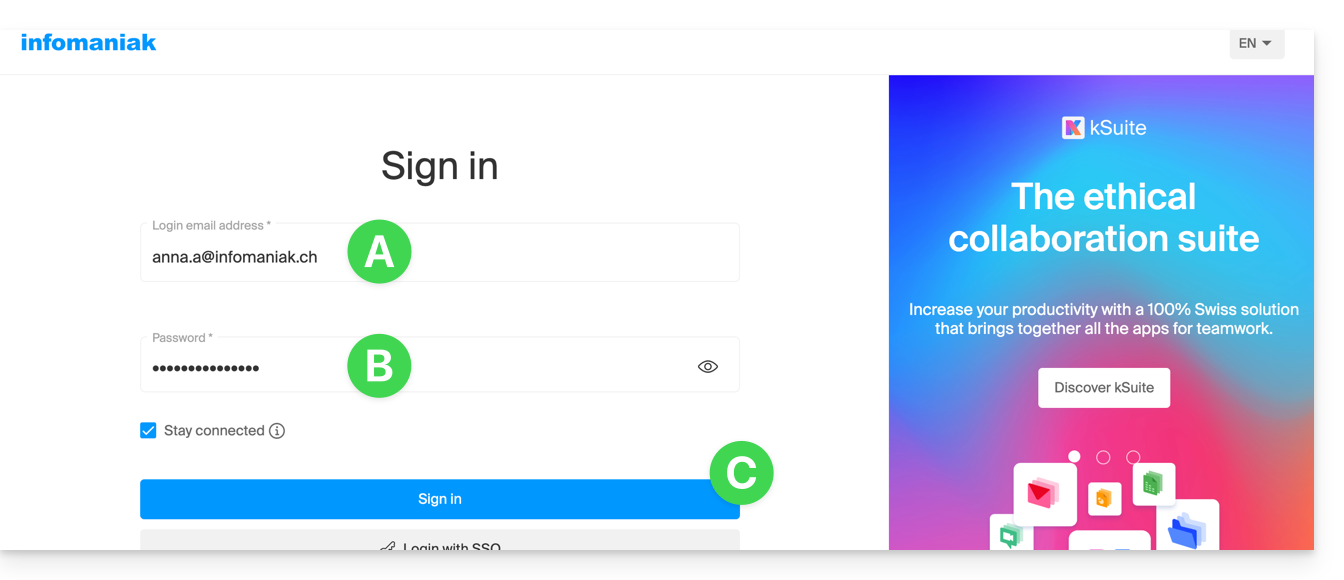
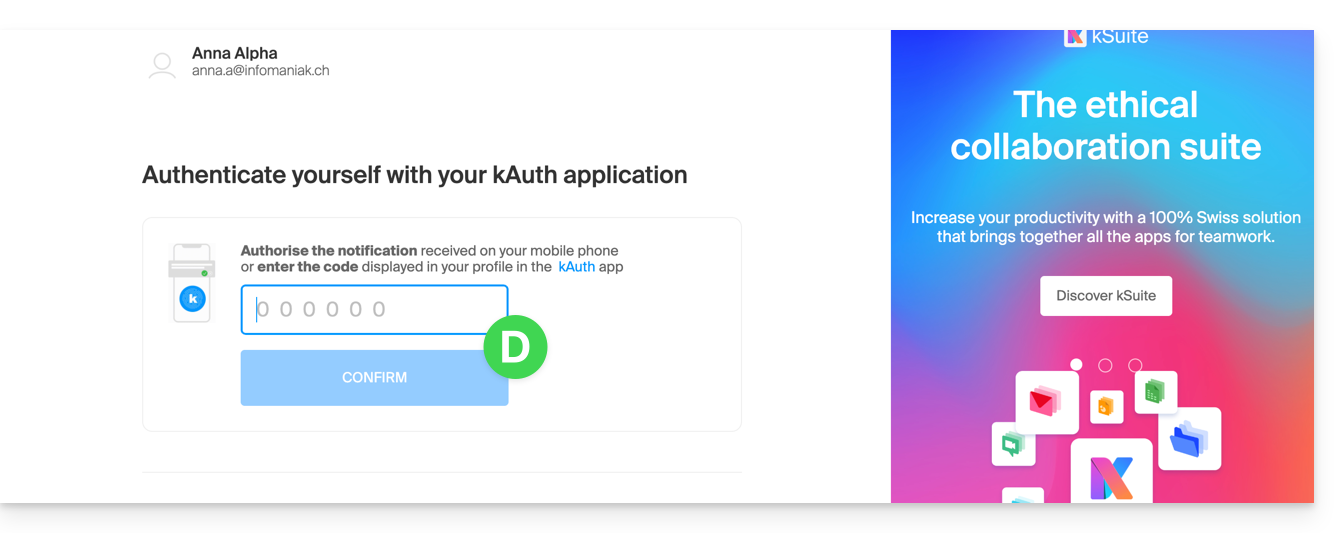
- Validate the entry on the Manager with the 2FA (two-factor authentication) method initially defined:
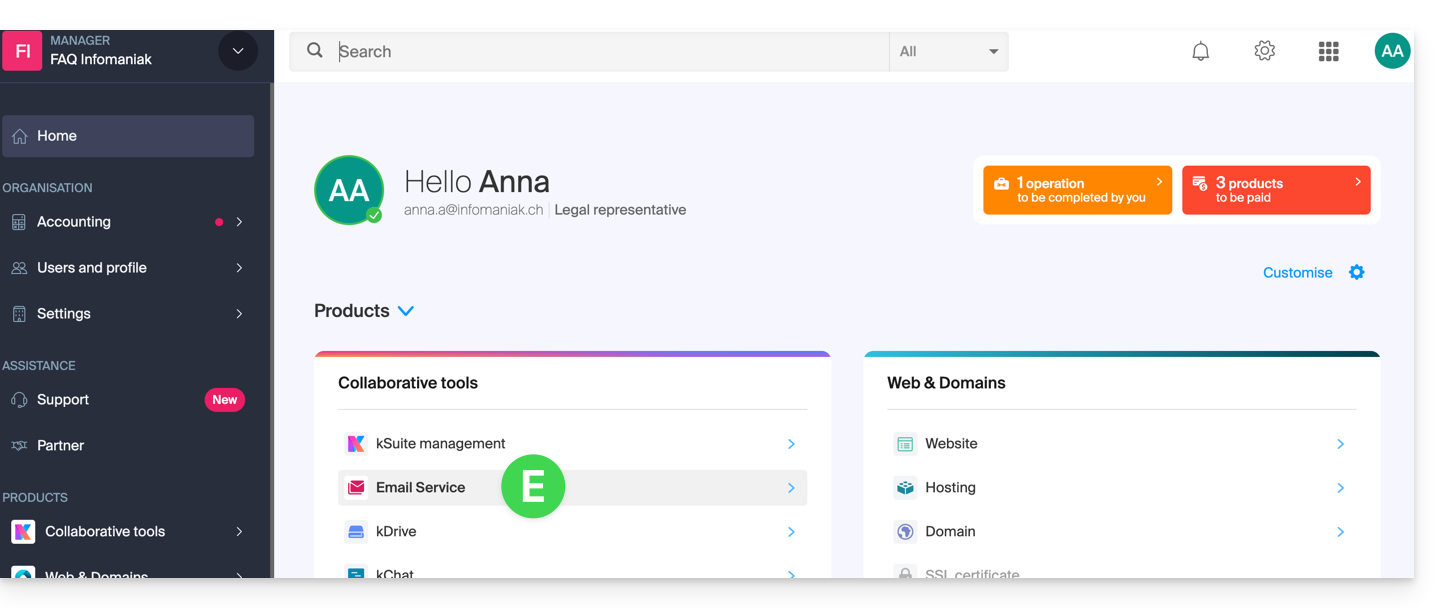
- Once on the dashboard, click on Mail Service:
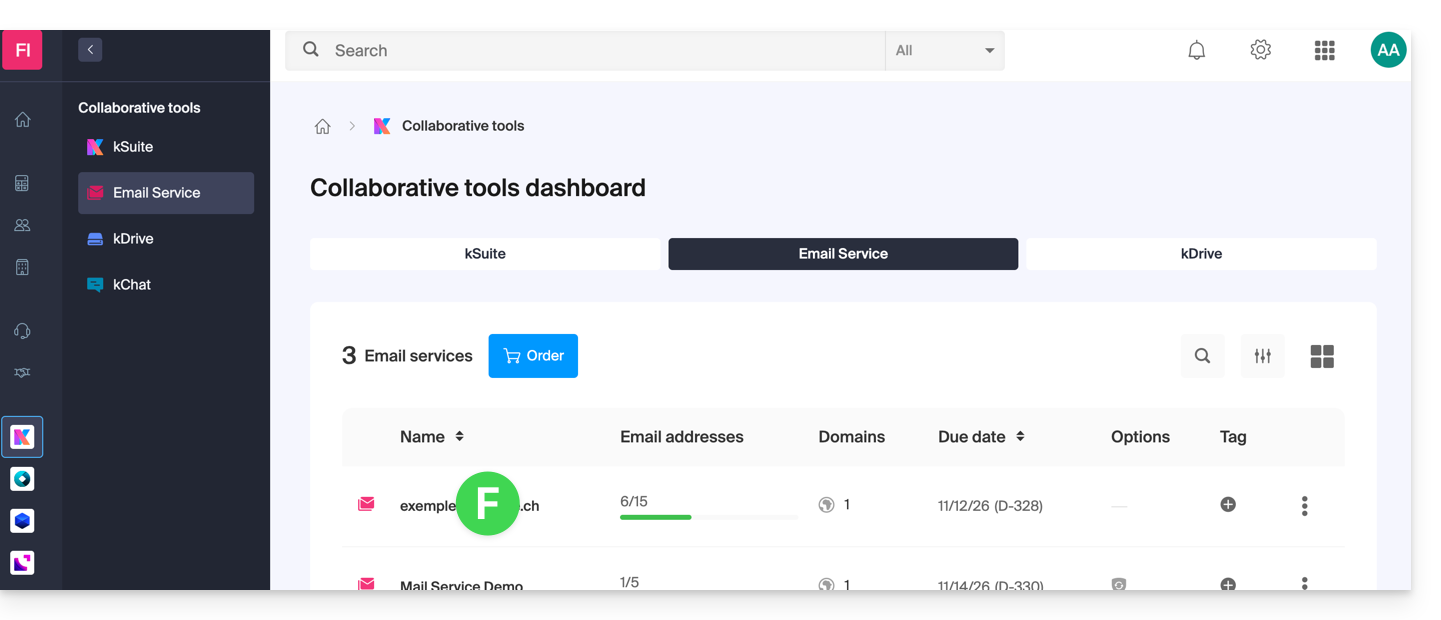
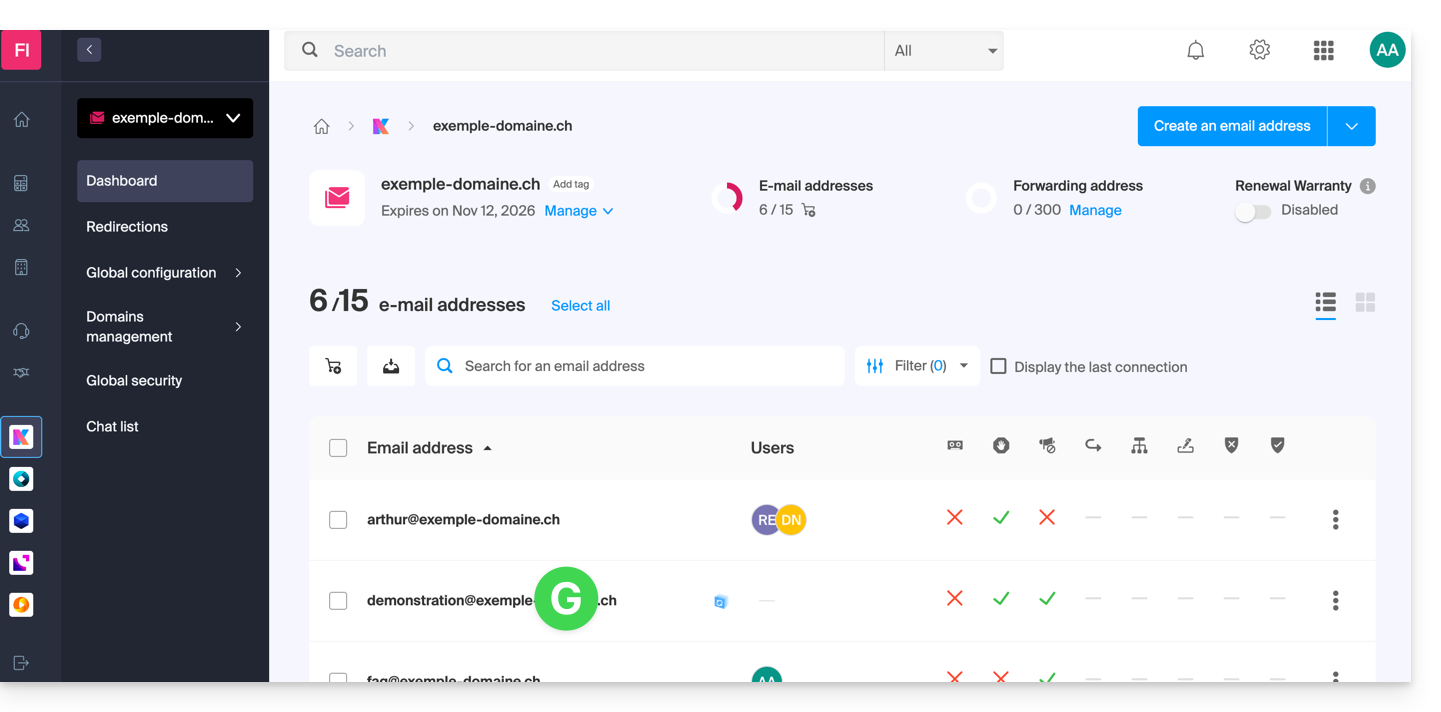
- Once on your Mail Services, click on the name/domain name to which the email address in question belongs:
- Once on the Mail Service to which the address belongs, click on the email address in question:
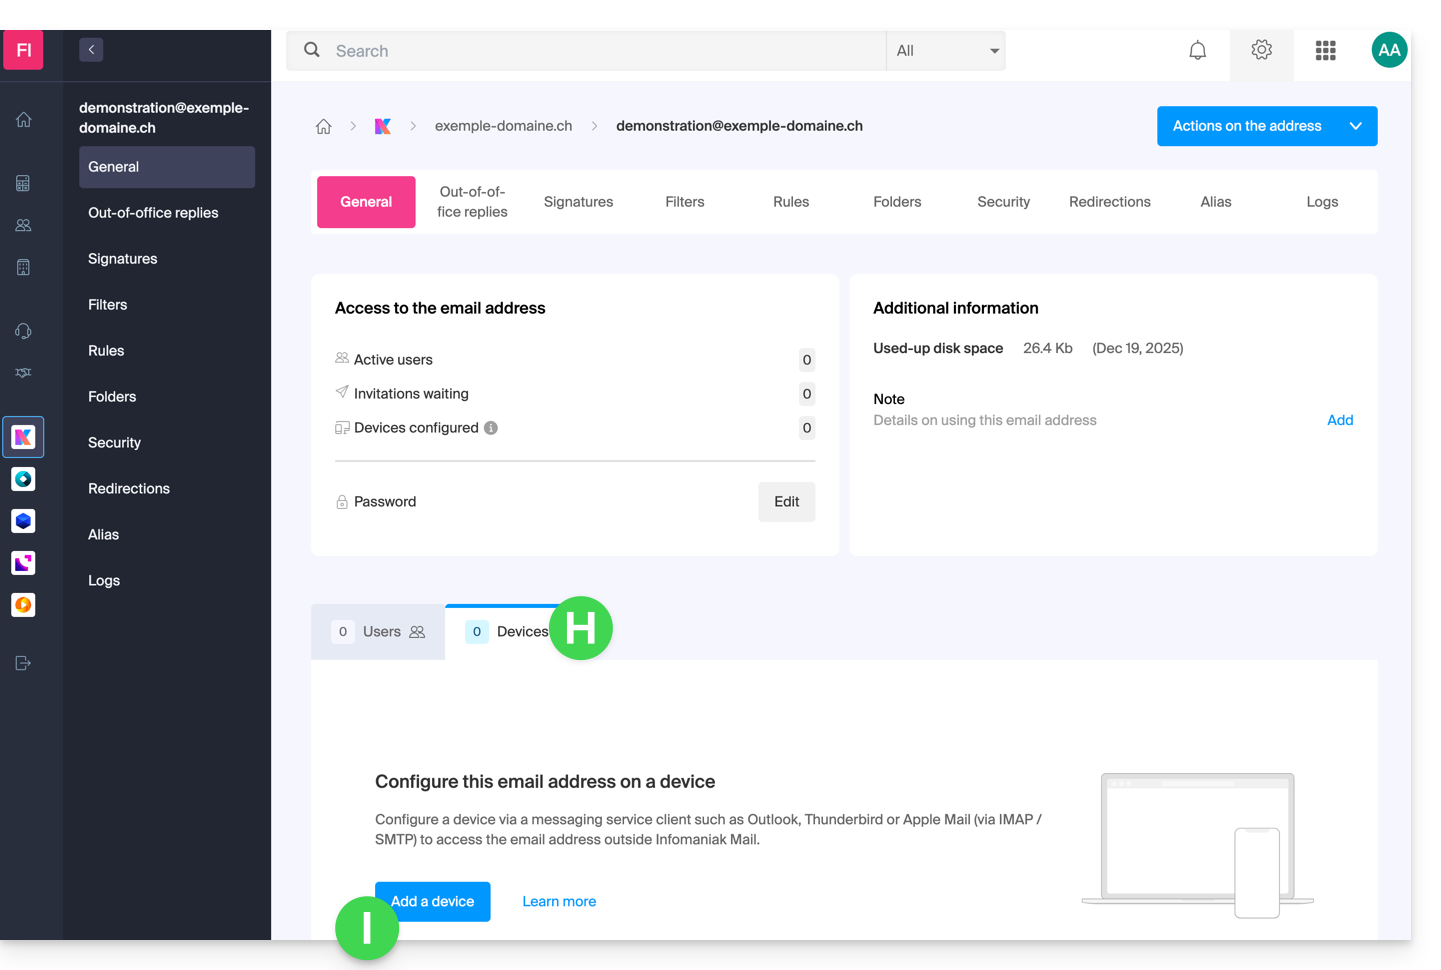
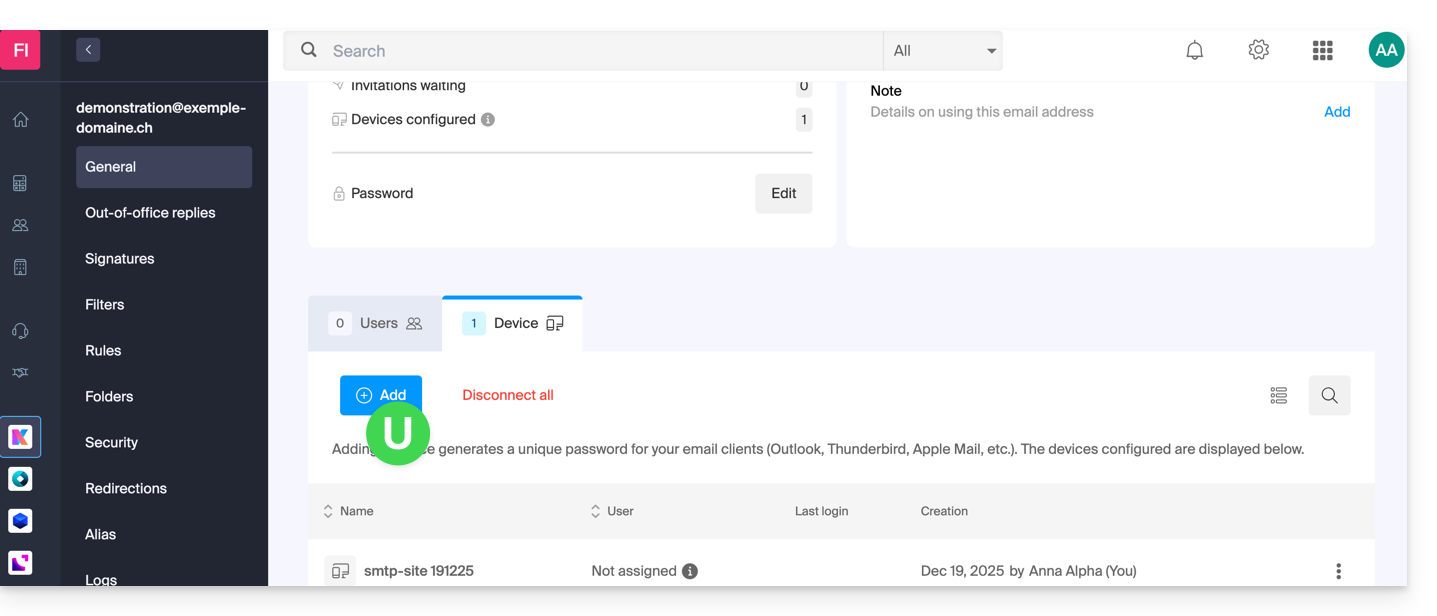
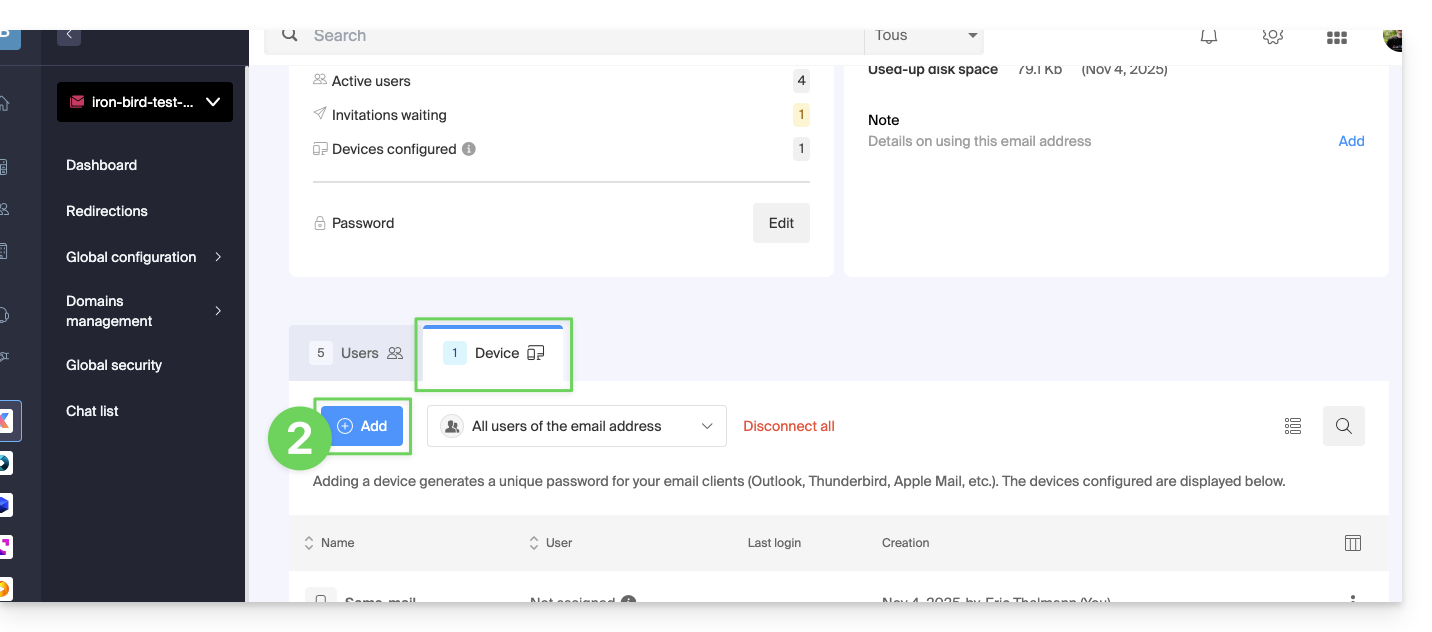
- Once on the email address in question, click on the Devices tab and then on Add a device:
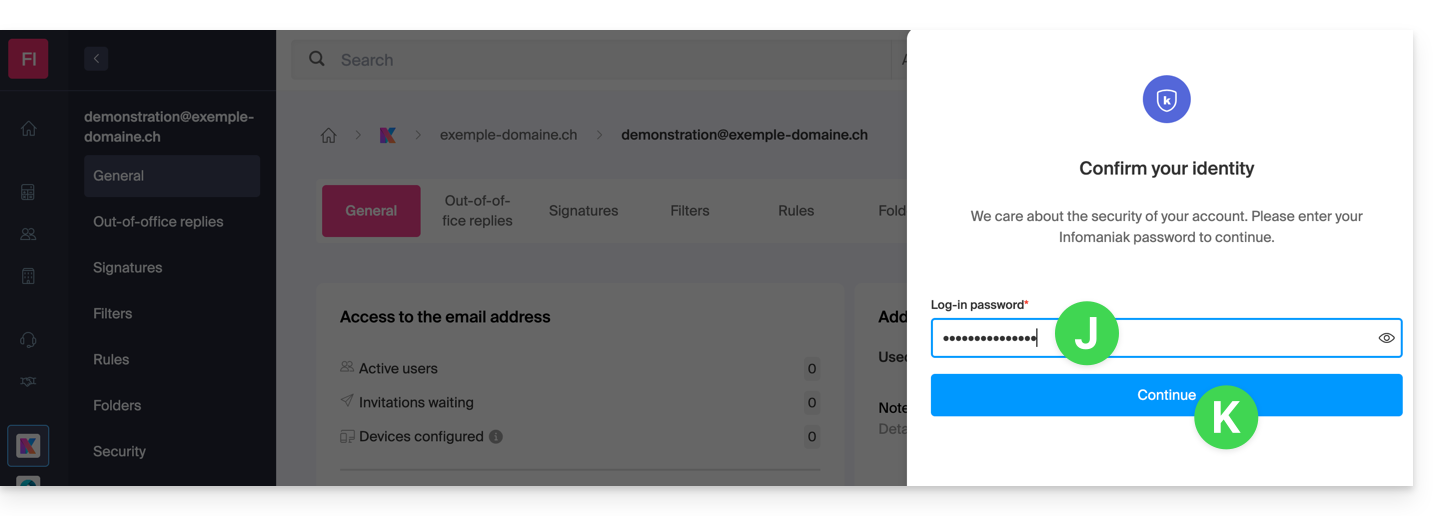
- It may be necessary at this stage to re-enter the login password (the one at point B above):
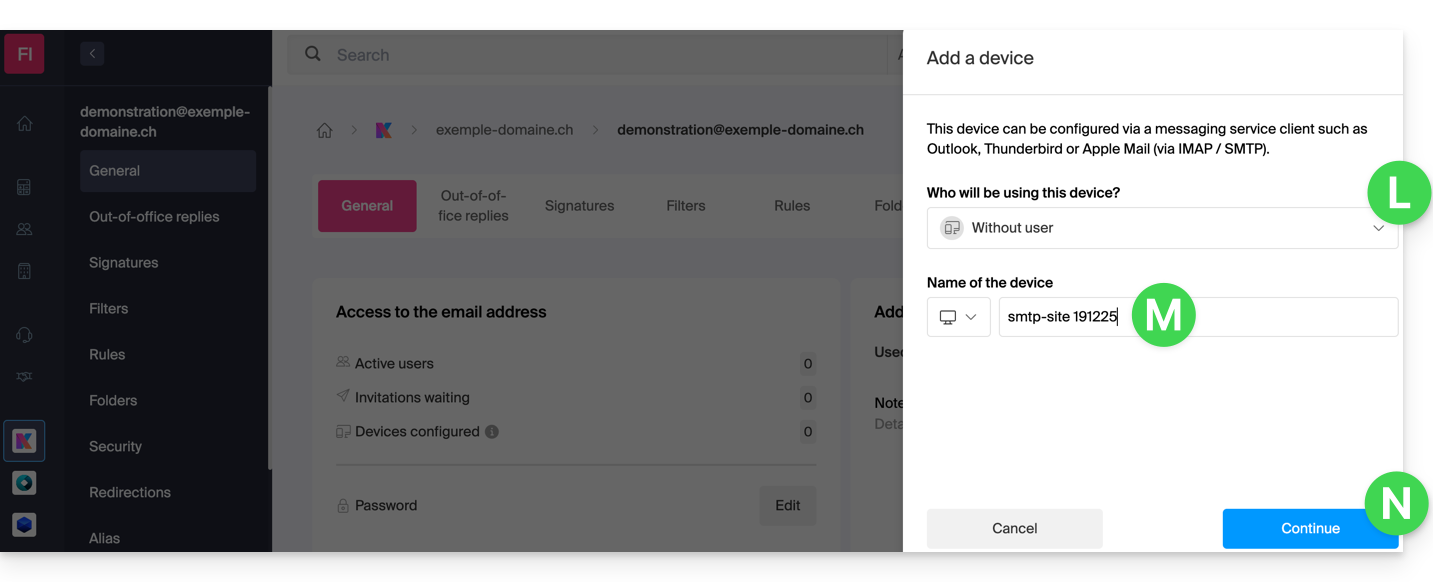
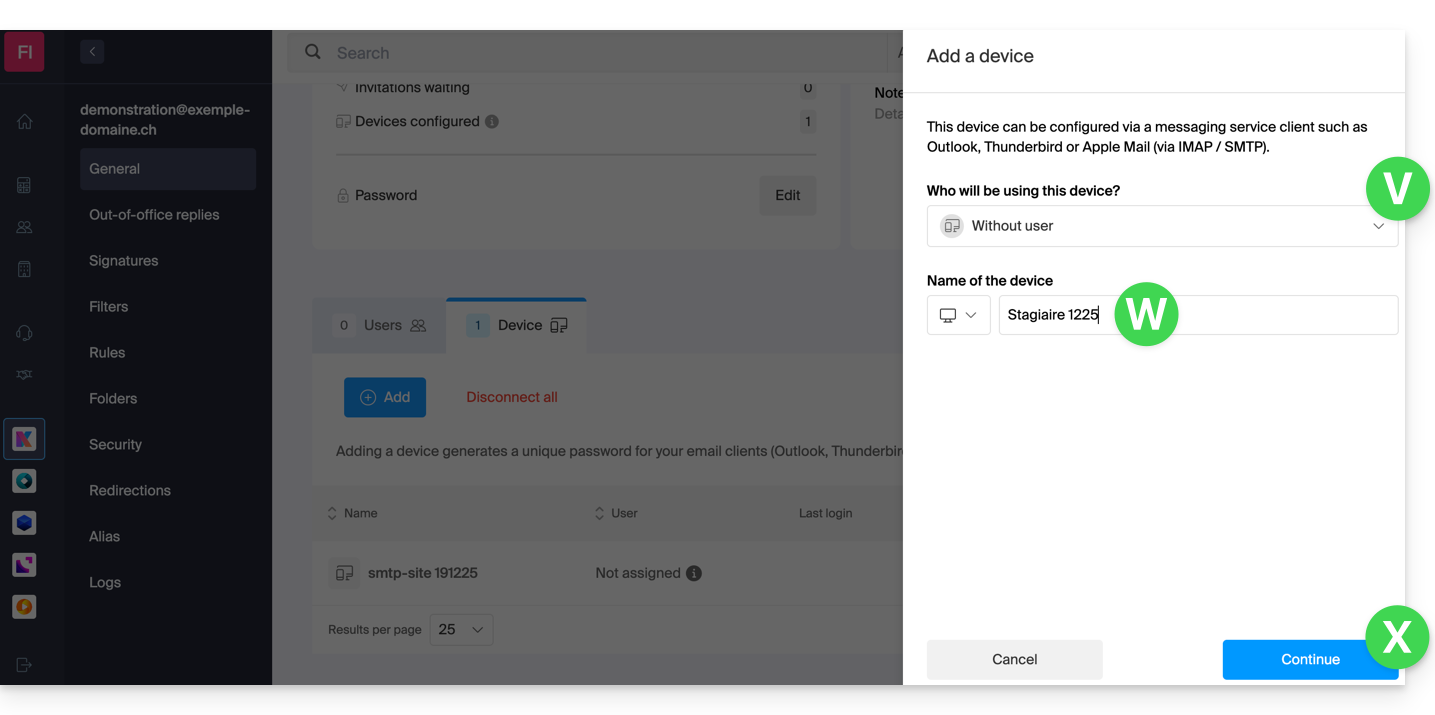
- Then choose to not specify a particular user ("Without user").
- Enter a descriptive name that allows you to identify the reason why you created this device (here the user needs a password to be able to send emails from a site, and adds as useful information today's date):
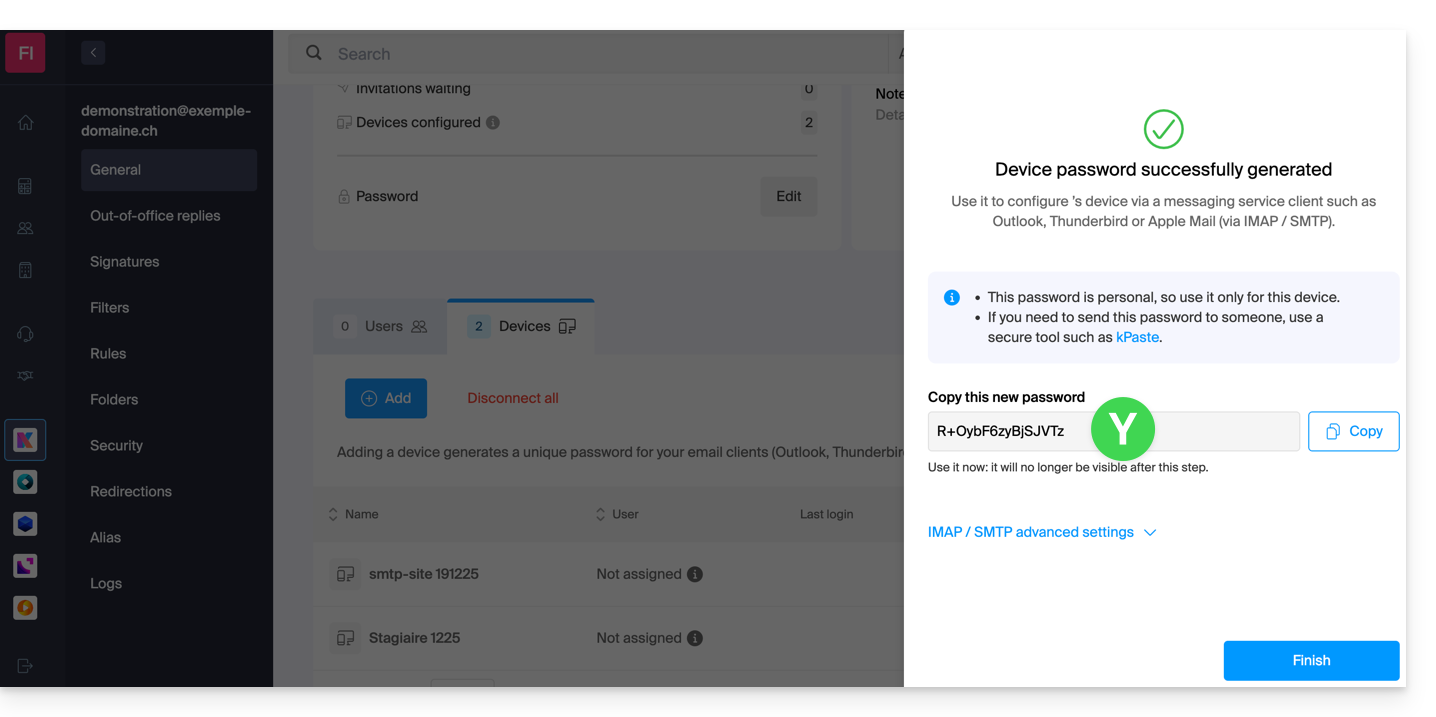
- There you go: the new password is displayed, you can change the characters (16 minimum) if necessary (be careful, it will not be possible to display it again later).
- Save it at the bottom of the page to use it as you wish:
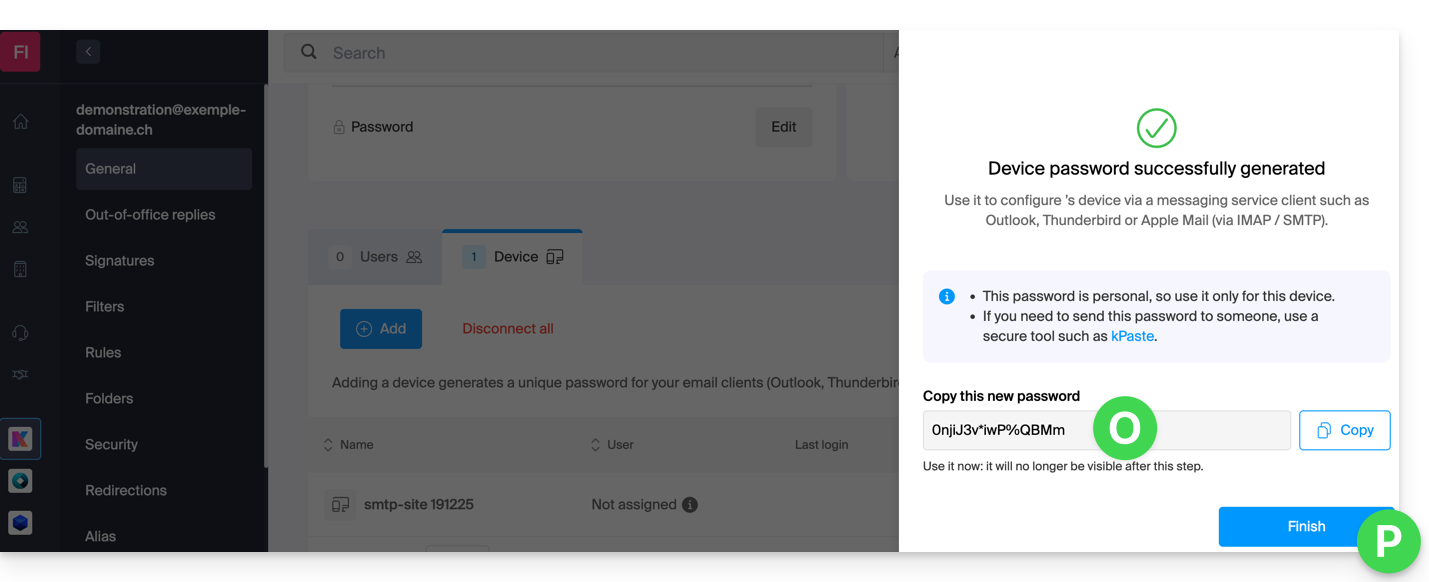
You clicked on the “Finish” button (above “P”) without noting the password? No problem, modify or generate a new one!
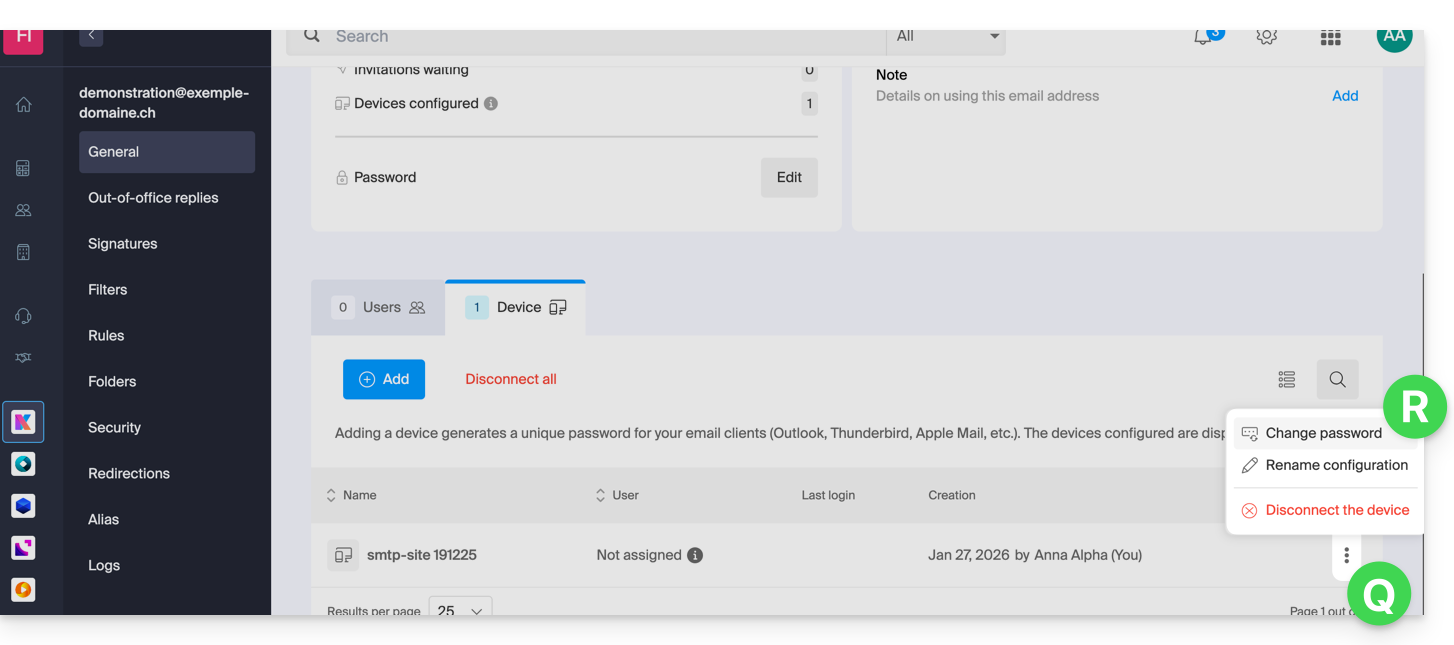
- Click on the action menu ⋮ located to the right of the device just created and click on Modify the password:
- Click on the button on the far right of the field to generate a new random password and/or enter the secure characters you wish to use (16 minimum) for the new password, then click on the button to save the modification:
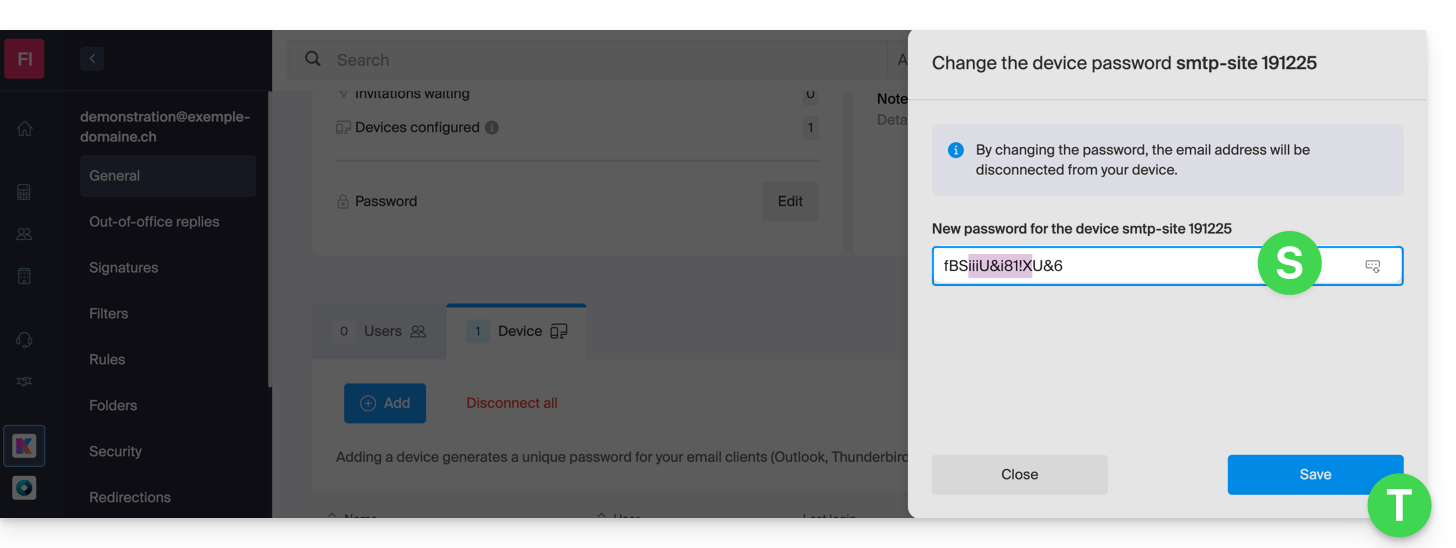
- There you go, the password that replaces the old one is displayed permanently, you can enter it on your device(s) in place of the previous one (be careful, it will not be possible to display it again later).
Do you need a password for a secondary and temporary user? No problem, generate a second one!
- Click on the button to Add another device:
- Then choose to not specify a particular user, and enter a name that allows you to identify the reason why you created this device (here the user needs a password for an intern for a week):
- There you go, the password is displayed, you can use it as you wish (be careful, it will not be possible to display it again later, however, as before, it will of course be possible to modify it or generate a new one):
Alternative: create a password for a user
Rather than creating a password yourself and having to communicate it to the user later, you can directly allow a user who does not have as many permissions as you to obtain the password for the device they need:
- Add the new user (existing in the Organization or not) as described in this other guide:

- Once the user is added, switch to the devices tab to add a new device:
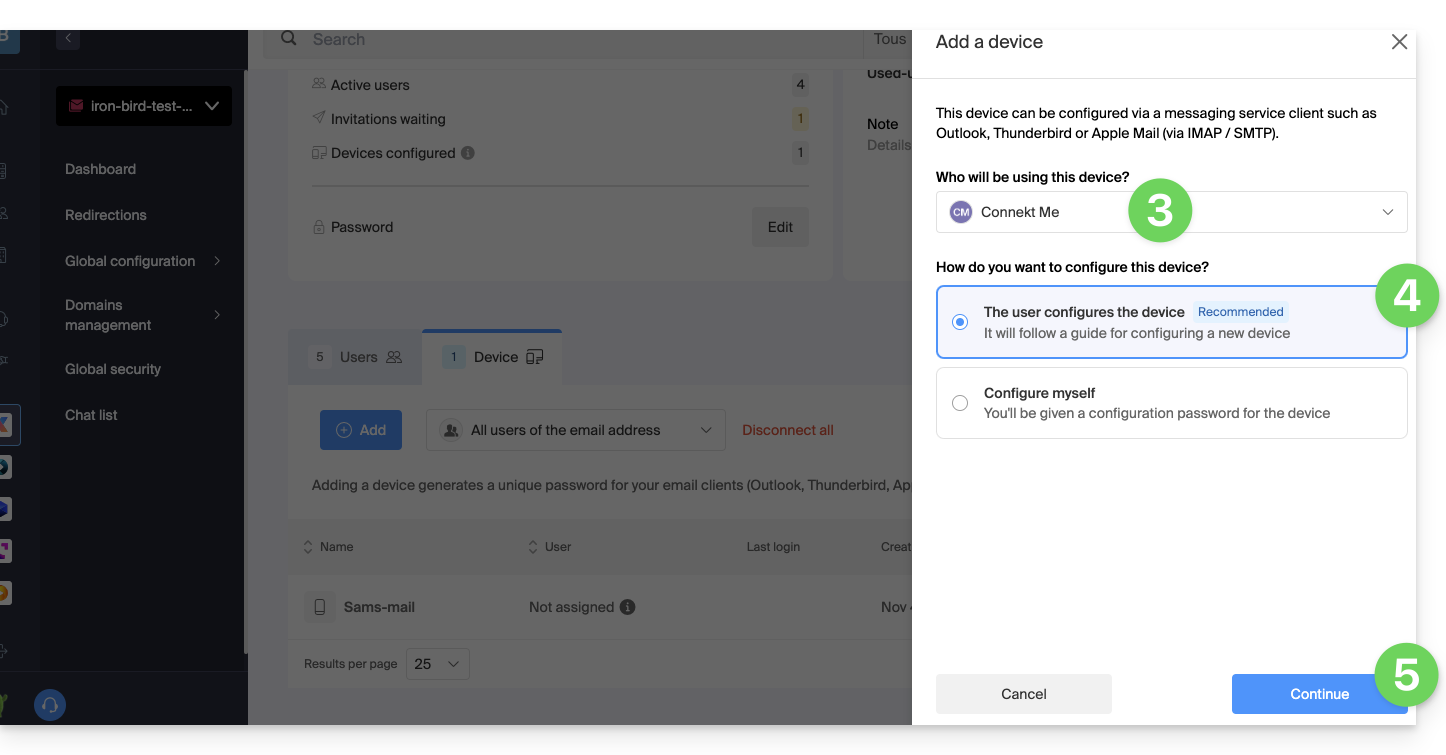
- If necessary, enter the password to log in to your Infomaniak account and then select the user created in step 1.
- Click on the first option to send a setup assistant for the user's device.
- Click on the Continue button:
- Copy the invitation link valid for 30 days to send to the user.
- If necessary, send the invitation to the user's email address:
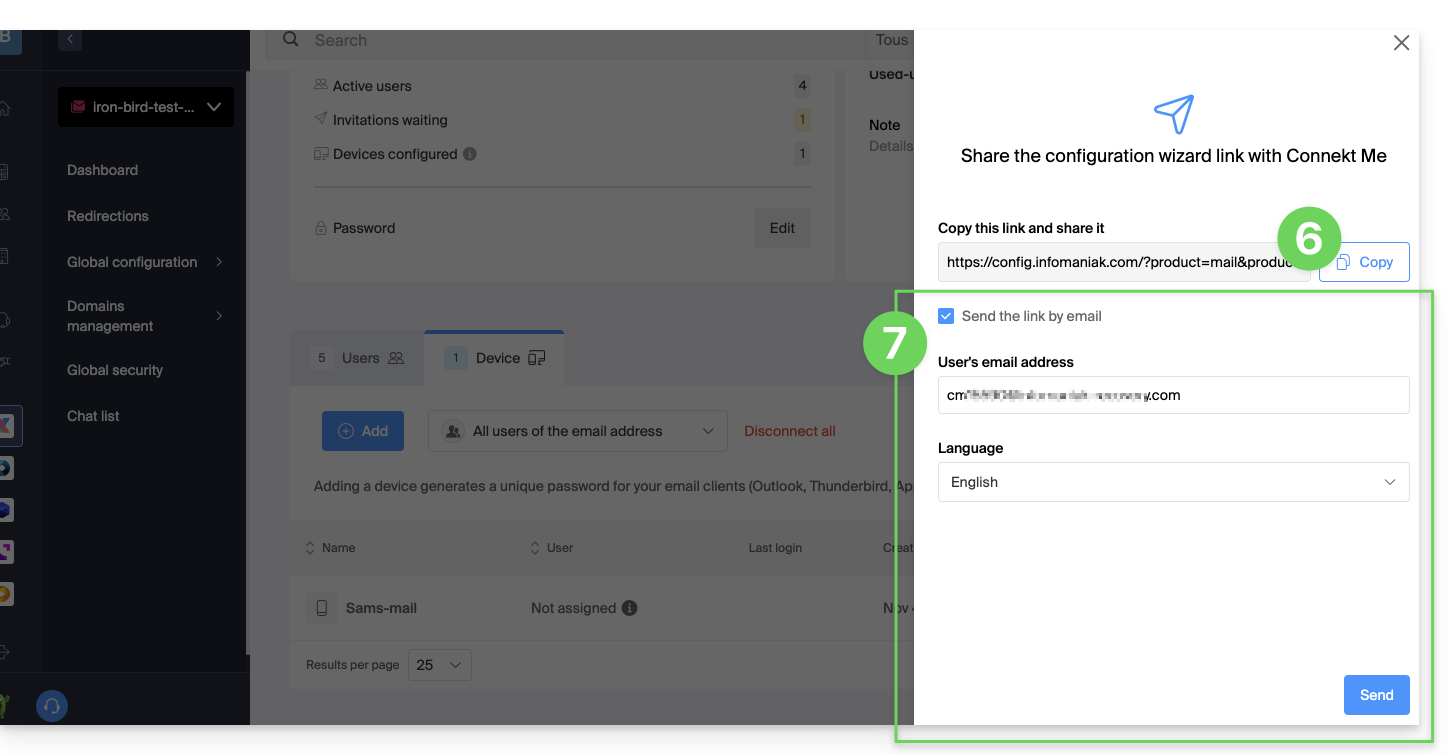
In point 4 above, you can also choose to generate a password:
- The created password will be displayed, you can modify it one last time, copy it, and keep it safe (password manager, for example); it will no longer be able to be displayed afterward.
Modify or remove an existing password
When access is no longer necessary, revoke only the password concerned: other accesses to the email address remain active.
Link to this FAQ: https://faq.infomaniak.com/1321
Has this FAQ been helpful?