Knowledge base
1000 FAQs, 500 tutorials and instructional videos. Here, there are only solutions!
Create and define a default calendar in Infomaniak Calendar
This guide explains how to create an additional calendar in the Infomaniak Calendar web app (online service ksuite.infomaniak.com/calendar) and then set it as the default.
Introduction
- Setting a default calendar, for example, allows you to speed up the creation of new events because you will no longer need to change the calendar each time you create a new event.
- You can only set calendars that you directly own as the default.
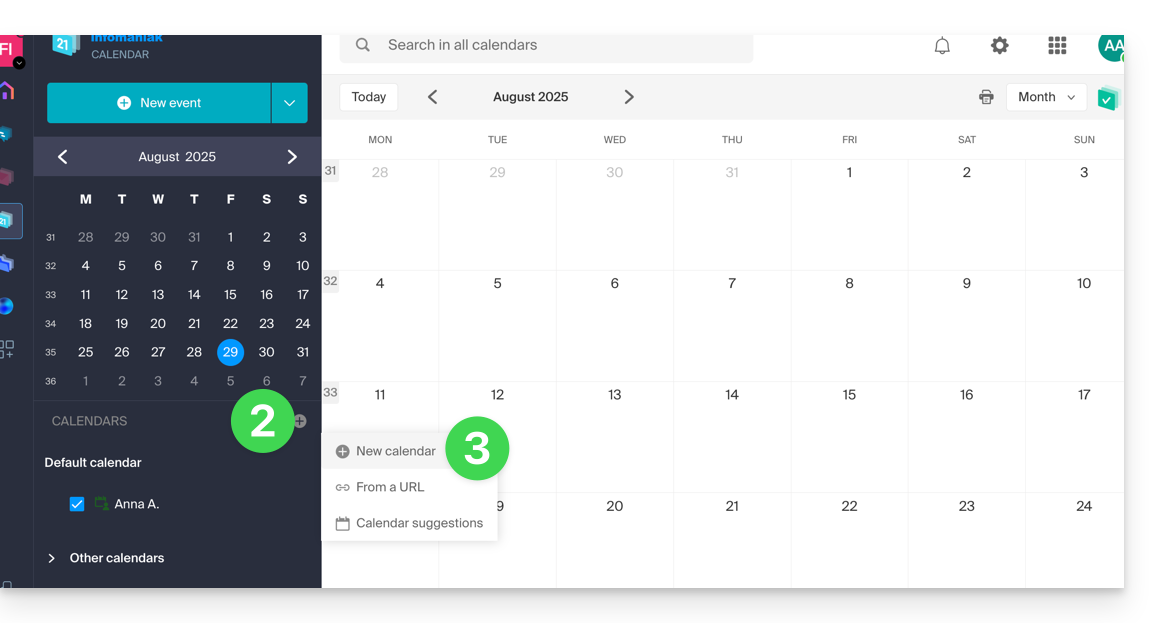
Add a new calendar
To create an additional calendar:
- Click here to access the Infomaniak Calendar web app (online service ksuite.infomaniak.com/calendar).
- Click on in the left-hand menu.
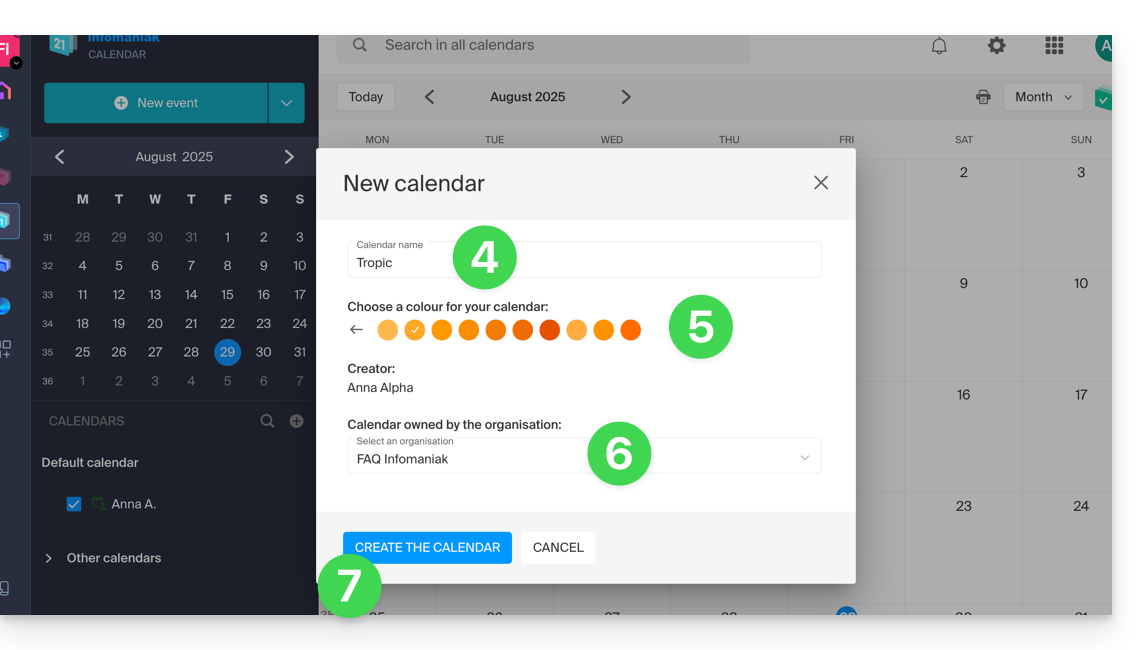
- Click on New calendar:
- Enter a name for the calendar.
- Choose a color.
- Choose one of your Organizations in which to create the calendar.
- Click the button to create the calendar:
Change the default calendar
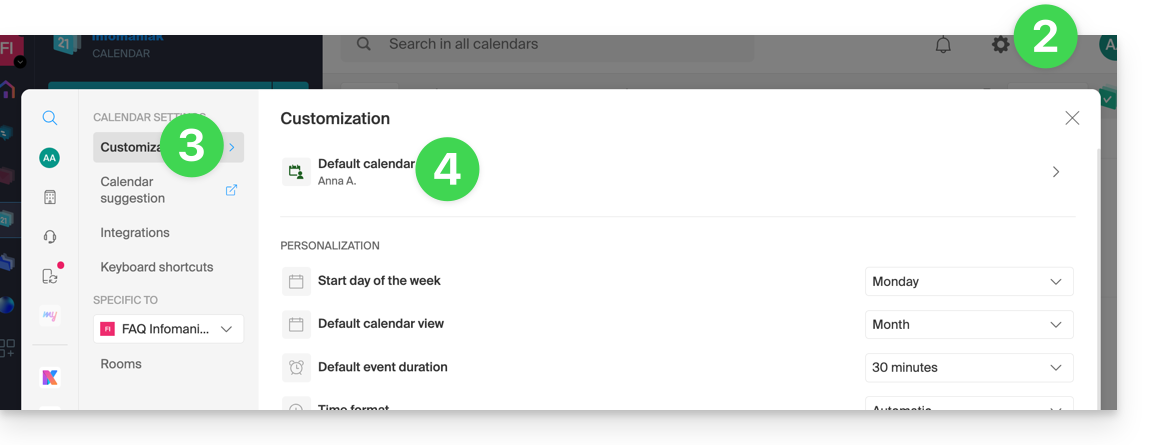
To set one of your calendars as the default:
- Click here to access the Infomaniak Calendar web app (online service ksuite.infomaniak.com/calendar).
- Click on the Settings icon in the top right corner.
- Click on Customization in the left-hand menu.
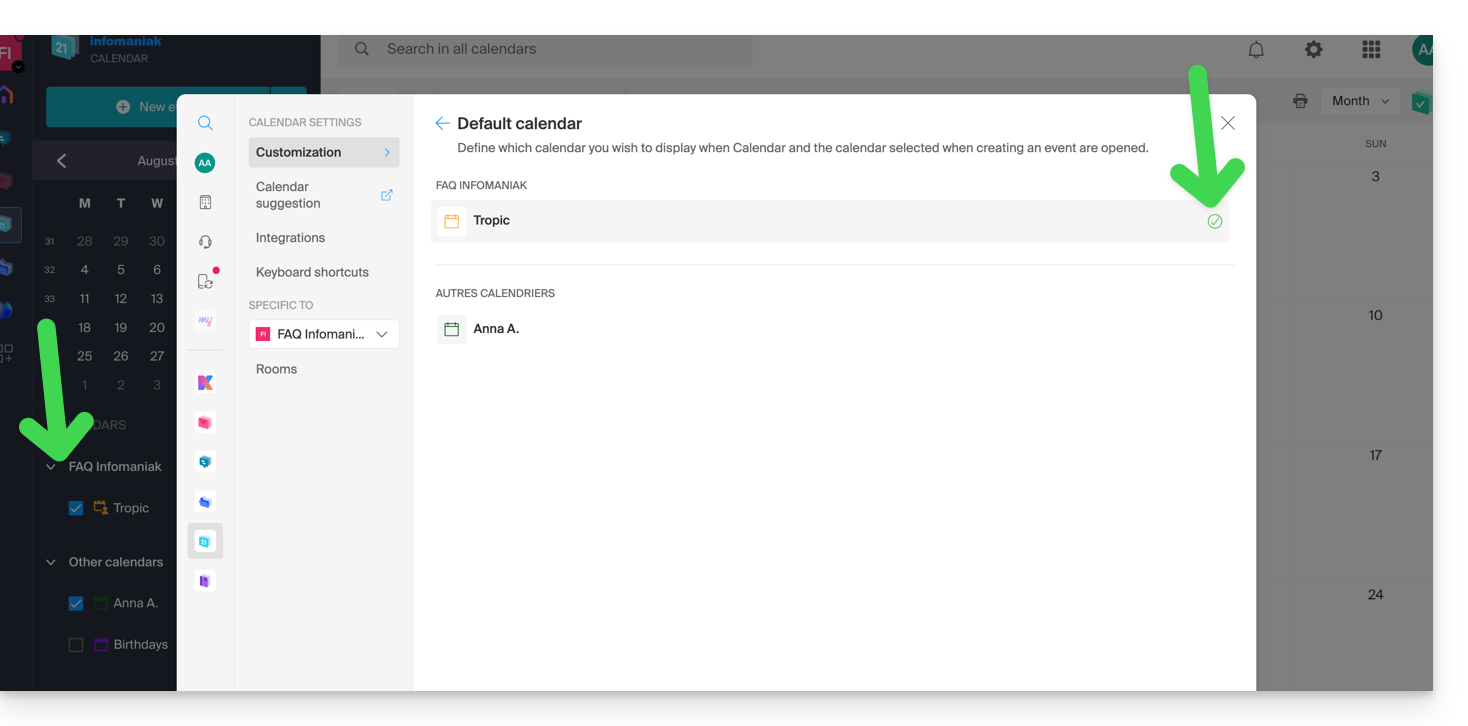
- Click on the default calendar to open the options menu:
- Choose the desired calendar in the Default Calendar field; it will be placed in the first position in your calendar lists:
Link to this FAQ: https://faq.infomaniak.com/1078
Has this FAQ been helpful?