Base de conhecimento
1000 perguntas frequentes, 500 tutoriais e vídeos explicativos. Aqui, você encontra apenas soluções!
Este guia explica como usar a ferramenta Newsletter da Infomaniak com um nome de domínio externo (não gerenciado na Infomaniak).
Pré-requisitos
- O nome de domínio deve ser de sua propriedade.
- Os domínios sinônimos e o domínio principal não podem ser usados para enviar newsletters.
- É possível configurar seus sinônimos como alias.
Associar um domínio externo
Para aceder à gestão dos domínios de envio de newsletters:
- Clique aqui para acessar o gerenciamento do seu produto no painel de controle Infomaniak (precisa de ajuda?).
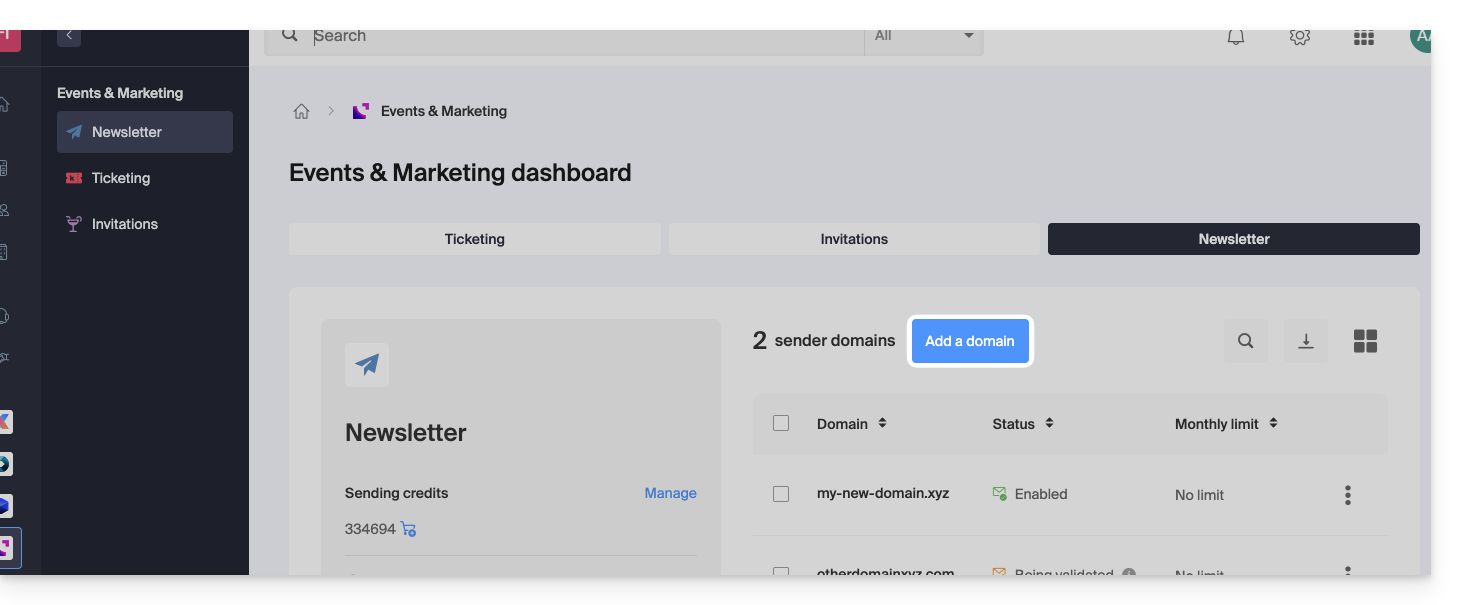
- Se você já possui uma newsletter, clique em Adicionar domínio:
- Caso contrário, clique em Começar gratuitamente:
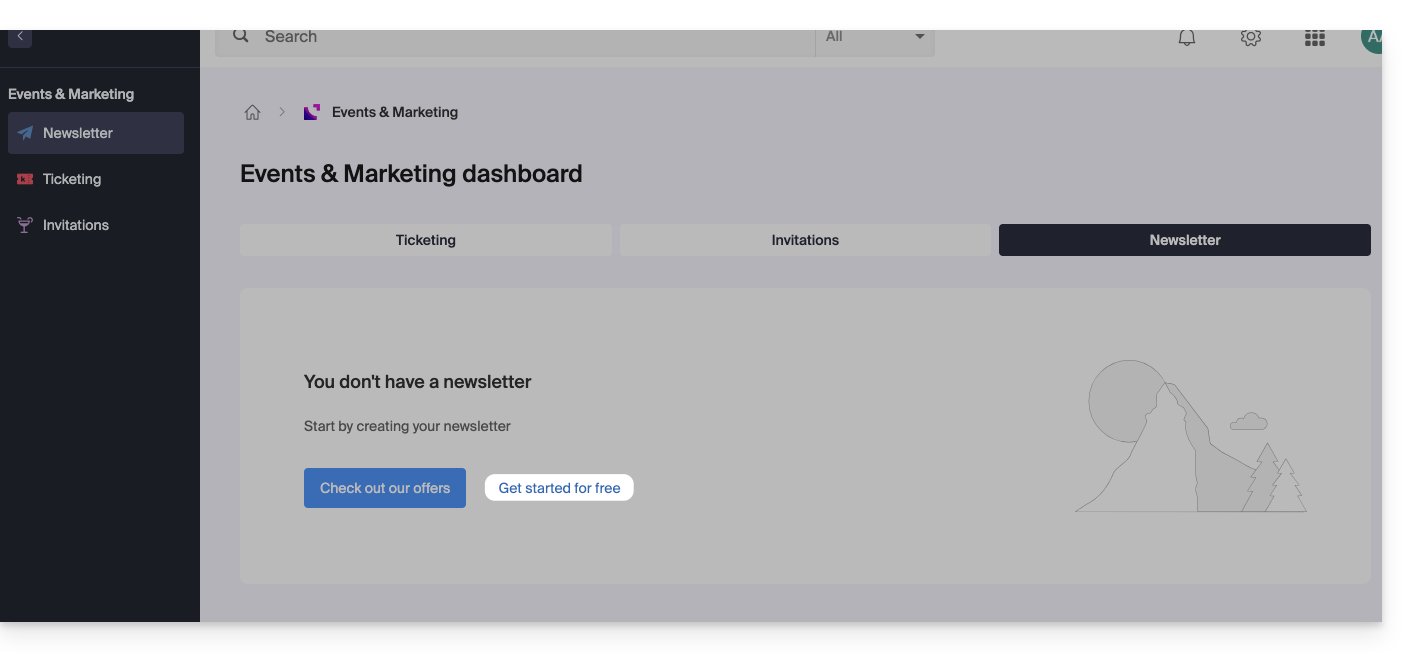
- Caso contrário, clique em Começar gratuitamente:
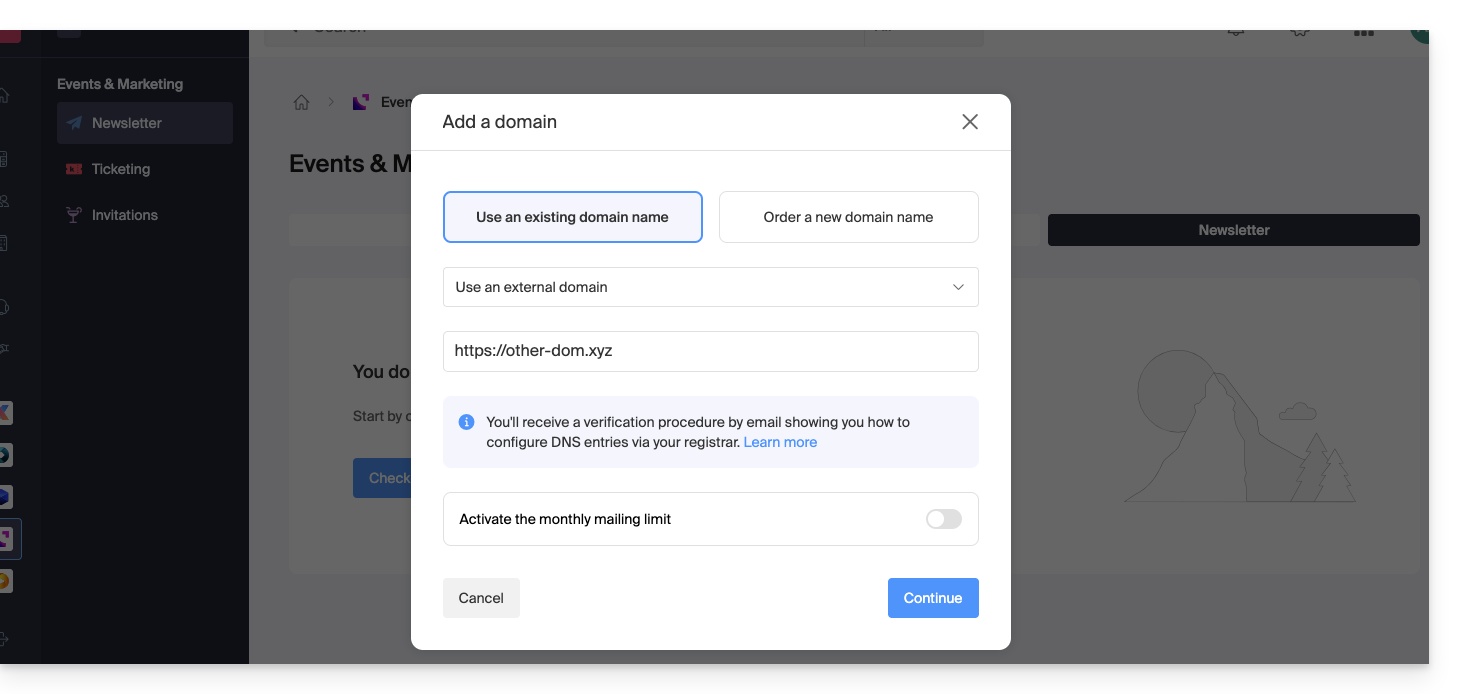
- Selecione Outro domínio no menu suspenso antes de inserir (ou insira diretamente) o nome de domínio com o qual deseja enviar newsletters.
- Escolha um limite mensal, se desejar.
- Clique no botão para Continuar:
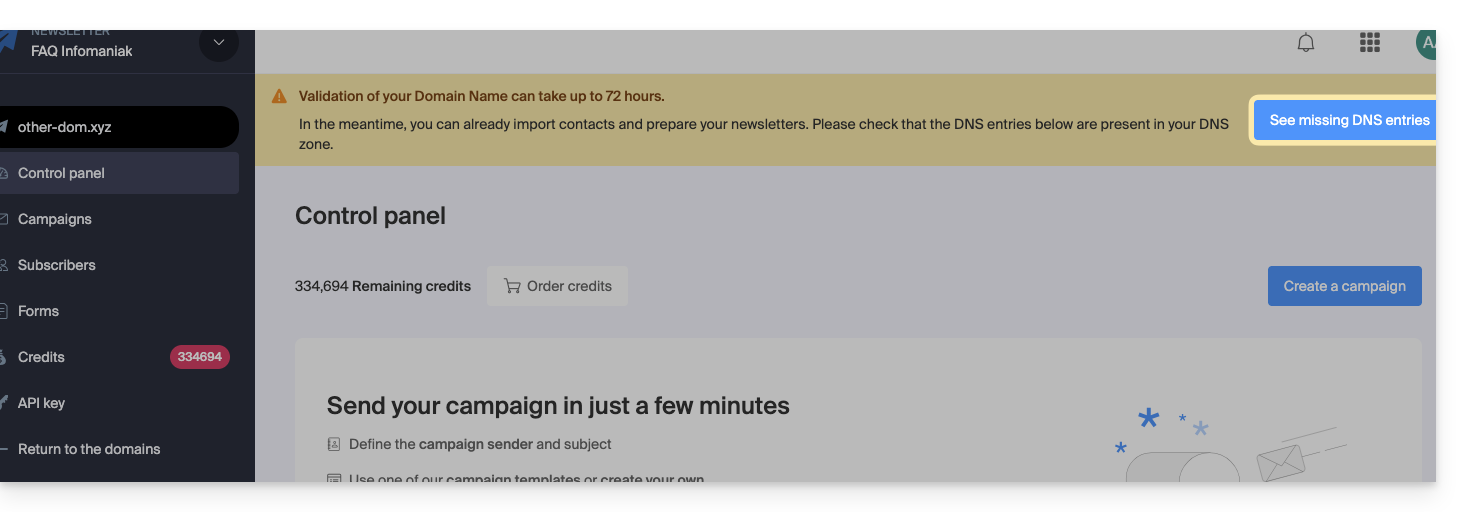
- Adicione no seu registrador os registos TXT / CNAME / DKIM que receberá por e-mail e que poderá consultar na interface ao clicar no botão:
Link para esta FAQ: https://faq.infomaniak.com/2241
Esta seção de perguntas frequentes foi útil?
Este guia explica como ser notificado por e-mail quando um novo assinante se inscreve na sua Newsletter através de um dos seus formulários de contacto.
Ser notificado quando um novo contacto se inscreve
Para aceder à sua Newsletter:
- Clique aqui para aceder à gestão da sua Newsletter no Manager Infomaniak (precisa de ajuda?).
- Clique, se necessário, no nome do domínio correspondente na tabela que aparece:
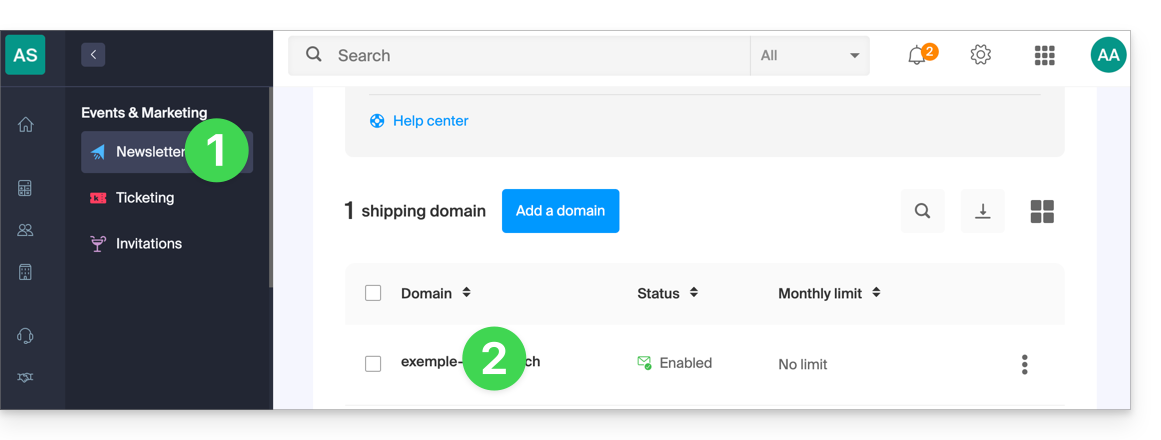
- A interface da Newsletter é exibida.
Em seguida, para aceder ao formulário de inscrição na Newsletter:
- Clique em Formulários no menu lateral esquerdo.
- Crie ou edite o formulário cujas inscrições pretende acompanhar:
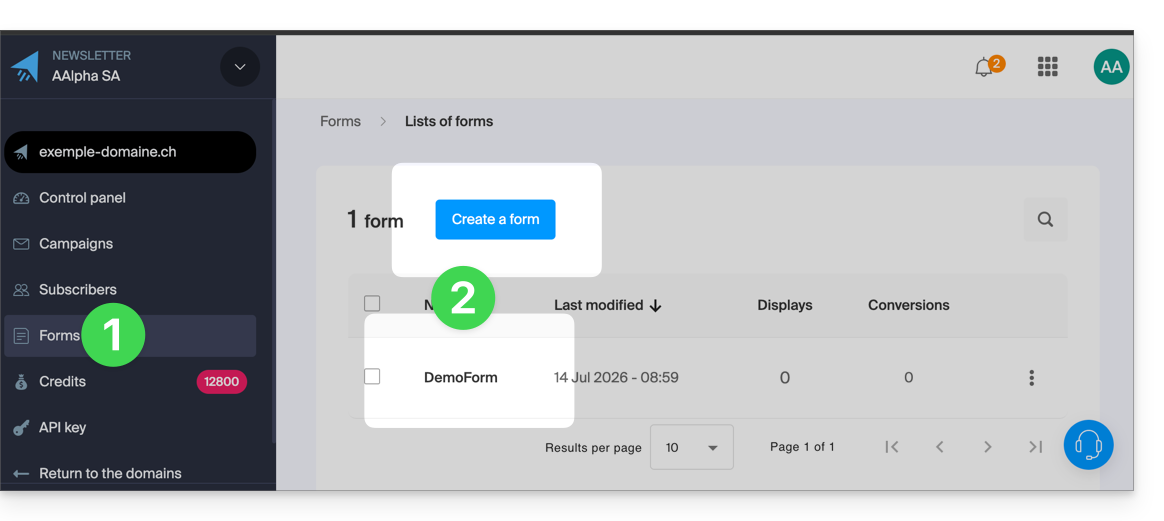
- Na parte inferior da página, marque a caixa Receber um e-mail quando houver uma nova inscrição.
- Clique no botão azul Guardar para validar as alterações:
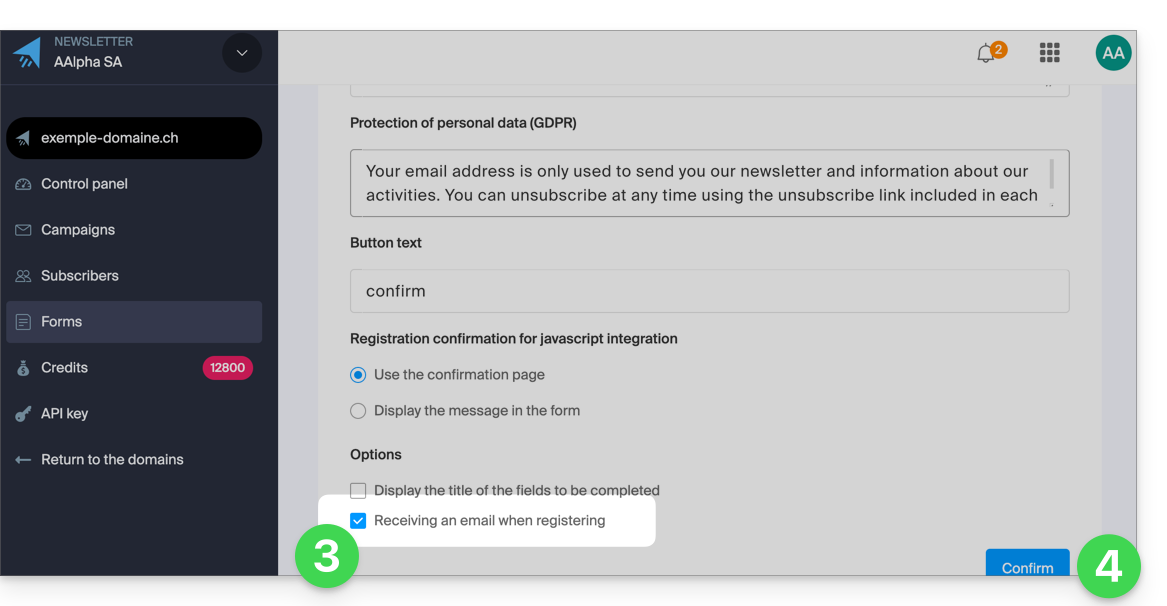
Receberá agora um e-mail assim que um contacto se inscrever na sua Newsletter através deste formulário de inscrição.
Basta desmarcar a caixa a qualquer momento para deixar de receber notificações por e-mail.
Link para esta FAQ: https://faq.infomaniak.com/2245
Esta seção de perguntas frequentes foi útil?
Este guia explica como criar e gerenciar seus tokens de autenticação para interagir com a API Infomaniak de forma segura.
Introdução
- Características dos tokens:
- Número: sem limite de criação
- Validade: ilimitada por padrão (personalizável no momento da criação)
- Inatividade: um token é automaticamente desativado se não for utilizado durante um ano
- Exemplo de utilização:
Gerenciar os tokens da API
Ao criar, você deve definir a aplicação e o escopo de acesso:
- Acesse a gestão de tokens no painel de controle (precisa de ajuda?).
- Clique em Criar um token:
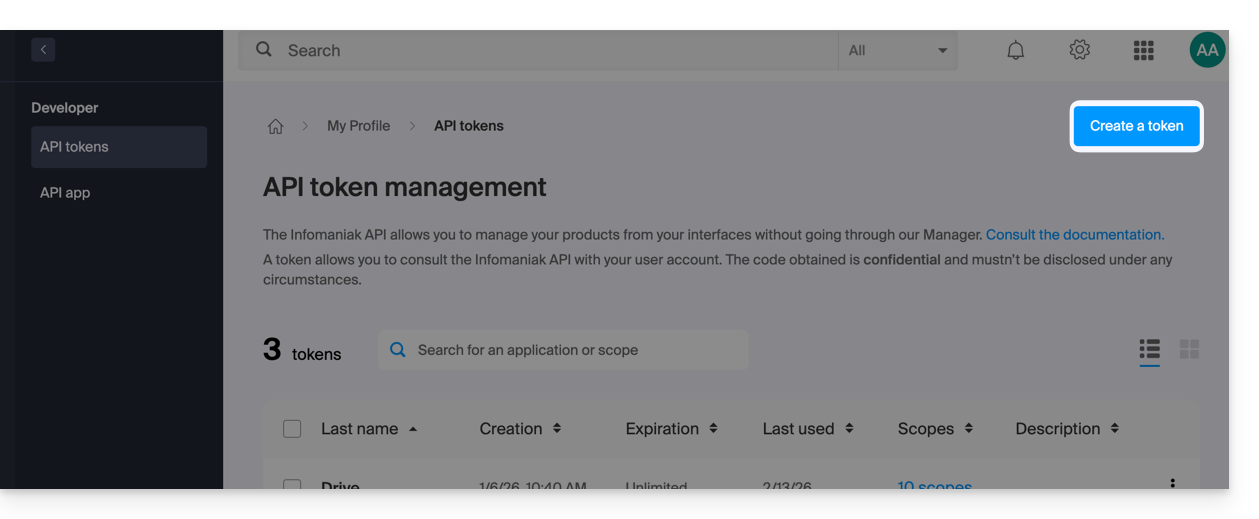
- Selecione o produto/aplicativo e o período de validade:
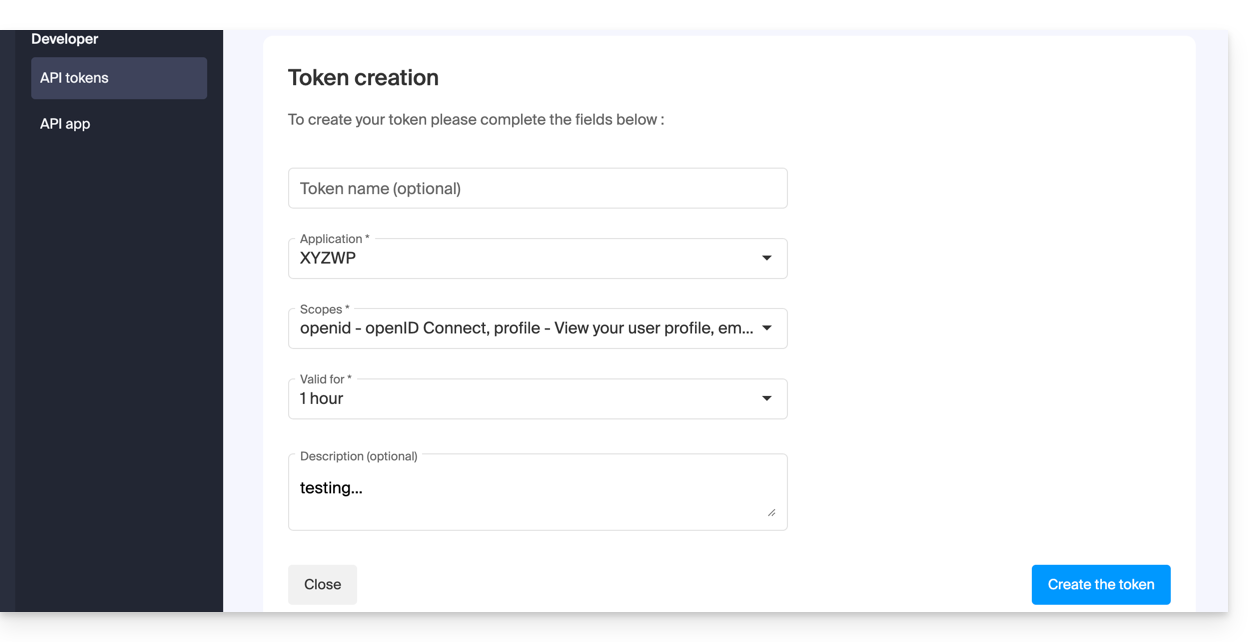
- Confirme a operação com a sua senha de conta.
- Importante: copie o token e guarde-o num local seguro; ele não será mais exibido posteriormente.
Para remover tokens, selecione-os e clique no botão de revogação que aparece: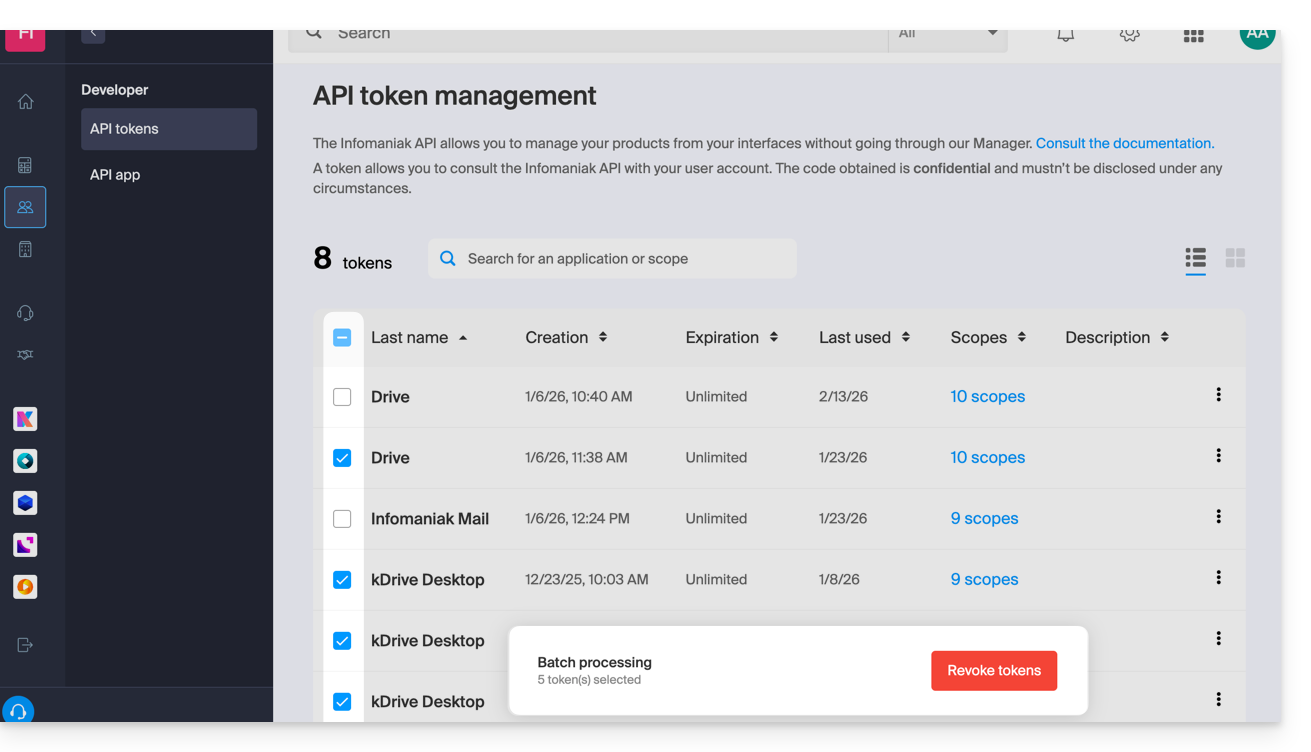
Link para esta FAQ: https://faq.infomaniak.com/2582
Esta seção de perguntas frequentes foi útil?
Este guia aborda a gestão dos formulários que permitem a inscrição na Newsletter que você gerencia na Infomaniak.
Pré-requisitos
- Ter acesso ao produto Newsletter.
- Ter criado pelo menos um formulário de inscrição.
Copiar o código necessário para integrar o formulário
Para aceder aos formulários da sua newsletter e obter o código de integração:
- Clique aqui para acessar o gerenciamento do seu produto no painel de controle Infomaniak (precisa de ajuda?).
- Clique diretamente no nome de domínio atribuído ao produto em questão.
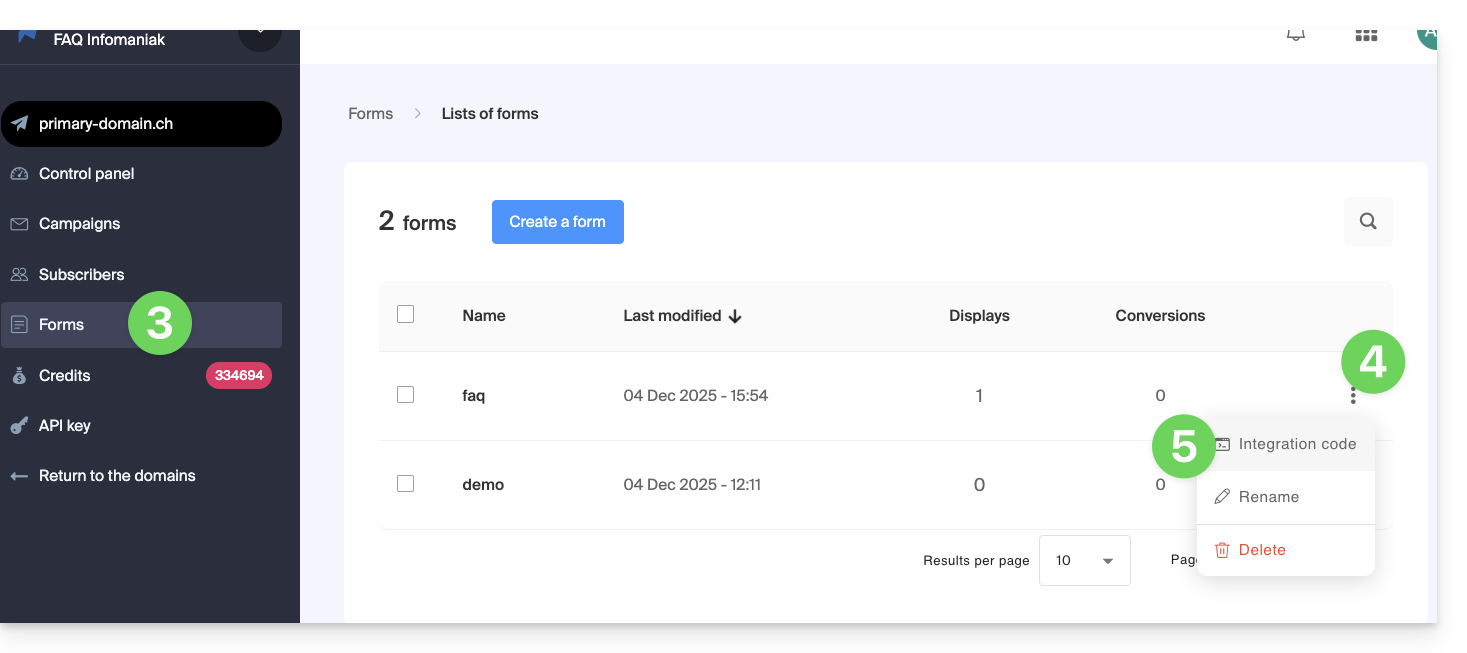
- Clique em Formulários no menu lateral esquerdo.
- Clique no menu de ação ⋮ à direita do item correspondente na tabela exibida.
- Clique em Código de incorporação:
- Escolha entre o separador JAVASCRIPT e HTML para obter um dos dois tipos de código, útil para inserir o seu formulário nas suas páginas, e clique no botão azul para copiar o código para a área de transferência:
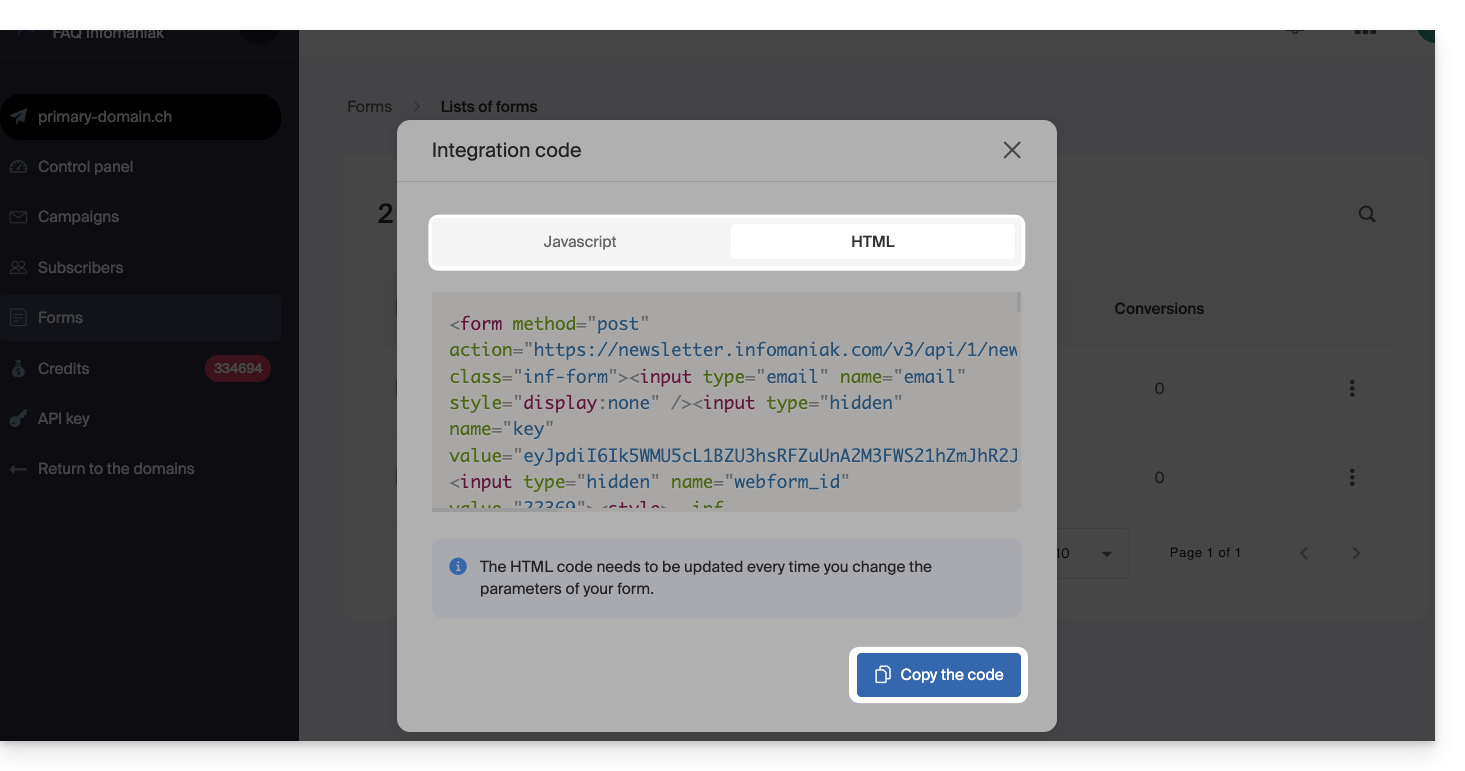
O código HTML precisa ser atualizado sempre que você alterar as configurações do seu formulário (portanto, será necessário reinserir o código HTML em caso de alterações no editor do formulário de inscrição).
Inserir o formulário num site…
Pode inserir o mesmo formulário em diferentes locais. Também pode criar vários formulários (para preencher diferentes grupos de contactos, por exemplo). Obviamente, uma newsletter é enviada apenas uma vez por contacto, mesmo que este esteja presente em diferentes listas/grupos:
… com o WordPress
- Insira um novo bloco HTML no local desejado:
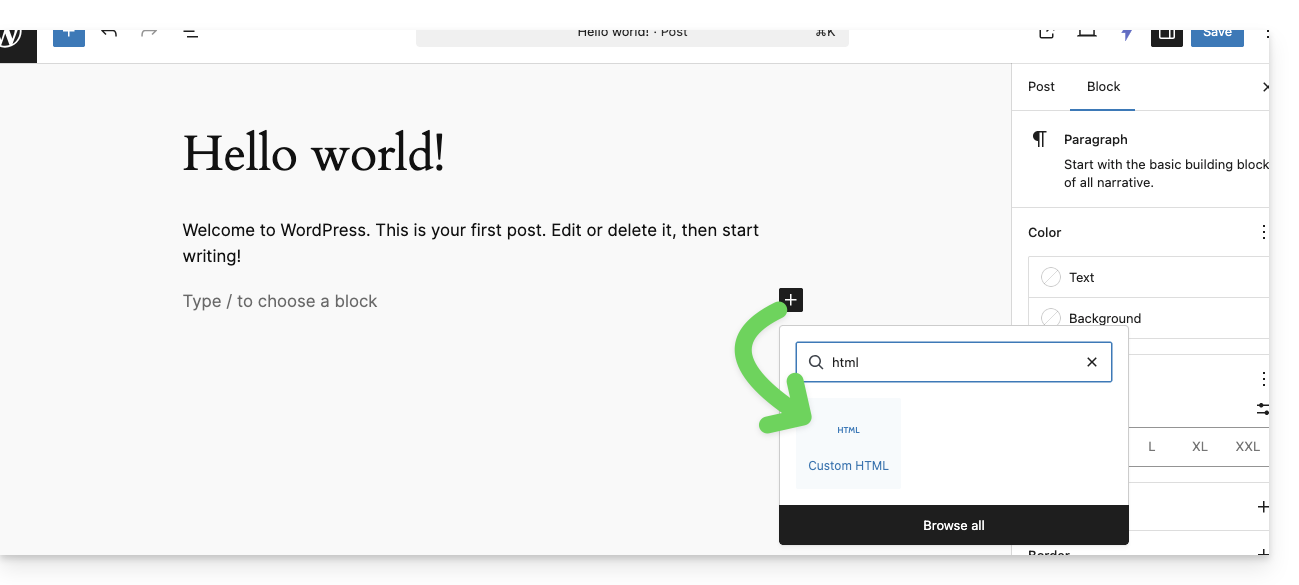
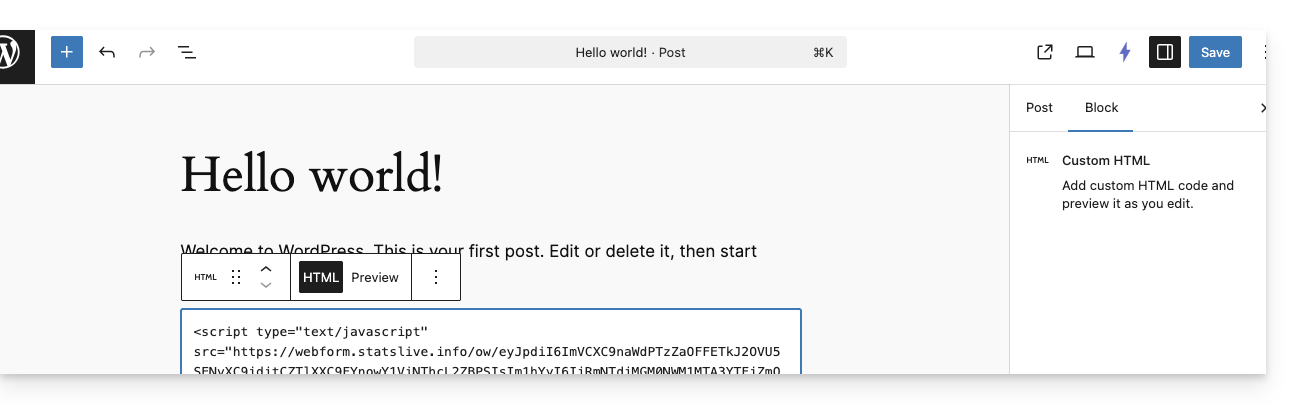
- Cole o código HTML ou JAVASCRIPT obtido no passo 6 acima e salve:
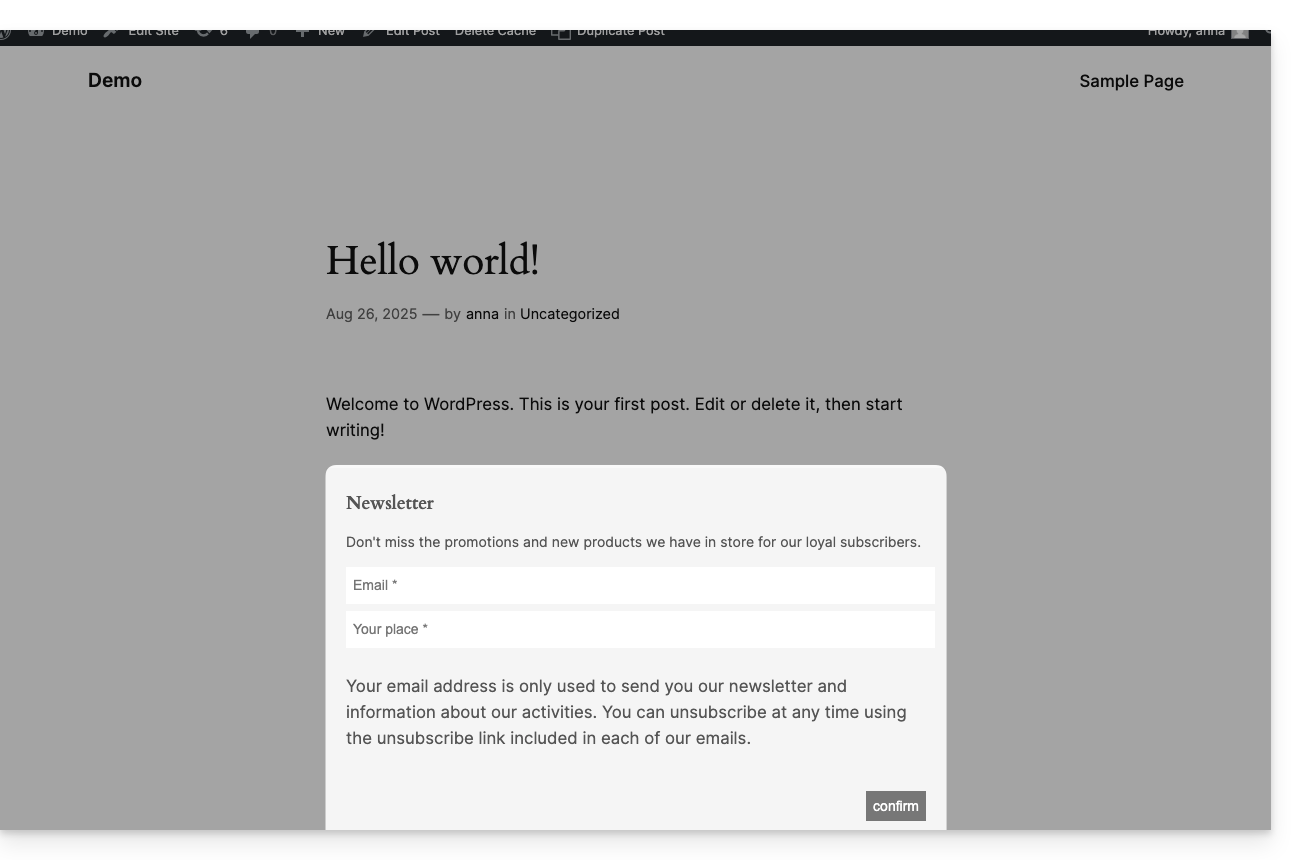
- O formulário configurado anteriormente será exibido no seu site:
… com o Site Creator Infomaniak
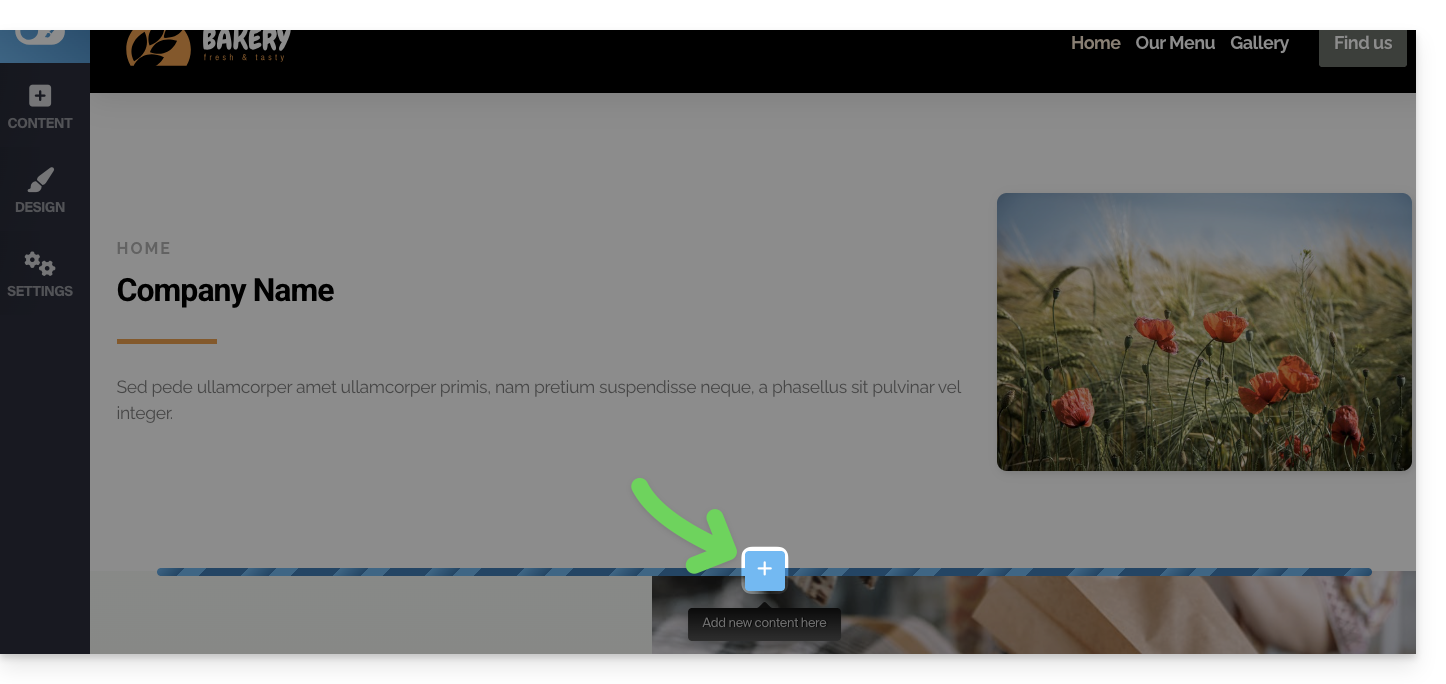
- Passe o cursor sobre o local desejado na página para exibir um botão MAIS, que permite adicionar um bloco:
- Clique no botão MAIS para escolher um bloco de código HTML personalizado:
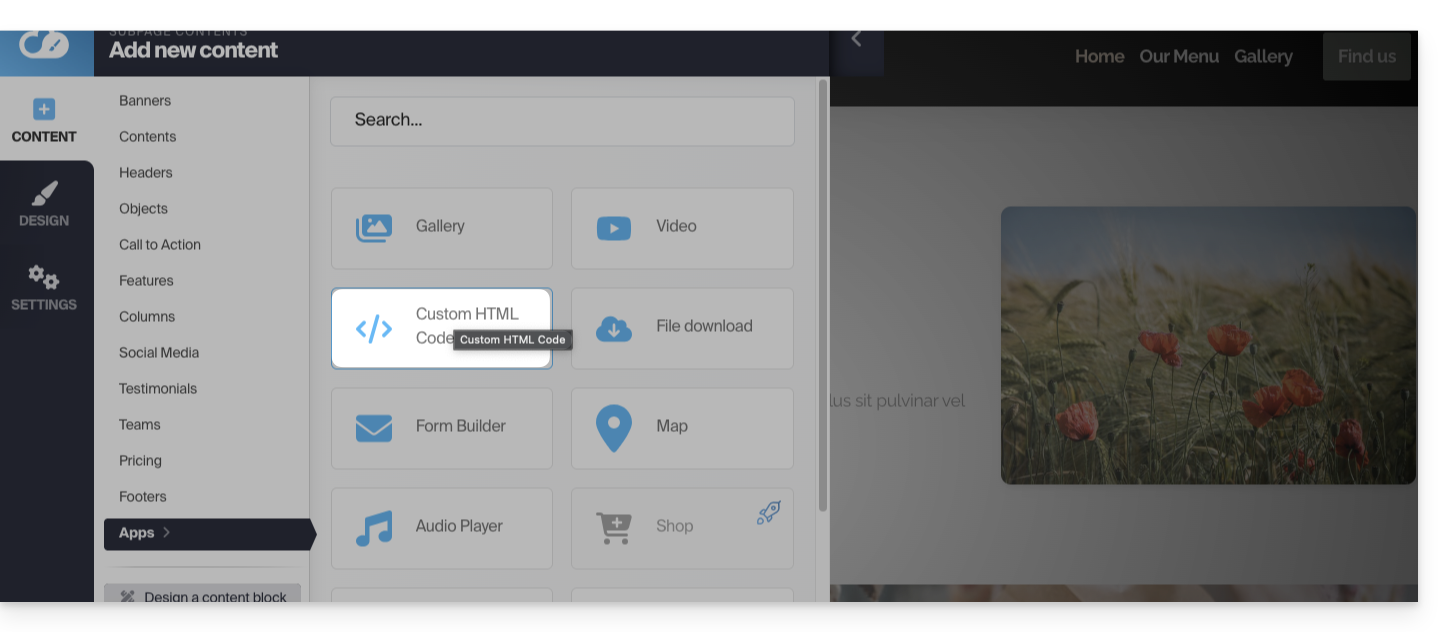
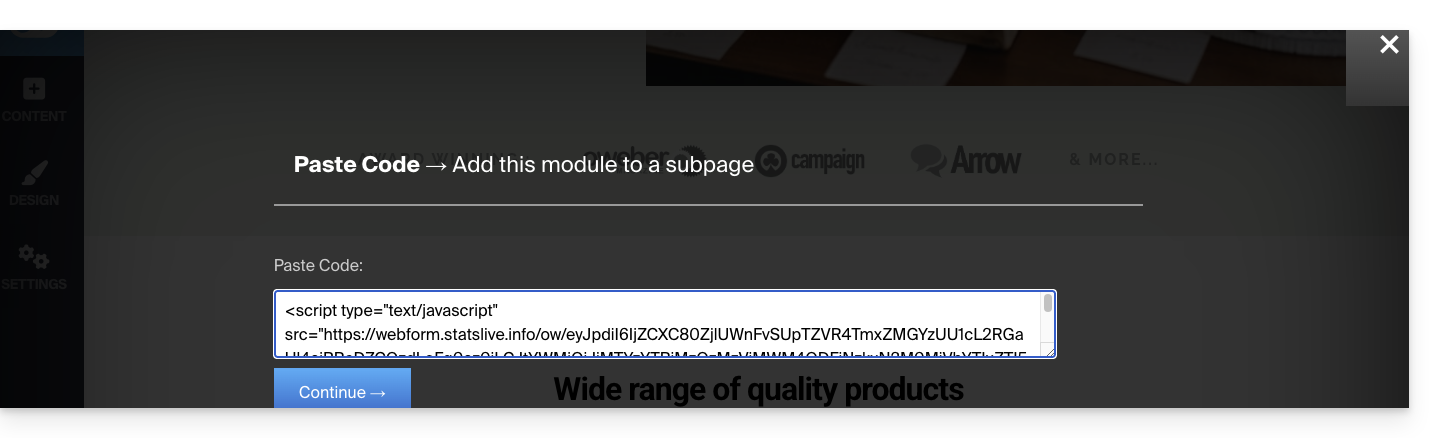
- Cole o código HTML ou JAVASCRIPT obtido no passo 6 acima e clique no botão para Continuar:
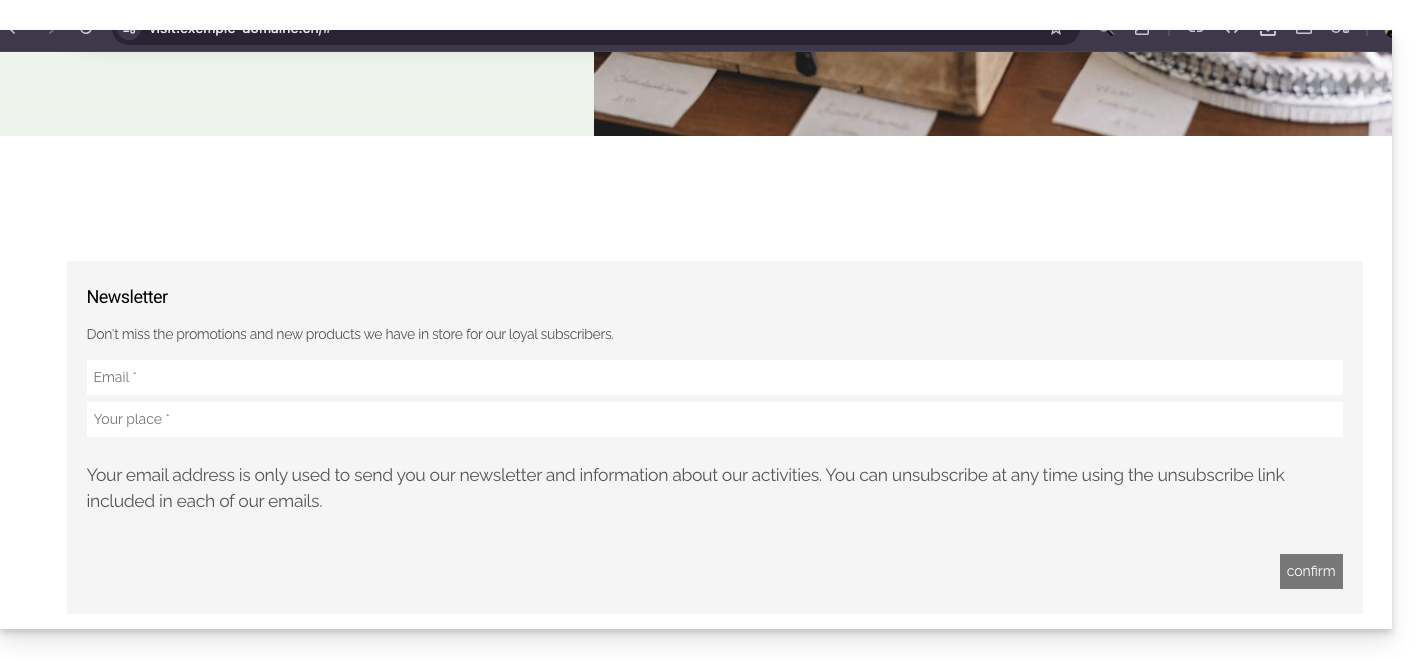
- O formulário é exibido em pré-visualização na sua página de edição e será exibido para os seus visitantes:
Link para esta FAQ: https://faq.infomaniak.com/2878
Esta seção de perguntas frequentes foi útil?