Base de conhecimento
1000 perguntas frequentes, 500 tutoriais e vídeos explicativos. Aqui, você encontra apenas soluções!
Understanding how to create a standard email address within an Infomaniak Mail service
This guide details the first of the three options (❓: help) available to you when adding a new email address to an Infomaniak Mail Service: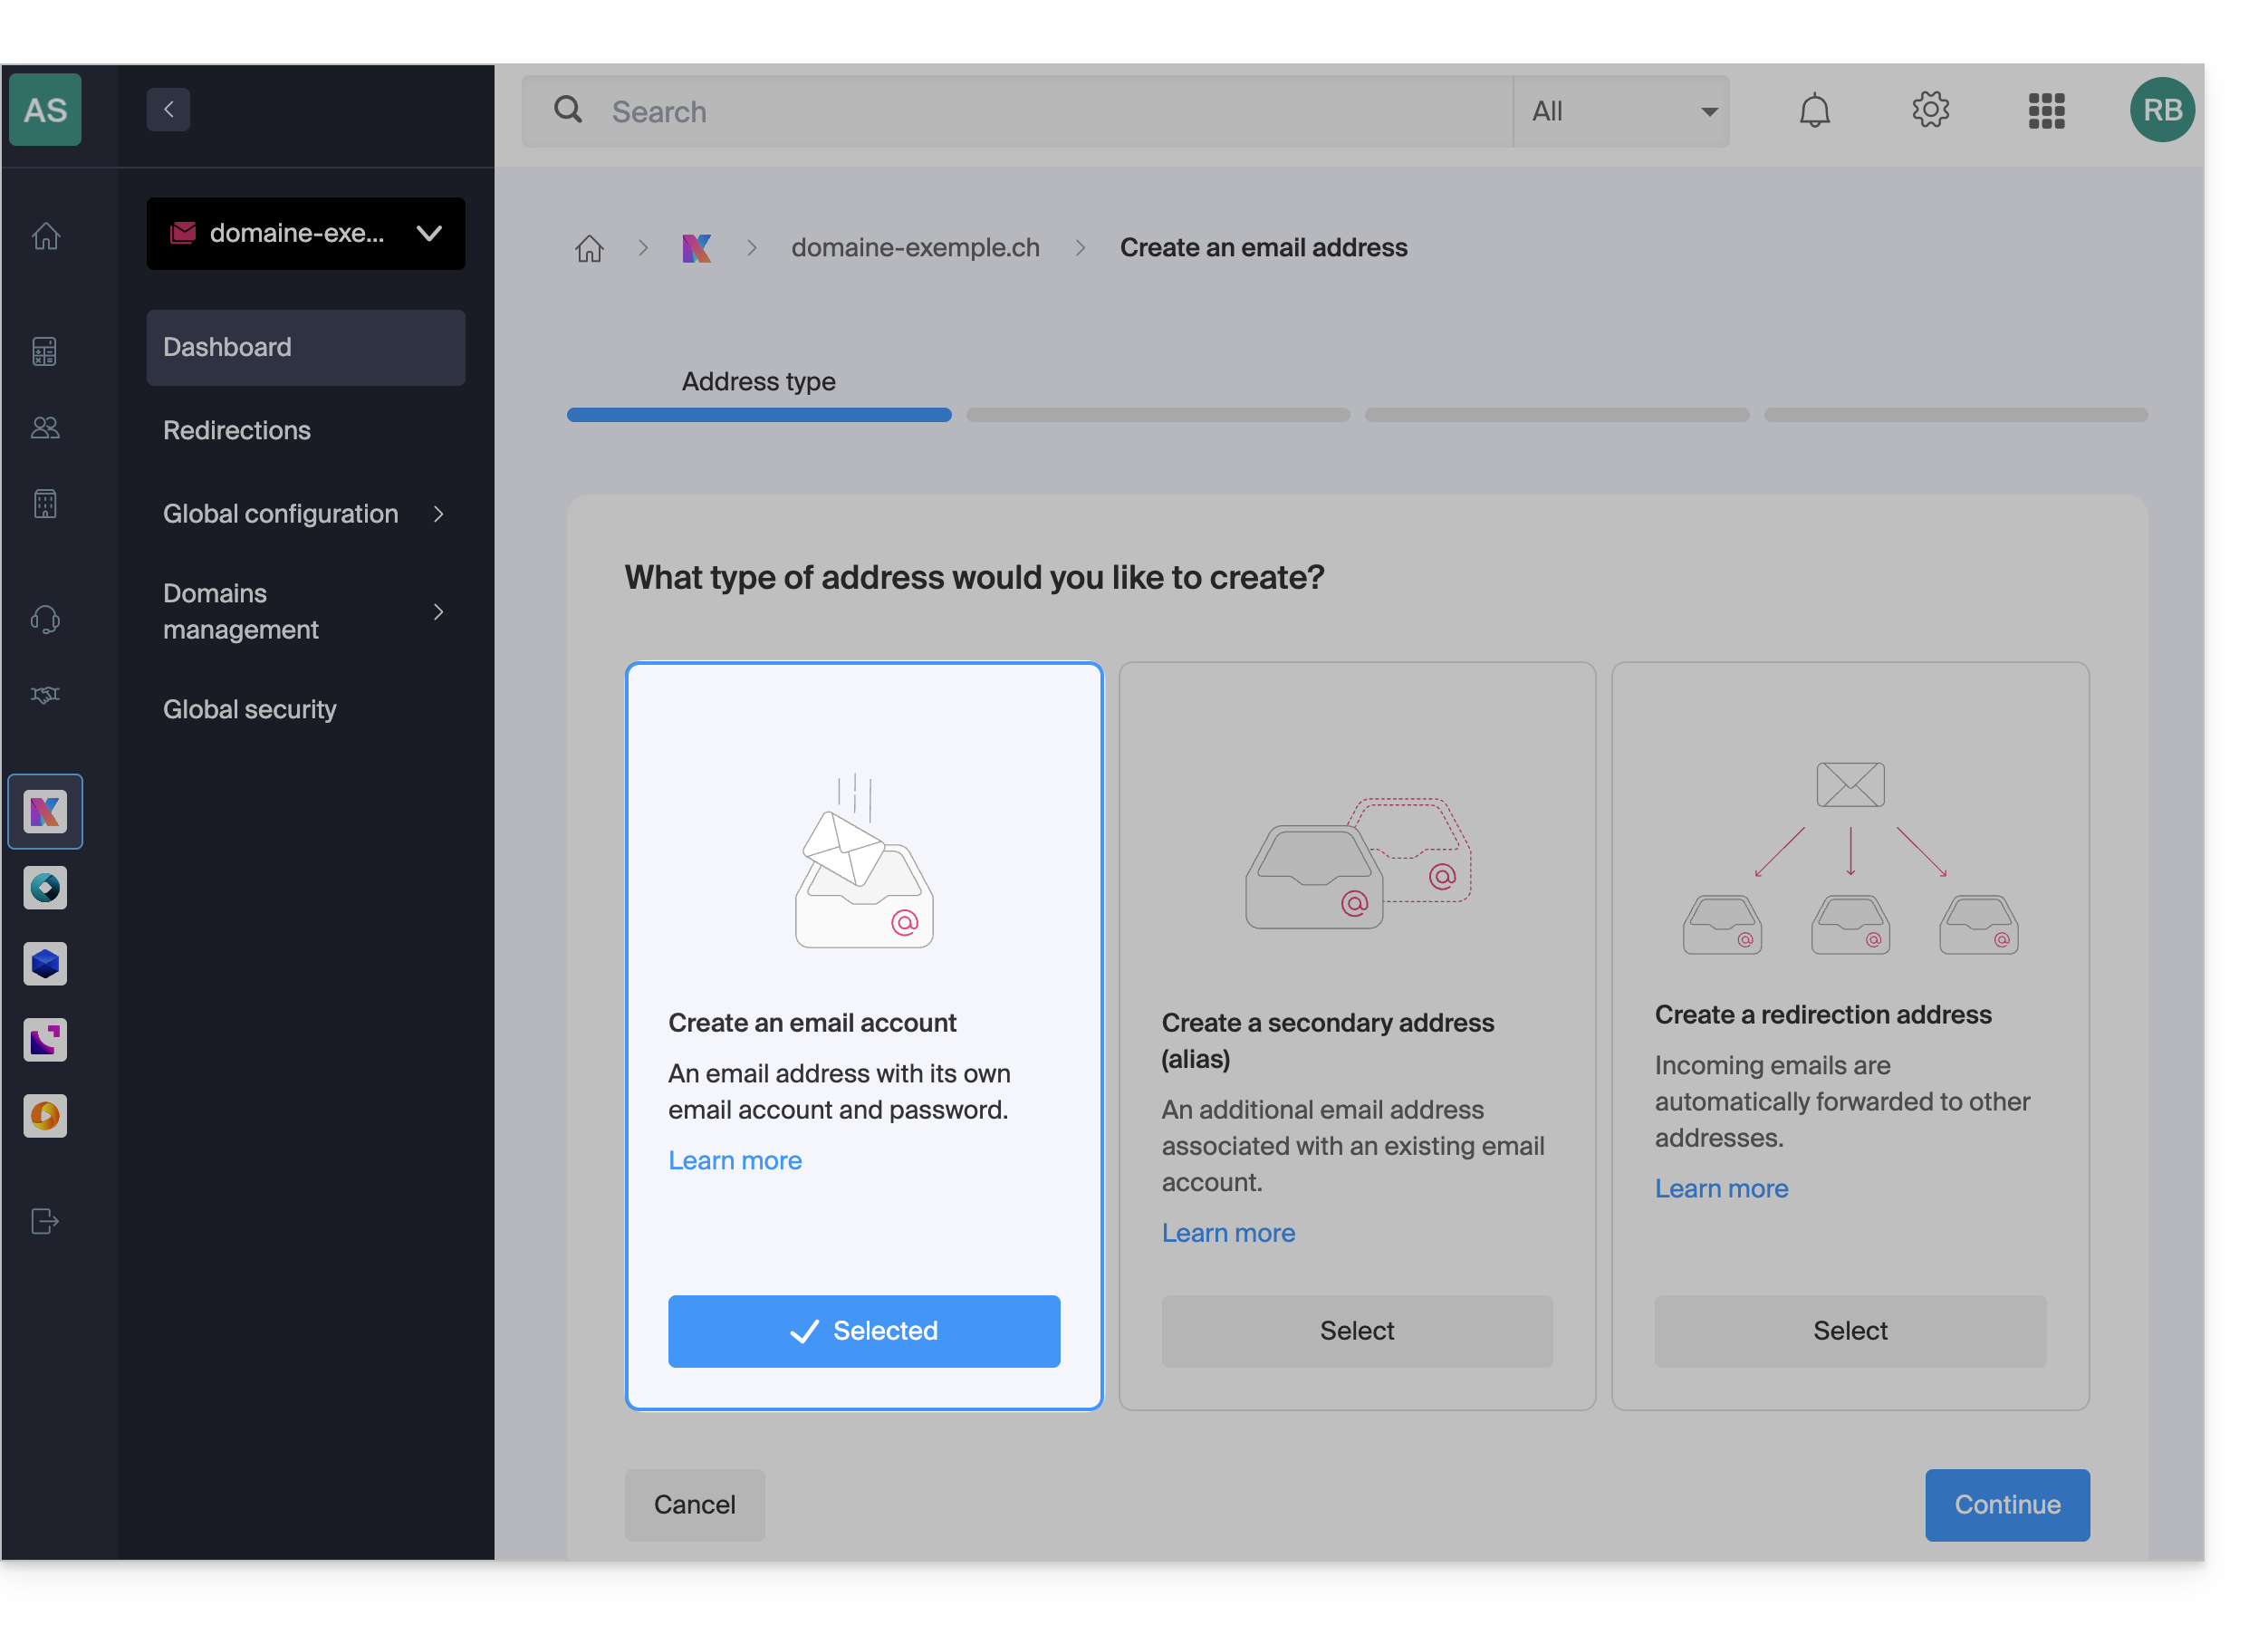
Prerequisites
- Have a Mail Service on your Infomaniak Manager (❓: help).
- Be at least an Administrator of the Organization (❓: help).
- Have a quota of available addresses or adjust it beforehand if necessary (❓: help).
- Follow the guide (❓: help) to begin adding a new email address, up to step 8.
Create a primary email address
Once you have followed the prerequisites above and reached step 8 of the main guide (❓: help), click in the text field to choose who will be able to view the email address: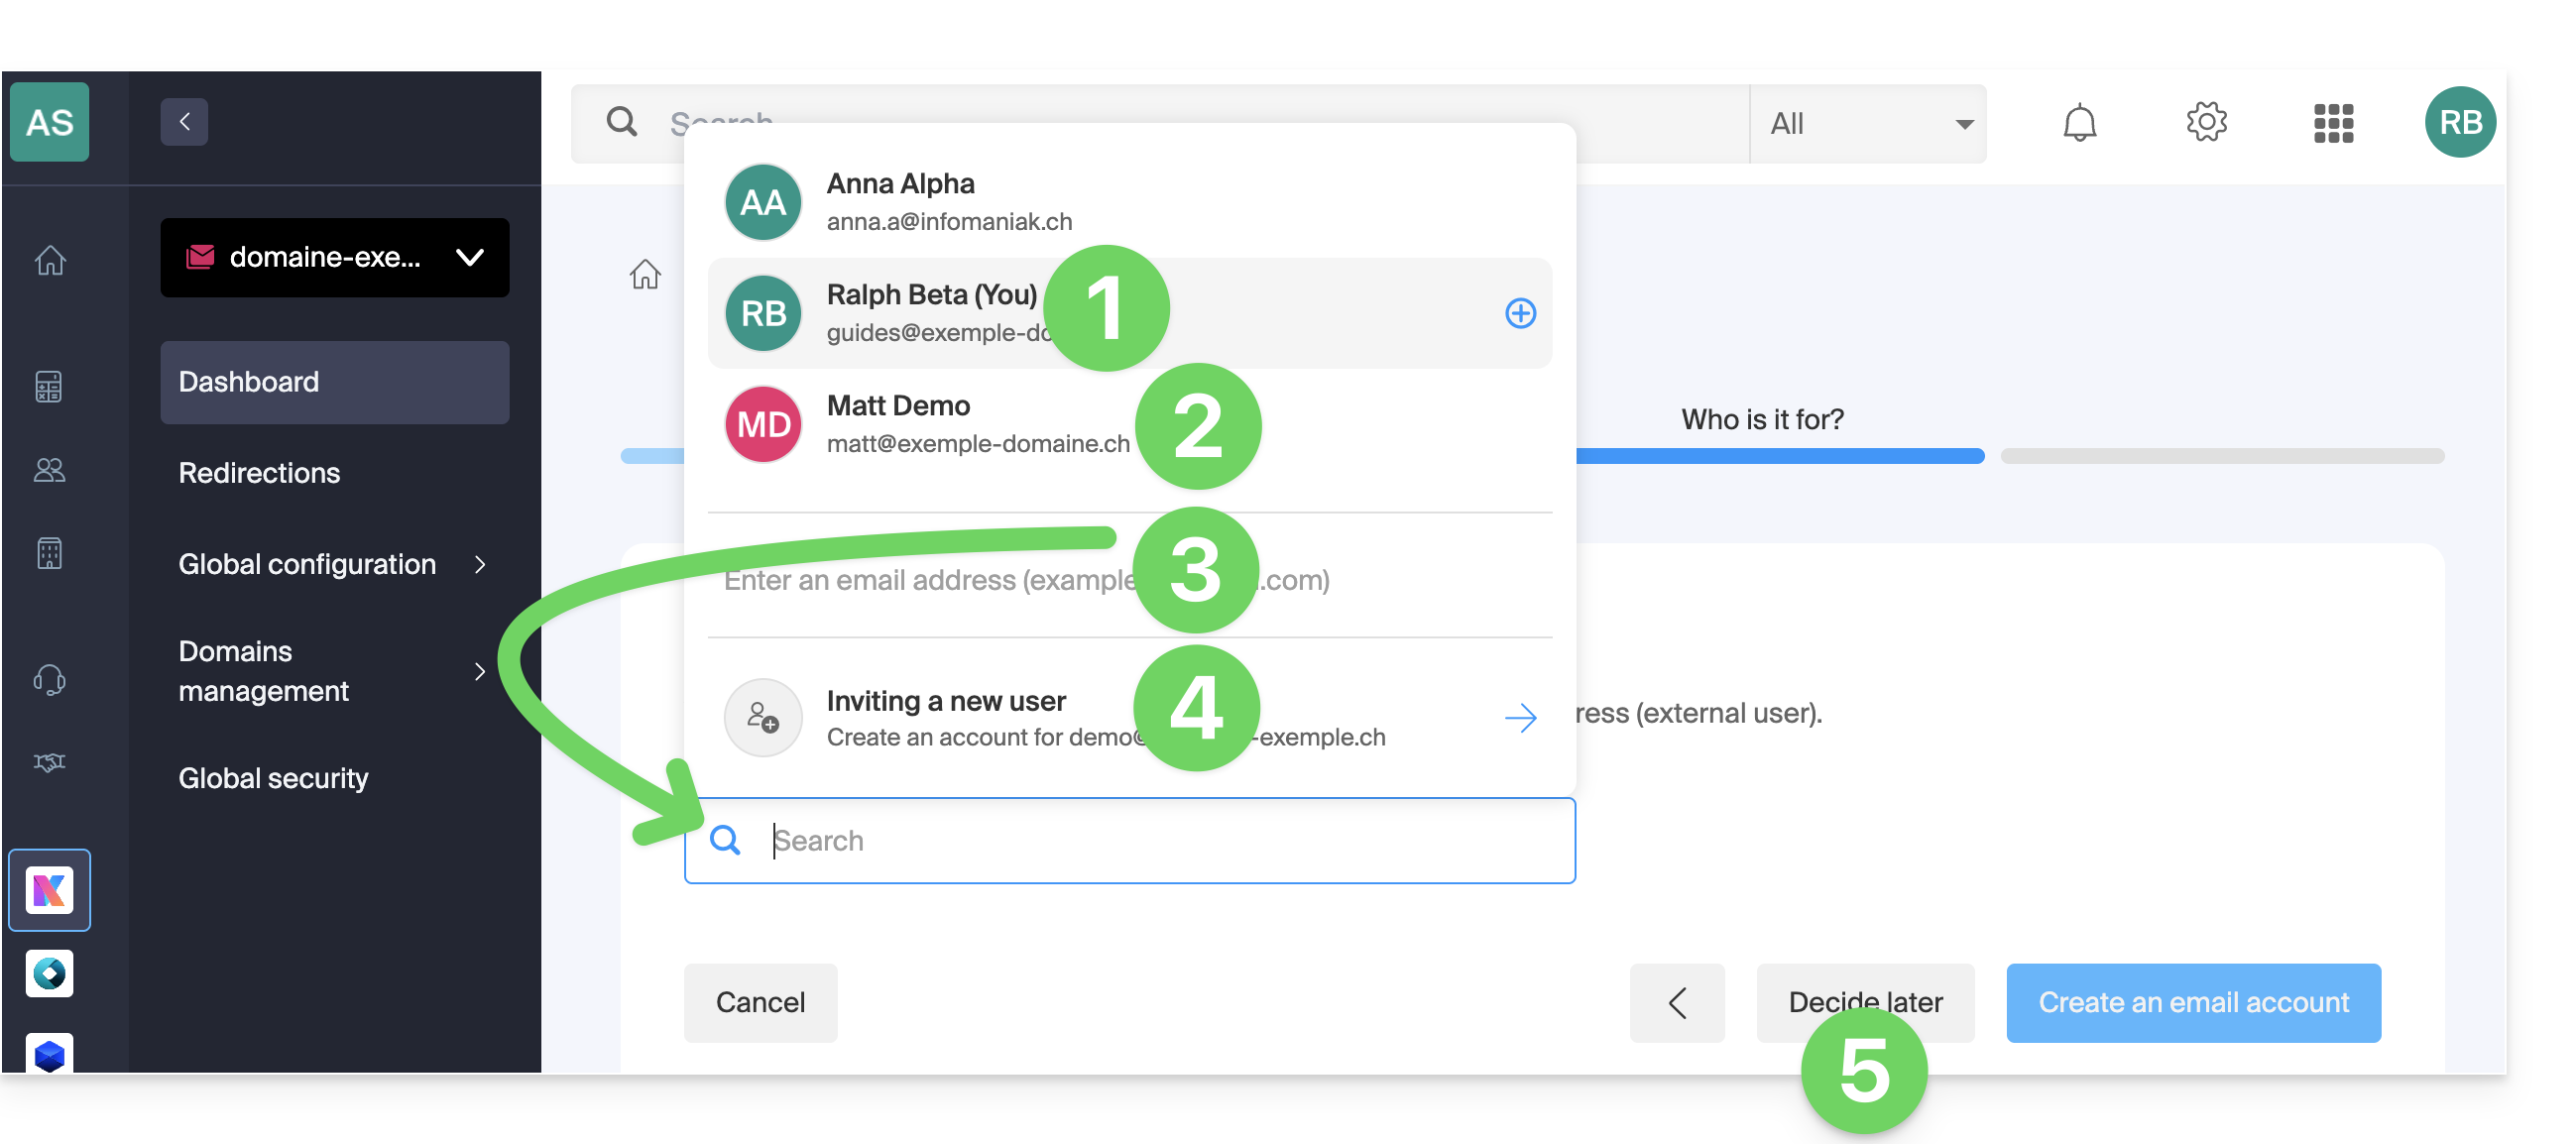
- You (you will be able to directly access and use the email address on the Infomaniak Mail apps - web, mobile, etc.).
- Existing users in your Organization (they will be able to directly access and use the email address on the Mail apps - Web, mobile, etc.).
- An external user who already has an email addressto whom you will send an invitation link to the email address that you must specify in the field below.
- An external user who does not yet exist for whom you will create an Infomaniak account that will have the same login ID as the address you wish to create.
- YOU and/or a new user to whom you will subsequently send an invitation link using your own means (the created email address will not be visible anywhere initially).
Option 1: yourself (your identifier)
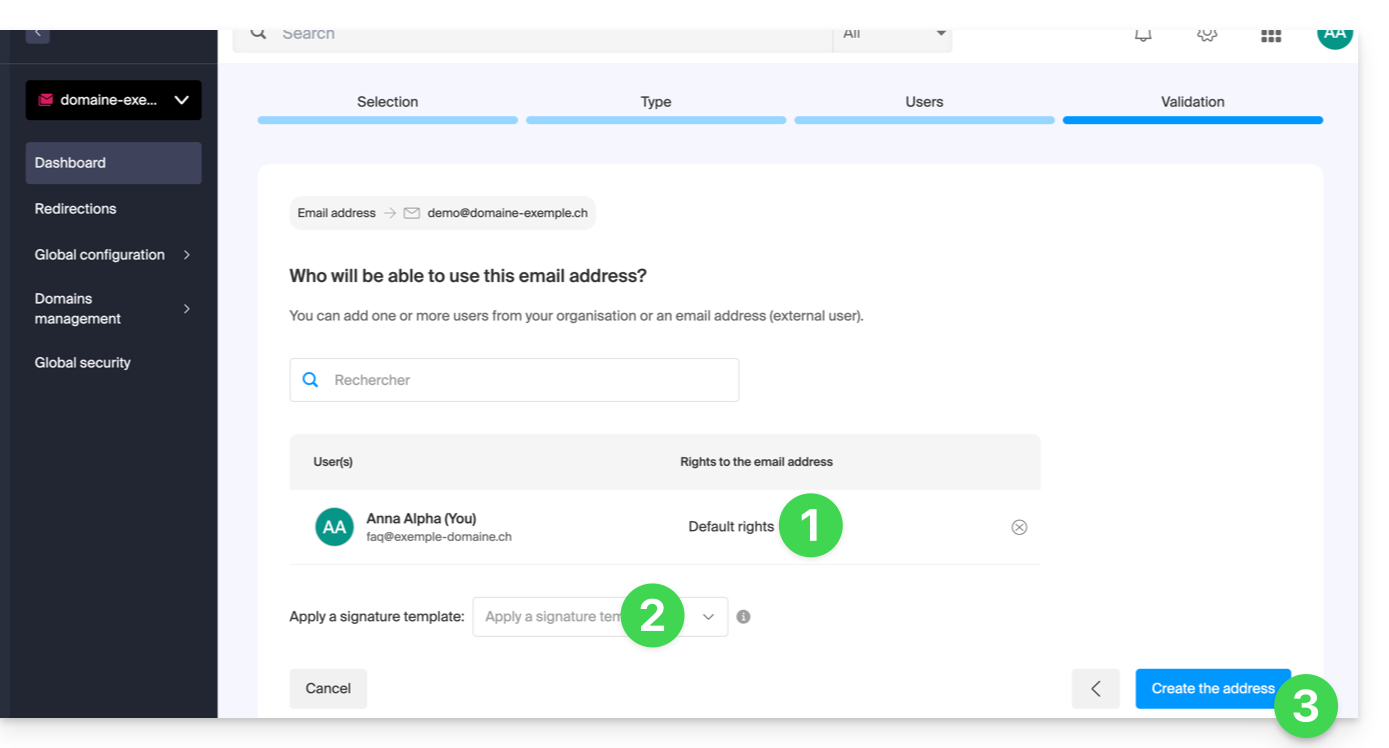
In the list of users, click on your login ID (yourself):
- Manage your access rights to voicemail, device addition, etc. by clicking on “Default Rights”.
- Choose an optional signature template (❓: help).
- Click on Create the address:
- That's it:
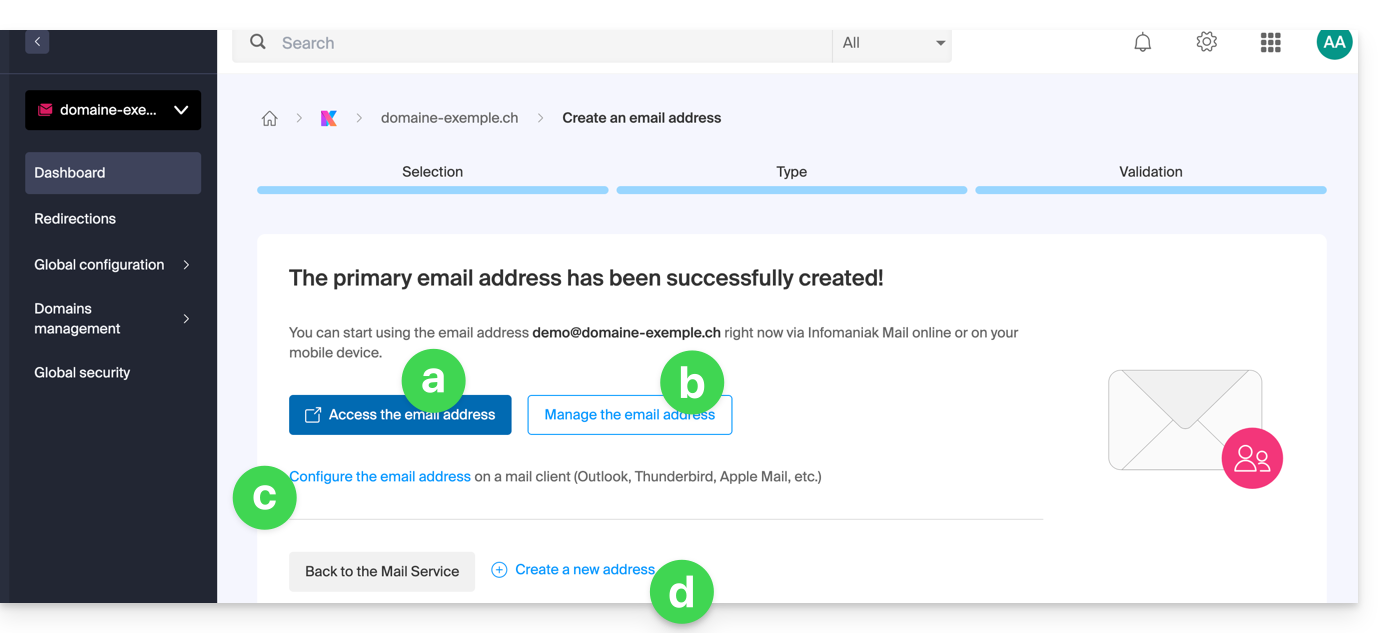
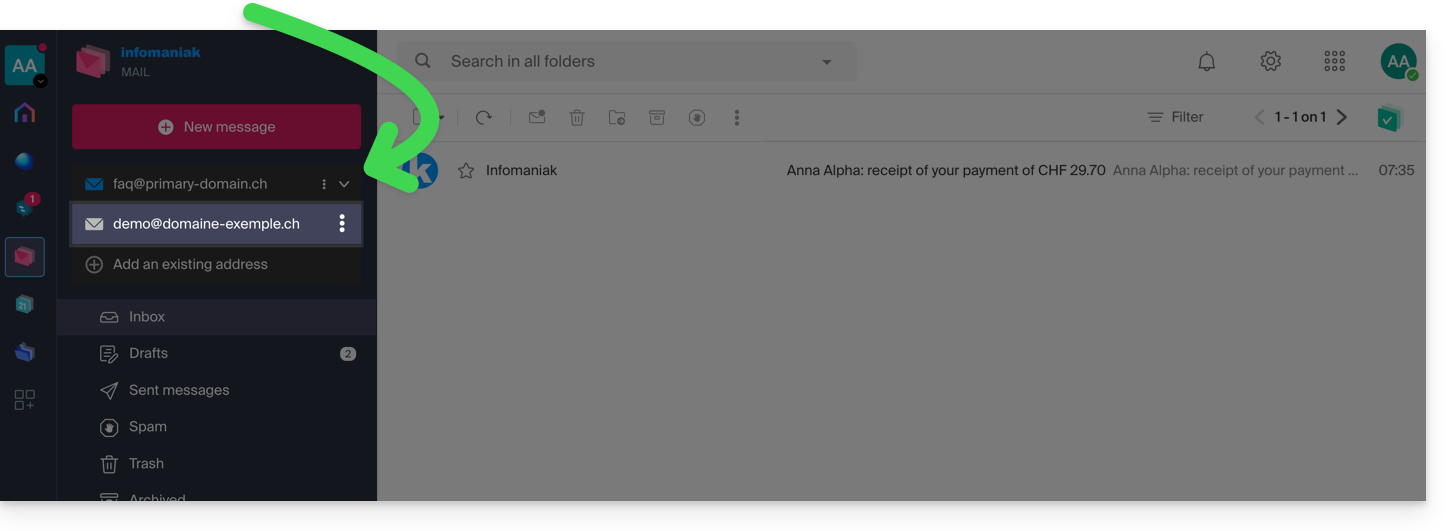
- The email address is now visible in the Infomaniak Mail apps (ksuite.infomaniak.com/mail, mobile app, etc.); if necessary, click on the created address to view it:
- Manage the options for your address (such as the out-of-office message (❓: help), filters (❓: help), etc.).
- If necessary, configure different devices (❓: help) to also access this email address.
- Create additional addresses as needed.
- The email address is now visible in the Infomaniak Mail apps (ksuite.infomaniak.com/mail, mobile app, etc.); if necessary, click on the created address to view it:
Option 2: Select other users from the Organization
In the list, you select other existing users within the Organization:
- Manage their potential access rights to the voicemail, device addition, etc. by clicking on “Default Rights”.
- Click on Create the address:
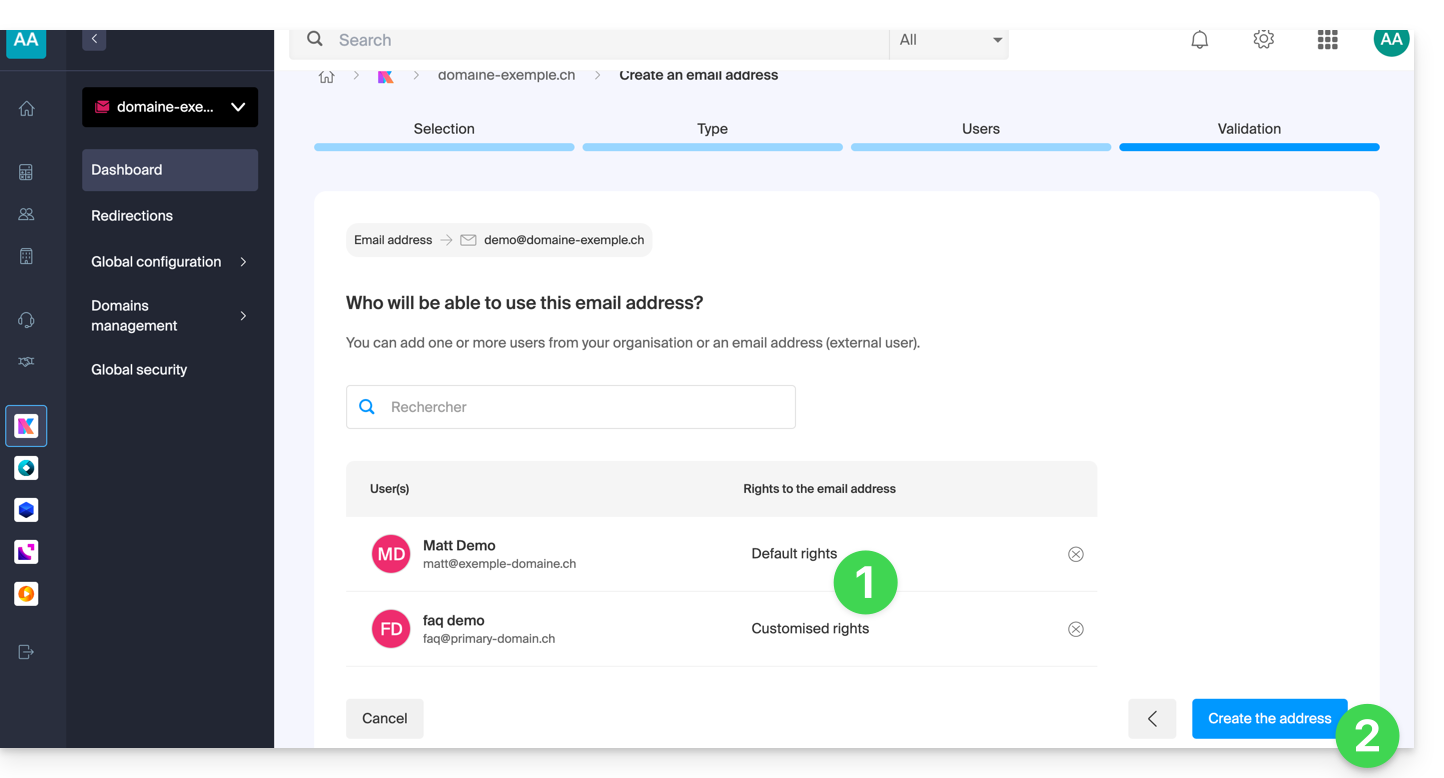
- That's it: the email address is now visible in their Infomaniak Mail apps (ksuite.infomaniak.com/mail, mobile app, etc.).
Option 3: Invite an external user who already has a personal email address
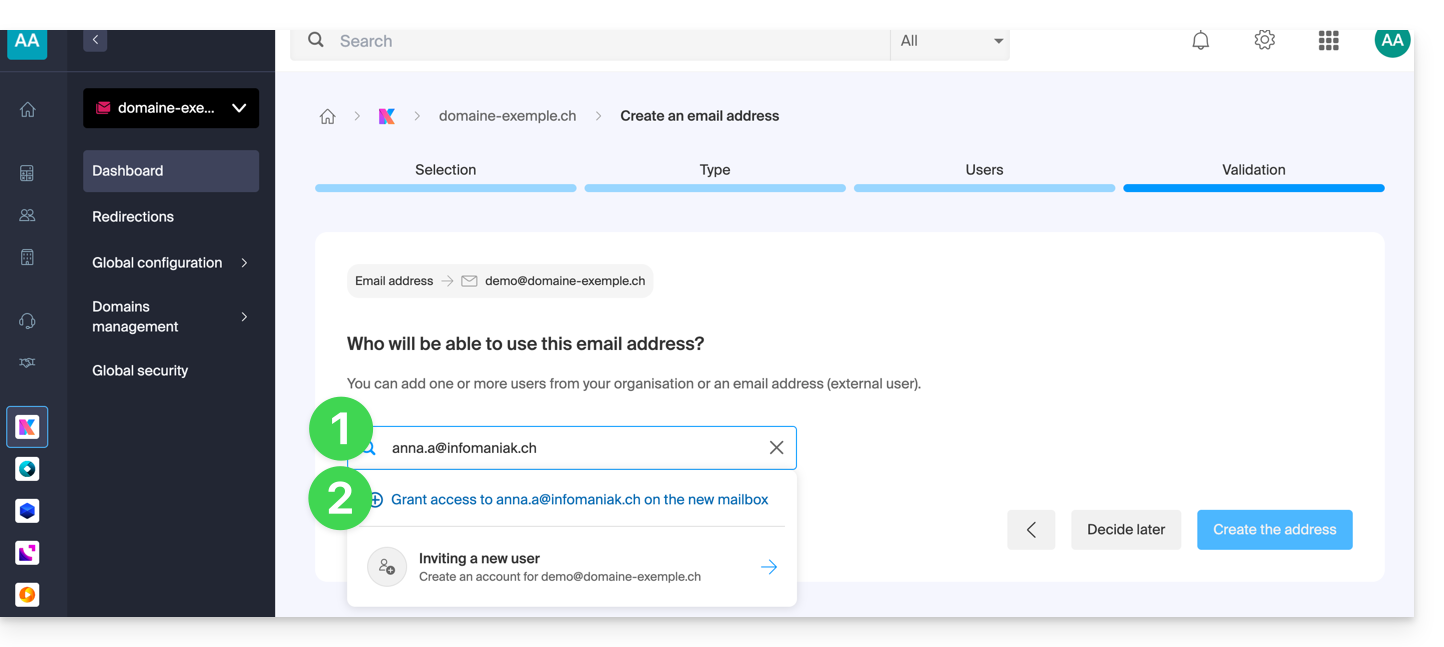
You want to enter theexisting email address of a contact, colleague, etc.to grant them access to the new email address you are creating:
- Enter the user's email address (whether they already have an Infomaniak account or not) in the search field.
- Click on the line to add it as a user:
- Manage its possible access rights to the voicemail, device addition, etc. by clicking on “Default Rights”.
- Click on Create the address:
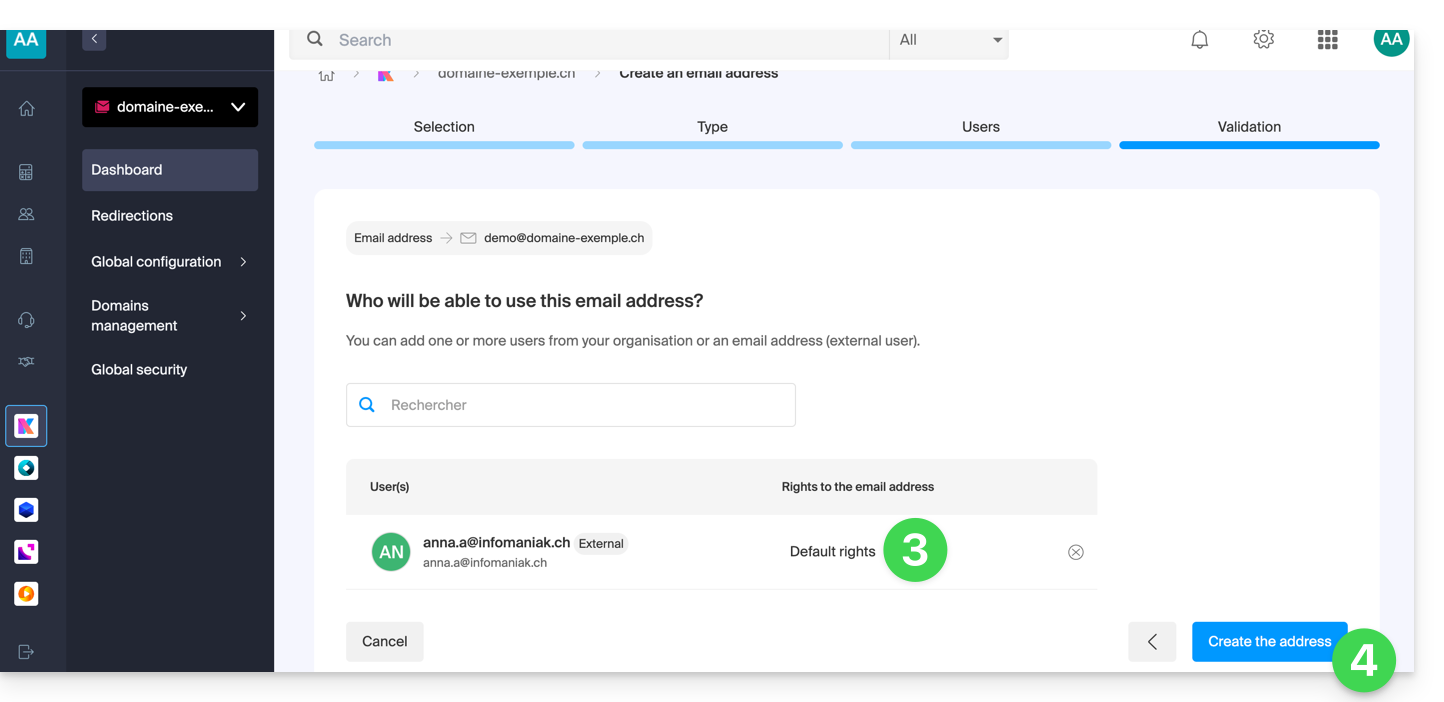
- That's it:
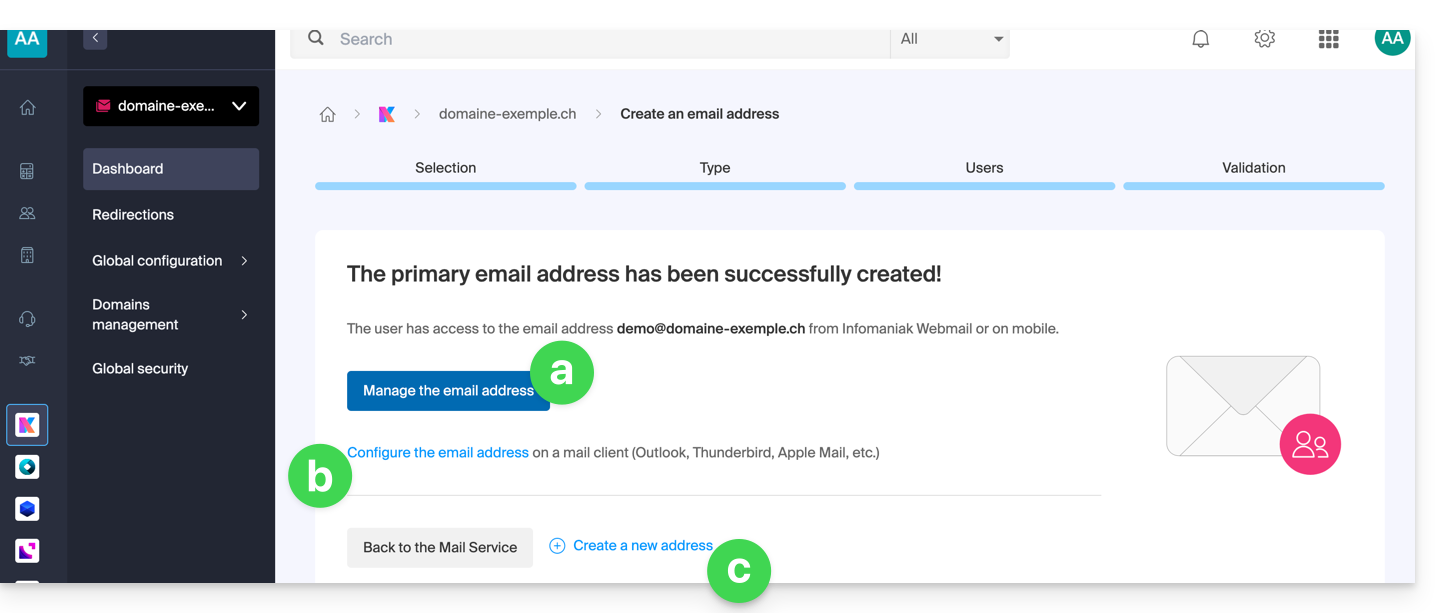
- The user receives an invitation to view the email address, valid for 30 days:
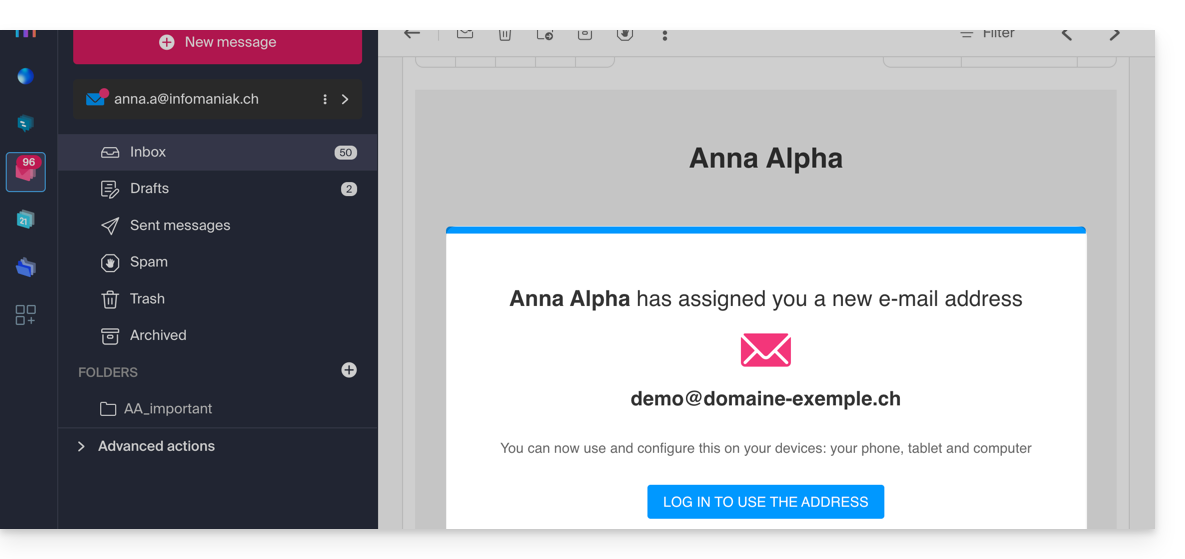
- The button takes them to a page where they can either create a new account or log in to an existing account they may already have with Infomaniak. Once completed, the address will be automatically visible in their Infomaniak Mail apps (ksuite.infomaniak.com/mail, mobile app, etc.).
- The current invitation is visible in the email address management section of your Mail service:
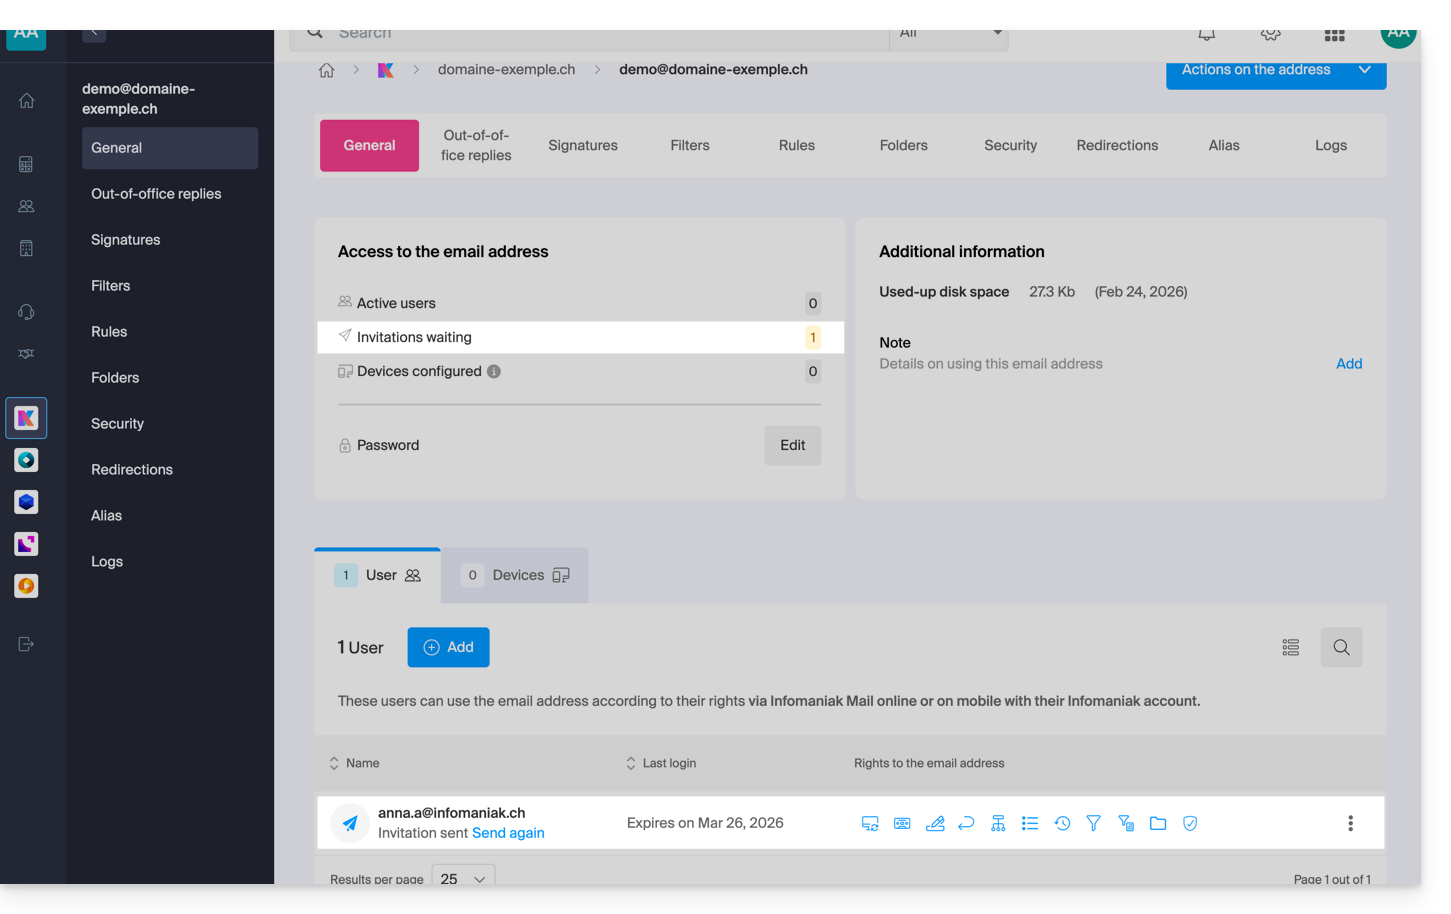
- By clicking Resend, you can view the link to copy it and/or resend it.
Option 4: Create the Infomaniak account associated with the new email address from scratch
You are being redirected to the user creation page within the Organization (❓: help), which will allow you to add the user from scratch and create the desired email address at the same time. Some restrictions may apply: please refer to this other guide for more information.
Option 5: Decide later
- The email address is created directly (still without a password, and this time without any user, so the address will not be visible anywhere at first) and is fully functional.
- You can, of course, manage users and passwords (❓: help) directly from the email address management interface.
Link para esta FAQ: https://faq.infomaniak.com/2901
Esta seção de perguntas frequentes foi útil?