Base de conhecimento
1000 perguntas frequentes, 500 tutoriais e vídeos explicativos. Aqui, você encontra apenas soluções!
Usar o DynDNS Infomaniak e o Home Assistant
Este guia explica como acessar sua central de automação residencial Home Assistant (que está localizada atrás de um endereço IP dinâmico, fornecido pelo seu provedor de serviços de Internet) com um nome de domínio na Infomaniak, através da opção gratuita DynDNS e de um script gratuito (❓: ajuda).
Introdução
- A integração que você instala funciona como um mensageiro: ela monitora continuamente o endereço IP da sua rede local.
- Assim que detecta que o seu provedor de acesso alterou o seu IP, ela envia instantaneamente um sinal para a Infomaniak.
- A Infomaniak atualiza então o seu nome de domínio (ex:
ha.domain.xyz) para que ele aponte para o novo endereço IP.
Instalar o Infomaniak DynDNS — Integração com o Home Assistant
Pré-requisitos
- Ter uma instalação do Home Assistant (por exemplo, em um Raspberry Pi 5) conectada à Internet com um endereço IP dinâmico.
- Um DNS dinâmico deve ter sido criado no domínio em questão através do painel de controlo Infomaniak (❓: ajuda).
Em seguida:
- Faça login no painel de administração do Home Assistant.
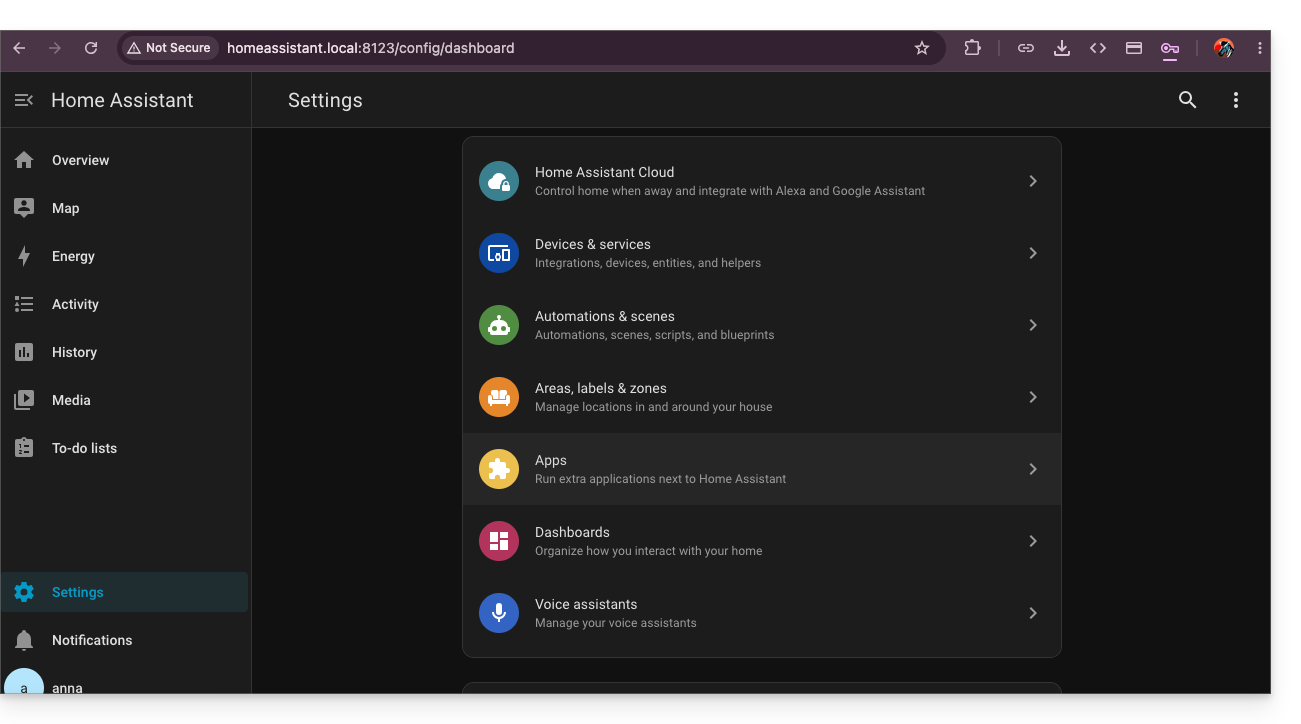
- Instale o HACS, caso ainda não o tenha feito; vá para as configurações do Home Assistant:
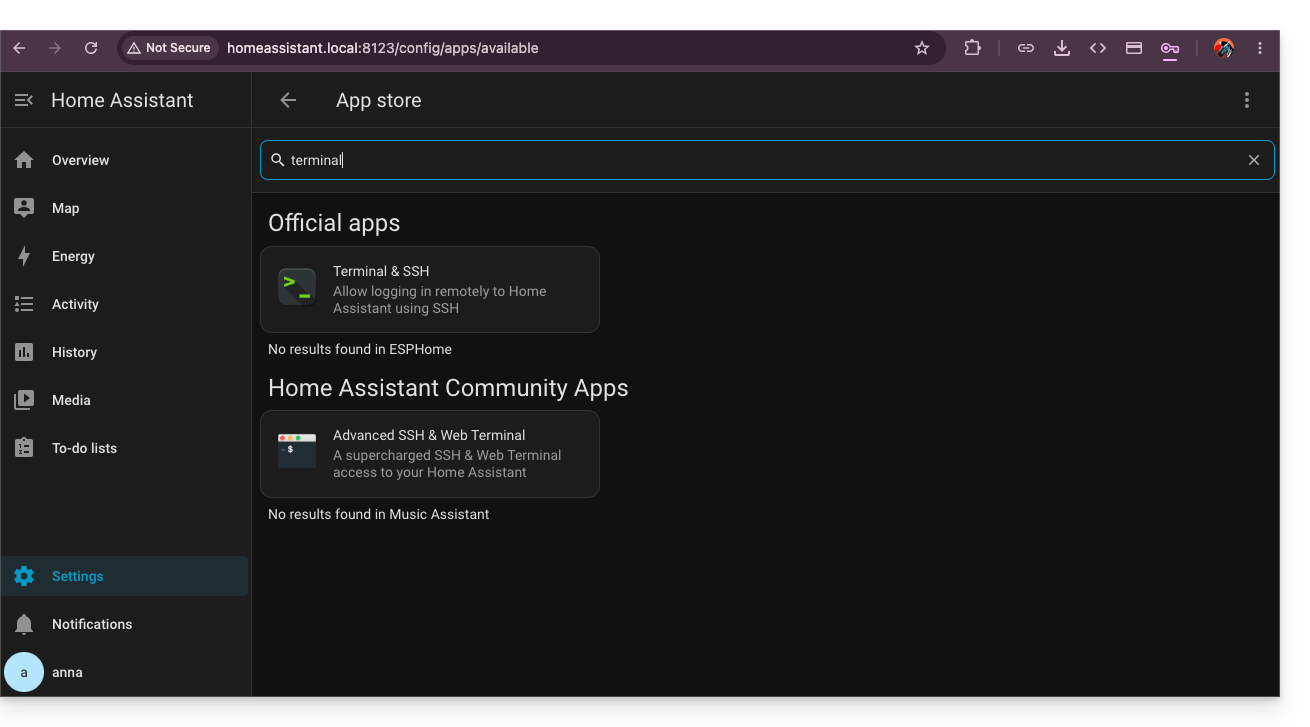
- Instale o aplicativo Terminal & SSH:
- Neste terminal, insira o comando
wget -O - https://get.hacs.xyz | bash -: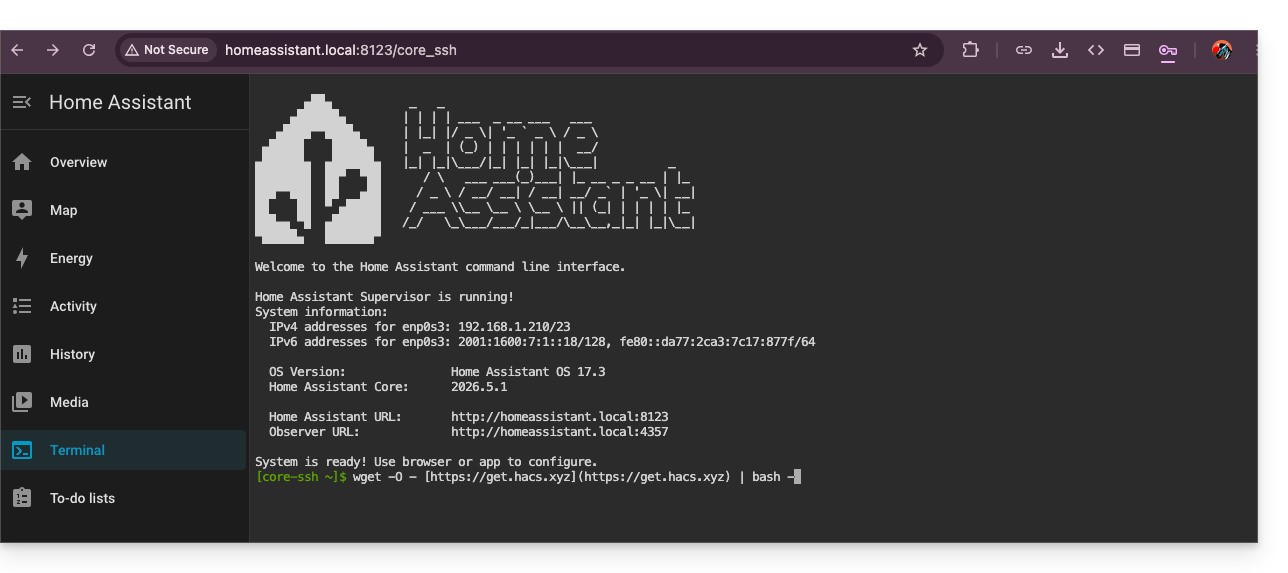
- Após a instalação do HACS, reinicie o Home Assistant.
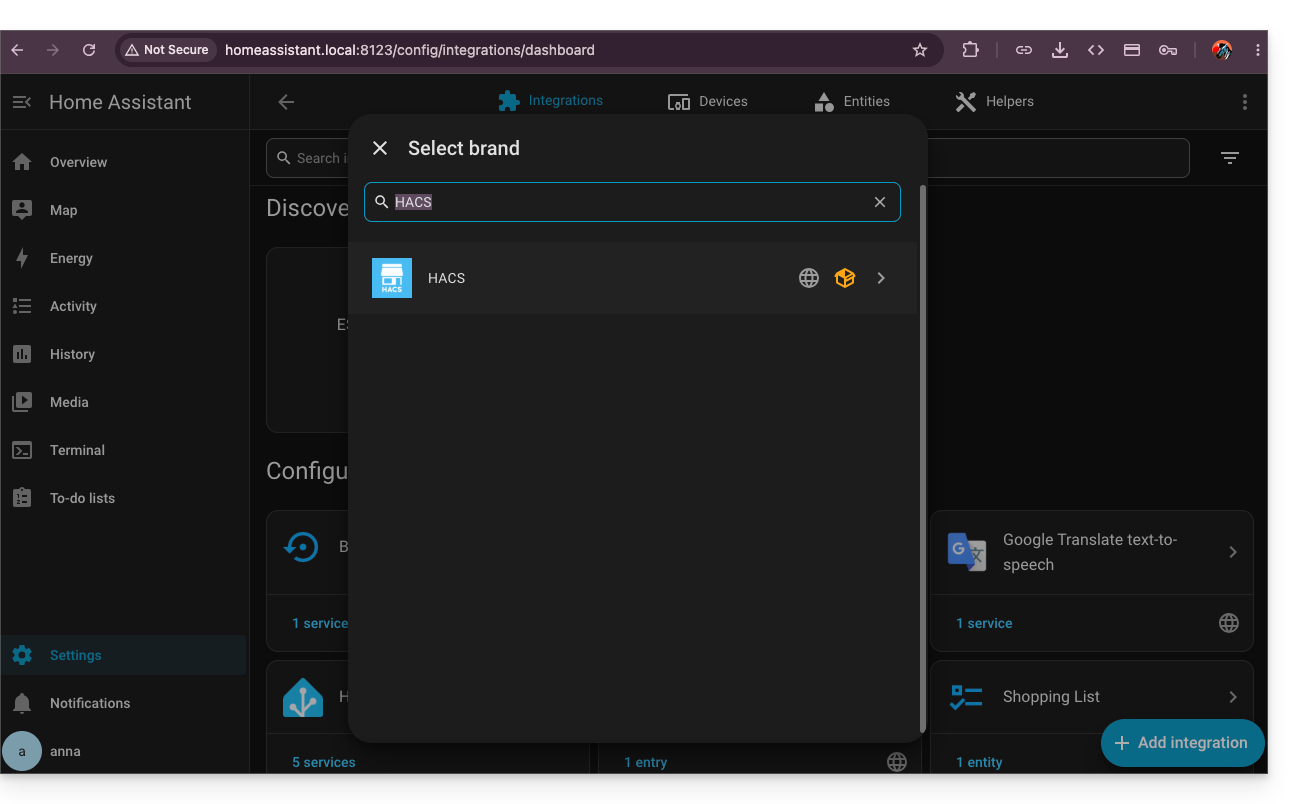
- Ative o HACS procurando-o nas integrações:
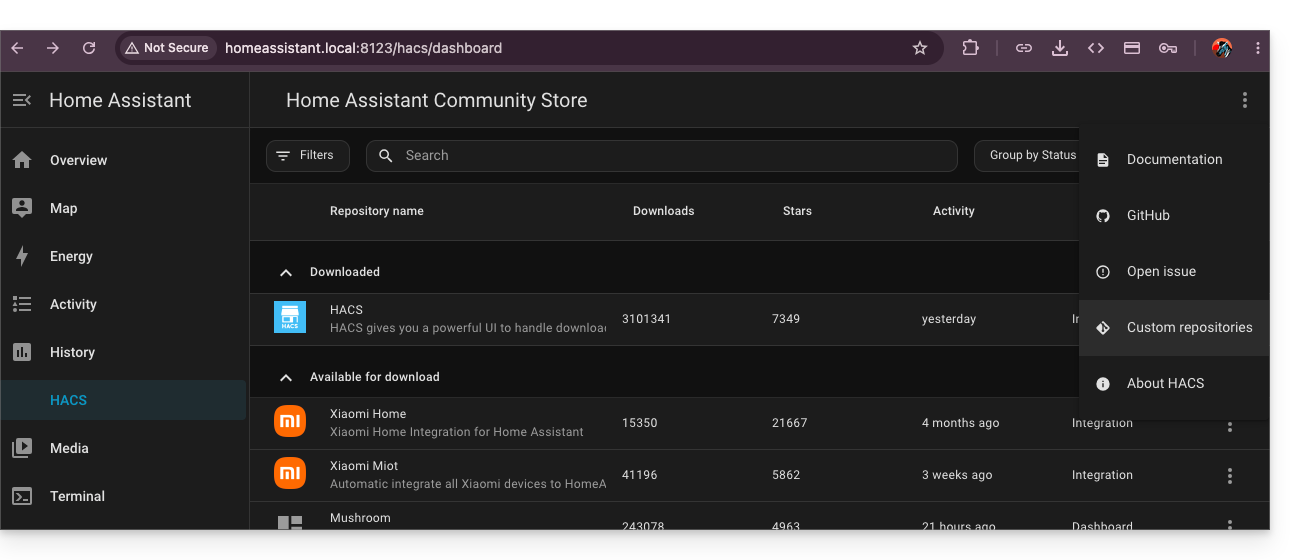
- Após a validação via Github, volte para o HACS instalado na sua barra lateral esquerda e clique no menu de ação ⋮ no canto superior direito da interface do HACS para escolher os repositórios personalizados:
- Insira a URL
https://github.com/cy-bertrand/Infomaniak-dyndns-ha(❓: ajuda) e escolha o tipo Integração, antes de clicar em Adicionar: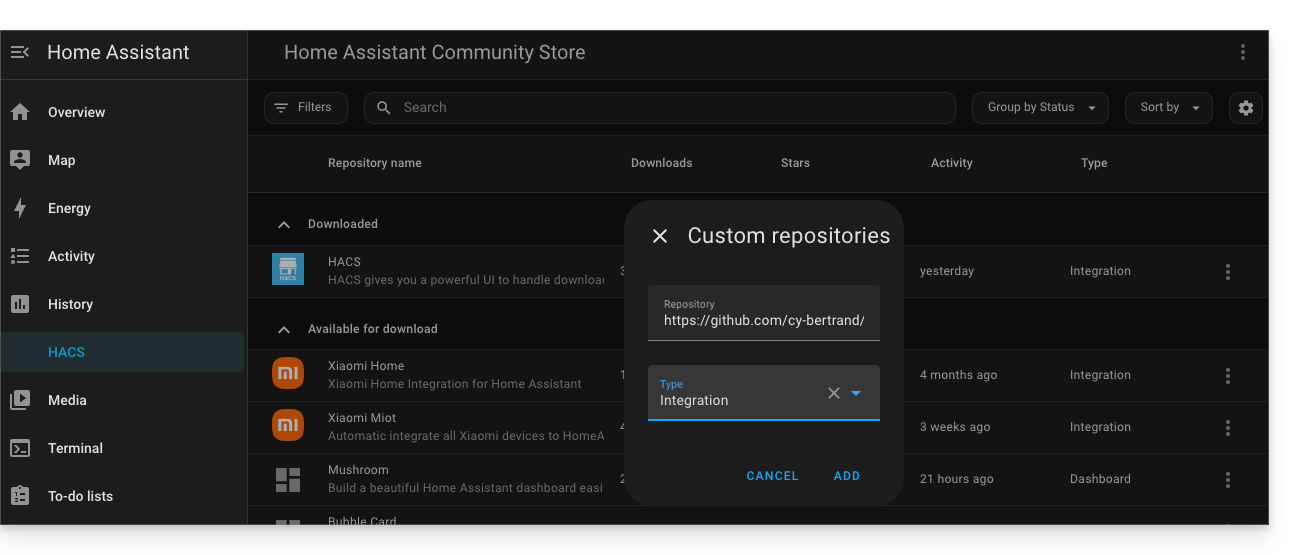
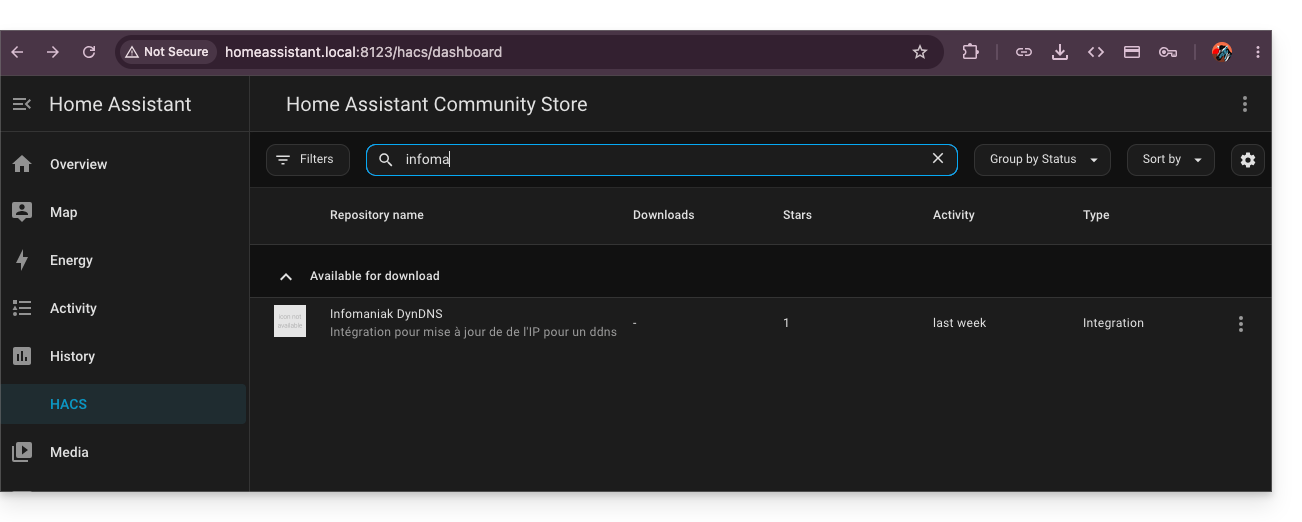
- Em seguida, procure por Infomaniak DynDNS e clique nele:
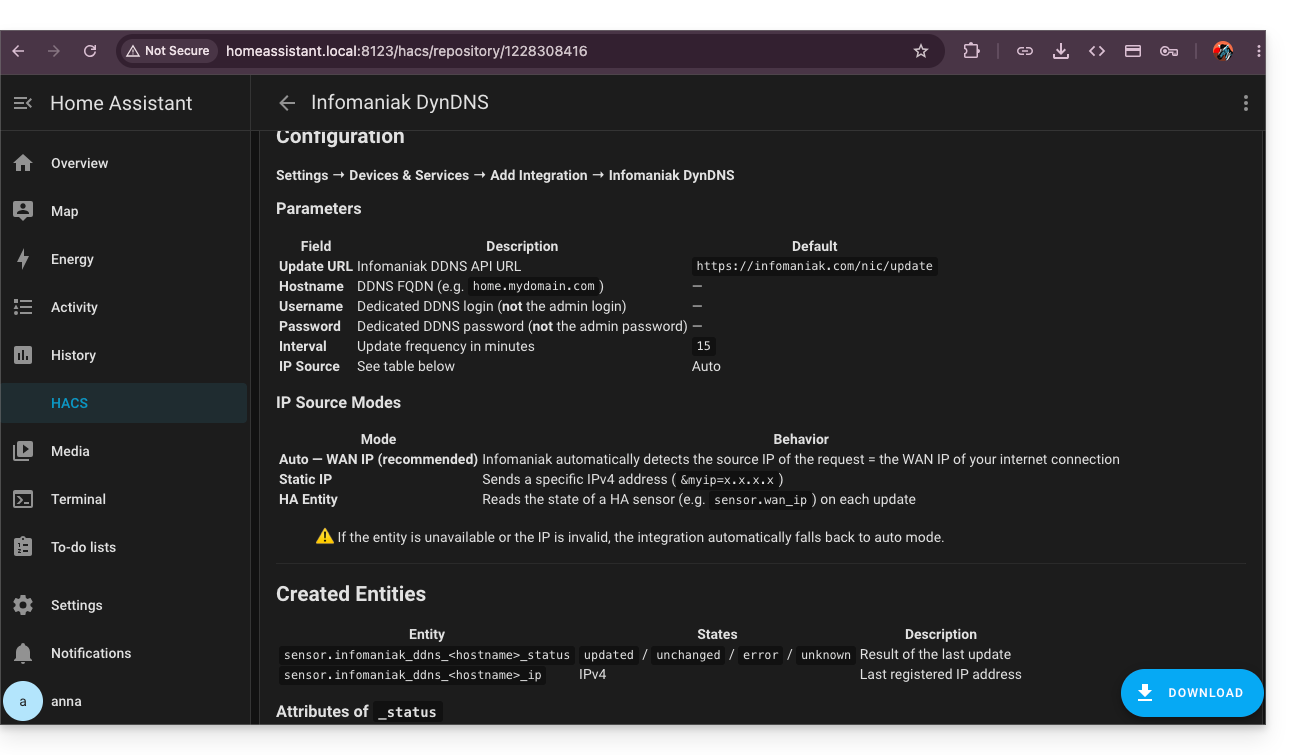
- Instale este serviço clicando no botão Download no canto inferior direito:
- Reinicie o Home Assistant.
Configurar o Infomaniak DynDNS — Integração com o Home Assistant
Para isso:
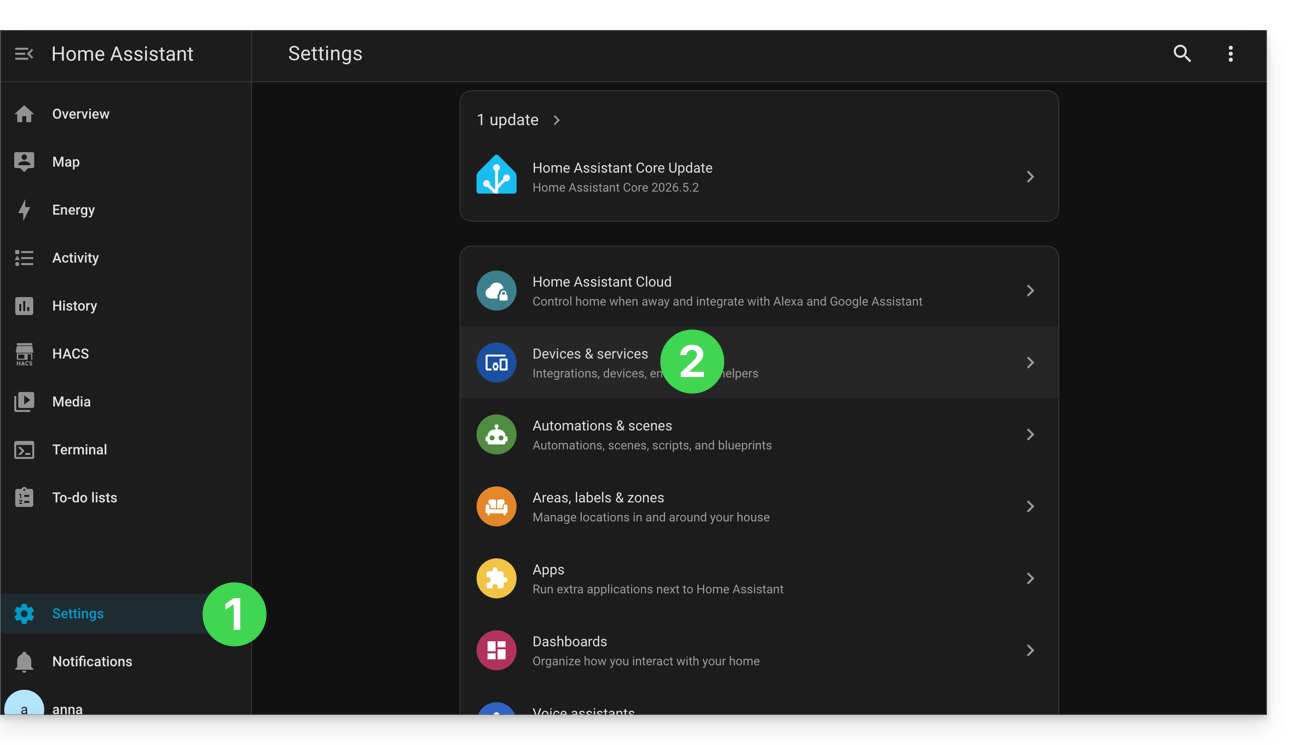
- Clique em Configurações no menu lateral esquerdo do HA.
- Clique em Dispositivos e serviços:
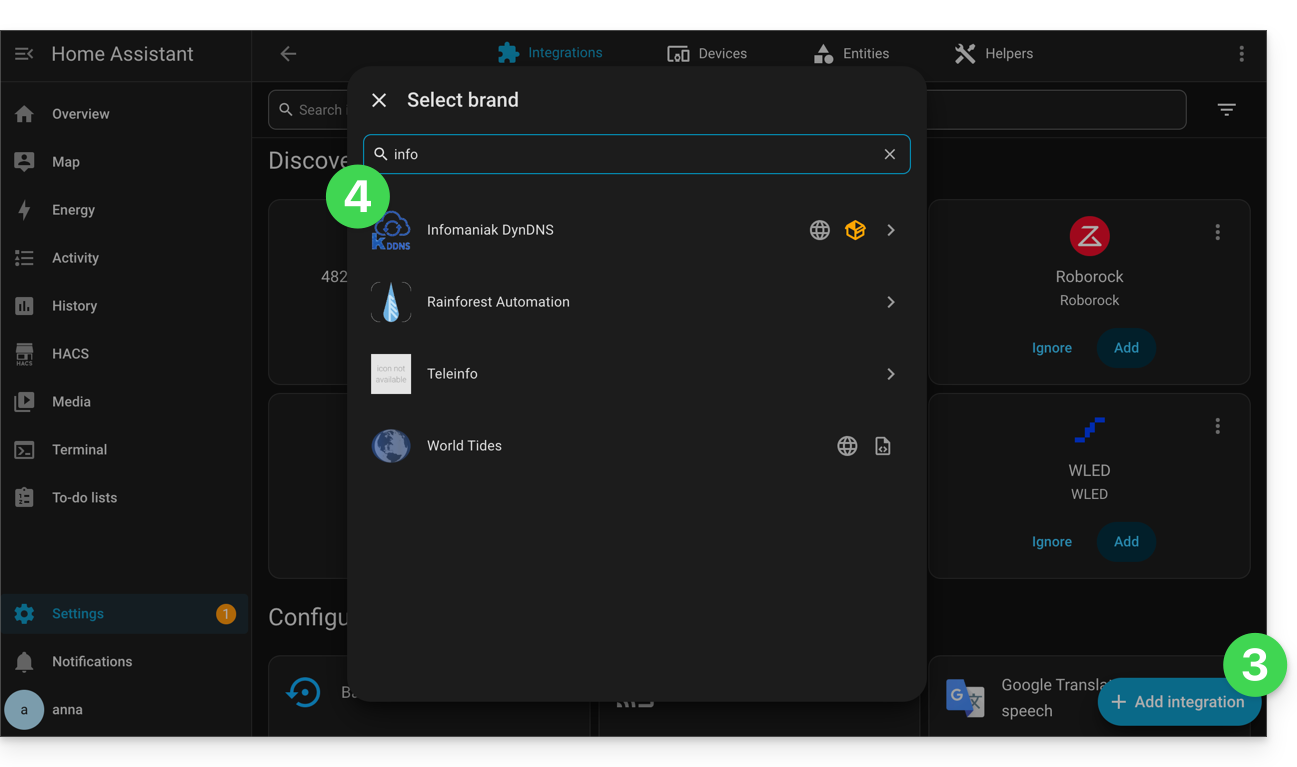
- Clique no botão para Adicionar uma integração.
- Clique em Infomaniak DynDNS:
- Configure o seu equipamento:
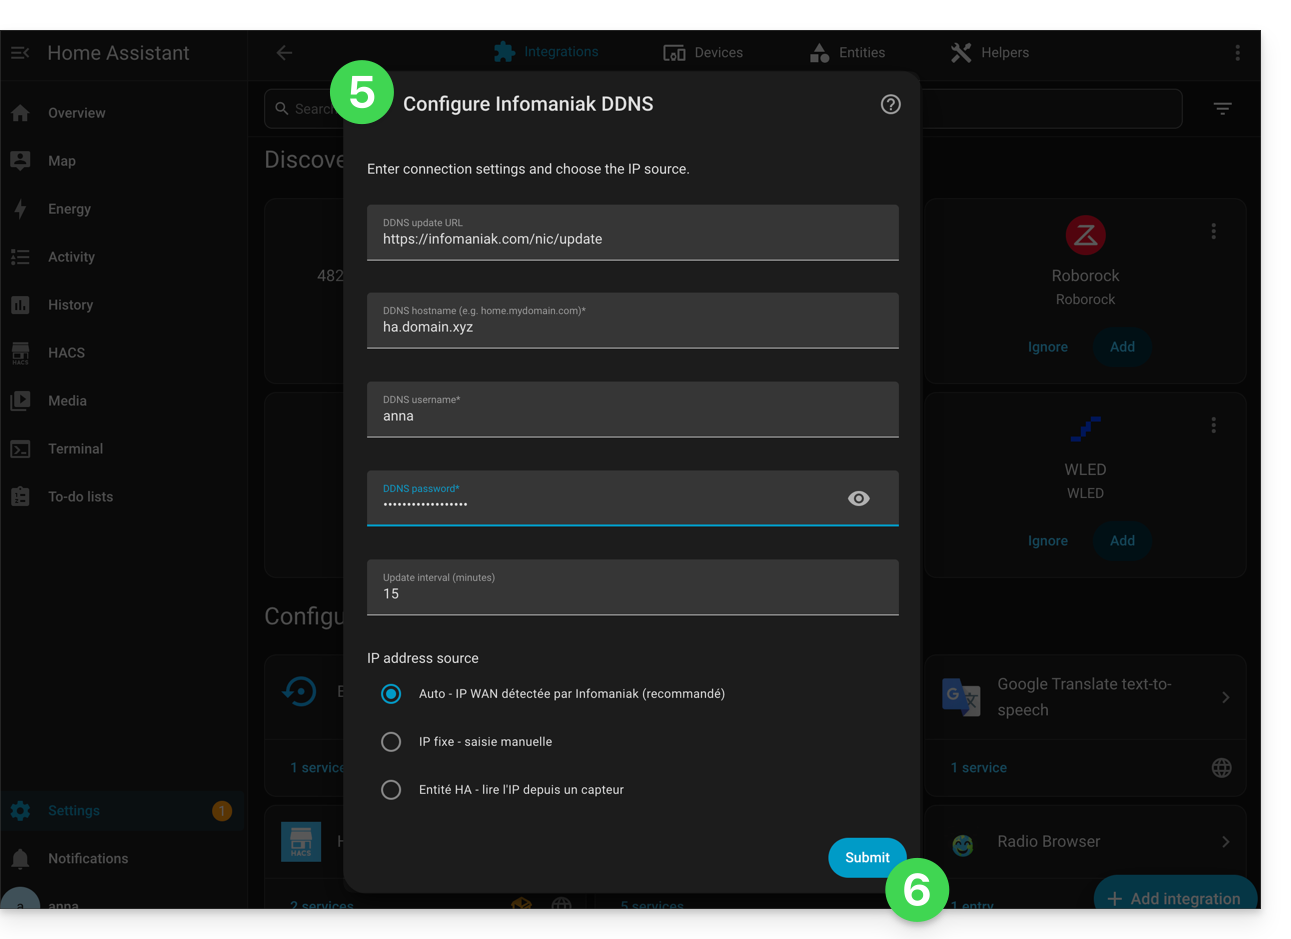
- Validade na parte inferior da página.
- Atribua um nome à entidade e salve suas alterações clicando em Concluir:
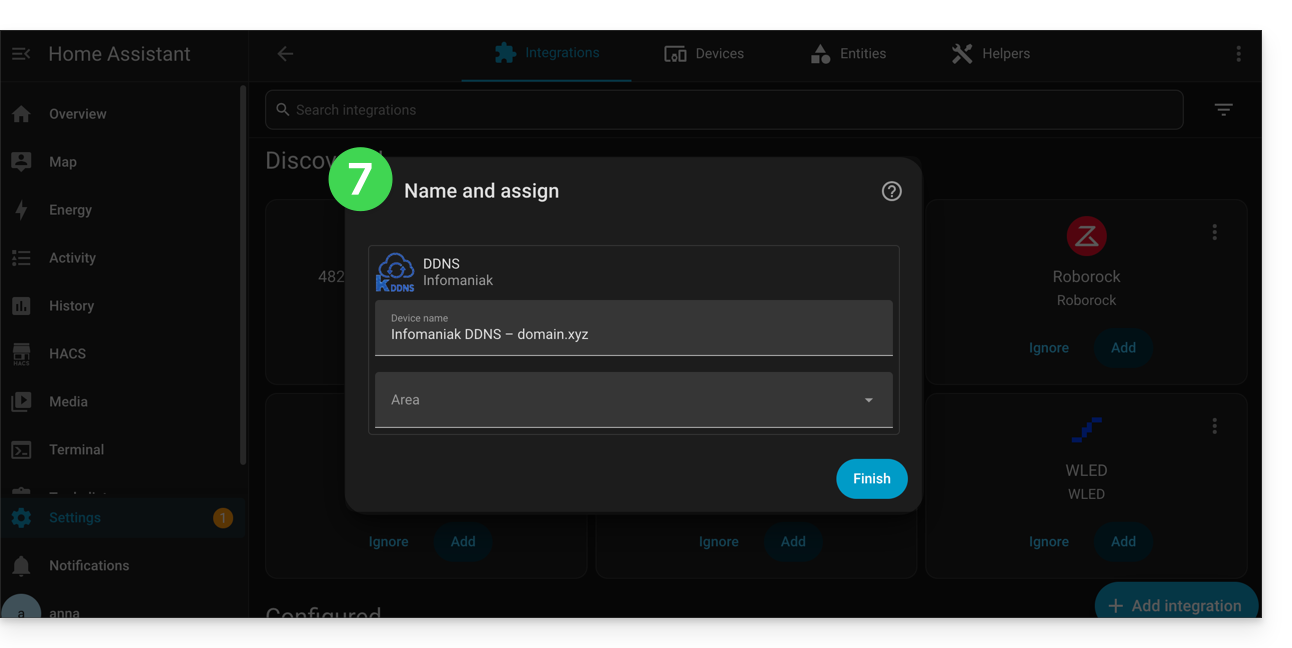
O Home Assistant verificará o endereço IP externo a cada 15 minutos. Se este endereço tiver mudado, o DNS será atualizado. Assim, o seu nome de domínio apontará continuamente para a sua instalação de automação residencial, mesmo que o seu provedor de serviços de Internet altere o seu endereço IP público.
Link para esta FAQ: https://faq.infomaniak.com/1665
Esta seção de perguntas frequentes foi útil?