Base de conhecimento
1000 perguntas frequentes, 500 tutoriais e vídeos explicativos. Aqui, você encontra apenas soluções!
Manage kDrive file deletion
This guide explains how to manage the behavior of deleted files and the trash bin in kDrive.
Introduction
- When a file is deleted from one of the tools synchronized with kDrive, the kDrive web app (online service ksuite.infomaniak.com/kdrive) places the file in its trash bin.
- If this kDrive trash bin is emptied, it is impossible to recover its contents.
- If the operating system's trash bin on the computer where kDrive is installed is emptied, this does not empty the trash bin of the kDrive web app.
- The file remains for at least 30 days after it is moved to the kDrive trash bin, but some offers may define a retention period of up to 365 days:
⚠ Maximum duration that can be chosen for file retention in the kDrive trash bin:
| kSuite | Free | 30 |
| Standard | 60 | |
| Business | 180 | |
| Enterprise | 365 | |
| my kSuite | 30 | |
| my kSuite+ | 60 | |
| kDrive | Solo | 365 |
| Team | 365 | |
| Pro | 365 |
Deleting a file…
… in the kDrive web app
To delete a file and track its path to the trash bin:
- Click here to access the kDrive web app (online service ksuite.infomaniak.com/kdrive).
- Select the file(s) you want to delete.
- Click on the trash can icon in the top bar:
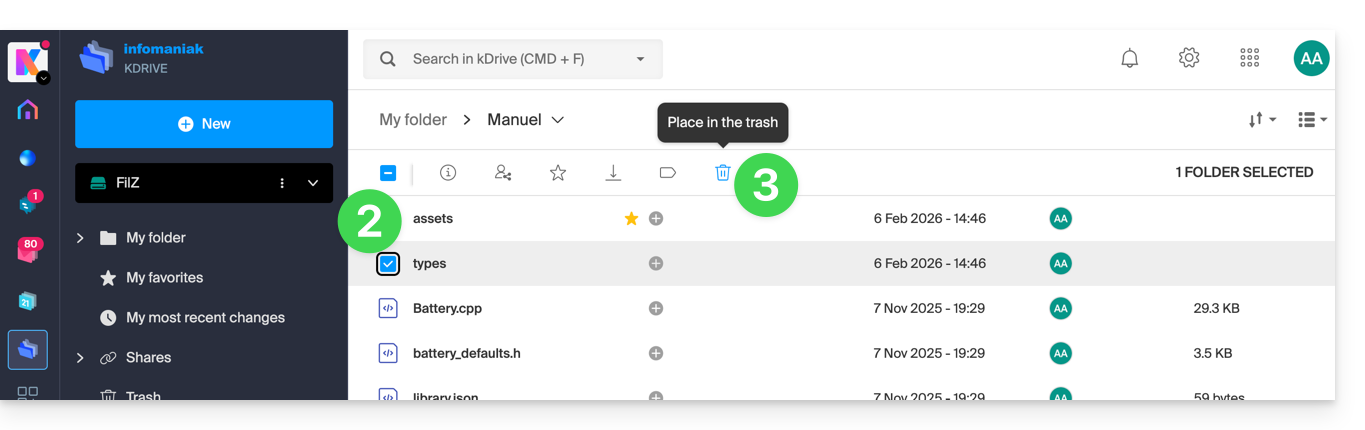
- Confirm the deletion:
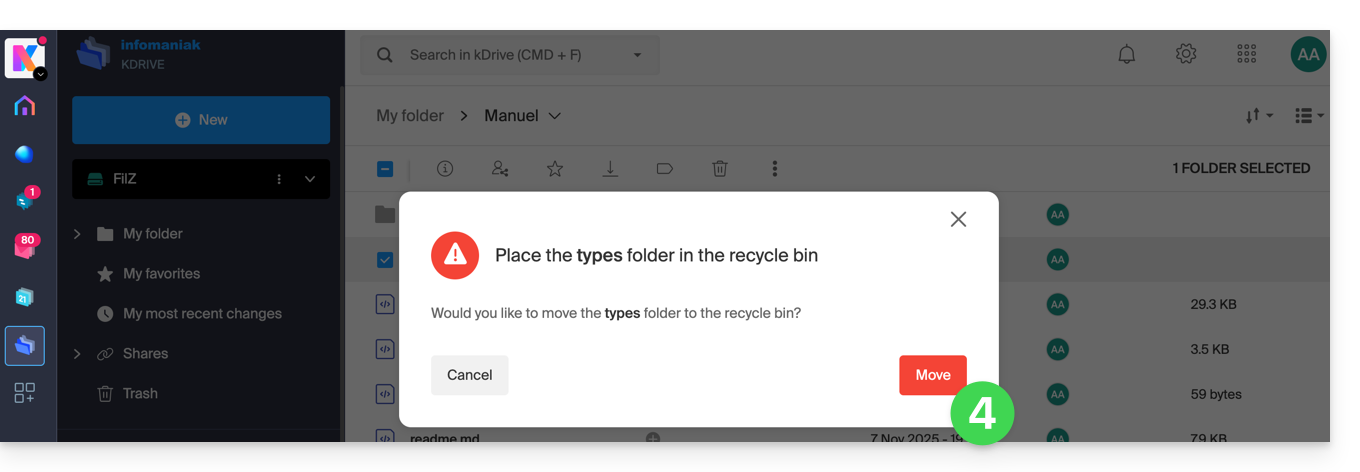
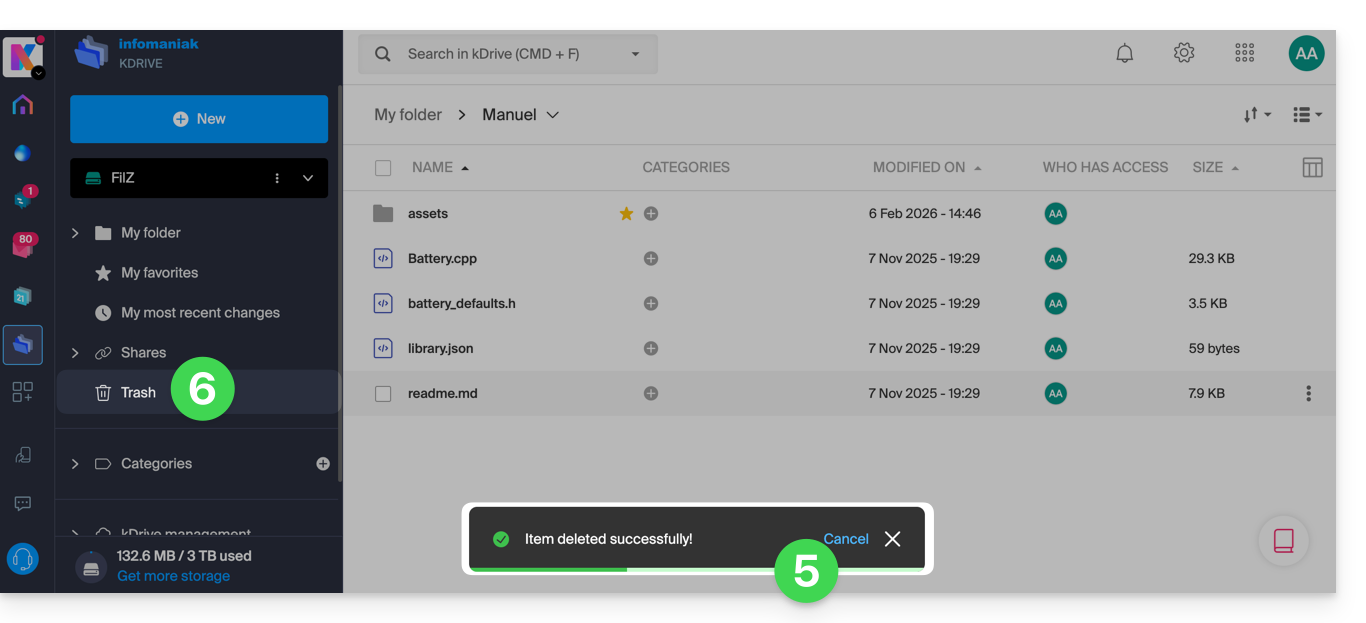
- A confirmation message will appear at the bottom of the screen, allowing you to cancel the deletion if needed.
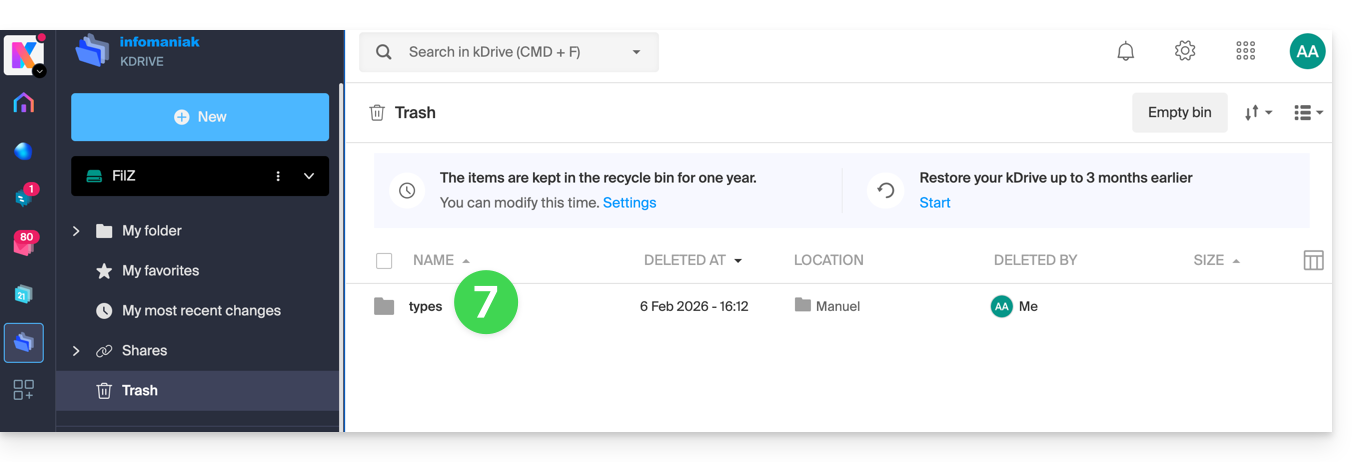
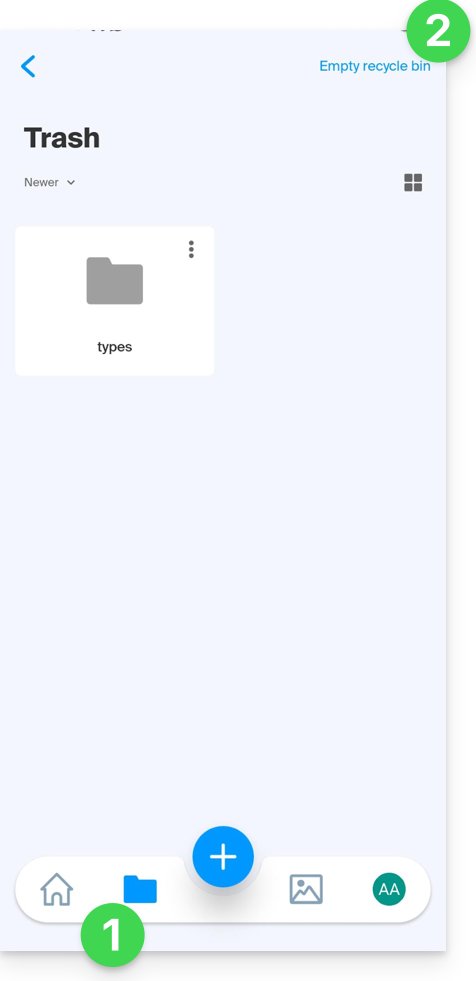
- Click on the Trash menu:
- Recently deleted items are displayed here:
Deletion is synchronized with the various solutions connected to the same kDrive, for example, the kDrive mobile app (application for iOS/Android smartphones or tablets):
- The Trash menu is located under the Folders icon at the bottom.
- You can empty the trash from this page, but please read the information below in this guide:
Deletion is also synchronized (if this option is not disabled – see below in this guide) with the kDrive desktop app (desktop application on macOS/Windows/Linux), which will send the command to move any data deleted from the web app to the computer's trash (and vice versa):
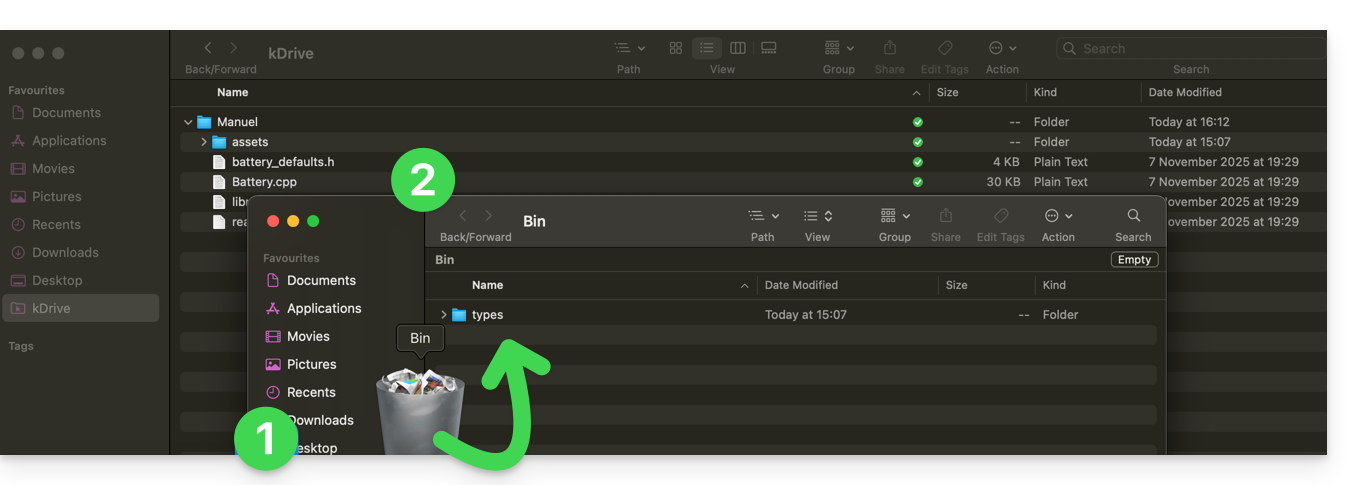
- Open the computer's trash.
- Deleted data is in the trash, and no longer in the main kDrive file structure:
Empty the trash manually…
… on the kDrive web app
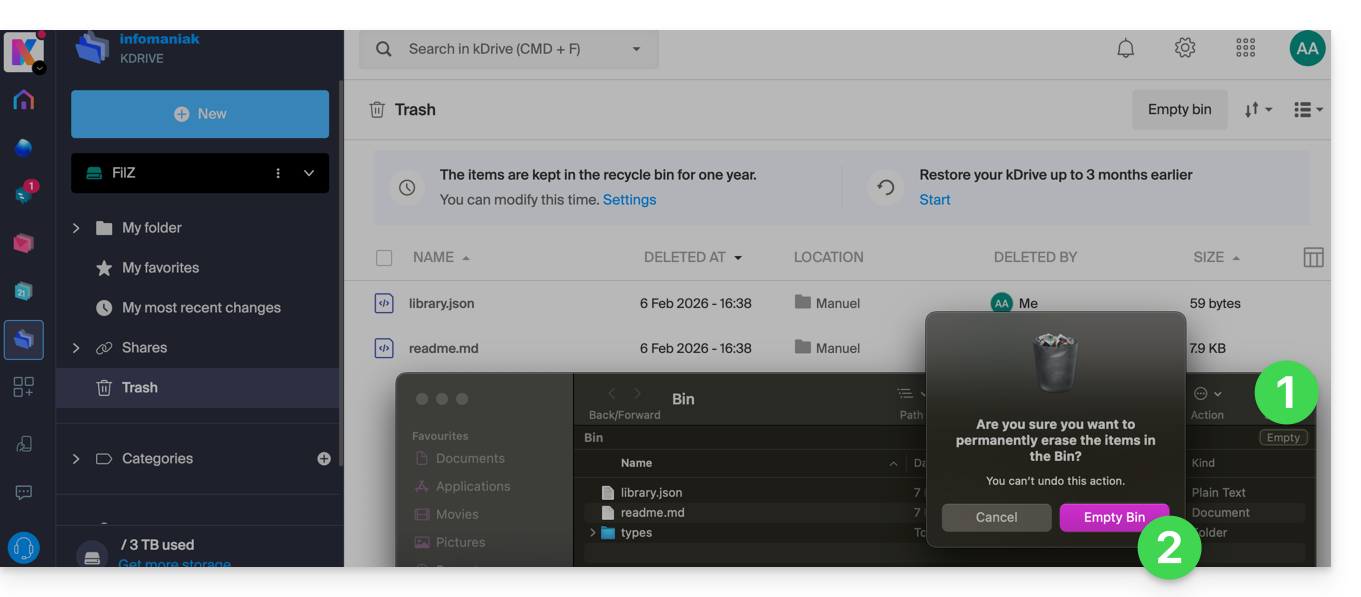
To empty the kDrive trash manually (not recommended because it is better to wait for the scheduled time until automatic deletion):
- Click here to access the kDrive web app (online service ksuite.infomaniak.com/kdrive).
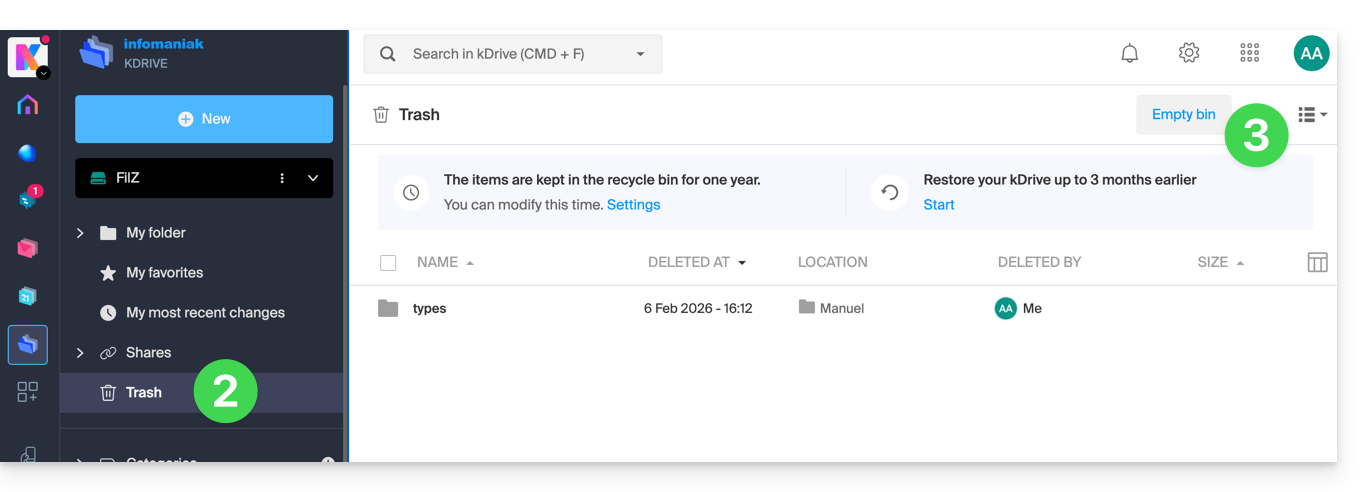
- Click on the Trash menu in the left sidebar.
- Click on Empty Trash:
- Confirm the operation:
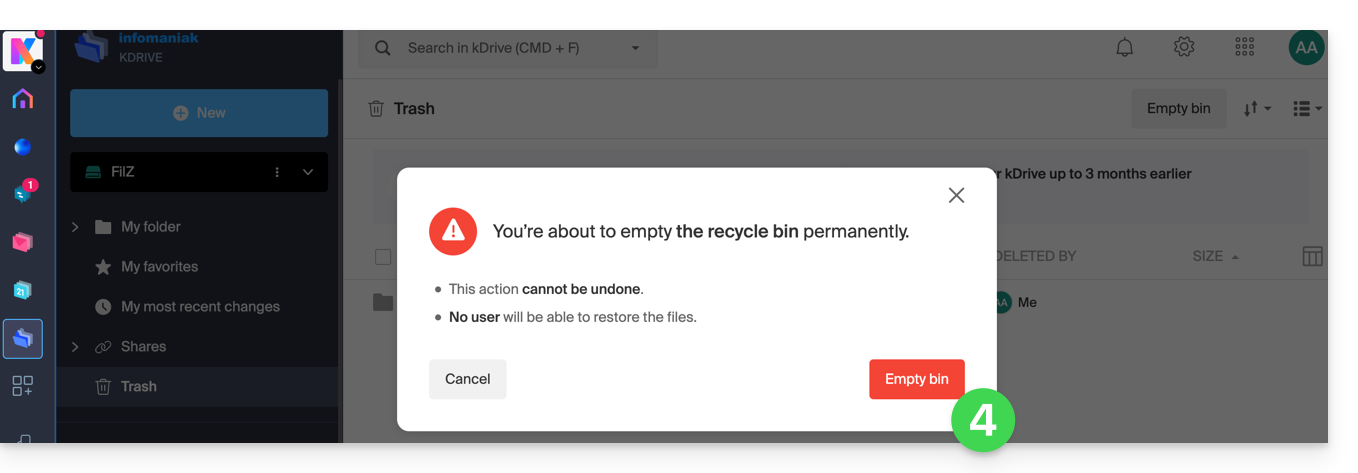
- The data is deleted permanently, only on the kDrive web app; the files remain in the computer's trash.
… on the synchronized computer
- If the computer's trash is emptied (Empty button in the example below)…
- and the deletion is confirmed…
- … the trash in the kDrive web app is not affected, and the deleted files will still be there, until this kDrive trash is emptied, either manually or automatically after a certain time.
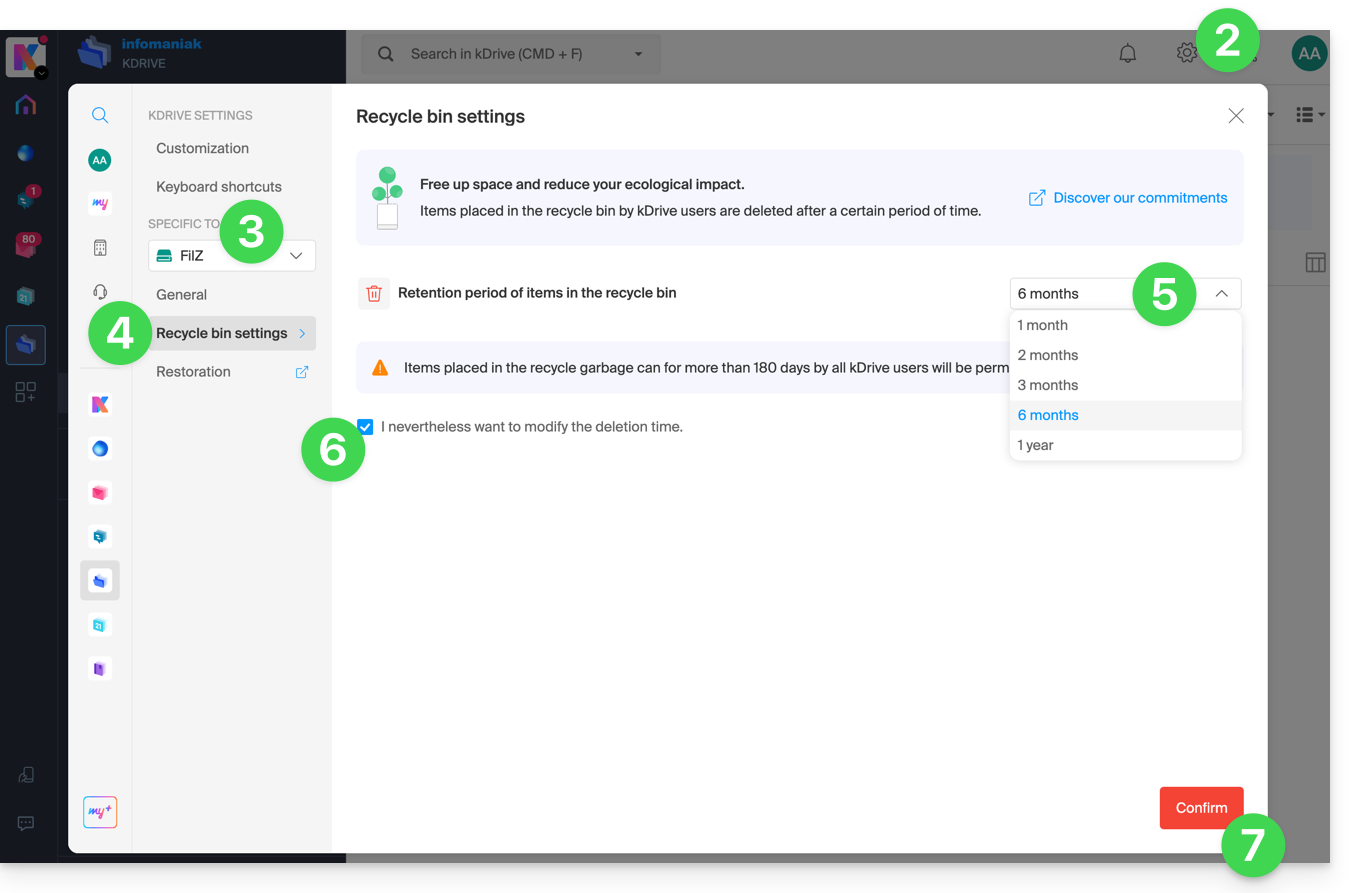
Manage the kDrive trash retention period
To access the files in the trash:
- Click here to access the kDrive web app (online service at ksuite.infomaniak.com/kdrive).
- Click on the Settings icon in the top right corner.
- Check or select the relevant kDrive from the drop-down menu in the left-hand sidebar.
- Click on Trash Settings.
- Choose the desired duration from the drop-down menu (between 1 month and 1 year depending on your plan – see at the top of this guide).
- Read the information regarding the possible permanent deletion of files moved to the trash before the new period you wish to apply, and confirm your choice.
- Click the button to Confirm:
Disable deletion synchronization on the desktop app
To choose whether deleting a file on the web app or mobile app should move the file synchronized with the desktop app to the computer's trash:
- Left-click on the desktop app icon in your computer's notification area (top right on macOS, bottom right on Windows, and double left-click in the taskbar on Linux).
- Click on the ⋮ action menu on the right in the window that appears.
- Click on Application Preferences:
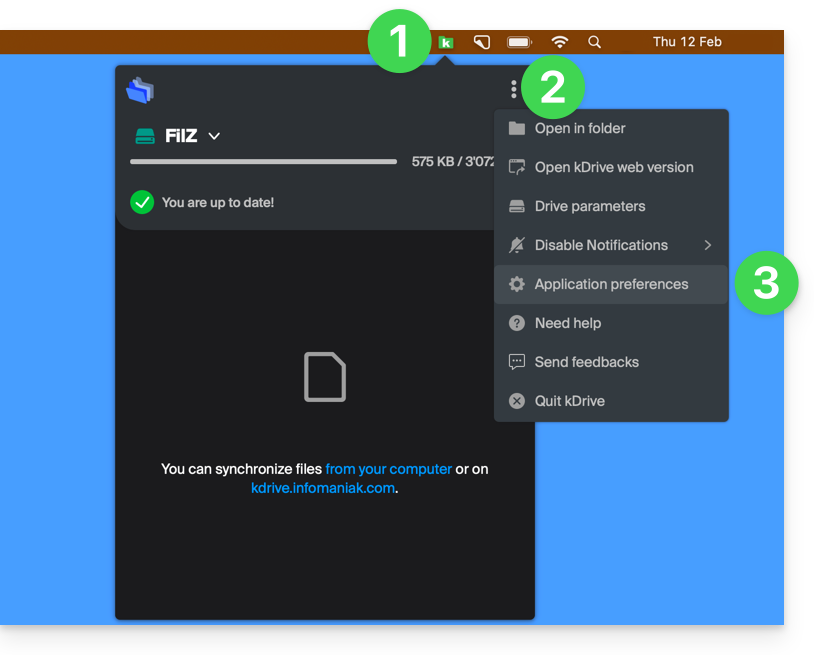
- Activate or deactivate the toggle switch to decide whether or not to send the synchronized version to the computer's recycle bin:

Troubleshooting Recycle Bin Issues on Your Computer
In rare cases, even if you have configured the app to move files to the recycle bin (point 4 above), the desktop app may permanently delete the file from your computer when it is deleted from:
- … the web app (online service ksuite.infomaniak.com/kdrive)…
- … the mobile app (application for smartphone or iOS/Android tablet)…
- … another synchronized computer…
instead of placing it in the recycle bin, because:
- Insufficient space: the recycle bin has reached its maximum configured size.
- No recycle bin: on some file systems, such as network drives or removable drives (e.g., USB drive), there may be no recycle bin.
This list is not exhaustive but covers the majority of cases that will not be reported to the user. Other issues, such as those related to the use of read-only mounted disks, will be taken into account and reported to the user.
If in doubt, also make sure that your computer does not instantly delete items that are too large when they are placed in the recycle bin, due to the size of the Windows recycle bin, for example:
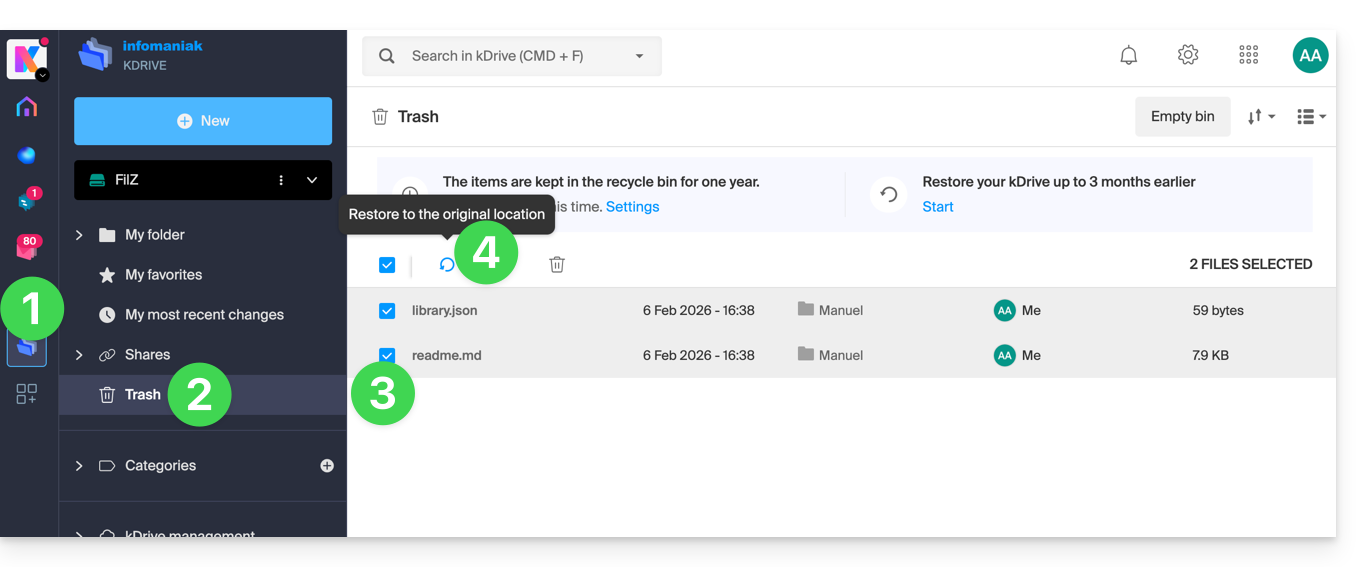
Restoring a File from the Recycle Bin…
To restore a file to its original location when the recycle bin has not yet been emptied in the kDrive web app:
- Click here to access the kDrive web app (online service ksuite.infomaniak.com/kdrive).
- Click on Trash in the left-hand menu.
- Select the items to restore.
- Click on Restore:
To restore an entire kDrive to its state before file movements or reorganizations, please refer to this other guide.
To restore a previous version of an existing file, please refer to this other guide.
Link para esta FAQ: https://faq.infomaniak.com/2383
Esta seção de perguntas frequentes foi útil?