
Knowledge base
1000 FAQs, 500 tutorials and explanatory videos. Here, there are only solutions!
Add or remove a password from an email address
This guide explains how to manage the password(s) of an existing email address on Infomaniak.
Prerequisites
- Order a Mail Service from Infomaniak.
- Create one or more addresses on this Mail Service.
- Be Administrator or Legal Responsible within the Organization.
Define a password for an Infomaniak email address
To define a new password or add an additional password to an existing email address on your Infomaniak Mail Service:
- Click here to access the management of your product in the Infomaniak Manager (need help?).
- Click on the product name concerned.
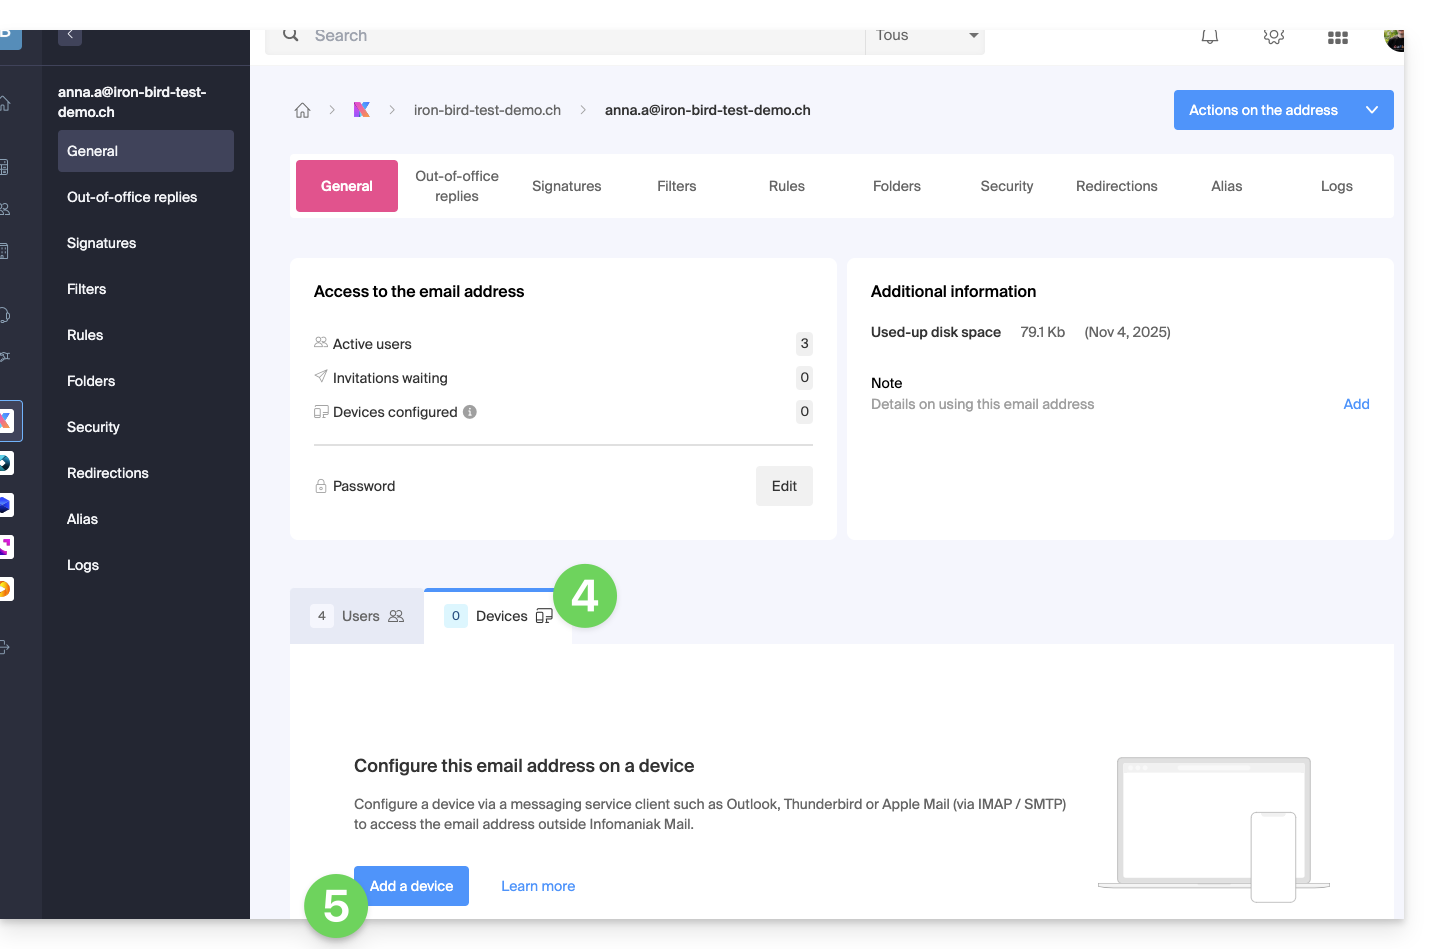
- Select the email address concerned in the table.
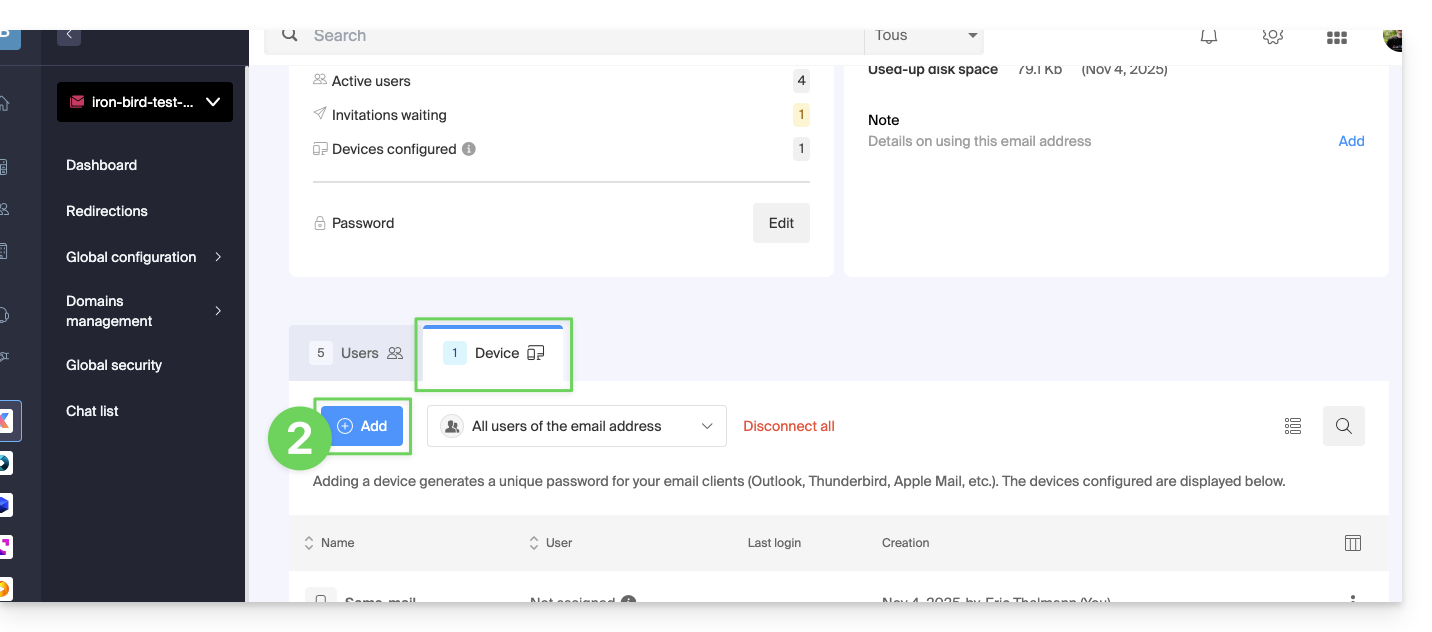
- In the users section, click on the Devices tab.
- Click the button to Add a device:
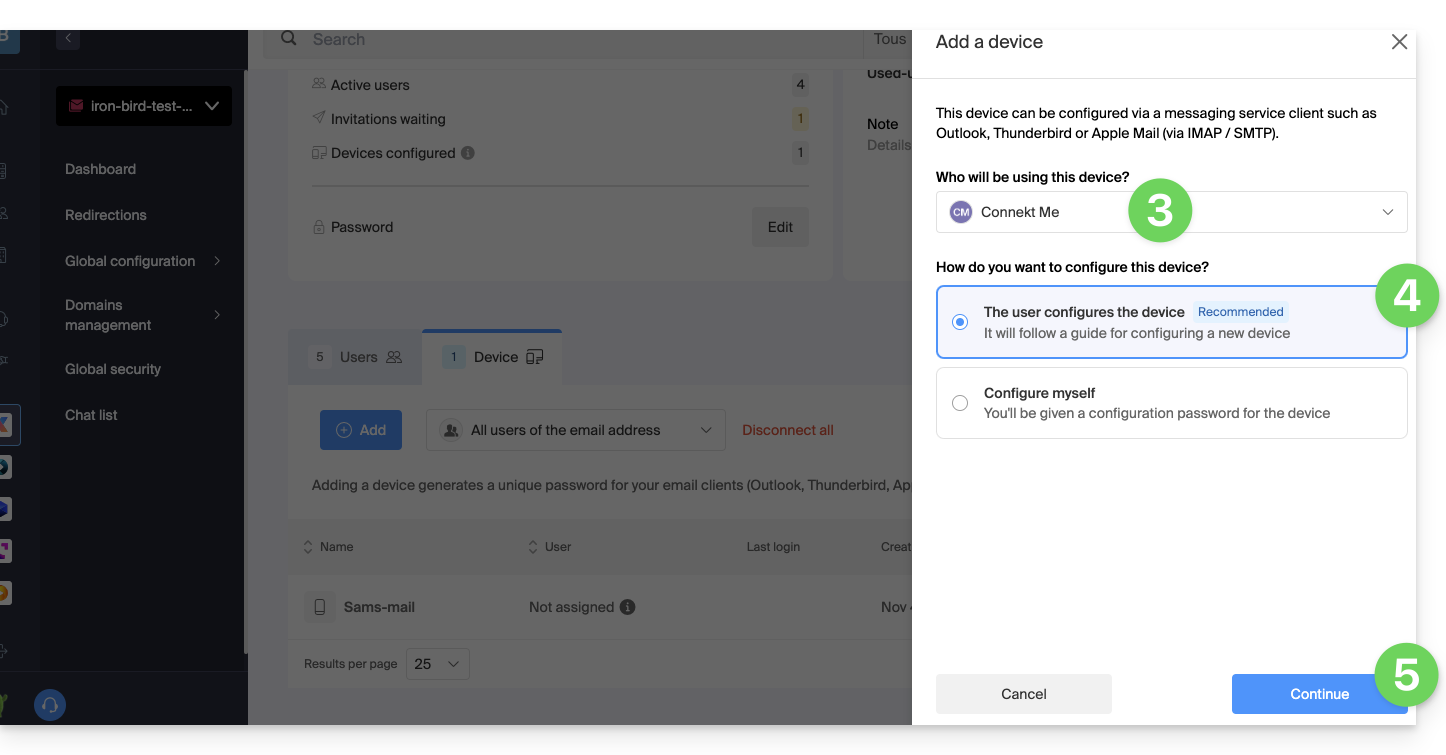
- Enter, if necessary, the password to log in to your Infomaniak account, then in the drop-down menu, choose Without user.
- Choose an icon and a descriptive name for your device that requires the password.
- Click the button to Continue:

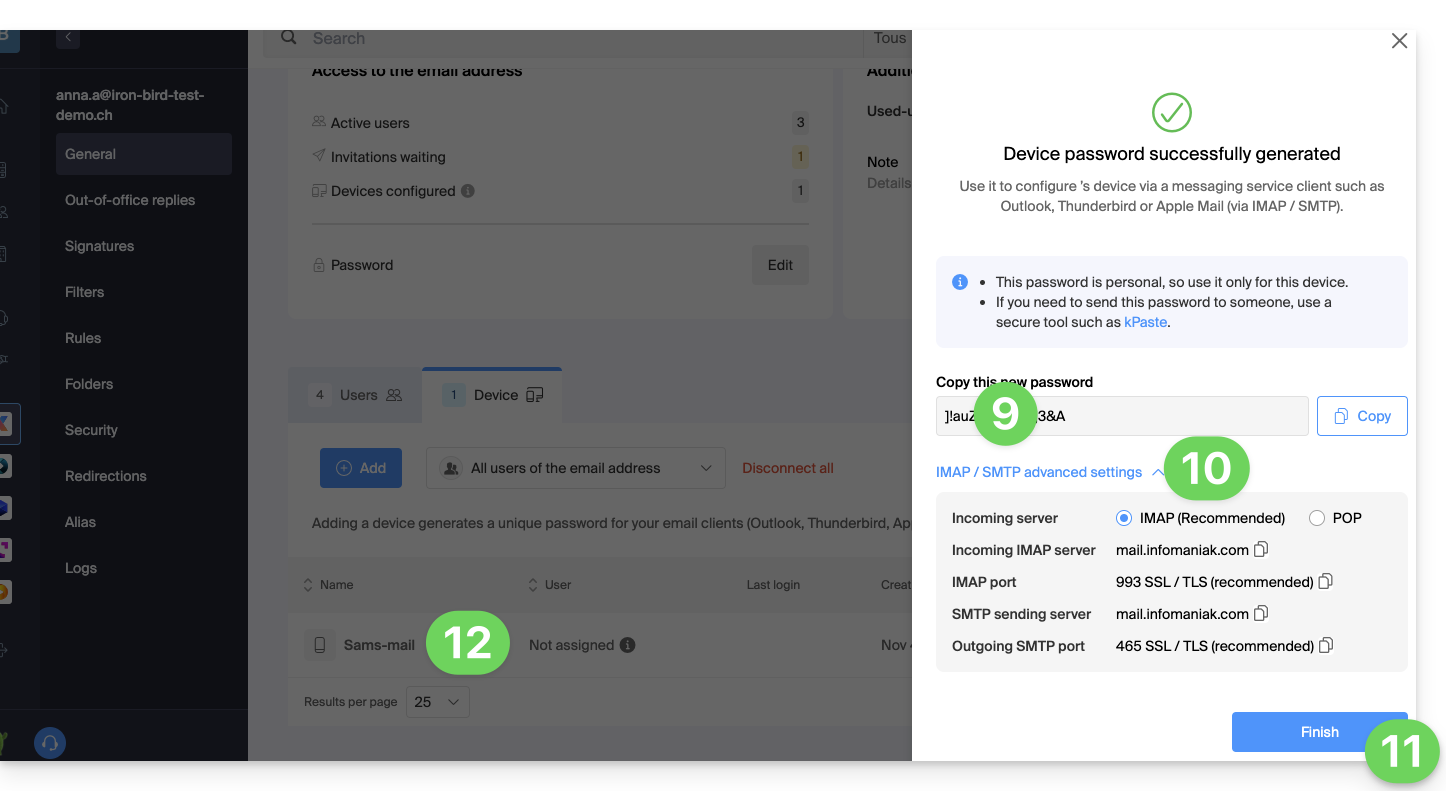
- The created password is displayed, you can copy it and keep it safe (password manager, for example); it will no longer be displayed afterwards.
- Click to display, if necessary, the recommended mail parameters.
- Click the button to Finish.
- The new device appears in the list with the information about the user who created it (you) and its creation date:
Create a password for a user
Instead of creating a password yourself and having to communicate it to the user at a later time, you can directly allow a user who does not have the same permissions as you to obtain the password for the device they need:
- Add the new user (existing in the Organization or not) as described in this other guide:

- Once the user is added, switch to the devices tab to add a new device:
- Enter the password to log in to your Infomaniak account if necessary, then select the user created in step 1.
- Click on the first option to send a setup assistant for the user's device.
- Click on the Continue button:
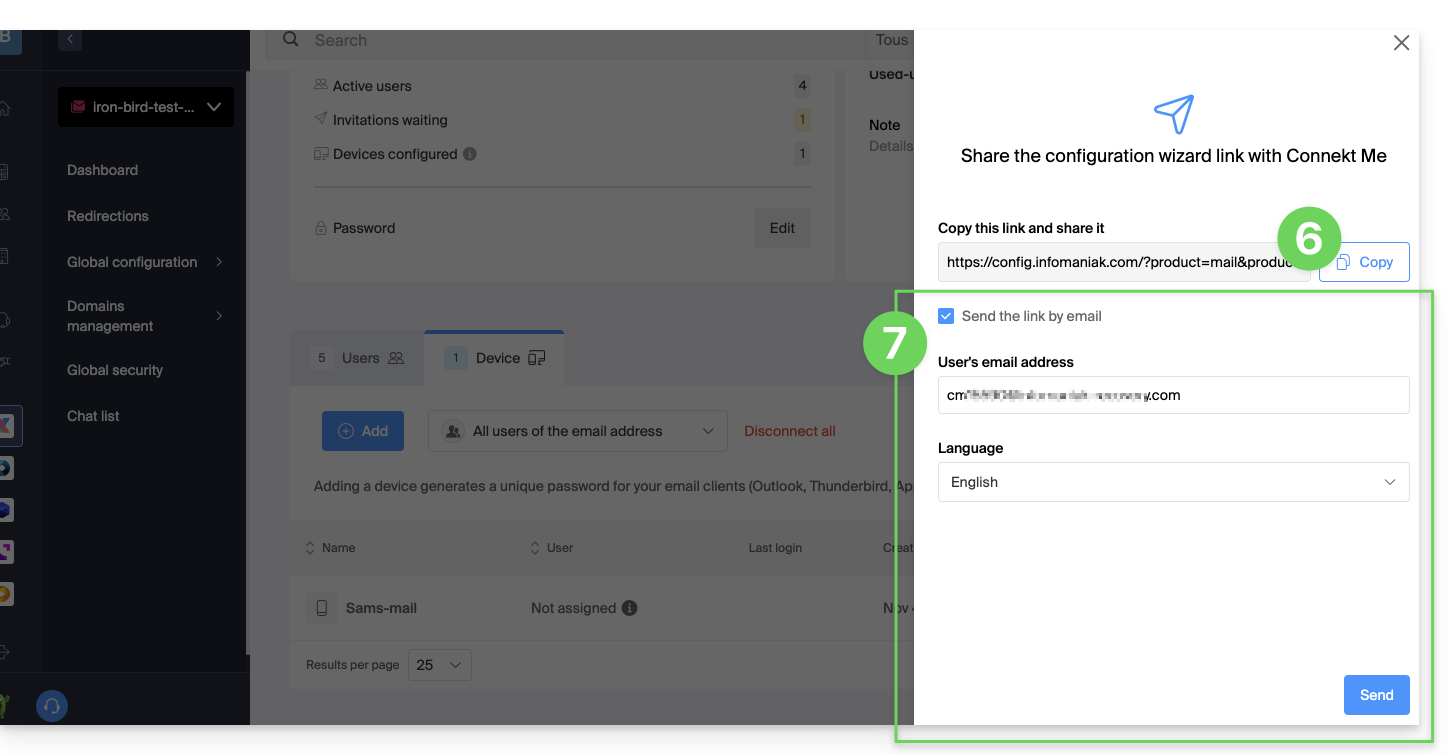
- Copy the invitation link valid for 30 days to be sent to the user.
- If necessary, send the invitation to the user's email address:
In step 4 above, you can also choose to generate a password:
- The created password will be displayed, you can copy it and keep it safe (password manager for example); it will no longer be able to be displayed afterwards.
Link to this FAQ: